In this tutorial, we will help you to unlock the bootloader of your Redmi Note 3. If you are new to rooting, you must understand that first, you need to unlock the device’s bootloader and then install a custom recovery like TWRP to root the device. So, that being said, let us get straight into the article itself:
Also Read
Page Contents
What is Bootloader Unlock?
A bootloader is a program that starts up your device. It loads the necessary programs for smooth and efficient performance. The bootloader is stored securely, but you can unlock it to root your device by following reliable guides. Be careful and follow the steps correctly to avoid damaging your phone.
Why do we need to unlock the bootloader?
Once you have unlocked the bootloader on your phone, you can root it. This allows the user to install restricted apps, mod apps, install custom OS like Lineage OS, etc. on the device. Note that unlocking the bootloader will void the warranty of your device. So, it is better to allow the warranty period to end and then unlock it.
Advantages of bootloader unlock
- You can install any custom ROM like Lineage OS, Resurrection ROM, etc.
- You can also root your device.
- Install a custom recovery like TWRP.
Disadvantages of bootloader unlock
Below are the disadvantages of the bootloader unlock that you need to keep in mind before you go ahead and actually unlock the bootloader of your phone:
- After unlocking the bootloader, it voids the warranty of your device.
- You will no longer receive the official OTA updates.
- You can brick your device if you do not follow the steps carefully.
Pre-requisites
Now before we go ahead and unlock the bootloader of Redmi Note 3, let us make a list of pre-requisites that are required to unlock it:
Charge your phone
You need to make sure that your Redmi Note 3 (kenzo) is charged to about 60% before operating it for unlocking the bootloader to avoid any boot loop issues during the unlocking process.
You need a PC or Laptop
We would be running certain ADB and Fastboot commands that can be executed via PC or a laptop. So, we would need a computer to unlock the bootloader.
Download USB Drivers
In order for your Redmi Note 3 to be recognized by your PC, you need to have proper USB Drivers appropriate to your phone installed on your computer. For that, you can follow the link below to download the correct Xiaomi USB Drivers on your PC.
Download the Mi Unlock Tool
Mi Unlocker Tool is used for unlocking the bootloader of any Xiaomi device after getting permission From MIUI’s official website. You can download the latest Mi Unlock Tool by clicking the link below:
Enable USB Debugging and OEM Unlock
To unlock the bootloader, first, you need to enable the USB Debugging and OEM unlock to interact with your PC or Laptop via the Mi Flash tool.
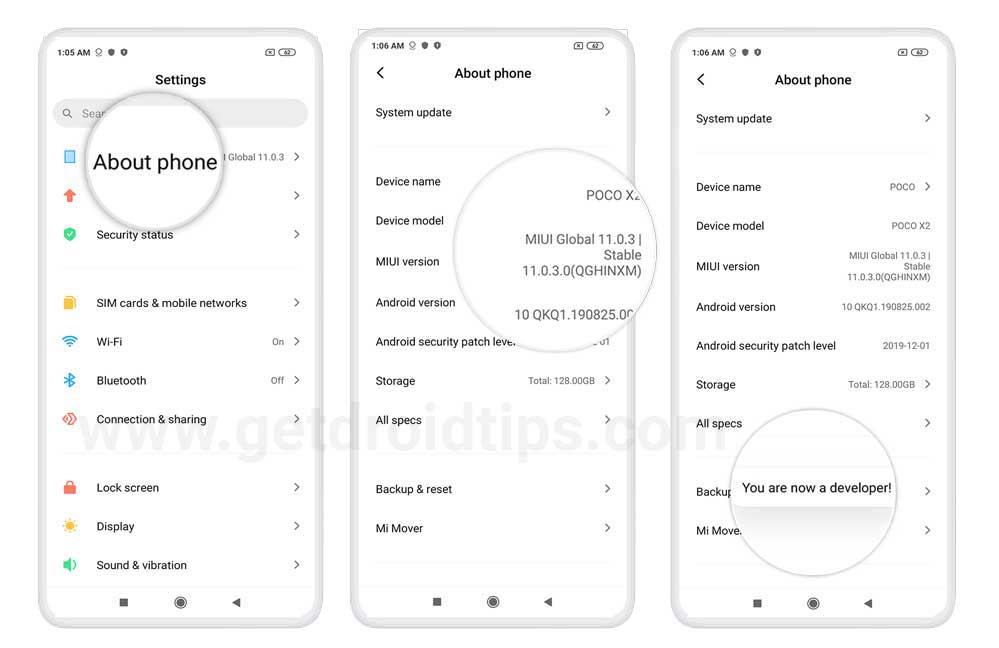
- On your phone, Open the Settings app
- Look for the About Phone menu and Tap on it
- You may see the device build number or software version detail, tap on it multiple times until the confirmation of developer options enabled flashes on the screen.
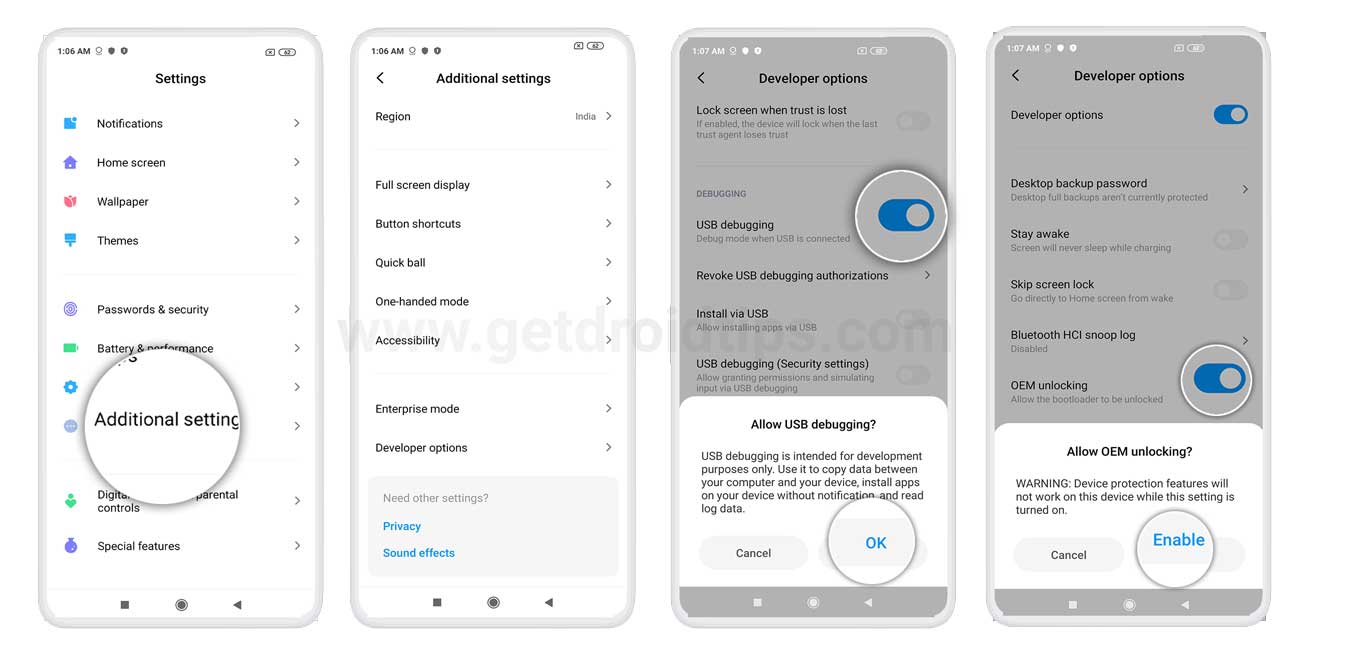
Now as the developer options are enabled on Xiaomi Redmi Note 3, this will appear inside settings. You can enable USB debugging by accessing developer options. The steps to do this are:
- If you have enabled the developer option, now go back and tap settings again
- Open the Additional Settings menu – Developer option
- Enable the USB Debugging and OEM unlock
Bind your Mi Account
In order to unlock the bootloader on your Redmi Note 3, you are first required to bind your Mi Account to your phone. This can be easily done via the Mi Unlock Status menu that is located within the Developer Options. Follow the steps below to bind your Mi Account with your Redmi Note 3:
- Make sure that you have a Mi Account. If not then, it can be easily created by visiting the official page.
- You need to insert the SIM card with the same number that you used to create the Mi account.
- Now, you need to use your mobile internet connection and disconnect from the WiFi for the further process.
- Then, head over to Settings>>Additional Settings>>Developer Options>>Add account and device and log in with your account.
- You will be greeted with a toast message stating “Added successfully. Mi account is associated with this device now.“
- That’s it!
Note that you should not try to bind your account, again and again, to avoid getting blocked temporarily by Mi.
Steps to Unlock Bootloader on Redmi Note 3 (kenzo)
- Turn off your phone and boot into the Fastboot mode.
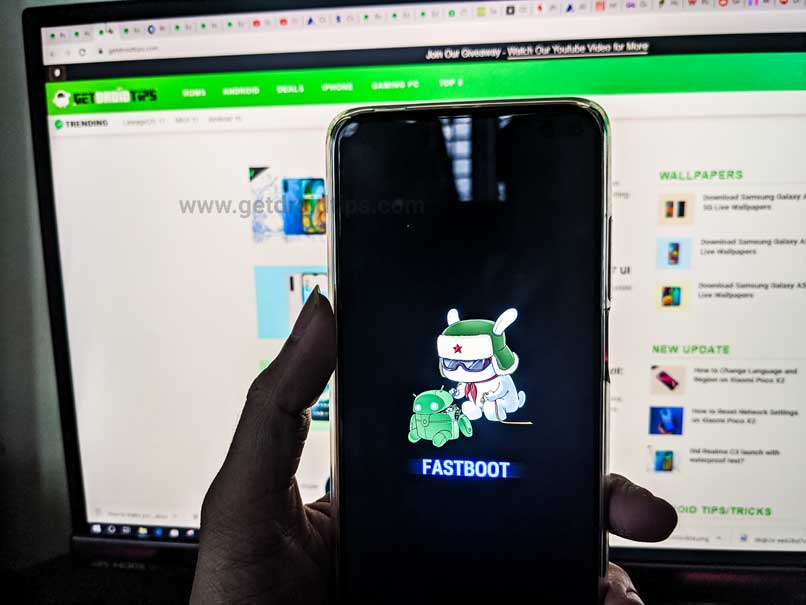
- You need to connect your device to your PC/Laptop with the help of USB Cable while in Fastboot mode.
- Download the Mi Unlock Tool from the above section.
- Extract the contents of the zip file and open the miflash_unlock.exe file.
- Log in to the Mi account within the tool.
- The tool will now verify whether your phone is eligible for bootloader unlocking.
- Once the phone is verified, the tool will show that the “Phone connected“.
- Now click the Unlock button within the tool.
- You will be prompted with a new message where you need to click on the Unlock anyway button.
- This will commence the unlocking process and once the process is complete, you will see a message stating Unlocked successfully.
- Click on the Reboot phone button. This will reboot your phone into the OS and you will be treated with an unlocked bootloader message confirming that the Redmi Note 3 is unlocked.
- That’s it.
If not, you can check our video tutorial for the same guide.
So, there you have it from my side in this article. I hope that this guide will help you unlock your Redmi Note 3 easily and in a safe and official way. Please let us know in the comments if this guide was helpful, and also comment below if you have faced any issues with any of the above-mentioned steps. Until the next post…Cheers!
How much time does it take to unlock the bootloader of RN3 ..? Can I use my device for that time?
normal 2-3 minutes