In this tutorial, we will show you how to bypass Google Account Login or the FRP Unlock on all Samsung devices running Android 10. For the unawares, FRP or Factory Data Protection is a safety mechanism put in by Google to protect your device from being reset in an unauthorized environment. As soon as you set up your device using a Google ID, the FRP kicks in and will be enabled as soon as someone tries to reset your device in a non-conventional method.
Once the FRP lock has been triggered in, then on the next boot, you could only access your device once you sign in with that Google ID that was used in the first place. This is indeed a welcome move from the security point of view. But in some instances, a user gets stuck in the FRP lock and is unable to proceed further. As to the reason for the same, there could be many, including the most common ones that he or she might have forgotten their account credentials.
And when that happens, you wouldn’t be able to access your device any further. This might prove to be a troublesome experience for quite a lot of users. In this regard, this guide will come in handy. Today, we will show you how to bypass Google Account Login or the FRP Unlock on all Samsung devices running Android 10. So without further ado, let’s begin.
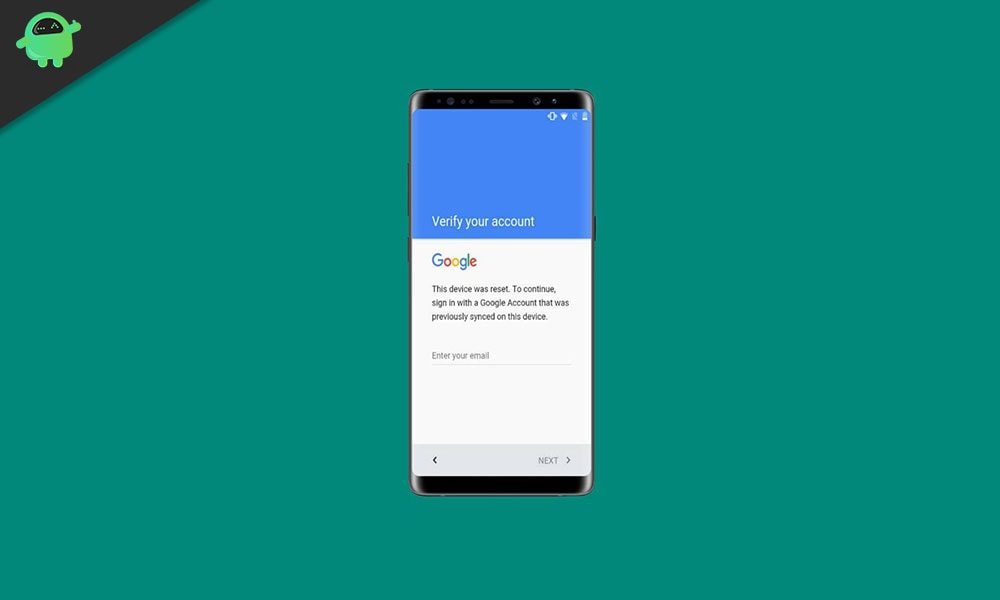
All Samsung Android 10 FRP Unlock/Google Account Bypass 2020
We would be mentioning the steps right from the first screen that you get when your Samsung device boots up. Please follow each and every step very carefully. Furthermore, for the ease of understanding, we have broken down the instructions into separate sections.
STEP 1: The Initial Setup Screen
- As soon as your device boots, tap on the Let’s Go arrow and then Accept the Terms and Conditions.
- In the Network Connection screen, you might be notified that “An Unauthorized Attempt has been made to reset your device…”, tap on OK.
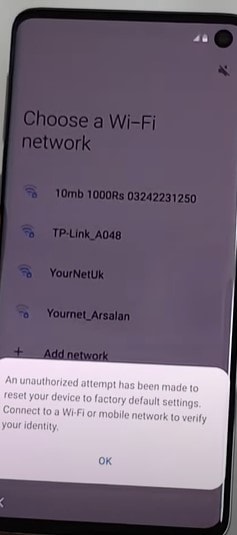
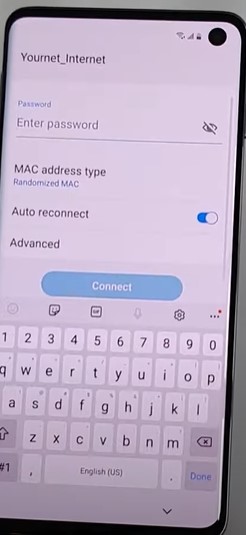
- Now select your WiFi network from the list and enter the credentials and hit the Connect button.
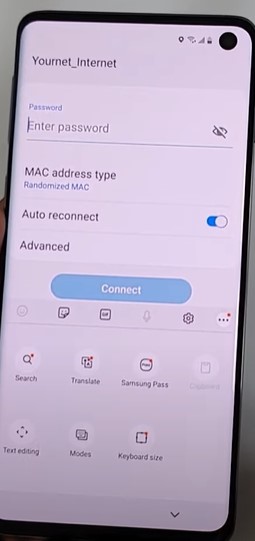
- You will now have to open the Keyboard app. For that, tap on any WiFi network, and the keyboard should pop up. Tap on the three horizontal dots that you see on the extreme right.
STEP 2: Making Use of Samsung Pass
- Then select the Samsung Pass option from the menu that appears and tap Continue.
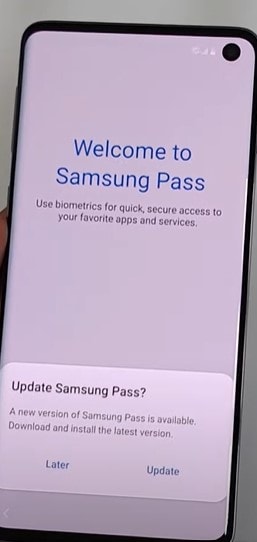
- You may now get a pop-up asking you to update the Samsung pass, tap on the Update button.
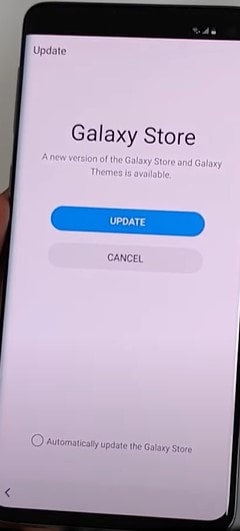
- Next up, you might get another pop-up this time asking for the update of Galaxy Store, again tap on Update.
- When the update is done, again launch the keyboard app. You might use the WiFi connection page to bring in the keyboard. Then tap on the three horizontal dots > Samsung Pass (similar to how we did before).
- Again you will be notified to update the Samsung Pass, tap on Update. You will now be taken to the Galaxy Store.
- Scroll down to the Seller Info section and tap on the View All option situated on the right side of your screen.
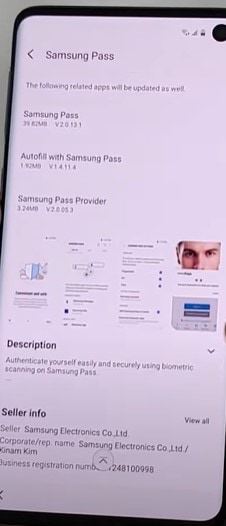
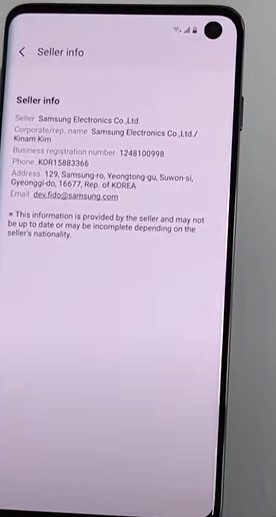
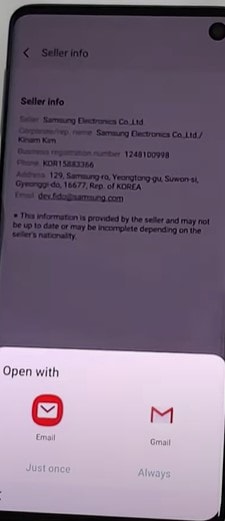
- It will now list out all the information related to the Seller. You will also see an Email ID xx@samsung.com.
STEP 3: Using Gmail to Change Google App Settings
- Tap on it and select Gmail > Just Once from the menu that appears.
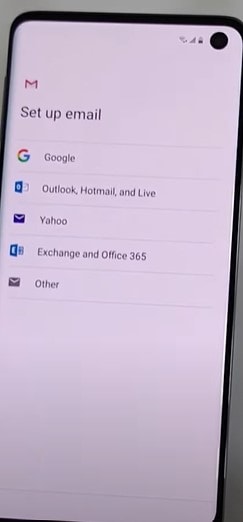
- Next up, from the Setup Email screen, select Outlook, Hotmail, and Live. Sign in using your credentials.
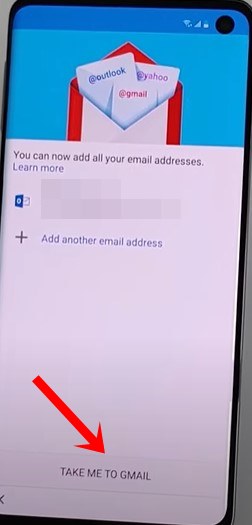
- When that is done, you will see a “Take Me to Gmail” button at the bottom, tap on it.
- Now from the Gmail screen, tap on the overflow icon situated at the top-right. Then select Help and Feedback from the menu that appears.
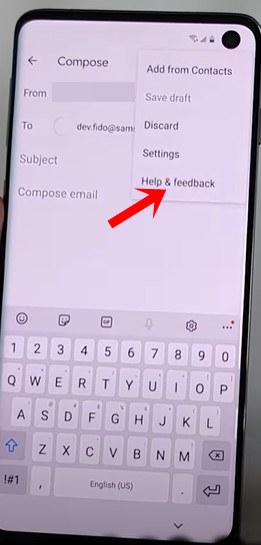
- Search for the Get Started with Voice Access option and select it.
- Once you are under that page, scroll to the last part of Check your Device Settings section and tap on Change Google App Settings.
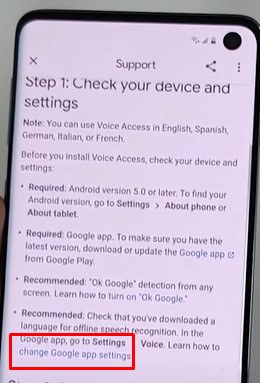
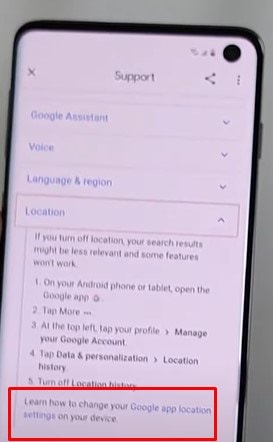
- You will now be taken to the Settings you can change page. Tap on the Location section to expand it and then select the Google App location Settings option.
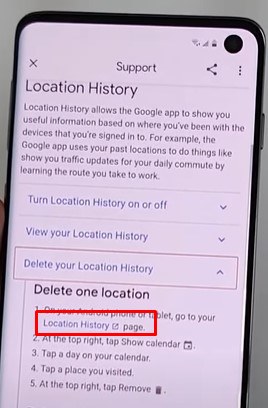
- This will take you to the Location History page. tap on Delete your location history to expand the menu. Then tap on Location History under the Delete One Location section.
STEP 4: Using Google Maps to Access Settings
- This will launch Google Maps. It will then ask to login, tap on Skip. Then tap on the blue GO button situated at the bottom right. Enter the desired drop location and hit Start.
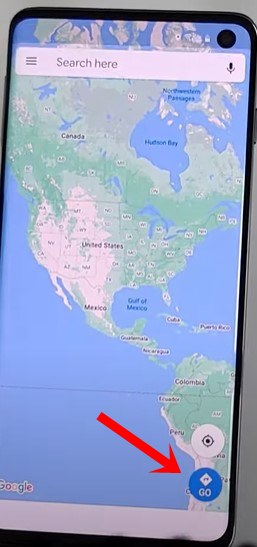
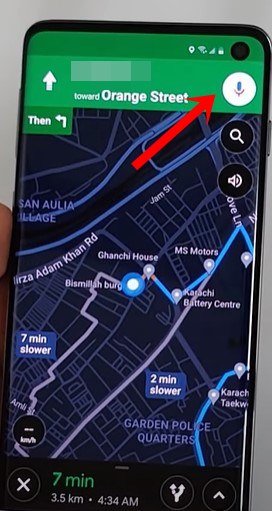
- You will then have to tap on the Mic button situated at the top right. Speak” Open Settings”.
- Although you will now be able to access the Settings page the job is half done. Go to the Accounts and Backup section and tap on Smart Switch.
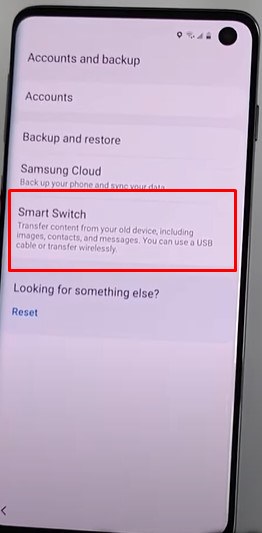
- It will then download this app and once that is done, you might have to tap on it again to launch it.
STEP 5: Smart Switch App
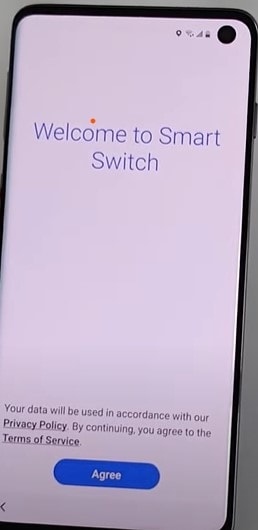
- You should then be greeted with the Welcome to Smart Switch screen, tap on the Agree button. Then tap on Allow under the permission screen that appears.
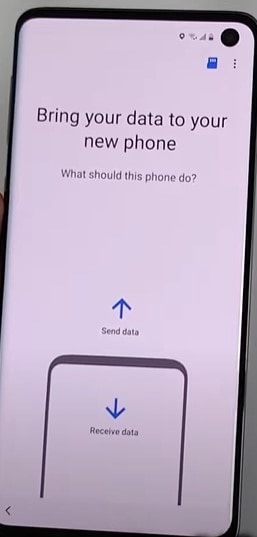
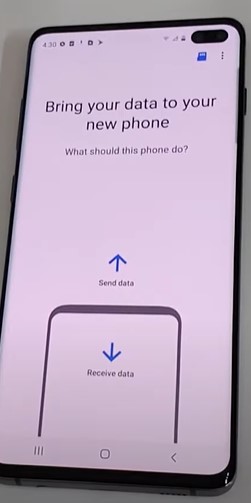
- Next up, tap on Receive Data followed by Galaxy/Android and select Cable in the transfer mode.
- At this point in time, bring in another Samsung/Android device that is non-FPR locked. Sign in with the Google Account on this second device.
- Once you have added/signed in with your Google Account on the non-FPR locked device, head over to the Play Store and install the Smart Switch app.
- Launch the app and tap on the Send Data option.
STEP 6: Using the Non-FRP Locked Device
- Now, on your first device (the FRP locked device) insert the OTG cable and then connect the second non FPR locked device to it via USB cable.
- Once that is done, you will get a prompt on both these devices, tap on Allow on both these devices. You will now have to select what all apps you need to bring in to this FRP locked device.
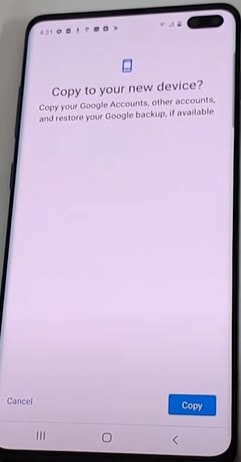
- On your non-FRP locked device, you will then get the Copy to your new device prompt, tap on the Copy button.
- Enter your Google account and password on your FRP locked device and hit the sign it button. It should be the same account that you have added to the non-FRP device.
- The data copying process will now begin and might take up some time. Make sure not to move the device or the USB cable while the process is going on.
- When the copying is done, you will be notified. At this point, you could remove the OTG and USB cable and the non-FRP device as well.
- Now on your locked FRP device, you will have to go back to the Setup Wizard screen. For that, just keep tapping the Back button until you reach the said screen.
- When you reach the Choose a Wifi network screen, tap on Next (since you have already logged in before, you wouldn’t have to do again).
- It will now Check for Updates and will then bring up the Account Added page.
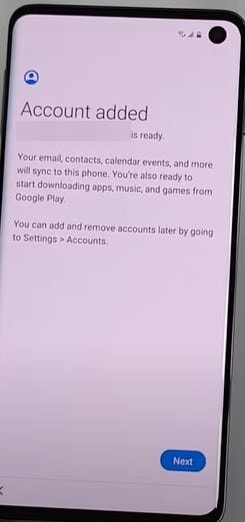
- Hit the Next button and complete the setup wizard as you normally would do.
Concluding Remarks
That’s it. With this, we conclude the guide on how to bypass Google Account Login or the FRP Unlock on all Samsung devices running Android 10. Although the steps might be pretty lengthy, the efforts are worth the rewards as well. On that note, if you still have any queries concerning any of the aforementioned steps, do let us know in the comments section below. Rounding off, here are some iPhone Tips and Tricks, PC tips and tricks, and Android Tips and Trick that you should check out as well.
