If you are using the Creative Clouds apps and it is asking for a serial number, then here is the required fix. Adobe Creative Clouds offers a wide range of products and apps. These include software that could be used for graphics designing, web development, video editing, photography, cloud services, and a set of mobile applications as well. These are some power-packed software offered by Adobe that goes a great length in helping users of their respective domains.
However, some users have reported that the Creative Clouds are asking for serial numbers, and hence they aren’t able to log in and use these services. For the unawares, the Creative Cloud apps don’t require a serial number. So if it is asking for one, it might be because of a server-side or internet connectivity issue. Apart from that, there are some other reasons why the said error might occur. Let’s check out these reasons and their associated fixes as well.

Page Contents
Creative Cloud apps ask for serial number: How to Fix?
The error could be the result of slow internet, the subscription might have expired, or their might be some issues with your account or your PC. With that said, here are the steps to correct them and hence fix the Creative Clouds apps asking for serial number error.
Fix 1: Check your Internet Connection
First things first, if there is a drop in network connection, then the apps might throw up the said error. Therefore check the internet connectivity and see everything’s up and running. Furthermore, you should try to access the Adobe activation servers. If you are seeing two Adobe logos, then you should be able to access the activation servers. Finally, sign in to the Creative Cloud app, and the serial number error should be fixed. If not, follow the next method.
Fix 2: Active Subscription
You should also make sure that you have an active Creative Cloud subscription. To do so, follow the below steps:
- Launch the Creative Clouds app on your PC.
- Now, go to your profile section from the top right side of the app and click on Sign out.
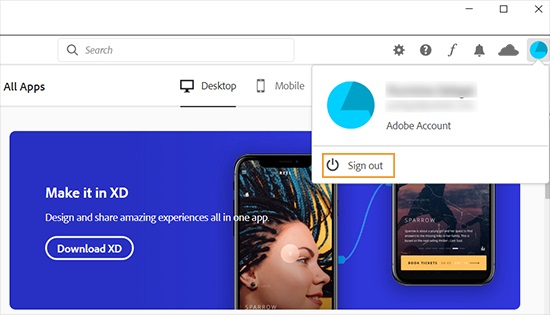
- Next up, sign back in with your Adobe credentials. At that instance, you might also get a popup to update the app if you aren’t using the latest version. Do it right away.
- Finally, launch the app and see if the Creative Clouds serial number error has been fixed or not.
Fix 3: Confirm Payment Details
Make sure that you have had an active Adobe subscription. Furthermore, it is advisable to check that all the account entries are correct as well. These include your name, address, phone number, etc. If that is not the case, then the said error might popup as well. So follow the below steps for that:
- First of all, sign in to your Adobe account.
- Then head over to the My Plans section and click on the Manage Plan option.
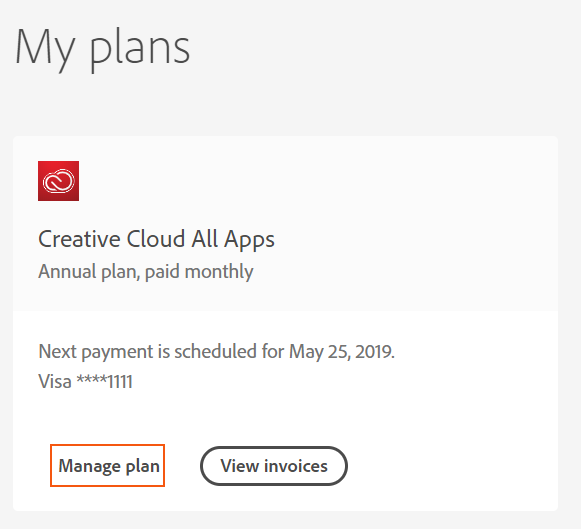
- Next up, under the plan details menu, go to the Plan & Payment section and click on Manage Payment.
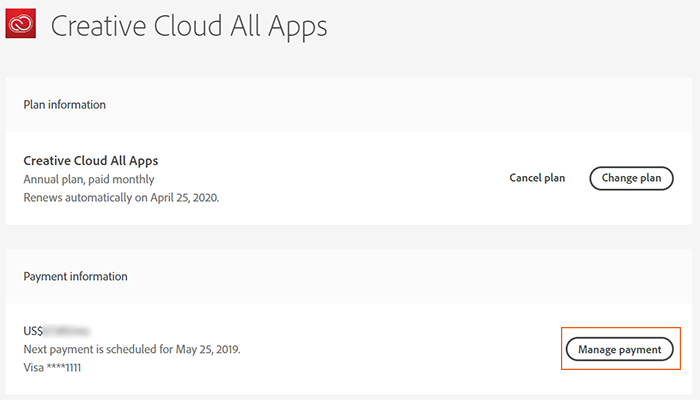
- Make sure your phone number, billing address, and payment details are all entered correctly. If not, update your billing info right away to fix the Creative Clouds serial number error.
Fix 4: Change Language to International English
Do keep in mind that if you have purchased an English-only subscription, then the default language in the Creative Cloudsapp should be set to English (International). Here is how it could be done:
- Launch the Creative Clouds app on your desktop.
- Click on the Settings (gear) icon situated at the top right of the app.

- Select Preferences from the menu that appears.
- Now click on the Apps section in the sidebar.
- Next up, under the Default Install Language screen, make sure that English (International) is selected. If not, select it from the drop-down menu.
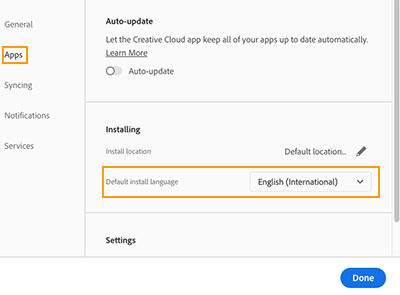
- Finally, click on the Done option at the end of the page to save the changes.
Fix 5: Check Date and Time Settings of your PC
This is one of the more common causes that lead to activation issues in a lot of apps. Therefore, make sure that your PC’s date and time are correctly set up. You should see the date and time in the bottom right corner of your screen. If it is correct, well and good, otherwise, to make it display the correct results, follow these steps:
- Head over to the Start menu and type in Date and time. From the search results, click on Change the date and time option.
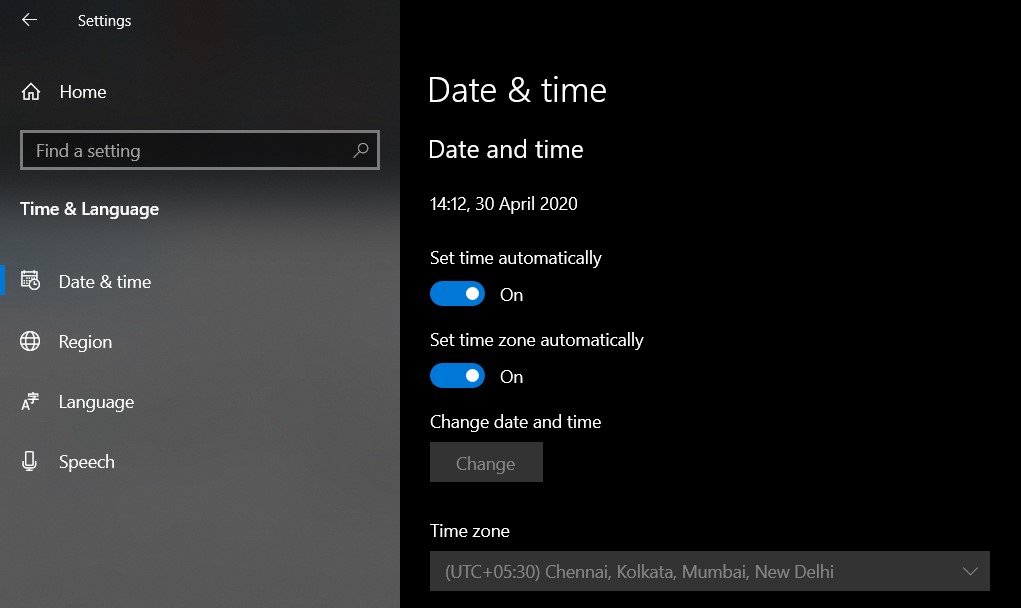
- Now disable the Set time automatically and Set time zone automatically options.
- Finally, click on the Change button in the Change Date and Time menu. That’s it. This should fix the Adobe error.
Conclusion
So with that, we conclude the guide on how to fix the Creative Clouds serial number error. All in all, we have mentioned five different types of fixes. Any one of the above should be able to rectify the issue. Do let us know which one managed to correct this Adobe problem. On that note, here are some iPhone Tips and Tricks, PC tips and tricks, and Android Tips and Trick that you should check out as well.
