If you are experiencing an issue with your Dell XPS 13 or XPS 13 Plus laptop not charging, you’re not alone. This is a common issue with both Dell laptop models. Thankfully, there are a few different ways to fix this issue. In this article, we’ll provide you with the steps to fix a Dell XPS 13 or XPS 13 Plus not charging issue. So if your laptop is not charging, read on to find the solution.
Also Read
Page Contents
Why is Dell XPS 13 / XPS 13 Plus Not Charging?
It is not unusual for laptop owners to experience charging issues with their Dell XPS 13 / XPS 13 Plus. Whether it is a sudden power failure or a slow battery charging process, there are several possible reasons why your laptop may not be charging.
Here’s a list of possible causes why your Dell XPS 13 or XPS 13 Plus is not charging:
- Battery issues: Your laptop’s battery may cause a charging issue.
- Charger problems: If the charger is not working correctly, then the laptop won’t be able to charge.
- Software issues: If the laptop is not charging, there could be a software issue.
- Motherboard issues: In some cases, the issue could be related to the motherboard. You may even have to replace the motherboard.
Fix Dell XPS 13 / XPS 13 Plus Not Charging
Fortunately, there are several steps you can take to get your laptop charging again. We will discuss the most effective solutions in this article. Follow along.
1. Check the Power Supply
If your Dell XPS 13 or XPS 13 Plus laptop is not charging, it could be due to a power supply issue. It may be that your power supply is faulty, or it could be that the power supply isn’t providing enough power to your laptop. Here’s what you need to do:
First, make sure that the AC adapter is securely connected to your laptop and to the wall socket. Also, check the power cord to ensure that it is not frayed or damaged. If the AC adapter or power cord appears to be damaged, replace it with a new one.
Once you have checked and/or replaced the power supply, plug the AC adapter into the laptop and the wall socket. If the laptop still does not charge, then you may check the charging port.
2. Check the Charging Port
It is important to check the charging port to ensure that it is not damaged or blocked.
First, check the charging port to make sure that there is no visible damage. If the port looks okay, then you should check the cable and power adapter to make sure they are securely plugged in. If they are plugged in correctly, then the issue may be related to the port itself.
If the port appears to be damaged, then it is likely that the port has shorted out and needs to be replaced. You should seek professional help for this, as replacing the port can be difficult and time-consuming.
If the port does not appear to be damaged, then you should check for any dirt, dust, or debris that may be blocking the port. This can be done by carefully examining the port and cleaning it with a soft cloth. Be sure to use a dry cloth, as wet cloths can cause damage to the port.
Once the port is all clean, plug in the power cable and your Dell XPS 13 or 13 Plus should start charging again.
3. Run the Built-in Troubleshooter
If your Dell XPS 13 or XPS 13 Plus laptop is still not charging, one of the best ways to troubleshoot the problem is to use the built-in power troubleshooter. This is a simple process that can help to identify and fix a variety of issues, from driver issues to hardware problems. Here’s how to run the built-in troubleshooter for your Dell XPS 13 or XPS 13 Plus.
- Press the Windows key + X to open the Power User menu and select “Control Panel” from the list.
- In the Control Panel, go to the “Hardware and Sound” category, then click on “Troubleshoot.”
- In the Troubleshooting window, select “Power” from the list of options and click “Next.”
- The troubleshooter will then run an automatic scan to identify any potential issues with the laptop’s power supply.
- Follow the troubleshooter’s instructions to fix any issues it finds. This may include updating drivers, reconfiguring settings, or replacing hardware components.
- Once the troubleshooter has finished, restart your laptop to apply the changes and check if the charging issue has been resolved.
Update your Battery Driver
To ensure your laptop is always running with up-to-date software, it’s important to update your battery driver. Updating your battery driver is simple and can be done in just a few steps:
- Press the Windows key + X to open the Power User menu and select “Device Manager” from the list.

- Once in Device Manager, expand the Batteries section. Here, you will see a list of the batteries on your device.
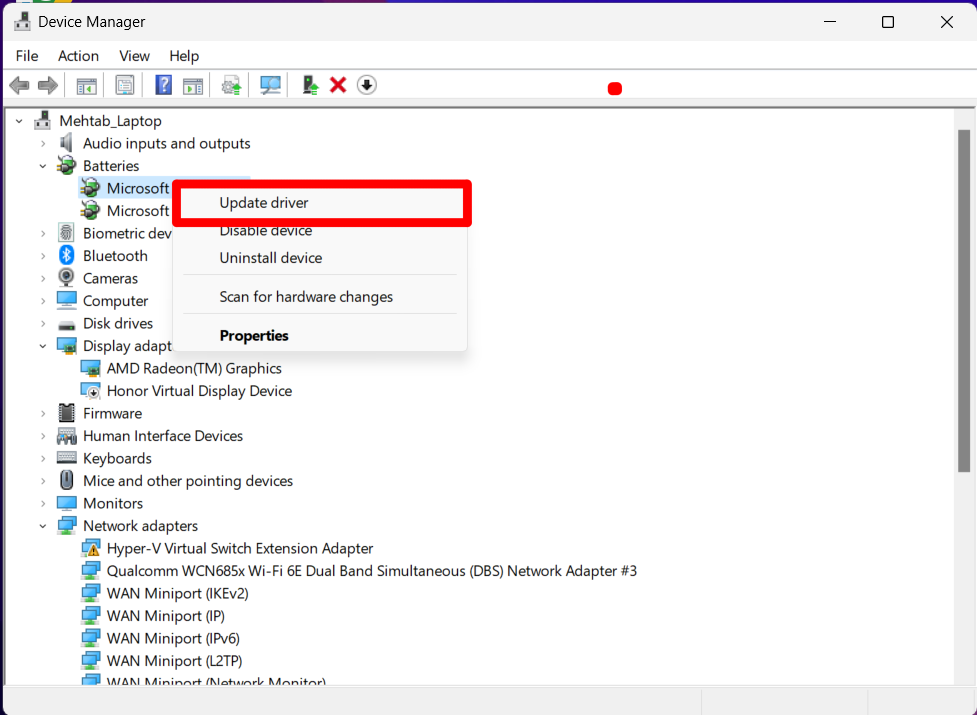
- Select the appropriate driver and right-click on it.
- From the menu, click Update driver.
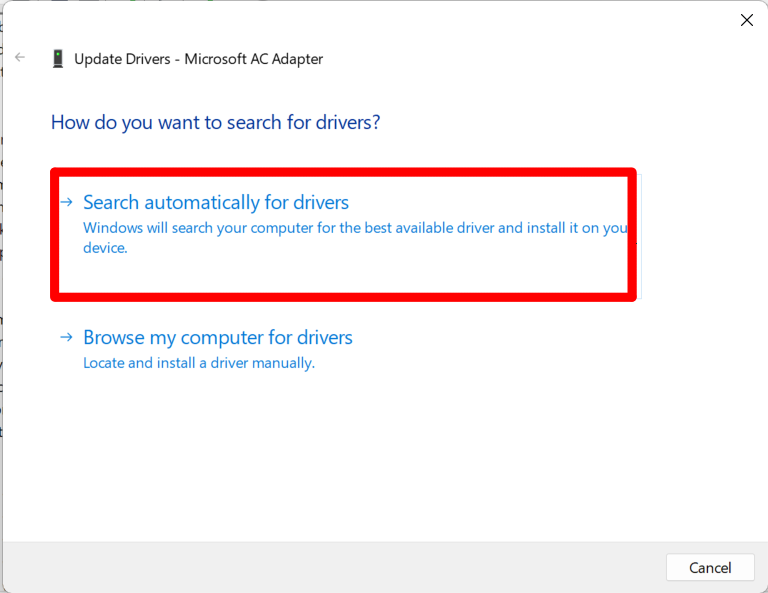
- In the following window, click on “Search automatically for drivers.”
- Once the driver is found, Windows will install it automatically.
- Restart your PC.
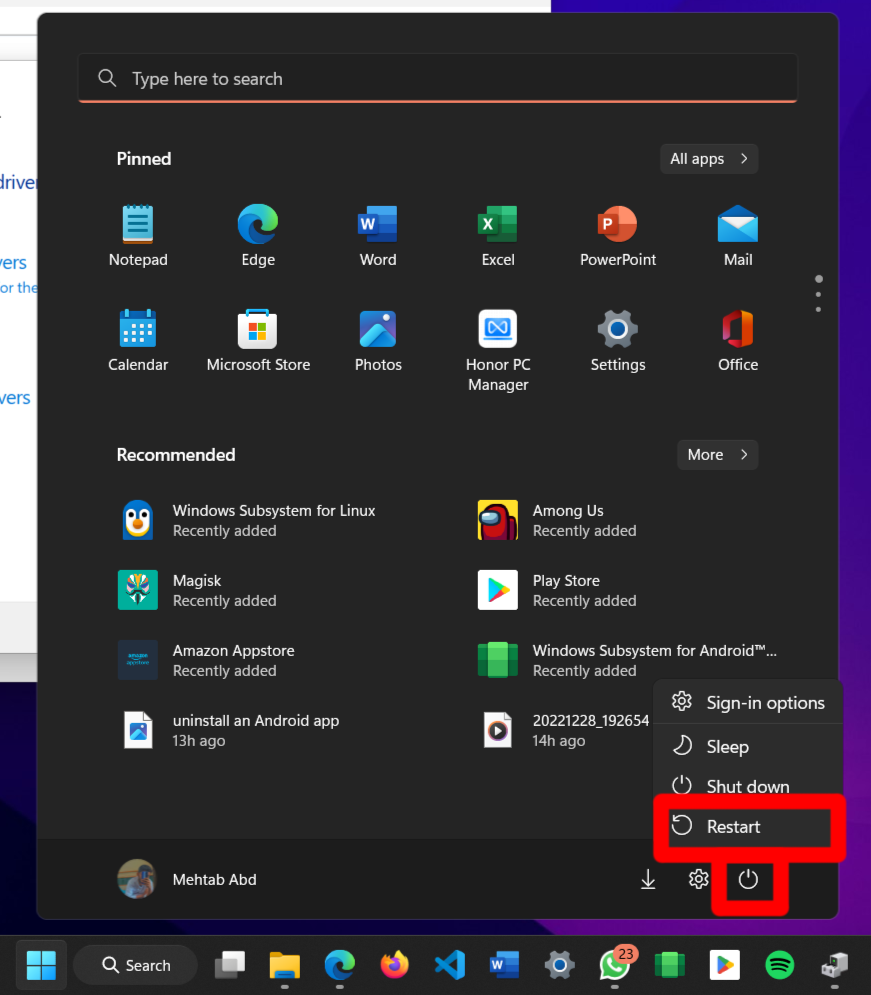
- After your PC has restarted, check if it is charging properly.
Perform a System Restore
If you are still experiencing an issue with your Dell XPS 13 or XPS 13 Plus laptop not charging, then you may need to perform a system restore. A system restore can help you to fix any software-related issues and can help to restore your laptop back to its original state.
System restore is a feature that is built into the Windows operating system and is designed to help you to restore your computer back to a previous point in time. This can be useful for troubleshooting or recovering your system after a major software or hardware issue. Here’s how to perform a system restore:
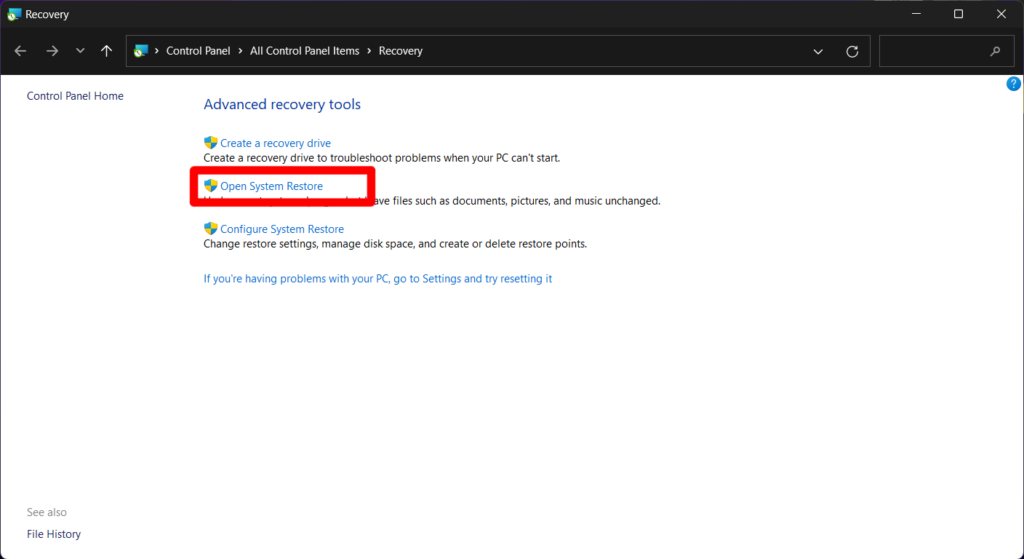
- Open the System Restore wizard. To do this, you can either type “system restore” in the search bar or open the Control Panel and go to System and Security > System > System Protection.
- Click on Open System Restore.
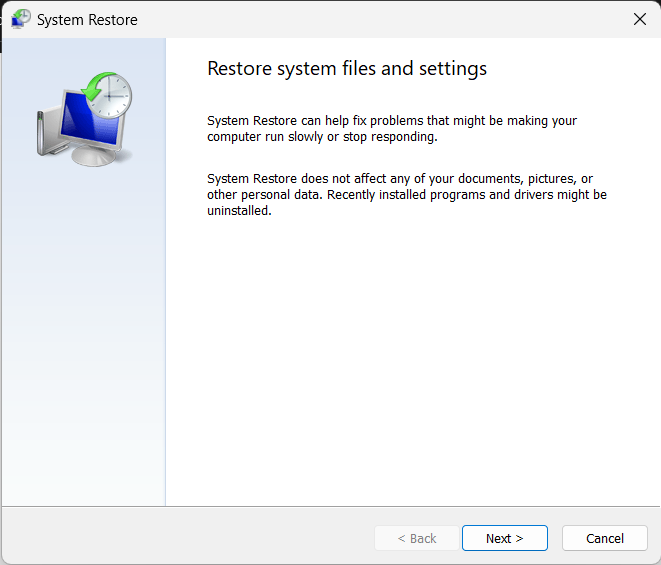
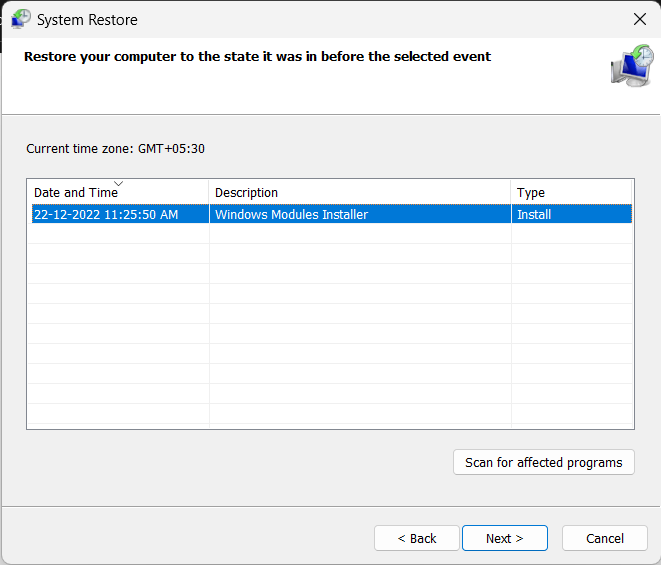
- Click Next. This will open a list of available restore points. These restore points are created whenever you make a major change to your computer, such as installing a new application or driver.
- Select your preferred restore point and click Next.
- Click Finish to complete the system restore.
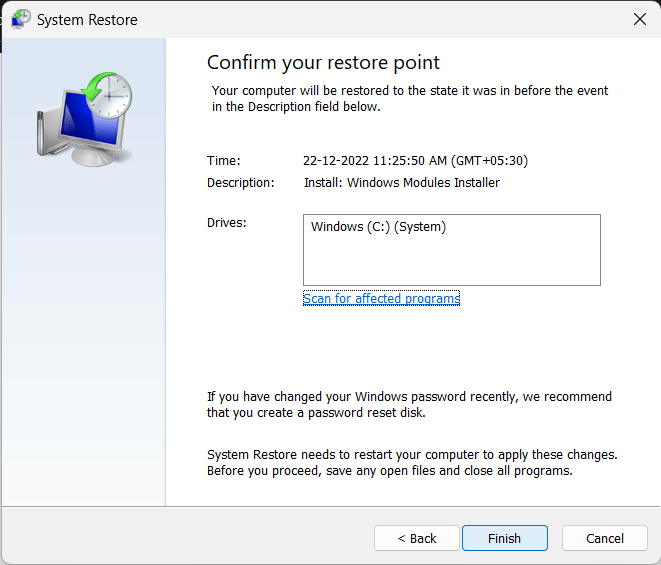
- Wait for the process to complete. Depending on the size of the restore, this may take some time.
Once the system restore is complete, try plugging in to see if the charging issue has been resolved. If it hasn’t, you may need to contact Dell technical support for further assistance.
Frequently Asked Questions
What is the issue with the Dell XPS 13 / XPS 13 Plus not charging?
The issue is that the laptop will not charge when connected to an AC power outlet. This could be due to a faulty power adapter or a faulty power port on the laptop.
How can I fix the Dell XPS 13 / XPS 13 Plus not charging issue?
To fix the issue, check the power adapter and ensure it is securely plugged into the wall outlet. You will also want to check the laptop’s power port and ensure it is free of any debris or dust. You can also try updating the battery drivers or even resetting your PC.
What do I do if I have a faulty battery or motherboard on my Dell XPS 13 or 13 Plus?
You should contact Dell’s technical support if you have a faulty battery or motherboard. They will be able to diagnose the issue and provide you with the best options for repair or replacement.
Final Words
The Dell XPS 13 / XPS 13 Plus can be powerful laptops with great features, but they are prone to certain charging issues. Fortunately, there are several steps you can take to help fix these problems. By checking your power adapter, updating your battery drivers, and performing a system restore, you can get your Dell laptop charging again in no time. Just follow all the steps carefully and if the problem persists, contact Dell customer service for assistance if the problem persists.
