Computer hardware is not always free of faults, but having faulty working hardware can be annoying in Windows. This is because every time a new device is connected, windows detects it and recognizes it using the drivers available. We get a ‘Found New Hardware’ message, and if you have faulty hardware, that will happen again and again.
The new hardware detection feature is essential in windows as it enables the hardware’s access to that computer. But if you have a defected hardware connected to your system, then now and then the “Found new hardware” message will keep popping up in the bottom right corner, which can be annoying. If you are looking to get rid of this new device detection message pop-up, then follow any one of the three methods mentioned below. Using any one of them will get you rid of the annoying “Found new hardware” message popping up again and again.
Page Contents
How to Disable ‘Found New Hardware’ Message on Windows 10?
There is a way to disable this feature for particular hardware, and if it is only one single hardware causing the issue, that would be the best thing to do. However, some users might want to get rid of this annoying message completely. For them, we have two other methods that would disable the “Found New Hardware” message completely for any hardware connected to the Windows 10 system.
Disable ‘Found New Hardware’ Message using the Device Manager:
As mentioned above, there is a way to disable this feature for particular hardware. So if you are getting annoyed by this message popping up again and again just for one piece of faulty hardware, follow this specific method.
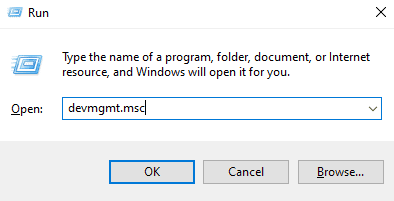
- Press Windows + R keys, and it will open up the Run dialog box.
- Enter “devmgmt.msc” in the Run dialog box and press Enter. It will open up the Device Manager.
- Find the device for which you are getting this message again and again. Once you find it, right-click on it and choose the “Disable Device” option.
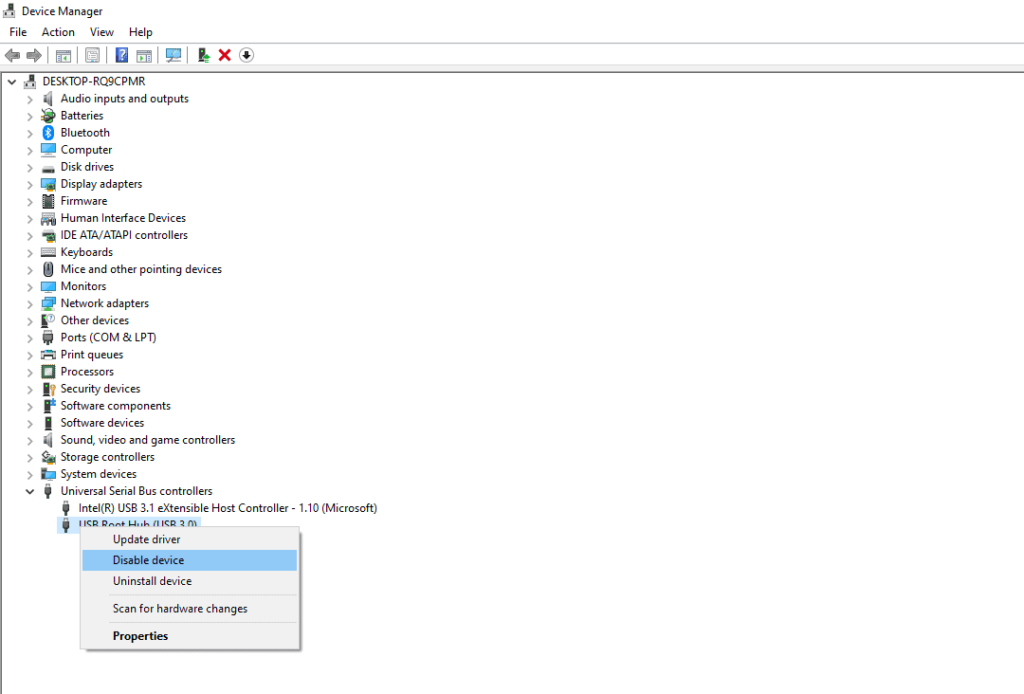
This will disable the ‘Found New Hardware’ message from popping up again and again. If for some reason if you still see the annoying message, then try one of the fixes mentioned below.
Disable ‘Found New Hardware’ Message using the Local Group Policy Editor:
This method is not like the previous method, which worked only for particular hardware. This method will altogether disable the ‘Found New Hardware’ message, and it won’t show up for any hardware connected to the computer.
- Press Windows + R keys, and it will open up the Run dialog box.
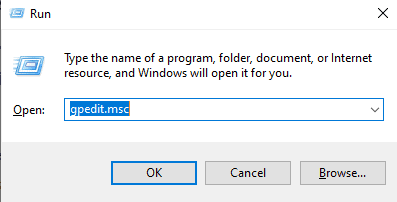
- Enter “gpedit.msc” in the Run dialog box and press Enter. It will open up the Local Group Policy Editor.
- On the left pane of the Local Group Policy Editor, navigate to the following location:
Computer Configuration\Administrative Templates\System\Device Installation
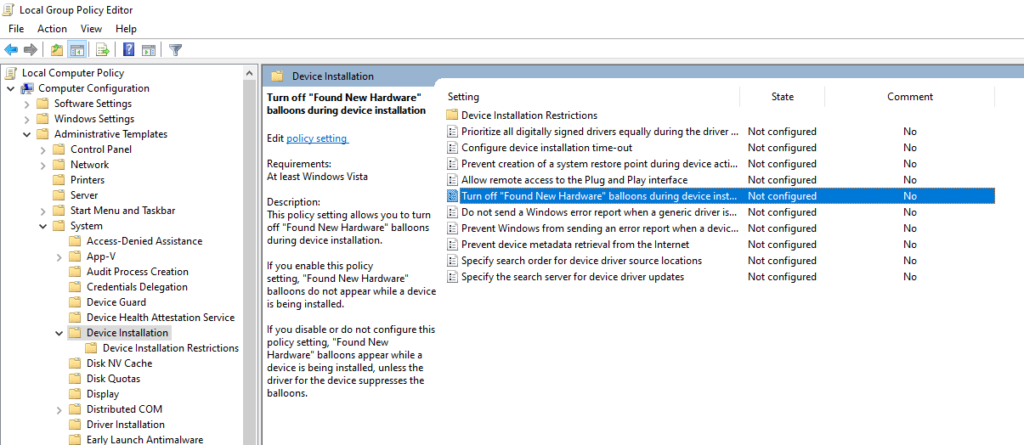
- Now on the right pane, you will see the “Turn off “Found New Hardware” balloons during device installation policy”. Double-click on it.
- It will open up a new window. Here change the toggle from “Not configured” to “Enabled.”
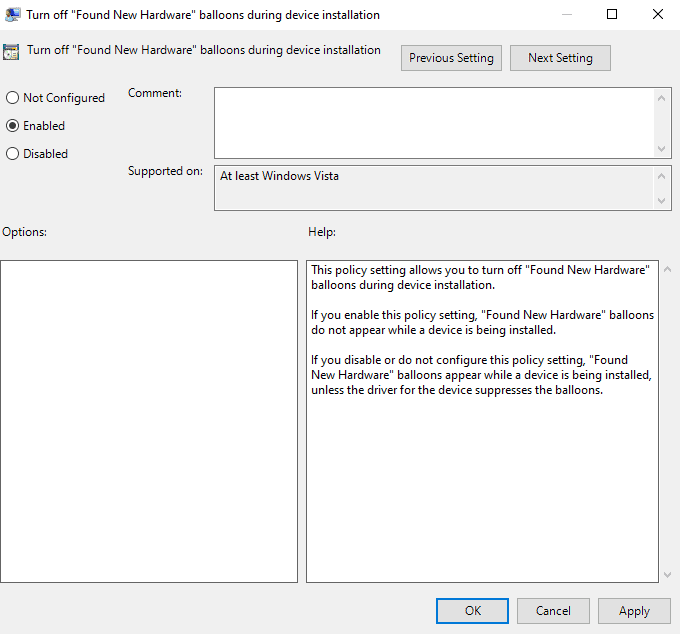
Now you won’t see the ‘Found New Hardware’ message for any hardware connections in the future. If you wish to change it back, then follow the steps mentioned above and change the toggle from “Enabled” to “Not configured” again.
Disable ‘Found New Hardware’ Message using the Registry Editor:
If for some reason the second method does not work out for you, then the last option you have is to use the Registry Editor. Compared to the previous two methods, this will be a bit tricky and dangerous too. One wrong move and the entire registry might get corrupted, which will ultimately corrupt the Windows system.
- Press Windows + R keys, and it will open up the Run dialog box.
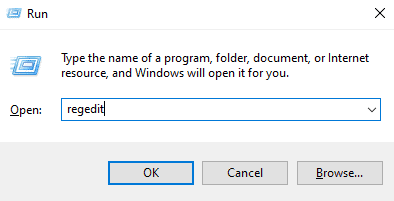
- Enter “regedit” in the Run dialog box and press Enter. It will open up the Registry Editor.
- On the left pane of the Registry Editor, navigate to the following location:
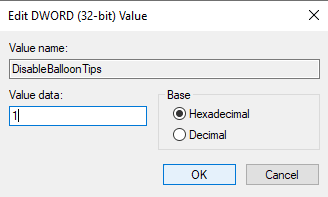
HKEY_LOCAL_MACHINE\Software\Policies\Microsoft\Windows\DeviceInstall\Settings - Click anywhere in the black space on the right pane and choose New > DWORD (32-bit) Value. Set the as DisableBalloonTips for this new value.
- Now double click on this newly created value and set the Value data to 1. Click on the Ok button.
- Now restart your system, and you won’t see the ‘Found new hardware’ message anymore.
If you wish to change things back to how it was previously, then go to that same location in the Registry Editor and delete the DisableBalloonTips value you created.
So these are all the ways to temporarily or permanently disable the ‘Found New Hardware’ message feature in Windows 10. If you have any questions or queries about this guide, then comment down below, and we will get back to you. Also, be sure to check out our other articles on iPhone tips and tricks, Android tips and tricks, PC tips and tricks, and much more for more useful information.
