Lately, the digital world is filled with numerous PC users stating about the “DISM Scan Fails with Error 1392”. This is a regular Windows error that can occur despite the version you are using. The DISM Error 1392 usually appears due to corrupt or unreadable temporary system files. It can also occur due to missing or broken data.
As the reason behind DISM Error 1392 is fundamental, its solutions too are not very complexed. In this article, we will discuss the effects of DISM Error 1392 and some of its standard fixed, which will help the user get quickly rid of it. Let’s get started.
Page Contents
What is DISM Error 1392 and its Effects?
As said above, “DISM Scan Fails with Error 1392” is a common Windows error that generally appears whenever data is corrupt or broken or a temporary system file is missing. The said error displays warnings stating system freeze, program lock-up, installation errors, slow or lagging PC performance, start-up or shut down problems, and others. If not resolved early, it can further lead to hardware failure, app damage, or even a complete system crash in a few cases.
The DISM Error 1392 is mainly related to temporary system files; hence the first resort is to delete all those files. However, if that does not solve the issue for you, then consider using the fixes given below.
Fixes for “DISM Scan Fails with Error 1392”.
FIX 1: Run SFC scan:
Corrupt system files are one of the most common reasons for DISM Error 1392 occurrence; hence running an SFC scan might help in this case. For doing so,
- Go to the Windows search bar and type “cmd”.
- From the search result, go to the option Command Prompt and select the option Run as Administrator.
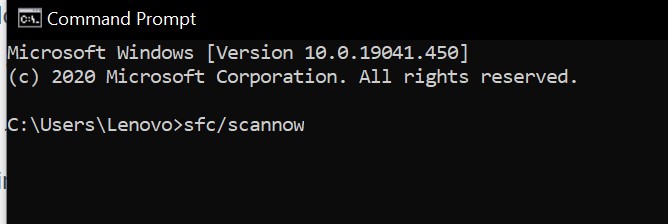
- On the Command Prompt window, type sfc/scannow and then press Enter.
- It will run the command now and will scan and repair all the corrupt files from your system. Once it is done, restart your system and check whether the said issue is solved or not.
FIX 2: Clean the Junk files:
Accumulated junk files can lead up to the DISM Error 1392 as well. When you use your PC, junk files get stored over time, and when you do not clean them regularly, they start to pile up. And due to file conflict or an overloaded drive, it might bring up the said error. Hence the best resort to overcome this issue is cleaning the junk files.
- For doing so, you can either delete such files manually or use a third-party cleaning tool as well.
- After cleaning your PC, it would make you get rid of the DISM Error 1392 and improve its speed and performance.
FIX 3: Run the Check Disk command:
The Check disk command checks the integrity of any disk and finds out any error that lies within, and then displays a message regarding that. For running the command, follow the steps given below:
- Go to the Windows search bar and type “cmd”
- From the search result, go to the option Command Prompt and select the option Run as Administrator.
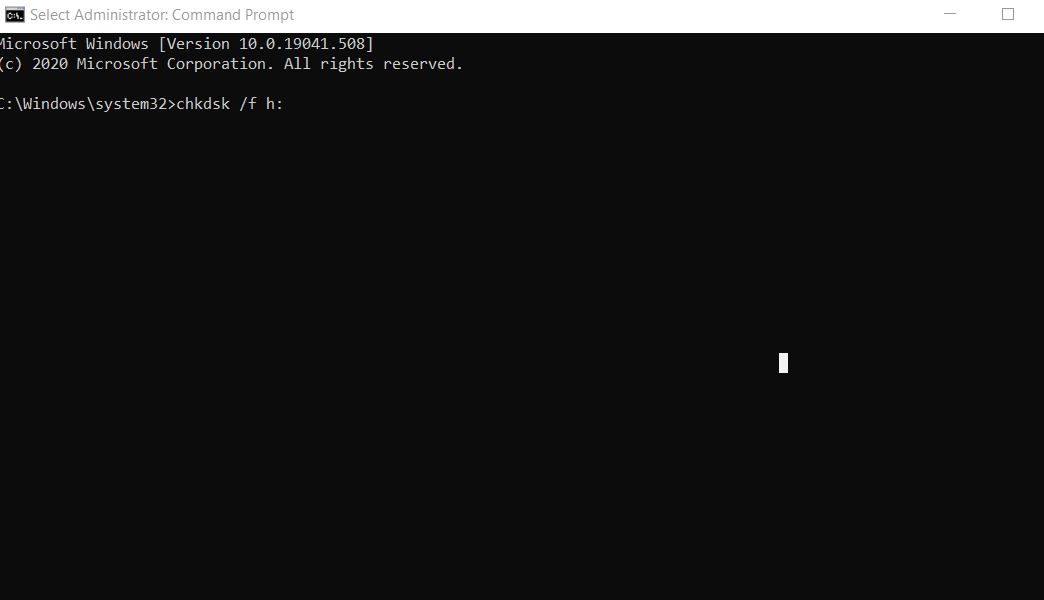
- On the Command Prompt window, type chkdsk /f h: and then press Enter.
NOTE: Here ‘h’ is the drive with the disk.exe error 1392 issue.
- After the scan, the Check disk will display a message regarding the issue. Now, unless you do not specify the next step, it won’t start repairing the problem. Hence to find and fix errors on Drive C, you need to consider the following command, chkdsk /f C:
FIX 4: Perform a Malware scan:
Malware infection in your PC can also lead to the “DISM Scan Fails with Error 1392”. Hence, to mark out, this possibility considers running a Malware scan. For doing so, we recommend you to use a trusted third-party tool.
Once the Malware scan is done, restart your system and check whether the issue is solved or not.
FIX 5: Disable the third-party antivirus program temporarily:
Disabling the antivirus program has helped a few users get rid of the “DISM Scan Fails with Error 1392” issue. For doing so,![]()
- Go to the Antivirus software icon on your Taskbar, right-click on it and then select Disable.
- Once done, check whether the error issue is resolved or not.
Important Note: Disabling the antivirus program might open possible threats for your system. Hence, we advise you to enable it as soon as possible in order to keep your system protected.
FIX 6: Go back to a system restore point:
System Restore helps you restore to an earlier date when your PC was working correctly without any error. Here in case, going back to a restore point where your system was running smoothly will help you eliminate the said error. Though, remember you might lose some files and programs you have downloaded after the restore date.
For doing so,
Create a restore point:
- On the Windows search bar type System restore.
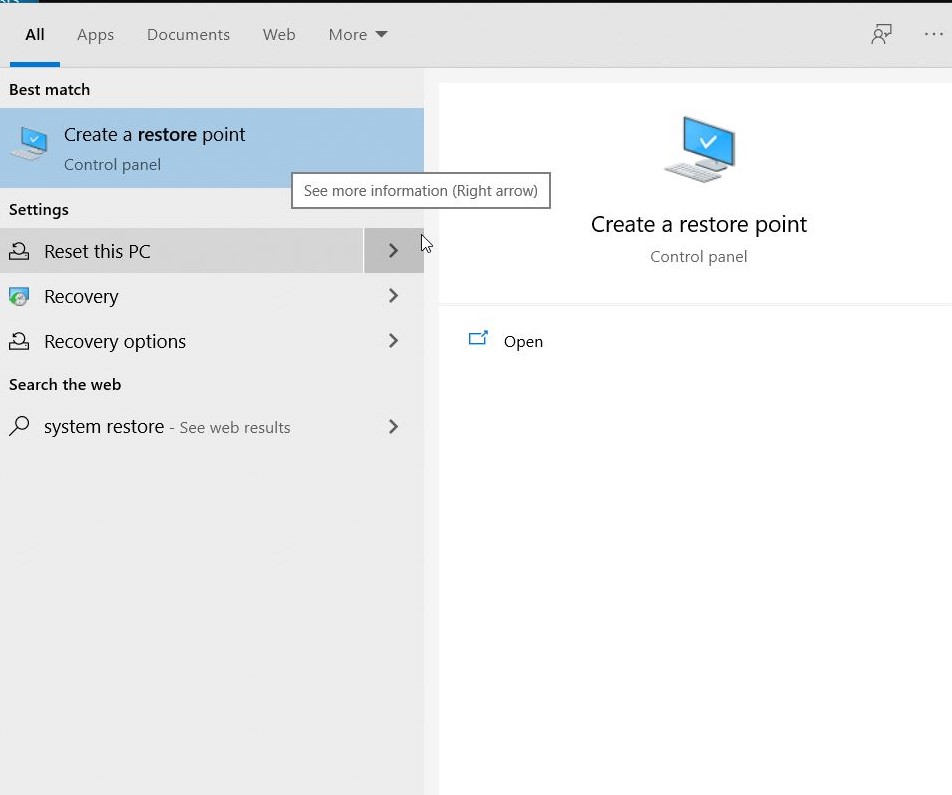
- Now from the search results select the option Create a restore point.
- Here enter your administrator’s account password or grant permission for access.
- In the next dialogue box click on the system restore tab and then click on Next.
- Now select a restore point that was created before the said error occurrence.
- Lastly, click on Next and then click on Finish.
Enter the restore point:
- Go to the windows search bar and type Control Panel.
- Open the first relevant search result.
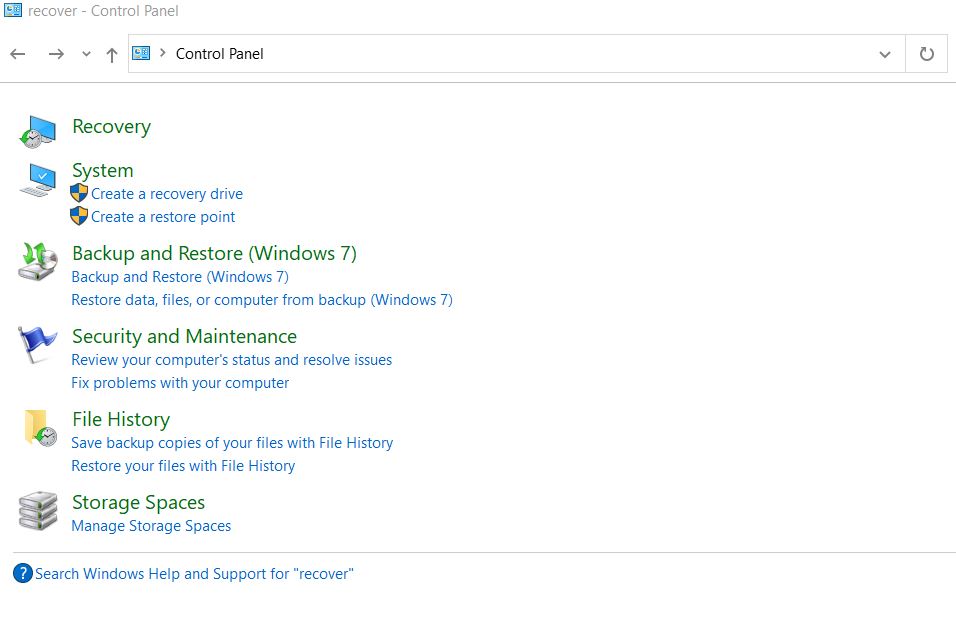
- Now from the options, select Recovery and then click on Open system restore.
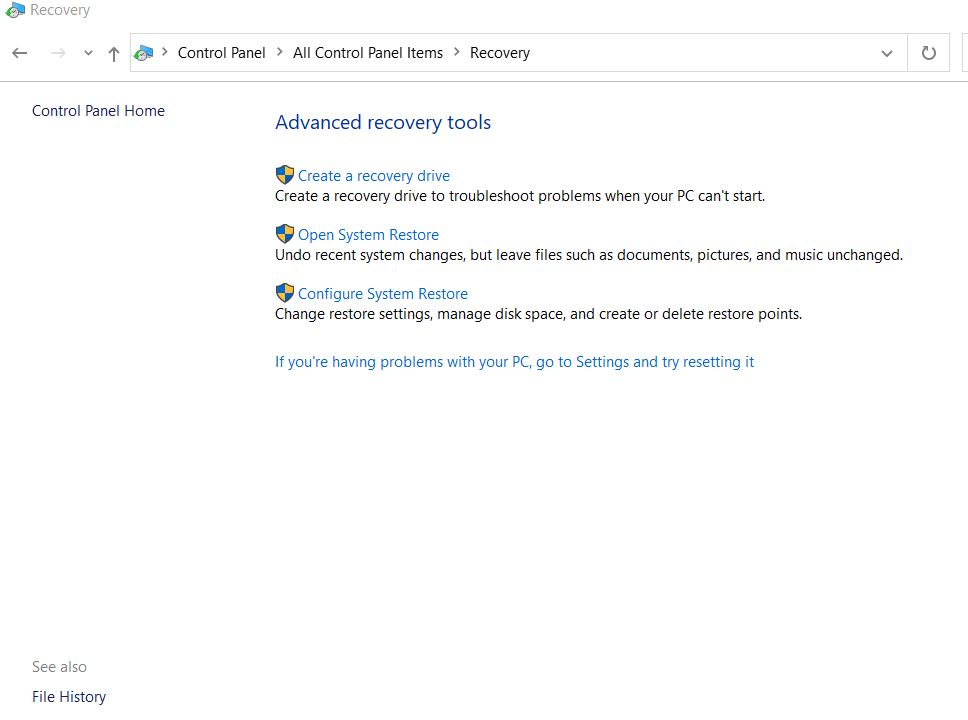
- Click on Next and then select a restore point connected to the problematic program.
- Lastly, click on Next and then click on Finish.
- You can check your system, and the said error might have resolved by now.
Dism.exe errors are very common for your PC, and you might end up getting them now and then. However, if you come across the DISM Error 1392, it is advised to resolve it quickly.
These were all the possible fixes for the “DISM Scan Fails with Error 1392”. The solutions mentioned in the article above are comfortable, and using them does not require any expert-level knowledge. If you have any queries or feedback, please write down the comment in the below comment box.
