Gaming Services Install Error 0x80073D26 is a common scenario with a lot of users these days. The said error usually occurs due to corrupt registry values of Gaming Services or conflicting applications (like EVGA Precision). Also, outdated or corrupt Windows of your System can end you up with the said error.
Today in this article, we will discuss all the details about the Gaming Services Install Error 0x80073D26 and how to resolve it. Make sure you stick till the end to get the most out of it. For more information, have a look down below:
How to fix the Gaming Services Install Error 0x80073D26?
FIX 1: Update Windows to the Latest Built:
When the Windows of your System is outdated, it can end you up with the Gaming Services Install Error 0x80073D26. Here the first solution is to update the System’s Window to its latest built and then check for improvement. For doing so, follow the steps given below:
- Go to the Windows search bar, type Check for updates and then launch the relevant search result.
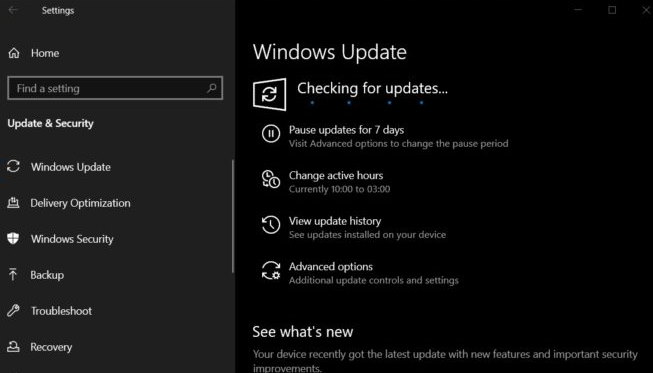
- Now on the next window, click on Check for Updates and then click on Download and install the updates (if any updates are available). Here make sure you install optional updates as well.
- Once the updating process gets done, check whether the Gaming Services Install Error 0x80073D26 got resolved or not.
If not, check if removing the conflicting Update helps or not.
FIX 2: Clean boot your computer:
If any app on your system is interfering with the related OS modules, Xbox Gaming Services may fail to install, and the user will end up with the Gaming Services Install Error 0x80073D26. Here try to clean boot your computer and check if it helps or not. For doing so, follow the steps given below:
Method to Clean boot your computer:
- Firstly, press Windows + R and launch the RUN dialogue box.
- Now inside the empty text box, type MSConfig and then click on OK. It will load the System Configuration window.
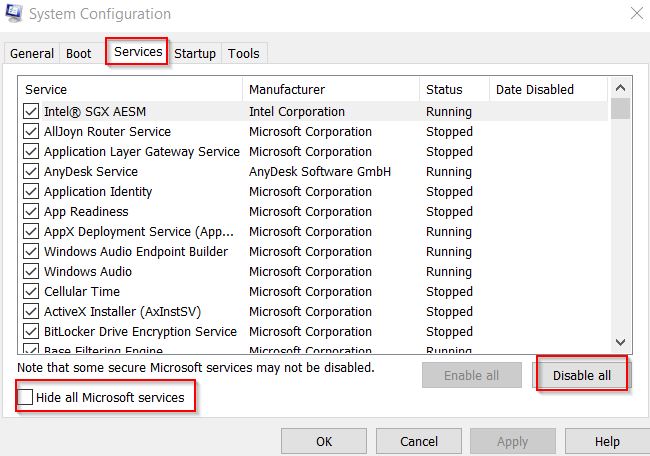
- From here, navigate to the Service tab (on the horizontal menu), tick the checkbox for the option Hide All Microsoft Services and then click on the Disable all tab.
- Now click on Apply and then click on OK. (Here, if it prompts you to restart, choose to restart later).
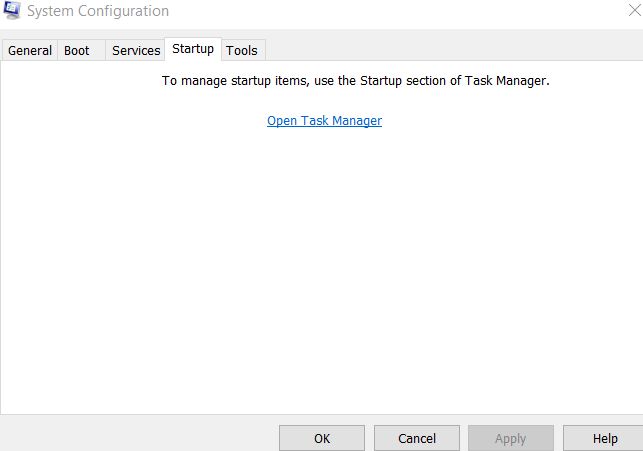
- Now head towards the Start Up tab (from the same horizontal menu) and then click on Open Task Manager.
- Here look at the last field called Start-Up Impact and then disable all the ones with High impact. For doing that, right-click over it and then select Disable. This will disable the services from automatically starting up when the computer reboots. Though if you any time want to start them, simply choose Enable instead of Disable.
- Once you are done, restart your computer, and it will instigate the Clean Boot mode.
Once you have Clean boot, check whether the Gaming Service Install error issue got resolved or not. If resolved, remove the conflicting application causing the issue. Below are a few of the applications that were repeatedly found responsible for the installation error.
- EVGA Precision
- Warsaw Banking App
- MacType
- Riva Tuner Statistics Server
- Xsplit
- OBS
- Wallpaper Engine
- MSI Afterburner
Enable all the disabled applications one after the other in order to find out the responsible one.
FIX 3: Perform an In-Place Upgrade of the System’s Windows:
At times, the corrupted and outdated Windows installation can end you up with the Gaming Services Install Error 0x80073D26. Here performing an In-Place Upgrade of the System’s Windows might help. To figure out if it works for you, try the steps given below:
- Firstly, launch the web browser and head towards the downloading page for Windows 10 on the Microsoft Website.
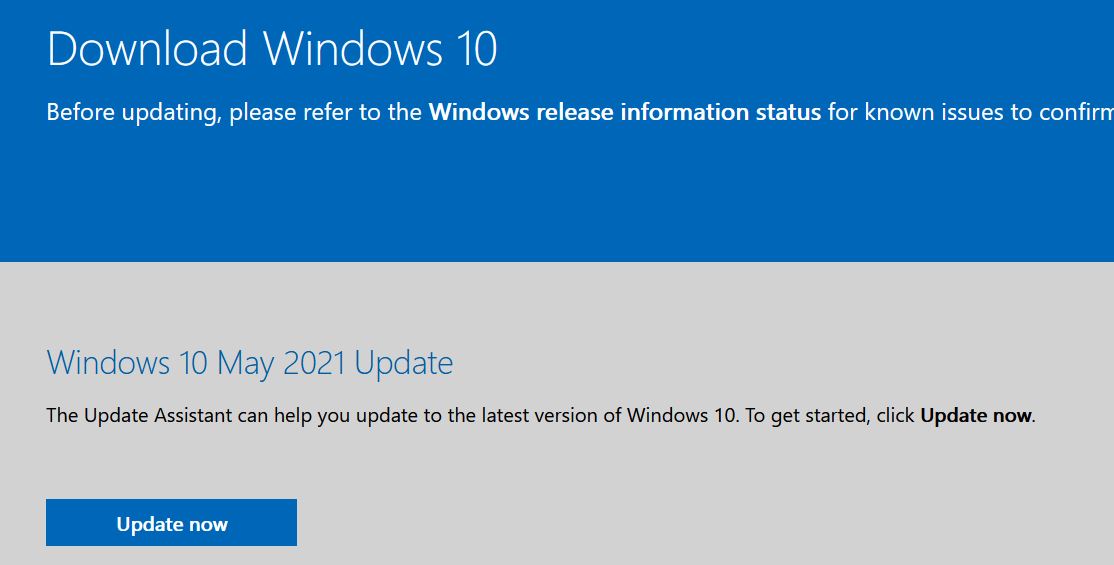
- On the Download Windows 10 page, click on the Update Now button (for the latest Update Assistant), and once it is downloaded, launch it with administrator access.
- Update your system by following the on-screen prompt and check whether the said issue got resolved or not.
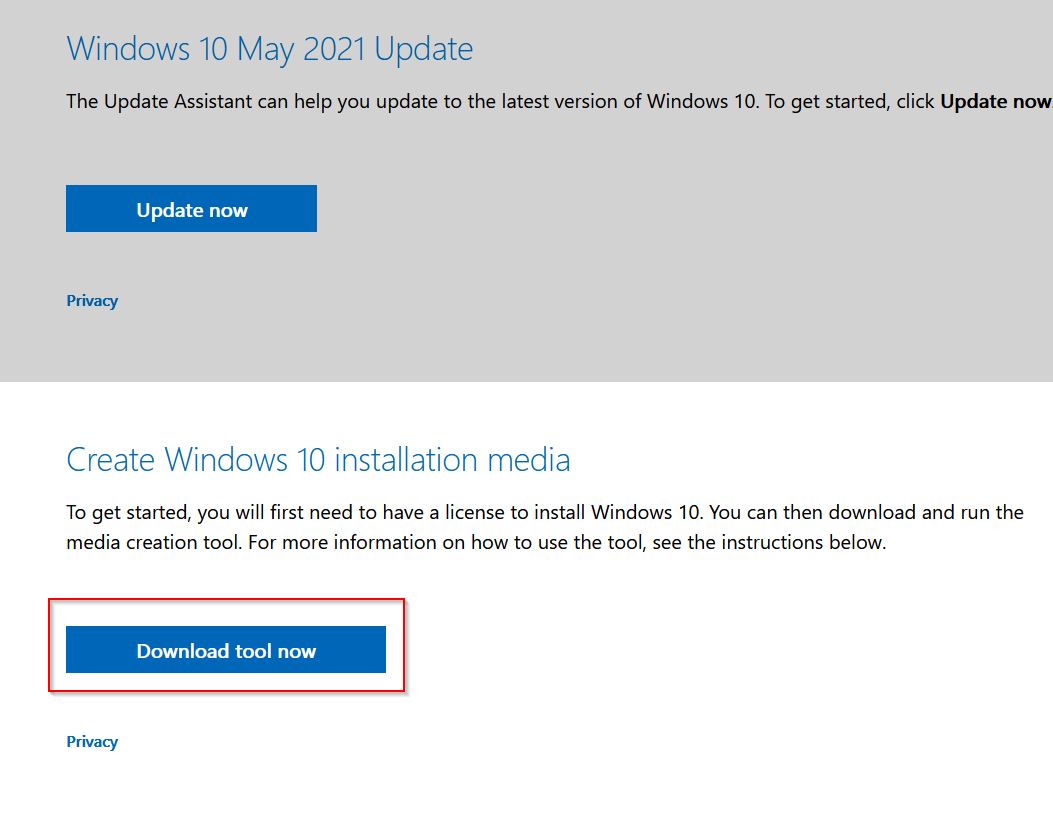
- If the error still persists, then go to the Windows 10 download page, and under the Create Windows 10 Installation Media, click on the Download Tool Now tab.
- Launch it with administrator access once it is successfully downloaded, and then select the option Upgrade This PC Now.
- Follow all the on-screen prompts and when asked what to keep, consider choosing the option Keep Windows settings, Personal Files, and Apps.
- Once done, check whether the said issue got resolved or not.
FIX 4: Edit the System’s Registry:
At times when the relevant registry entries are not properly configured or are corrupted, you might end up with the Gaming services of Xbox. In such a case, deleting the corrupt Registry entries or configuring the Registry entries might help. You can do the same by following the steps given below:
Note: Before you start with the process, make sure you Backup your System’s registry. Also, working with the system’s registry is one skillful task and until you are well versed with the process, refrain from going forwards with the same. Even a single wrong step can cause lasting damage to your system/data.
For deleting the GamingServices and GamingServicesNet Registry Keys:
- Firstly, go to the desktop search bar, type Registry Editor.
- From the search results, right-click over Registry Editor and then select Run as Administrator from the sub-menu.
- Now go to the address bar in the registry window and navigate to,
Computer\HKEY_LOCAL_MACHINE\SYSTEM\CurrentControlSet\Services.
- From the left-pane menu, right-click over GamingServices and then select the option Delete. Confirm your action.
- Further, repeat the same process for the option GamingServicesNet.
- Now close the Registry Editor and then restart your computer.
- Once your system restarts, launch the Microsoft Store and click on the three horizontal ellipses.
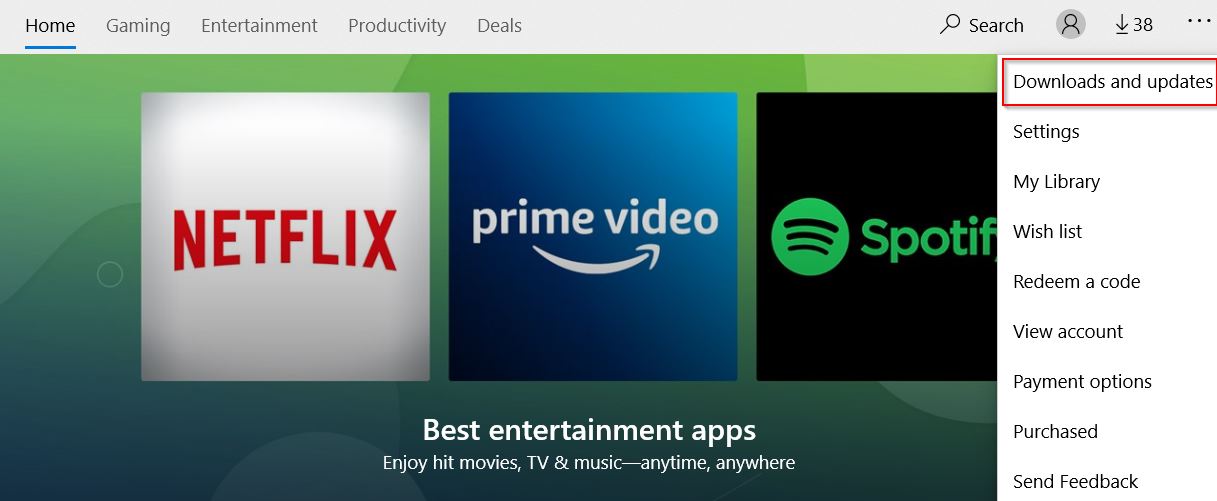
- From the sub-menu, click on Downloads and Updates and then select the option Get updates.
- Once all the updates are installed, restart your computer and upon restart, check for updates of Microsoft Store (repeat the above two steps).
- Again, restart your computer and check for improvement.
If it helps, you are good to go, though if it doesn’t, then launch the Xbox app from the Microsoft Store and check whether it helps or not.
For deleting the Software Distribution Folder:
- As discussed above, delete the Gaming Services and GamingServiceNet registry keys.
- Now launch the Command Prompt window, and for doing so,
- Go to the desktop search bar, type Command Prompt and launch the relevant search result. Make sure you launch it with administrator access.
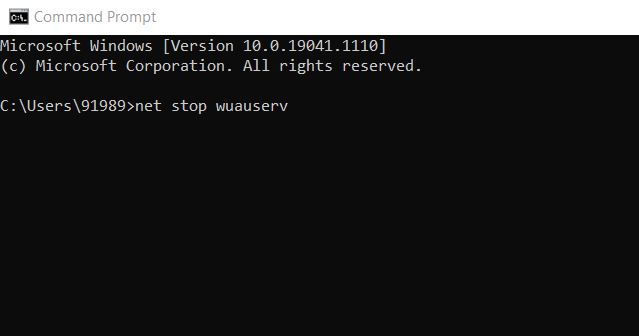
- Inside the Command Prompt window, type
net stop wuauserv

net stop bits
- Now press Enter after each of them.
- You can launch the Run dialogue box by right-clicking on the Windows icon and select Run from the context menu and in the empty text space, type the following command,
\Windows\SoftwareDistribution.
- On the Next window, backup the contents of the SoftwareDistribution folder and then delete all the content from the original folder.
- Now inside the Command prompt window, execute
net start wuauserv
net start bits
- and then press Enter after each of them.
- Further, restart your computer and upon restart, launch Microsoft Store and then click on three horizontal ellipses.
- From the sub-menu, click on Downloads and Update and then select the option Get updates.
- Once all the updates are installed, restart your computer and check for improvements.
FIX 5: Delete the Gaming Services Folders in the WindowsApps Directory:
As per some suffered users, when they deleted the Gaming Services Folders in the WindowsApps Directory, the Gaming Services Install Error 0x80073D26 got resolved for them. You can try the same by following the steps given below:
- Go to the desktop search bar, type Apps & Features and launch the relevant search result.
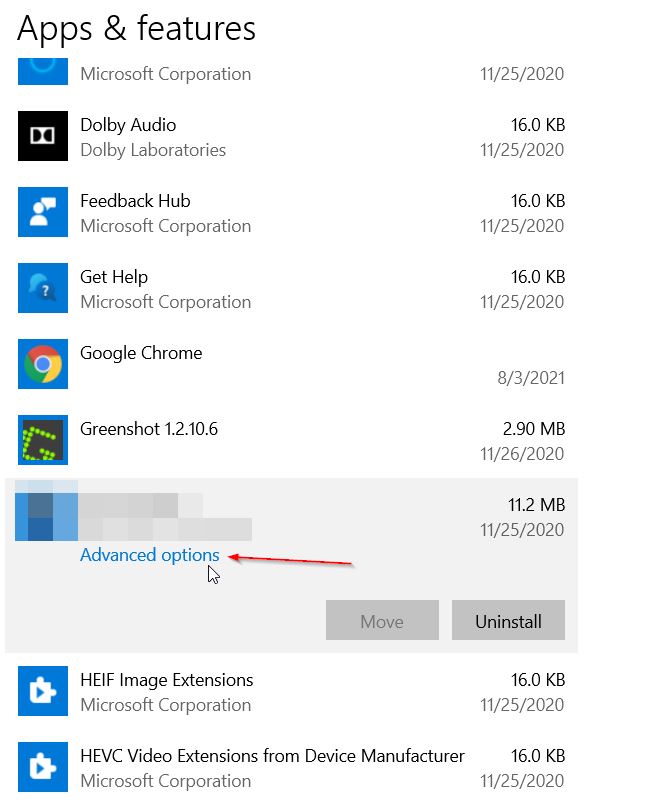
- Here select Gaming Services and then select Advanced Options.
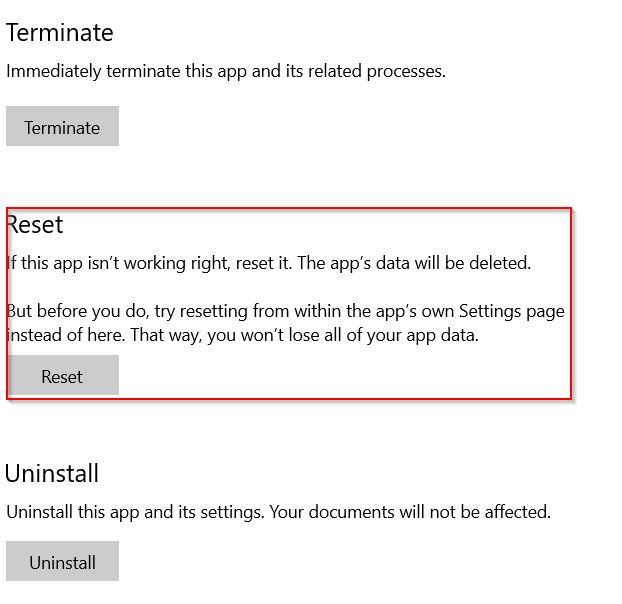
- Further, click on the Reset tab and then confirm to reset the Gaming Services.
- Now launch the RUN dialogue box by pressing Windows + R altogether.
- Inside the empty text box, type “\Program Files” and then click on OK.
- Here take WindowsApps directory’s ownership and then delete the 2 Gaming Services folders.
- Now launch the Registry Editor window by administrator access and then delete the below-given registry keys:
HKEY_USERS\.DEFAULT\Software\Classes\Local Settings\MrtCache\C:%5CProgram Files%5CWindowsApps%5CMicrosoft.GamingServices_2.45.11001.0_x64__8wekyb3d8bbwe%5Cresources.pri

HKEY_USERS\.DEFAULT\Software\Classes\Local Settings\MrtCache\C:%5CProgram Files%5CWindowsApps%5CMicrosoft.Gamingservices_2.45.11001.0_x64__8wekyb3d8bbwe%5Cresources.pri\1d6937194966bce

HKEY_LOCAL_MACHINE\SYSTEM\CurrentControlSet\Services\GamingServices

HKEY_LOCAL_MACHINE\SYSTEM\CurrentControlSet\Services\GamingServicesNet
- Further, close the Registry Editor, restart your computer.
- Once your system restarts, open a web browser and navigate to the following address,
https://www.microsoft.com/en-us/p/gaming-services/9mwpm2cqnlhn?activetab=pivot:overviewtab
- Now click on the Get tab, and from the dialogue box, click over Open Microsoft Store.
- Lastly, install the Gaming Services and check for improvements.
FIX 6: Use the PowerShell to Reinstall the Gaming Services:
If none of those, as mentioned above, fixes helped you in resolving the Gaming Service Install Error 0x8007326, then at last try using the PowerShell to Reinstall the Gaming Services. For doing so, follow the steps given below:
- Firstly, right-click Windows and open PowerShell (Admin).
- Now execute the following command one after the other,
Get-AppxPackage *gaming services* -allusers | remove-appxpackage -allusers

Remove-Item -Path "HKLM:\System\CurrentControlSet\Services\GamingServices" -recurse

Remove-Item -Path "HKLM:\System\CurrentControlSet\Services\GamingServicesNet" -recurse
- Further restart your computer and upon restart execute the following command in PowerShell (Admin)
start ms-windows-store://pdp/?productid=9MWPM2CQNLHN
- Microsoft Store will now launch with the Gaming Services page.
- Once it is launched, install the Gaming services and check whether the said issue got resolved or not.
- If not, uninstall the Gaming Services via the Powershell command discussed above and then delete the related registry keys. Further, restart your computer and check for improvements.
These were the top 6 fixes for the Gaming Service Install Error 0x80073D26. Though all of the fixes mentioned above are proven to resolve the said error while working with the registries, do not proceed further unless you are very sure.
At the end of this article, we hope that all of the information mentioned above will help you to get done with the Gaming Service Install Error 0x80073D26. If you have any queries or feedback, please write down the comment in the below comment box.
