The touchpad (also known as a trackpad) is an inevitable part of a laptop. Many users love to use the touchpad instead of an external mouse. However, the touchpad is sensitive, and it can get affected easily. Recently, some users have complained about their touchpads not working properly.
As the touchpad can get affected by both software and hardware issues, it becomes tough for the users to solve the problem on their own. If you’re also a user who’s looking for solutions to fix your laptop’s touchpad not working issue, then don’t worry. This article will show you some quick fixes on how to fix the touchpad.

Page Contents
Solutions to Fix Laptop’s Trackpad:
We are going to show you some effective solutions that you can use to fix the touchpad of your laptop. Before moving down to the solutions, we recommend you to connect an external mouse to your laptop. You can also use the laptop’s TrackPoint if available.
Solution 1: Reinstalling the Touchpad Drivers:
If the touchpad drivers stop working properly after a faulty update or if the drivers are incompatible with your OS version, then your touchpad will stop working. To fix this issue, you have to reinstall the original touchpad drivers. Follow these steps given below.
- Go to your driver’s official manufacturer’s website.

- Click on the Support option.
- Then, you have to enter the model number, service tag number, or serial number in the field requesting for it.
- You can also take the help of the model chooser utility on the website (if available).
- Choose the Driver option.
- Now, search for the touchpad driver for your laptop. You may find them under the Mouse or Touchpad option.
- Download and install the drivers. Then, restart your computer.
- Check if you resolved the issue by moving your fingers along the touchpad.
Solution 2: Update your Touchpad Drivers:
The touchpad of your laptop can stop working due to driver issues. Thankfully, you can detect the faulty drivers with the help of the Device Manager. If you find a device with an exclamation sign or an “X” icon next to it, it means the device has issues, and you have to update it. Now, don’t waste any more time, follow our steps and fix the issue.
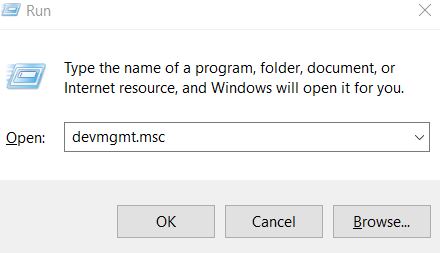
- Press Windows key +R.
- Type “devmgmt.msc” and press Enter.
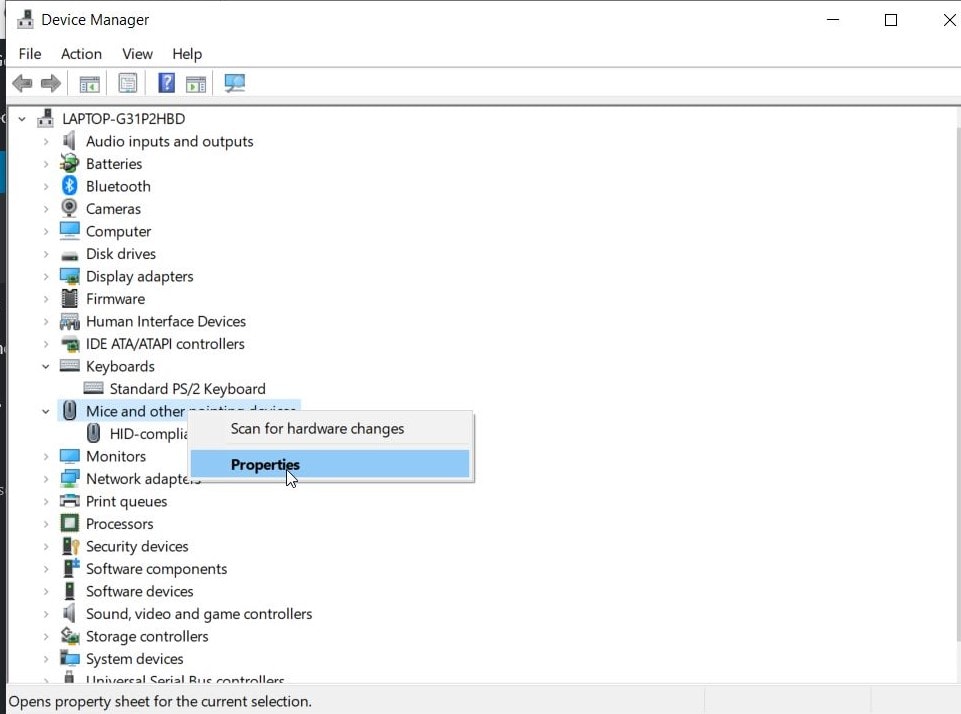
- Now, click on the arrow next to the “Mice and other pointing devices” option.
- Find the Touchpad option, right-click on it to open its Properties.
- Select the Driver tab.
- You have to make sure the Disable button is active. This ensures that the touchpad is enabled.
- Now, select the Update Driver option and click on the “Search automatically for updated driver software” option. And make sure you have the internet connection for the procedure.
- Then, you have to follow the prompt to update your touchpad drivers.
- After the process is complete, see if the touchpad is working.
Solution 3: Turn on the Physical Touchpad Switch:
It is possible that you have disabled the touchpad using the physical switch by mistake. But don’t worry, we will show you how to enable it again. Follow the steps given below.
- First, you have to search the “Fn” key on your keyboard and press it. This key usually has a different color, or you can find it next to the “Ctrl” key at the bottom.
- Then, look for the Function Keys (F1 – F12) which has the icon of a touchpad with a finger on it. The key can also have a touchpad sign with a diagonal line across it.
- Now, you have to press the Fn key and the touchpad Function Key simultaneously to enable the touchpad on your laptop.
- If your keyboard has multimedia mode enabled, you only need to press the touchpad key to reactivate the touchpad.
- Move your finger on the touchpad and see if that works.
Solution 4: Mouse/Touchpad Settings:
In most of the cases, the touchpad stops working because it is disabled from the touchpad settings. You can make the settings correct by following our steps given below.
- Go to the Start menu.
- Search “Control Panel” and press Enter.
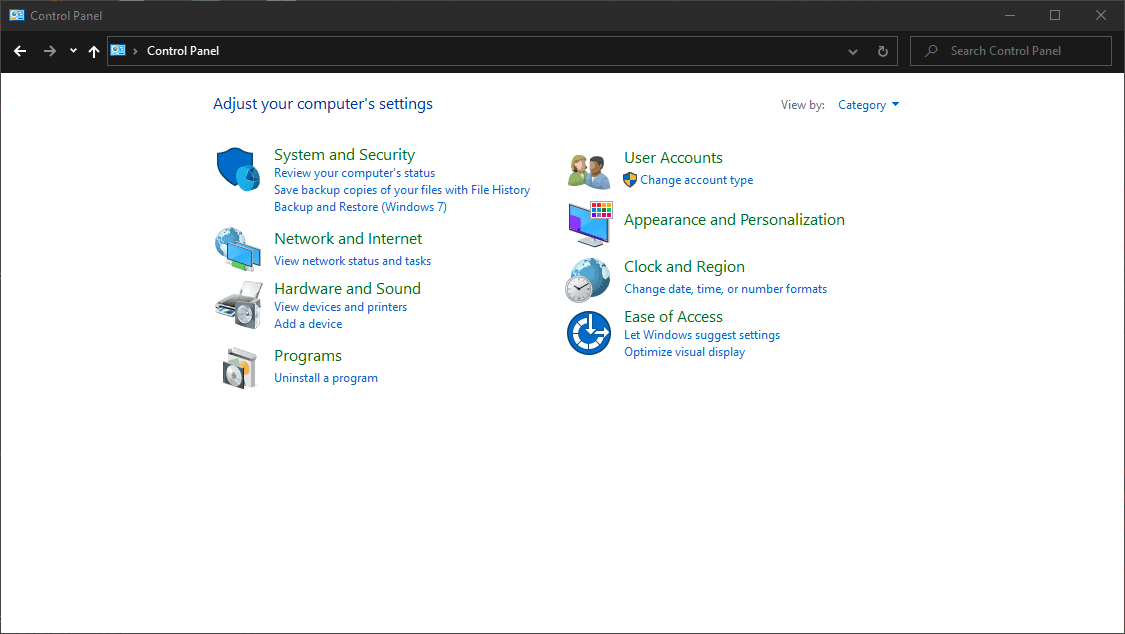
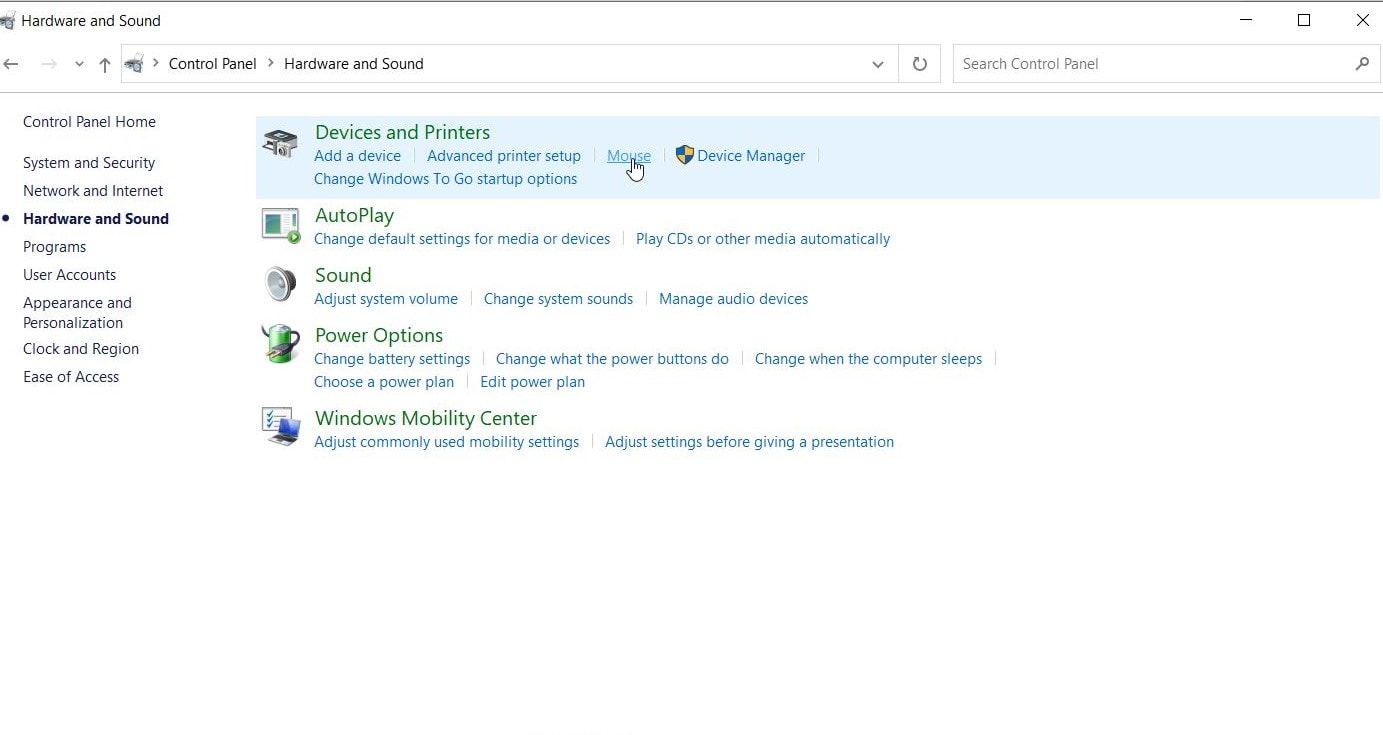
- Now, go to the Hardware and Sound section.
- Under the Devices and Printers tab, click on the “Mouse” option.
- Another way is to right-click on the mouse icon in the notifications tray and then open its Settings/Properties.
- Then, you have to find touchpad settings in the Mouse Properties window. It is usually located at the extreme right tab next to the Hardware tab.
- You have to make sure the checkbox beside the Enable Touchpad option is checked, or the Enable Device button is turned on.
- You can also adjust other settings. For example, the touchpad stops working when an external mouse is attached. You can disable this setting here.
- Select “Apply” and then click “OK” to save all the changes.
- Check if the solution worked for you by moving your finger on the touchpad.
Solution 5: Use the Windows Hardware and Devices Troubleshooter:
To find out if everything is fine with the hardware, you can take help of the Windows Hardware and Devices Troubleshooter. If the troubleshooter finds some issues related to your touchpad, it will show you how to solve them. Here’s a quick guide on how to use the troubleshooter.
- Go to the Start menu.
- Search Control Panel and press Enter.

- Once you enter the Control Panel window, go to System and Security.
- Then, click on the Security and Maintenance option.
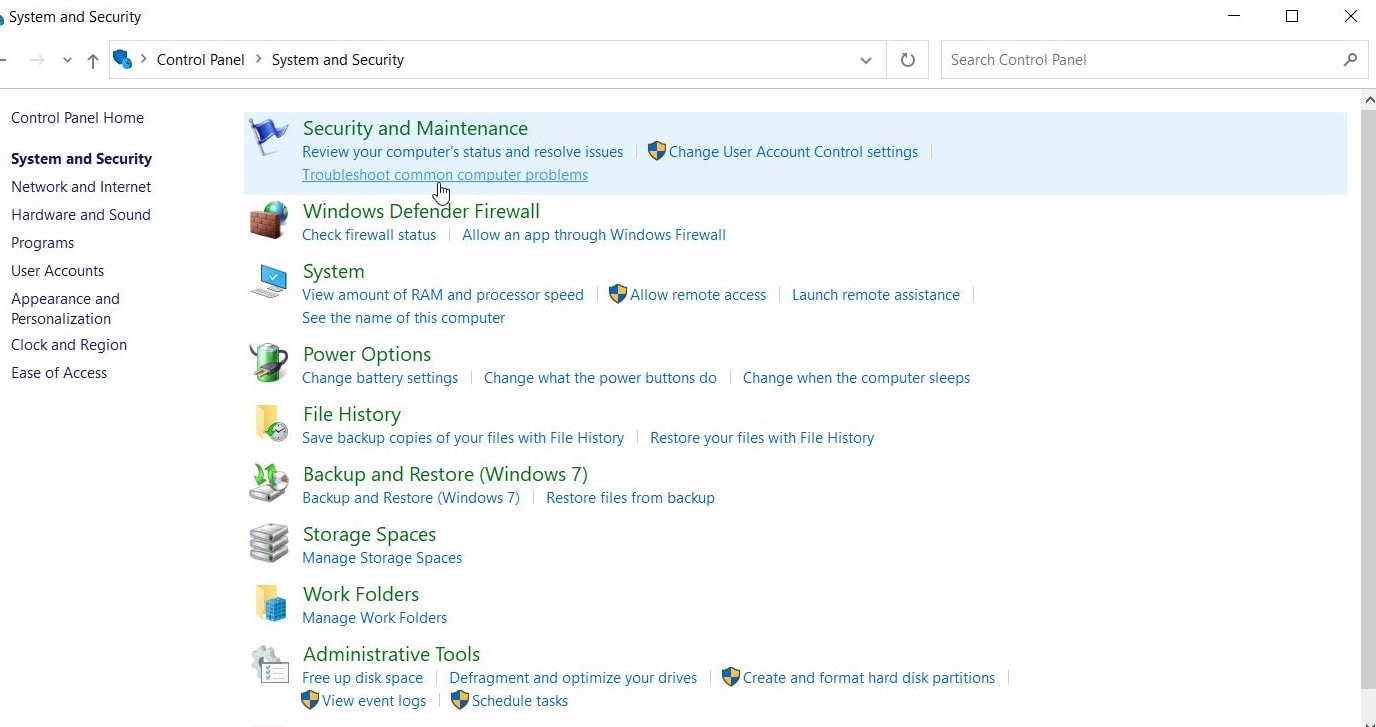
- Choose the Troubleshooting option and then select the “Configure a device” option under the Hardware and Sound section.
- Then, follow the troubleshooting wizard, which will show you different prompts. Follow the prompts and scan for problems.
- Apply the fixes to your hardware problems, and make your touchpad work again.
Solution 6: Enable Touchpad from the BIOS Settings:
It’s possible that the touchpad settings are disabled by default in BIOS. That’s why the above-mentioned solutions didn’t work for you. So, follow our steps given below and enable the touchpad settings using the BIOS settings.
- Start by shutting down your PC and pressing the appropriate key to reboot into the BIOS.
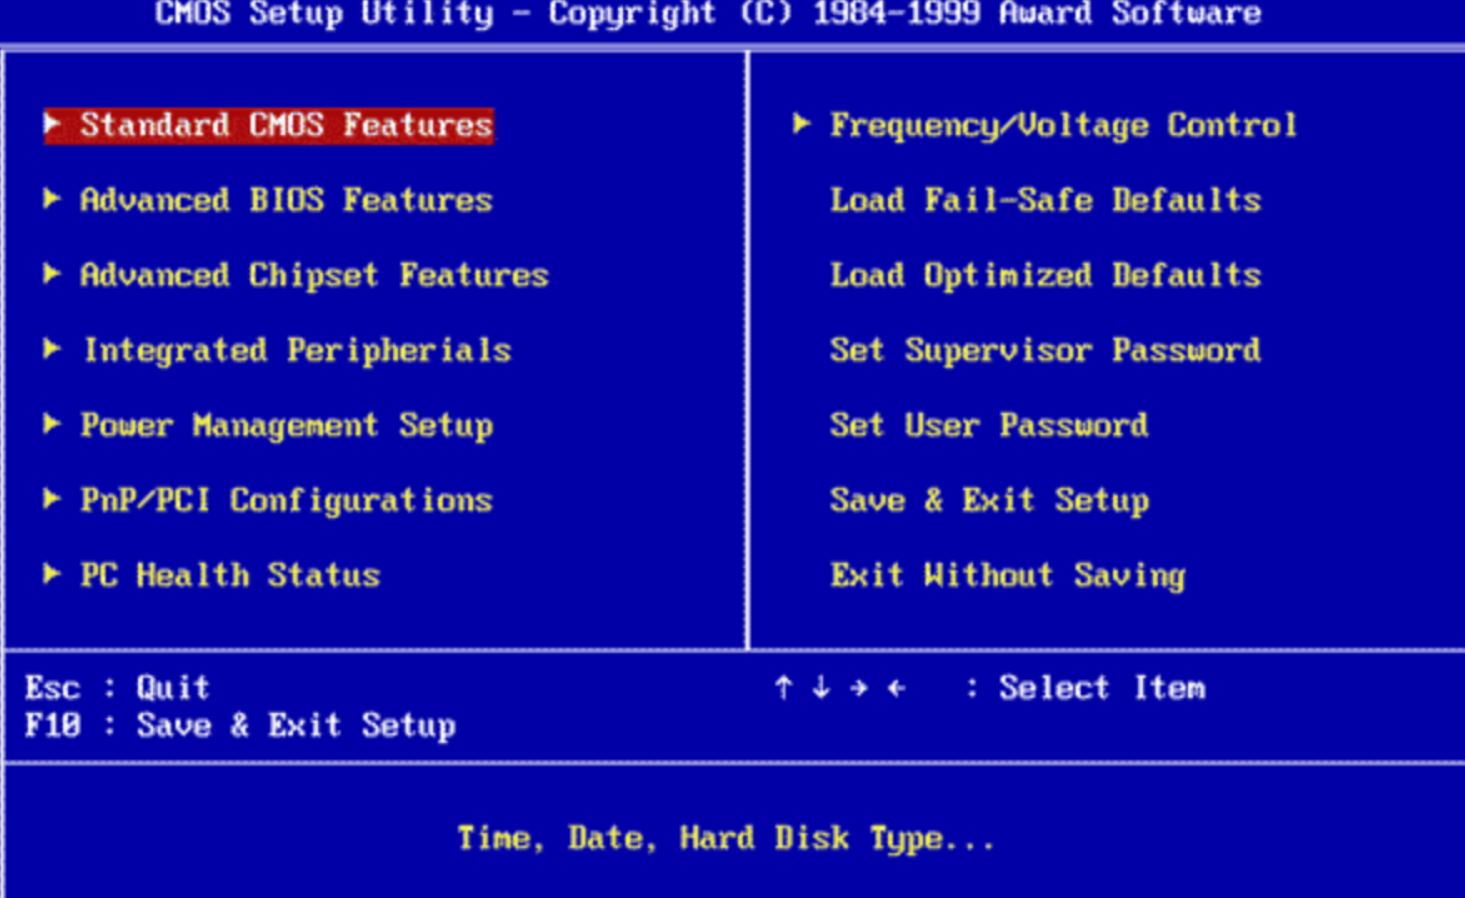
- The key is usually displayed when the POST screen comes up. The key is different for different devices. Most common keys are Esc, Delete, F2, F8, F10, F12 key.
- After you enter BIOS, look for the hardware device settings.
- If you find the touchpad disabled, enable it.
- After enabling the touchpad, leave BIOS. Reboot your computer and see if the problem is solved.
We understand how frustrating it can be when the touchpad of your laptop stops working. To ease your worries, we have provided some best solutions that you can use to fix the touchpad not working issue. The steps are easy, and you can perform them manually.
So, go through them one by one and see which one works for you. In case your touchpad is still not working after trying out the solutions given above, take your laptop to a technician. We hope you successfully solve the problem and start using your touchpad again. If you have any queries or feedback, please write down the comment in the below comment box.
