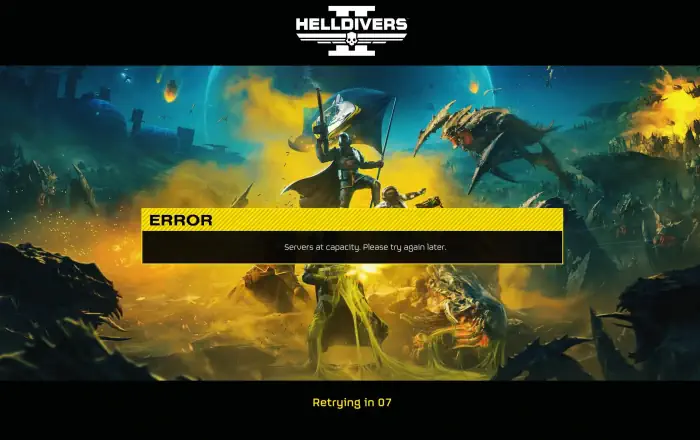
Ever wanted to play a game badly but couldn’t because of the capacity error? Well, this is not the case for every game, but few games are still giving this error to their players, and Helldivers 2 is one of those games. If you are also getting the server at capacity error in the Helldivers 2 game, this is the perfect place for you because we are here with a fix for that. In this article, we will show you a fix for the server capacity issue in Helldivers 2.
The worst thing about this error is that it won’t let you get in the game, and you will be stuck on the loading screen all the time, and you will get a prompt like “Server at Capacity” or “Please Try Again.” Let’s move on to all the potential fixes for the Helldivers server issue.
Also Read

Page Contents
What is Helldivers 2 Servers at Capacity Error and How to Fix?
Well, to address this issue, you need to identify the root cause of the problem, and the first thing that will come to mind is the probability of multiple numbers of players attempting to log in at the same time. The most prolific solution you can guess is to try again after some time. But since Helldivers 2 has already expanded its server capacity, this problem should not be coming for the players.
Helldivers developers have already established a limit on their server from 10,000 users to 20,000 users and have also increased the concurrent capacity. Here are some workarounds that you can try to fix this issue
Method 1: Check the server status

This is the most common thing you can do if you are facing a server capacity issue. Just check the server status of the Helldivers 2 game. You can go to the internet and, in the search bar, type “Server Status of the Helldivers 2 game,” and you will get multiple sites that can tell you the accurate status of the game server.
Method 2: Set the Internet Protocol to IPv4

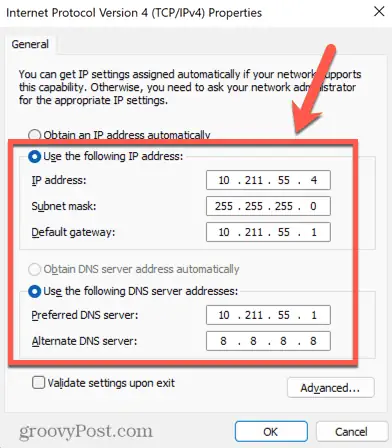
If you have checked the server status of the Helldivers 2 game and it is going fine, You can simply change the Internet Protocol to IPv4 (Internet Protocol Version 4) and use 8.8.8.8 as the preferred DNS server.
Method 3: Switch Internet Connection
If you are facing errors with the current server with your Internet connection, try switching your Internet connection to a different one. This might nullify any errors caused by the internet connection. You can also try switching to a wired connection to bypass the issue.
Method 4: Verify the integrity of game files

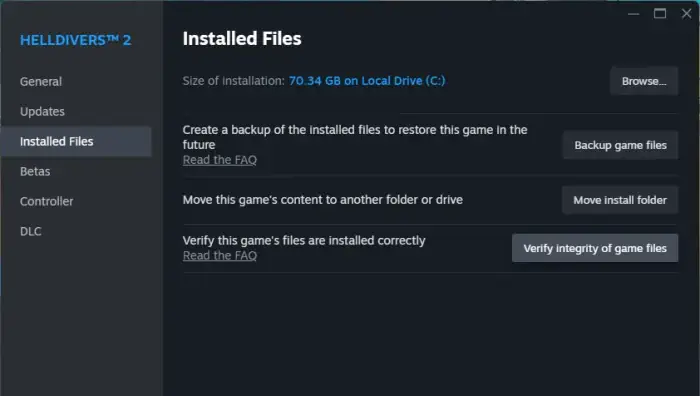
You can verify the integrity of game files to fix any issues you are facing in the PC game. Similarly, for Helldivers 2, you can just verify the integrity of the game files by following these simple steps.
- Go to the Steam library on your PC.
- Find the Helldivers 2 game in your library.
- Go to the properties, and then click on local files.
- Now click on Verify Integrity of Game Files.
Method 5: Turn off VPN
If you are using VPN on your PC and you are experiencing this error, you can simply turn off your VPN services and restart your game again. Having a VPN service sometimes restricts some programs from accessing all the features, and as a result, you get errors like these in your games.
Method 6: Disable IPv6

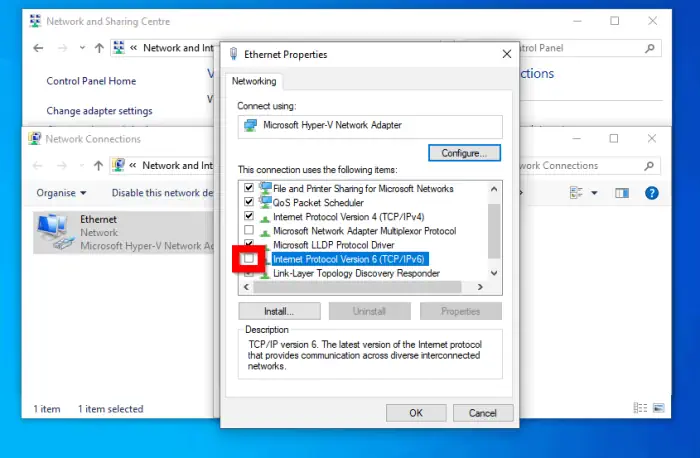
If your network has IPv6 enabled on your PC, you should disable it to avoid these error codes with any game, not just Helldivers 2. This has been proven by multiple redditors and Twitter users. Here is how you can disable IPv6 on your PC.
- Press Win+X to open the control panel.
- Click on Network & Internet.
- Now, open the Network and Sharing Center.
- Click on Change Adapter Settings.
- Now, right-click on “your connection” and go to the properties.
- Uncheck the checkbox next to the Internet Protocol version, TCP/IPv6.
- Click OK to disable and save the changes.
Conclusion
That concludes our guide to fixing the Helldivers 2 server at capacity error. You can follow each step to check and see if the error gets fixed or not. This is not a big issue for gamers and is usually fixed within time or even after restarting, but if you are having difficulty starting the game, again follow the above-given steps. I hope that this article has helped you fix this issue.
