Recently, NTFS.sys BSOD (Blue Screen of Death) error that has been troubling a lot of Windows 10 users. Ntfs.sys is a system file located in the C:\Windows\System32\drivers folder, it is essential for your Windows to run, or the hardware driver that helps Windows to read and write to NTFS drives. However, despite several bits of help, the Ntfs.sys file has still come up with an error.
Page Contents
Fixes for “Failed Ntfs.sys in Windows 10” issue.
The failed Ntfs.sys error in Windows 10 is an issue that could cause the system to crash, further leading to data loss. It can happen due to disk corruption, outdated or corrupted hard drive drivers, problematic RAM sticks, or antivirus conflict with the system. Today, considering all these possible reasons, we have compiled a list of some proven solutions that will help you in fixing the “Failed Ntfs.sys in Windows 10” issue. Have a look:
FIX 1: Enter Safe Mode with Networking:
Before you begin with any of the steps, we recommend you first enter the safe mode with networking. For doing so, follow the steps given below:
- Firstly, your Computer must be turned off.
- Now turn on your computer by pressing the Power button. Now once you see the Login screen, press and hold the power button to turn it off.
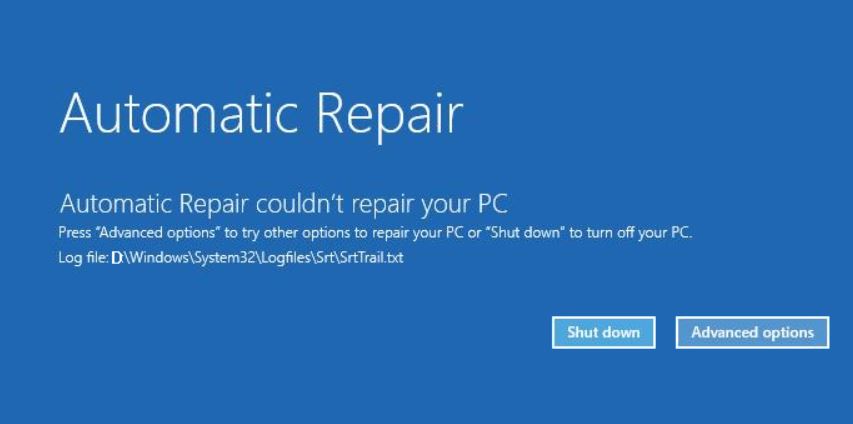
- Keep repeating the above two steps until your screen displays Preparing Automatic Repair.

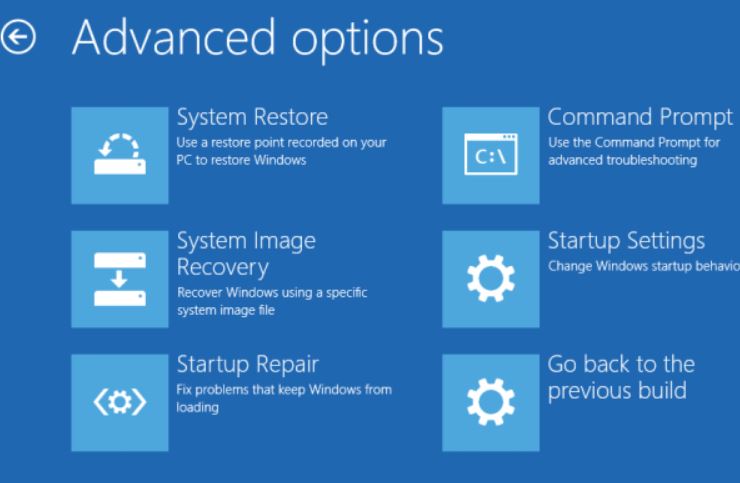
- Now once Windows finishes with diagnosing your Computer, click on Advanced options and then select the option Troubleshoot.

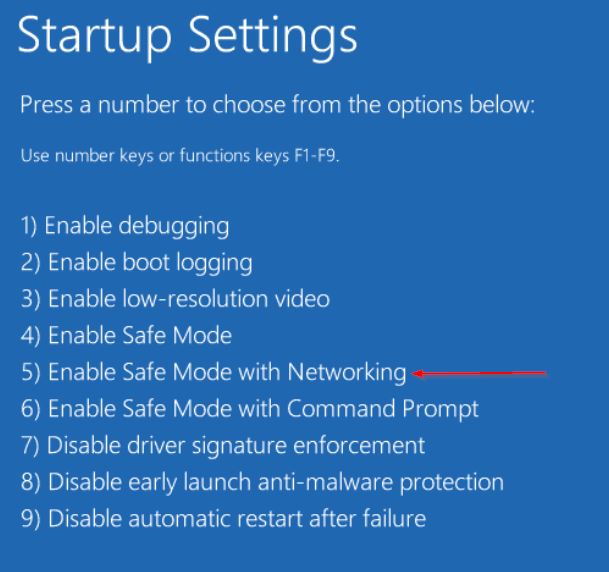
- Again, select Advanced options and then click on Startup Settings.
- On the next screen, click on the Restart tab.

- Now press key 5 on your keypad for enabling the Safe Mode with Networking.
- Once you have entered into the Safe Mode with Networking, you can now begin with the next fix in the row.
FIX 2: Update the Device Driver:
Corrupt or outdated Device Drivers can eventually lead you to the “Failed Ntfs.sys in Windows 10” issue. Here the best resort you can try is updating the Device Driver. Now you can either perform the updating process manually or automatically with dedicated software. Down below, we have explained both. Have a look and follow the steps:
For updating the Driver Manually:
- Firstly, right-click on the Windows icon on your desktop bar and select the option Device Manager.
- Now inside the Device Manager window, navigate to Display Adapters, expand it, and you can see the list of drivers.
- Here right-click over the problematic Driver and select the option Update driver from the sub-menu.
- Further, on the next screen, select the option Search automatically for drivers, and Windows will begin searching for the latest update automatically.
- Once found, you can install them on your computer.
- Restart your computer once you are done.
For updating the Driver automatically:
Updating drivers automatically is quite an easy task, and you can perform the same with multiple drivers updating software available online. If you lack in time and efforts, we recommend you to use the automatic way only.
FIX 3: Check for RAM issues:
As discussed earlier in the article, problematic RAM sticks can also lead to the “Failed Ntfs.sys in Windows 10” issue. Here we recommend you to check whether everything with your hardware is fine or not. For doing so, have a look down below:
Firstly, check your hardware. For doing so,
- Begin with Turning off your Computer. Make sure you unplug it as well.
- Further, remove all the RAM sticks.
- Now try to Power On your Computer with the RAM sticks one after the other. Make sure you check each RAM stick individually.
- While trying the RAM sticks individually, if your Computer fails to boot with any specific, then there lies the corruption.
Secondly, check the timings and frequency of the RAM. For doing so,
- Navigate to the official website of your RAM’s manufacturer and locate the default & recommended values.
- Here if the values do not match, then it means you might have to overlock/underlock the RAM.
NOTE: IF you aren’t well familiar with the BIOS moulding stuff, we recommend you to contact some professionals.
FIX 4: Remove BitDefender and/or Webroot:
There are several third-party software (s) that does not perform well with our operating system resulting in errors and glitches. However, we have found out that with the failed Ntfs.sys file, BitDefender and Webroot are the most responsible ones. Here we recommend you remove BitDefender and Webroot and check whether it helps or not. For doing so, follow the steps given below:
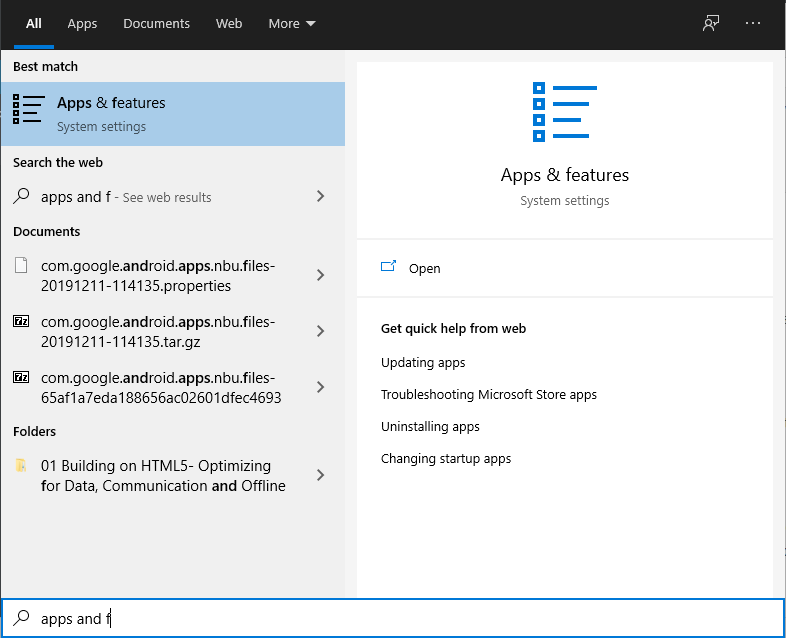
- Firstly, go to the desktop search bar, type “apps” and launch the option Apps and Features.

- Now scroll down the list of apps and locate BitDefender and Webroot.
- Once you locate them, click over them, and it will expand some options. Here select the Uninstall tab for both of the applications.
- Lastly, restart your computer.
NOTE: Uninstalling an application manually does not remove various files related to that particular application. Thus, in case you want to remove every single file and folder related to it, then we recommend you to use any of the dedicated software removing tool.
These were all the tried, tested, and proven fixes for the “Failed Ntfs.sys in Windows 10” issue. All of them have worked for most of the suffered users, and thus, we hope they will prove helpful in your case as well.
Apart from the above-mentioned fixes, we recommend you run an anti-malware scan as well. It has been a proven solution for a few of the suffered users, and thus we hope it might work for you as well. If you have any queries or feedback, please write down the comment in the below comment box.
