This guide outlines the steps to import or export saved passwords from the Microsoft Edge browser. There could quite a few reasons why one needs to carry out any of the aforementioned tasks. If we talk about import, this could come in handy when you are switching to the Edge browser from Chrome, Firefox, Internet Explorer (legacy), etc. On the other hand, the export option will let you save all the passwords in a CSV file.
This file could then be used to access all your passwords and import the desired ones to any other browser. Likewise, many browsers let you save the passwords in an HTML file format. In this regard, Edge gives you the option to directly import this file and hence get hold of all the saved passwords. On that note, here are the complete instructions to import or export saved passwords from Microsoft Edge.

Page Contents
Import Saved Passwords to Microsoft Edge
So if you have decided to use this offering from Microsoft, then the first step will be to import all the saved passwords from your previous browser. There are two ways of doing so. The first method involves directly selecting your old browser from the list and carrying out the import. However, if your browser name is missing from the list, you could give a shot to the second method, i.e. importing via an HTML file. Here are the required steps for both of these methods:
Import directly via Edge
- Launch the Microsoft Edge browser on your PC.
- Click on three horizontal dots situated at the top right.
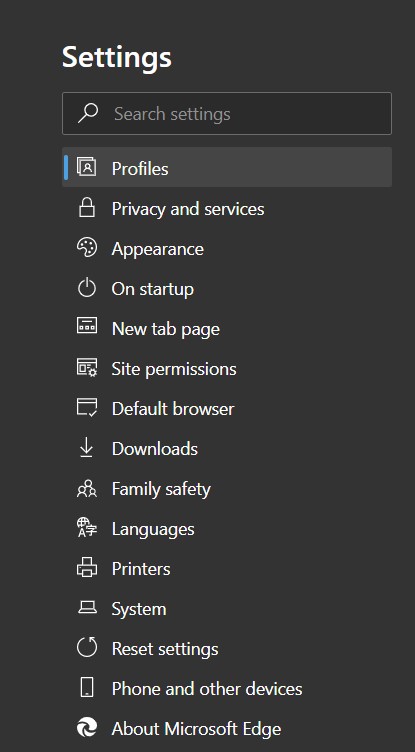
- Then select Settings from the drop-down menu. Within that, head over to Profiles from the left menu bar.
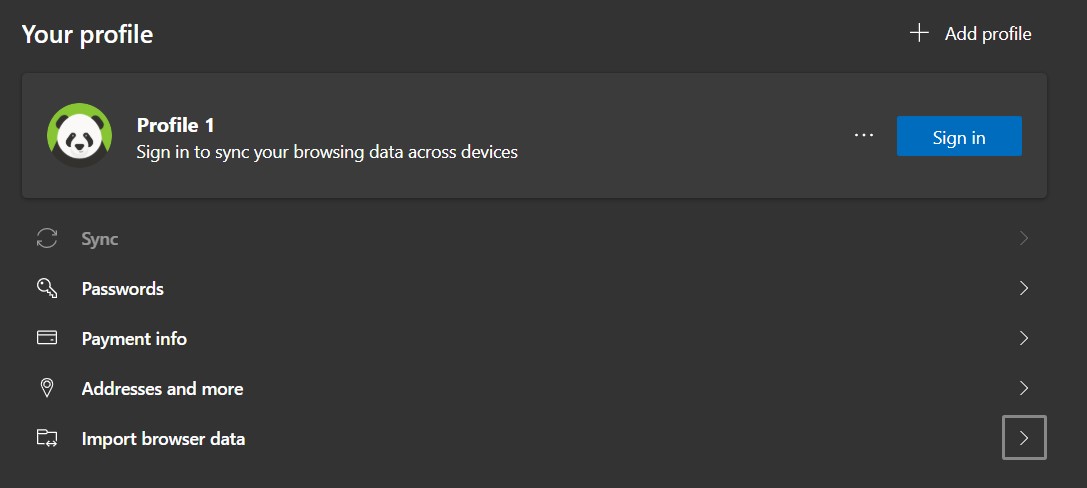
- Next up, click on Import browser data.
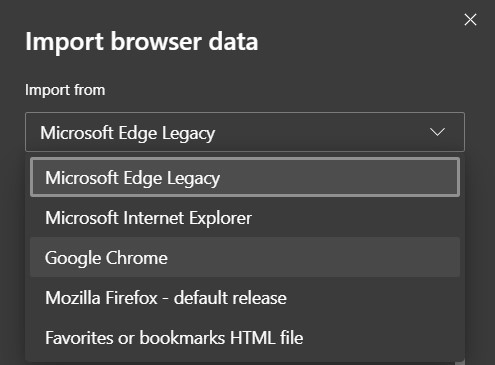
- From the ‘Import from’ option, select the browser from which this import needs to be done.
- Then select your previous browser’s profile and then tick mark the Saved Passwords option. if you wish to import any other settings a swell, make sure you select that as well.
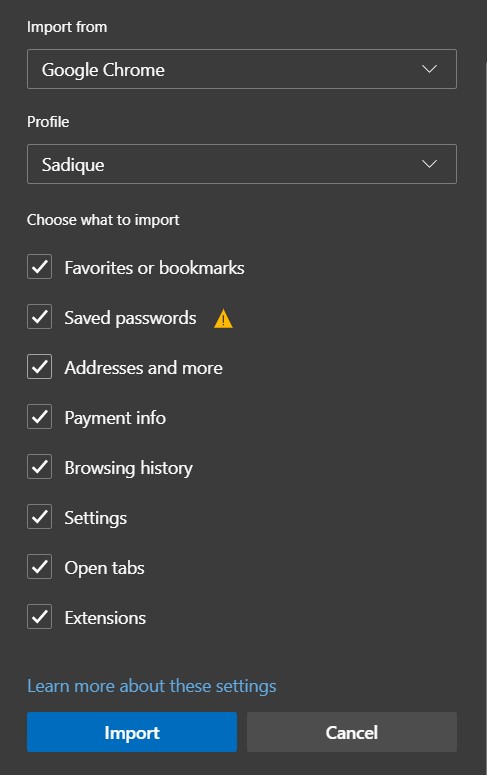
- Once the selection has been done, hit the Import option situated at the bottom.
Importing via HTML File
- If you are having the HTML file for all the saved passwords, then here is what needs to be done:
- Head over to Settings > Profiles and click on Import browser data.
- Now rather than selecting your previous browser this time you should go for Favorites or Bookmark HTML file.
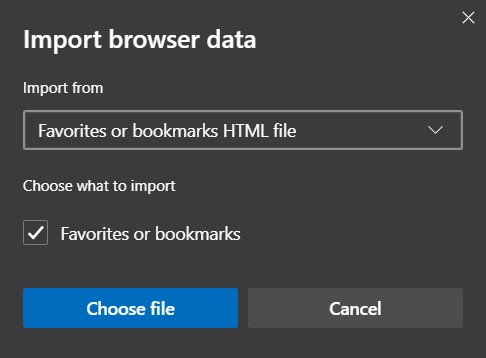
- Browse to that HTML file and click on Open. That is it. All the saved passwords from that HTML document will now be imported within a few minutes, depending on the number of saved passwords that you have.
So these were the required steps to import passwords to Microsoft Edge, let’s now check out the method to export these passwords.
Export Passwords from Microsoft Edge
If you have decided to bid adieu to Microsoft Edge and wish to try out a new browser, the first step involves exporting all the saved passwords from the Edge browser. As mentioned before, the export will be done to a CSV file. This file could be accessed by anyone. Therefore it is recommended to keep it at a safer place or upload it to the cloud, if possible. On that note, here are the required steps:
- Head over to the Microsoft Edge browser on your PC.
- Click on the three horizontal dots present at the top right.
- Then navigate to Settings and go to the Passwords section.
- Right next to the Saved Password section, you will see three horizontal dots, click on it.

- Then click on Export Passwords. You will then be notified that ‘Your passwords will be visible to anyone who can see the exported file.’ Click on Export Password.
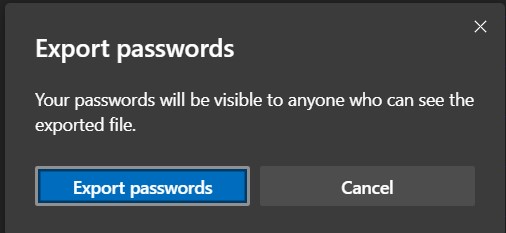
- Then select the destination where you want to save this file and give it a name. Finally, hit the Save button.
That is it. You have successfully exported the saved passwords from the Edge browser. On that note, we conclude the guide on how to import or export saved passwords from the Microsoft Edge browser. If you still have any queries left, do let us know in the comments section below. Rounding off, here are some iPhone Tips and Tricks, PC tips and tricks, and Android Tips and Trick that you should check out as well.
