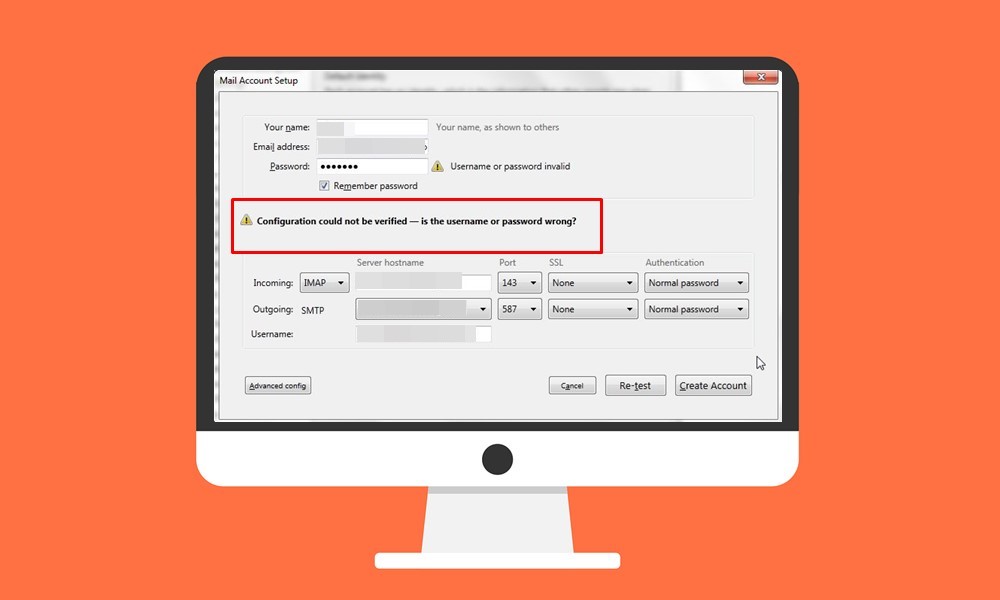
This open-source cross-platform email client from Mozilla gives equal weightage to speed and privacy. So a secure and private email application along with tons of add-ons, extensions & themes is on the card. However, not everyone is able to make full use of this app. Quite a few users are complaining across various forums that they are facing the Configuration Could not Be Verified error in Thunderbird. As far as the reason for this error goes, well there could be quite a few ones.
To begin with, the most common cause is an incorrect username or password. Along the same lines, an older version of the app might also cause an issue or two. Likewise, restrictive permissions, two-step verification, or your Firewall app might also conflict with the proper functioning of this app. In this regard, this guide has listed out various methods to fix these issues which in turn will fix the Thunderbird configuration could not be verified error as well.
Page Contents
How to Fix Thunderbird Configuration Could not Be Verified
There isn’t any universal fix for this issue. You might have to try out all the below-mentioned tweaks until you are able to achieve success. Follow along for the complete instructions.
Fix 1: Verify your Credentials
While it may sound like an obvious one, but the most common culprit seems to be related to the input of incorrect account credentials. Well, even one part of the error message reads out as “is the username or password wrong?”. So we would suggest you head over to the Google or Yahoo email clients, input the same ID and password that is showing this error.
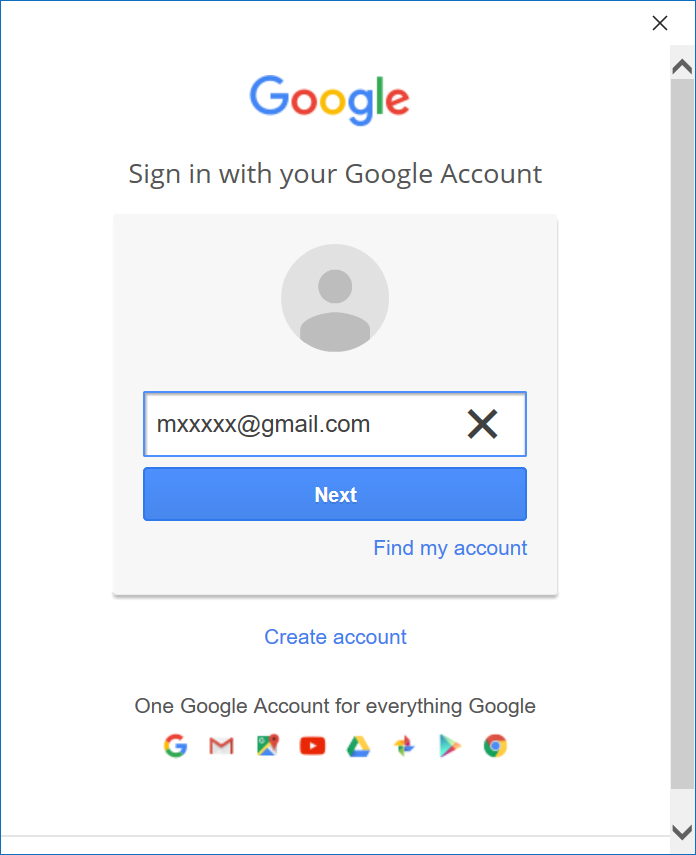
If they accept the credentials, then it means something is wrong with Thunderbolt and you should proceed with the other fixes given below. On the other hand, if it shows an incorrect ID or password, then you should use the Forgot Password option of your email client and proceed with the on-screen instructions to get it back and hence fix the Thunderbird configuration could not be verified error.
Fix 2: Update Thunderbird
If you are using an older build of the app, then there are bound to be a few issues. Developer releases a new version of their software which fixes bugs and issues and brings stability improvements. Therefore it is always recommended that you be on the latest version of the app. As far as Thunderbird is concerned, you could directly update it from within the app itself.
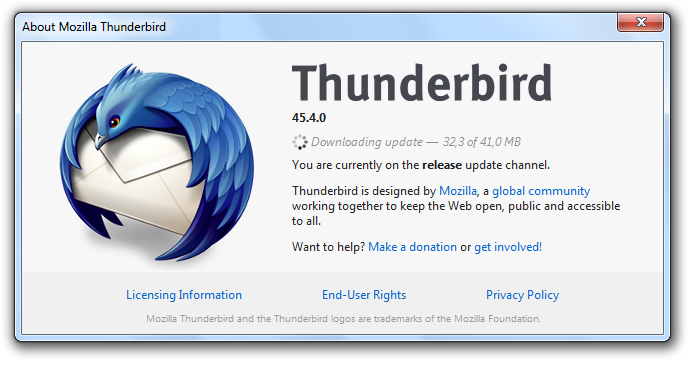
So launch it and head over to the Help section. Then go to the About Thunderbird section and the app will automatically search for a newer version, and if found will download and install it. Once that is done, click on the Restart Thunderbird to update. button. Wait for the restart to complete and then check if it fixes the Thunderbird configuration could not be verified error.
Fix 3: Allow Less Secure Apps
Most email clients including the likes of Google and Yahoo flags third-party clients as less secure ones. However, since you are aware that Thunderbird is pretty much safe to use, you could allow less secure apps on Yahoo and Gmail. Follow the below steps for that:
For Gmail:

- Head over to the Security section of your Google Account.
- Scroll down until you reach the Less secure app access section.
- Then click on Turn on access (not recommended).
- Finally, enable the toggle next to Allow less secure apps.
For Yahoo:
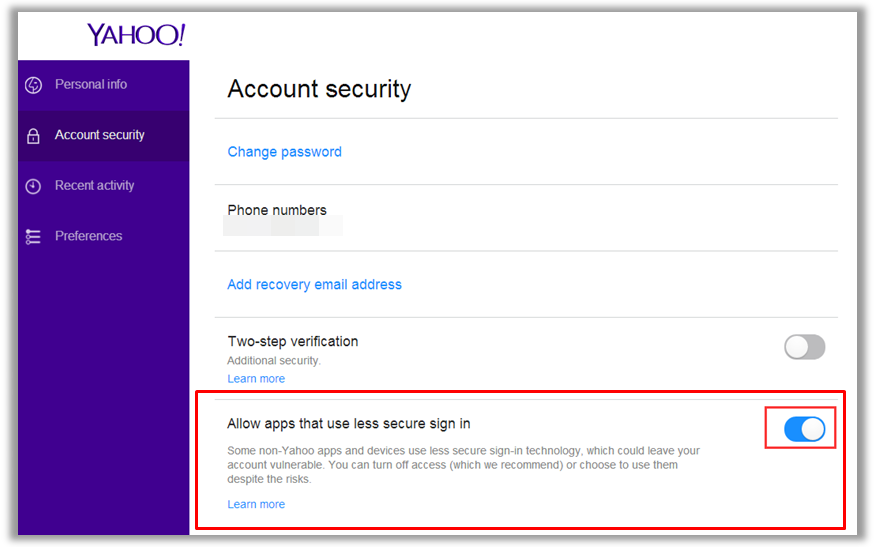
- Go to Yahoo Mail’s Settings page
- Head over to the Account Security option from the left menu bar.
- Then scroll to the “Allow apps that use less secure sign-in” section.
- Now just enable the toggle next to the said option.
Once that is done on Google/Yahoo, launch the app, and see if it fixes the Thunderbird configuration could not be verified error.
Fix 4: Disable Two-Step Verification
While Two-Step Verification or Two Factor Authentication adds an extra layer of security, yet sometimes it might result in a few issues as well. So if your email account has this additional security enabled, then you could disable it for the time being and then try accessing Thunderbird. Given here are the steps to disable the authentication for Yahoo and Gmail:
For Gmail:
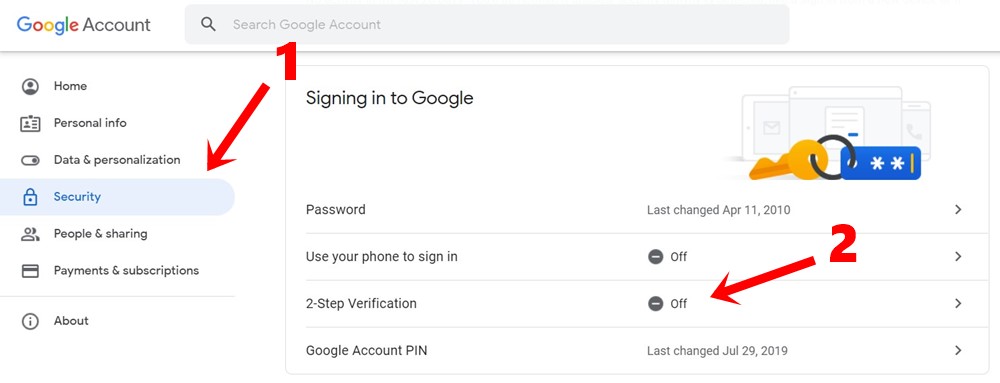
- Go to your Google Account’s Security section.
- Scroll to the Sign in to Google section and click on 2-Step Verification
- Now follow the on-screen instructions to disable this security measure.
For Yahoo:
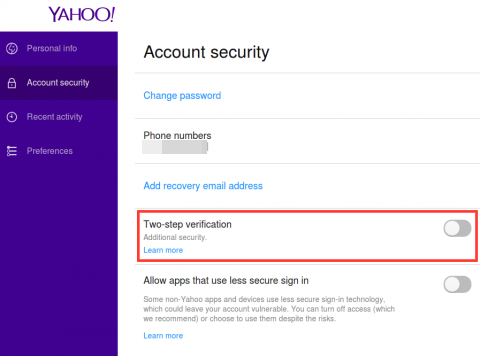
- Head over to Yahoo Mail’s Settings page
- Then go to the Account Security option from the left menu bar.
- Now scroll to the Two-step verification section and disable the toggle.
Once you have disabled 2SV on your Google or Yahoo account, launch Thunderbird and check whether the configuration could not be verified error stands rectified or not.
Fix 5: Add Thunderbird to Firewall’s Whitelist
In some instances, your Firewall app might be a little over-protective and could raise a false positive against Thunderbird. As a result, the app will then not be able to function as expected. So the best bet, in this case, is to add the app to the Firewall’s whitelist. Here are the steps to do so on the Windows Firewall:
- Head over to the Start menu and search for Windows Defender Firewall.
- Then click on Allow an app or program through Windows Defender Firewall.
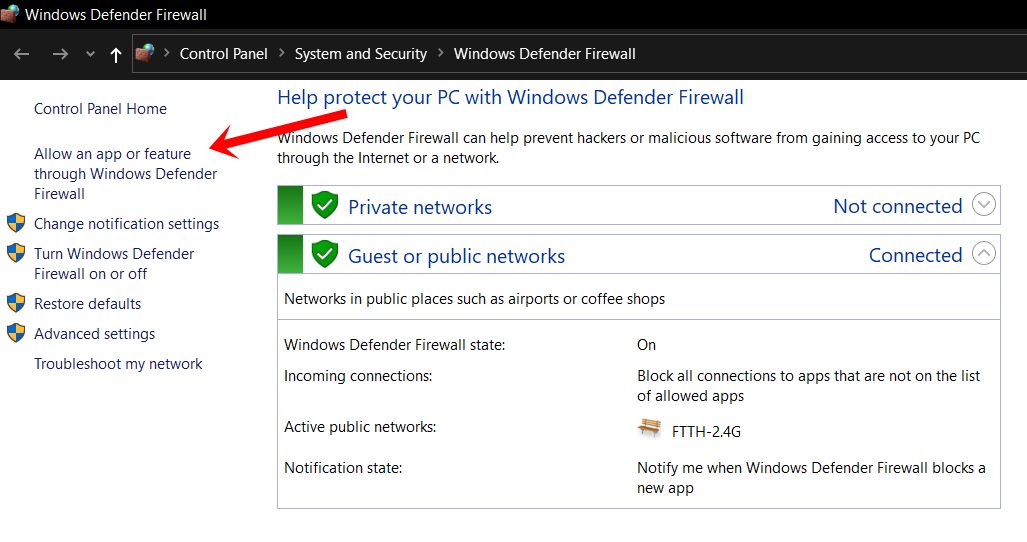
- Select the Thunderbird app from the list and click OK.
- However, if it isn’t present there, then click on the Change Settings button situated at the top right. You will need administrative privileges to carry out this task.
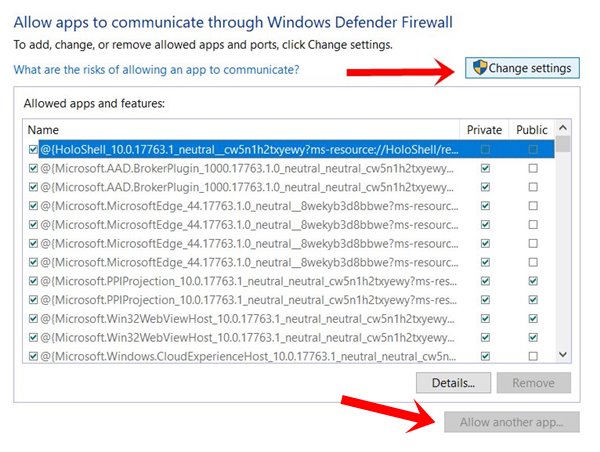
- Navigate to the Thunderbird app, select the file, and click OK.
Once this is done, restart your PC and see if the Thunderbird configuration could not be verified error has been fixed or not.
Fix 6: Enable Cookies
If you are using Mac, then it might be the case that your PC isn’t accepting cookies from Google. In that case, your Google ID might not be able to interact with Thunderbird. So we would recommend that you enable the cookies on your Mac setup. Here is how it could be done:
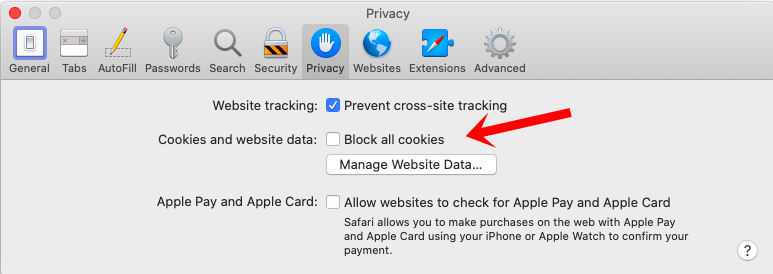
- On your Mac, go to the Safari option from the menu bar
- Then select Preferences from the drop-down menu.
- Finally, disable the Block all cookies option.
That’s it. These were the steps to fix the Thunderbird configuration could not be verified error. We have shared six different workarounds for the same, do let us know in the comments which method managed to rectify the issue. Likewise, here are some iPhone Tips and Tricks, PC tips and tricks, and Android Tips and Trick that deserve your attention as well.
