Tuneskit iOS System Recovery can restore/repair more than 150 iOS/iPadOS/tvOS system problems like stuck on Apple logo boot loop, and the screen won’t turn on, recovery mode, blue screen, iPhone disabled, etc. It will bring your Apple devices back to normal condition in minutes without data loss.
Overall, it’s amazing and powerful software with which you can solve any software-related issue with your iOS device or iPhone. But, as always, before we recommend you to use this, we will tell you some interesting features that the Tuneskit has. So, before you decide to get this amazing application, make sure to read this detailed article on the Tuneskit, the best iOS system recovery tool for Windows. So, let’s get started.

Page Contents
Tuneskit: Best iOS System Recovery Tool For Windows
We have already stated that Tuneskit is a pretty amazing and well-known software that can literally solve any software-related issue on your iOS device. Don’t worry! You do not require to jailbreak your iOS device. So, everything this software uses is one hundred percent authentic. Anyway, let’s dive into it and check out the features that this guide offers you. But, before that, let’s clear some of the questions that users generally ask us.
Is Tuneskit iPhone Recovery Safe to Use?
You know the answer buddy, of course, this is a legit and safe-to-use iPhone recovery tool that offers loads of features using which you can easily recover data from your broken iPhone or any iOS device.
Is Tuneskit Recovery Free to Use?
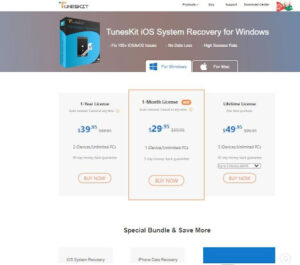
We have already stated that this application will help you fix any issue on your iPhone and is fully supported on almost all iOS models and versions. So, you need to spend some money to get this amazing software. But, nothing to worry about as this software is totally budget and pocket-friendly. This software costs you around 29.99USD. However, originally it costs 59.95USD, but as we know right now, there’s an 85% off due to the Christmas deal on their all products. Here’s the link that you need to use to purchase the Tuneskit Recovery tool.
What Are The Minimum System Requirements?
It is very important to cross-check if your Windows PC is able to run this software properly or not. However, although this application doesn’t need a strong, powerful device. But, still, you can check the minimum requirement that we have mentioned below:
- OS: Windows 10, 8.1, 8, 7, Vista, XP
- CPU: 1G Hz processor (32-bit, 64-bit), or above
- RAM: 256 MB or higher of RAM (1028MB recommended)
- Free Storage Space: 200 MB or above
- iOS Support: iOS 7 to iOS 14
Supported Device List
- iPad: Every iPad
- iPhone: iPhone 8 Plus, iPhone 8, iPhone 5, iPhone 4s iPhone SE, iPhone 6s Plus, iPhone 7 Plus, iPhone 7, iPhone 5c, iPhone 6s, iPhone 6 Plus, iPhone 5s, iPhone 4, iPhone 12 Pro Max, iPhone 12 Pro, iPhone 12, iPhone 12 Mini, iPhone 11 Pro Max, iPhone 11 Pro, iPhone 11, iPhone X, iPhone Xs Max, iPhone Xs, iPhone Xr.
- iPod Touch: iPod touch 2, iPod touch 5, iPod touch 3, iPod touch 4,
- iPod touch 6, iPod touch 7
- Apple TV: Apple TV 3rd Generation, Apple TV HD, Apple TV 2nd Generation
What Type of Issue Can It Handle?
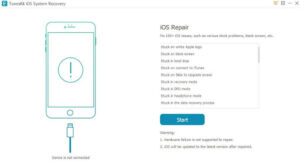
The Tuneskit iOS System Recovery can restore/repair problems such as blue screen, stuck in DFU mode, stuck in headphone mode, black screen, red screen, White Apple logo, stuck in recovery mode, restore error, iPhone activation error, iPhone bricked, iPhone locked, white screen, frozen screen, disabled screen, boot loop screen, iOS update failure, iTunes gets stuck, iTunes connection error, etc.
What Are The Ways That You Can Use?
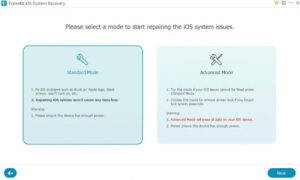
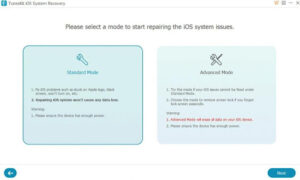
In case your iOS device gets stuck in Recovery Mode for some cause. So, in Tuneskit, you’ll get two different modes, i.e., Advanced Mode and Standard Mode, although if you are generally going to fix it on your own, then it might be a bit complicated.
But, using the Tuneskit will make it easy to fix iOS or tvOS errors in just a few minutes. Anyway, as we stated, in Standard Mode, you can fix the common iOS problems without losing your data, and Advanced Mode will help you fix some more serious iOS issues but keep in mind that this will clear all your data permanently.
How To Use Standard Mode
So, here are some steps that you need to follow to use the Standard mode to fix iOS related problems too without losing your data. Therefore, let’s get started:
- First of all, connect your iPhone/iPad/Apple TV to your Windows PC and wait until it gets connected to your PC.
- Then, launch the Tuneskit on your Windows PC and click on the Start button.
- After that, choose the Standard Mode and hit the Next button.
- Now, select the device model that you are connected to.
- Then, follow the on-screen instruction and enter into DFU mode. Then, hit the Next button.
- After that, you need to download the Firmware package that you want to install on your device.
- That’s it. Now, begin the recovery process.
How To Use The Advanced Mode
Now, the issue is severe in your case, and it is not possible to not erase your data, then you have no other option other than to erase them. However, you need to perform an Advanced mode recovery to do so. But, how? Don’t worry! Here are the guidelines that will help you do so:
- Firstly, connect your iPhone/iPad/Apple TV to your Windows PC and wait until it gets connected to your PC.
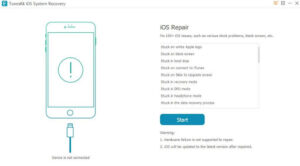
- Then, launch the Tuneskit on your Windows PC and click on the Start button.
- After that, choose the Advanced Mode and hit the Next button.
- Now, select the device model that you are connected to.
- Then, follow the on-screen instruction and enter into DFU mode. Then, hit the Next button.
- After that, you need to start downloading and verifying the Firmware package that you want to install on your device.
- That’s it. Now, begin the recovery process.
Conclusion
Well, in my opinion, the Tuneskit iOS recovery tool is amazing that offers you tons of features and options. But, as we have already stated that this application is not free, you need to invest some money to get it. Therefore, it totally depends upon you whether you want to spend your money. But, we highly recommend you to use this application as it is worth spending money on it.
So, that’s all from our side. We hope this guide helps you. However, if you liked this guide, make sure to tell us in the comment section which one thing you liked the most about this amazing recovery tool.
