Triumph Studios and Paradox Interactive have recently released a fantasy tactical turn-based RPG called ‘Age of Wonders 4’ where players can rule a fantasy realm of their own and explore new magical realms. Players can control a faction that grows and changes as they expand their empire with each turn. Here in this troubleshooting guide, we’ve shared with you possible workarounds to easily fix the Age of Wonders 4 DirectX and 0x887A0006 Error on the Windows PC while trying to launch the game.
Several players have started reporting specific error while trying to play the game, including the 0x887A0006 error and the DirectX error. This kind of issue might appear to you due to an outdated game version, outdated graphics drivers, corrupted or missing game files, DirectX-related conflicts, and so on. Now, if you’re also one of the victims to experience such an issue, follow this guide to resolve it by performing some workarounds.

Page Contents
Fix: Age of Wonders 4 DirectX and 0x887A0006 Error
Luckily, here we’ve shared with you possible methods that should come in handy. Make sure to follow all methods until the problem gets fixed. So, without wasting any more time, let’s jump into it.
1. Run the Game as an administrator
First of all, you should run the game executable application as an administrator on the Windows PC to ensure the game file can run properly. It’ll basically allow the User Account Control (UAC) access to the system to run the program properly with the administrator’s permission. To do so:
- Go to the installed Age of Wonders 4 game directory on the PC.
- Right-click on the game application file > Click on Properties.
- Click on the Compatibility tab.

- Click on the Run this program as an administrator checkbox to enable it.
- Once done, click on Apply and then OK to save changes.
- Finally, just double-click on the game app file to launch it.
If you’re running the game via the Steam client or the Epic Games Launcher then perform the same steps for the respective game client too.
Also Read
2. Update the Game
If in case, you haven’t updated your Age of Wonders 4 game for a while then make sure to check for the latest available updates by following the steps below.
For Steam:
- Open the Steam client > Go to Library.
- Click on Age of Wonders 4 from the left pane.
- It’ll automatically search for the available update.
- If there is an update available, you can click on Update.
- You might have to wait for a while until the update completes.
- Once done, close the Steam client, and reboot your PC to apply changes.
For Epic Games Launcher:
- Open the Epic Launcher client > Go to Library.
- Search for Age of Wonders 4 from the left pane.
- Now, click on the three dots icon next to the game.
- Ensure to check the auto-update option to get a new update installed automatically.
- If there is an update available, the client will automatically install it.
- Otherwise, you can manually click on Update.
- Once done, reboot your PC to apply changes.
3. Repair the Game Files
You can also verify and repair the installed game files on the PC by following the steps below to ensure there is no issue with the game files. Sometimes corrupted or missing game files might trouble you a lot when launching.
For Steam:
- Launch Steam > Click on Library.
- Right-click on Age of Wonders 4 from the list of installed games.
- Now, click on Properties > Go to Local Files.

- Click on Verify Integrity of Game Files.
- You’ll have to wait for the process until it gets completed.
- Once done, just restart your computer.
For Epic Games Launcher:
- Open the Epic Games Launcher.
- Click on Age of Wonders 4 in the library.
- Click on the three dots icon next to the game.
- Select the Manage option.
- Now, click on the Verify option.
- Confirm the task and wait for it to be complete.
- Once done, reboot the PC to apply changes.
4. Update Graphics Drivers
An outdated graphics driver on the Windows system might trouble you a lot with the game launching or DirectX-related issues. It’s recommended to manually update the graphics driver by following the steps below.
- Press the Win+X keys to open the Quick Link Menu.
- Click on Device Manager from the list.
- Double-click on Display Adapters to expand it.
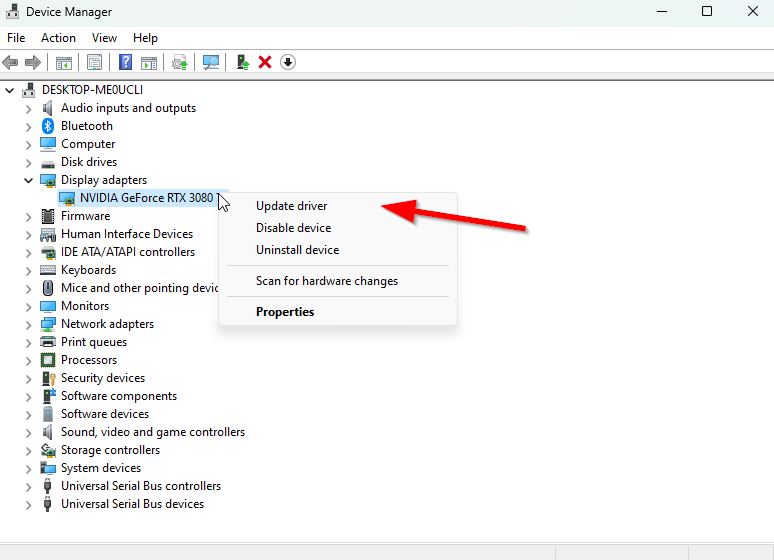
- Right-click on the dedicated graphics card name that’s active.
- Now, click on Update driver.
- Choose Search automatically for drivers.
- The system will automatically check for the available update.
- An update will automatically download and install the latest version if available.
- Once done, you should restart your PC to apply the changes.
If you can’t find any pending updates, head over to the official website of the respective graphics card brand below and search manually for the latest update. Do remember that you’ll always have to search for the latest driver version and specific for the model you’re using. If a new version is available for the graphics card, download the driver and install it on your PC. You can jump to the link below to do so:
5. Run the DirectX Diagnostic Tool
We’ll also recommend you run the DirectX Diagnostic Tool by following the steps below if in case you’re using an outdated DirectX version on your PC.
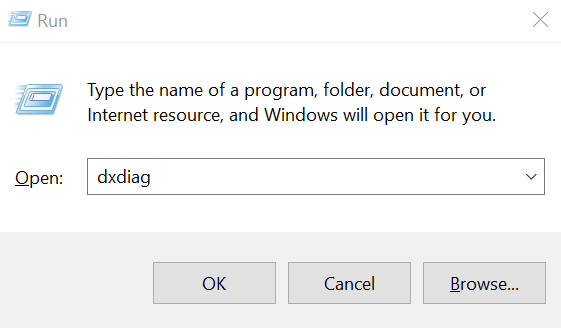
- Press the Win+R keys to open the Run dialog box.
- Now, type dxdiag and hit Enter to open DirectX Diagnostic Tool.
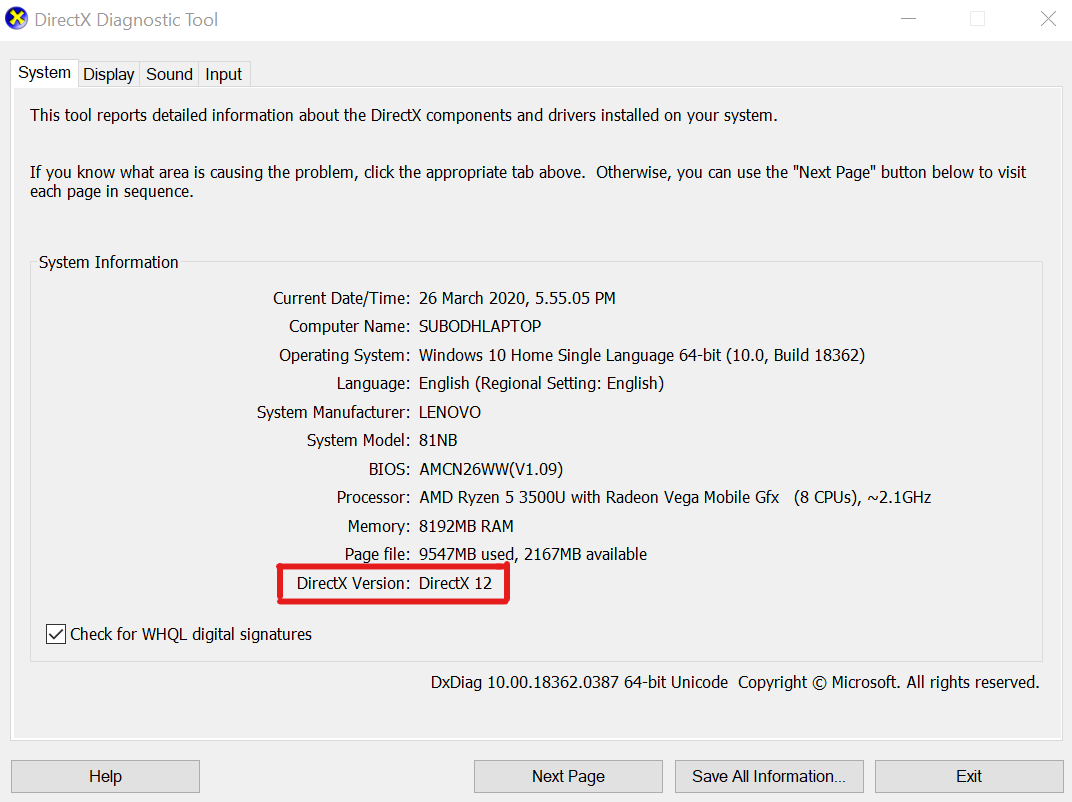
- Once the DirectX Diagnostic Tool window opens, you can check out the DirectX version from the System tab.
- Next, you can go to the Display tab > Here you can additionally check DirectX 3D Feature Levels and other DirectX Features too.
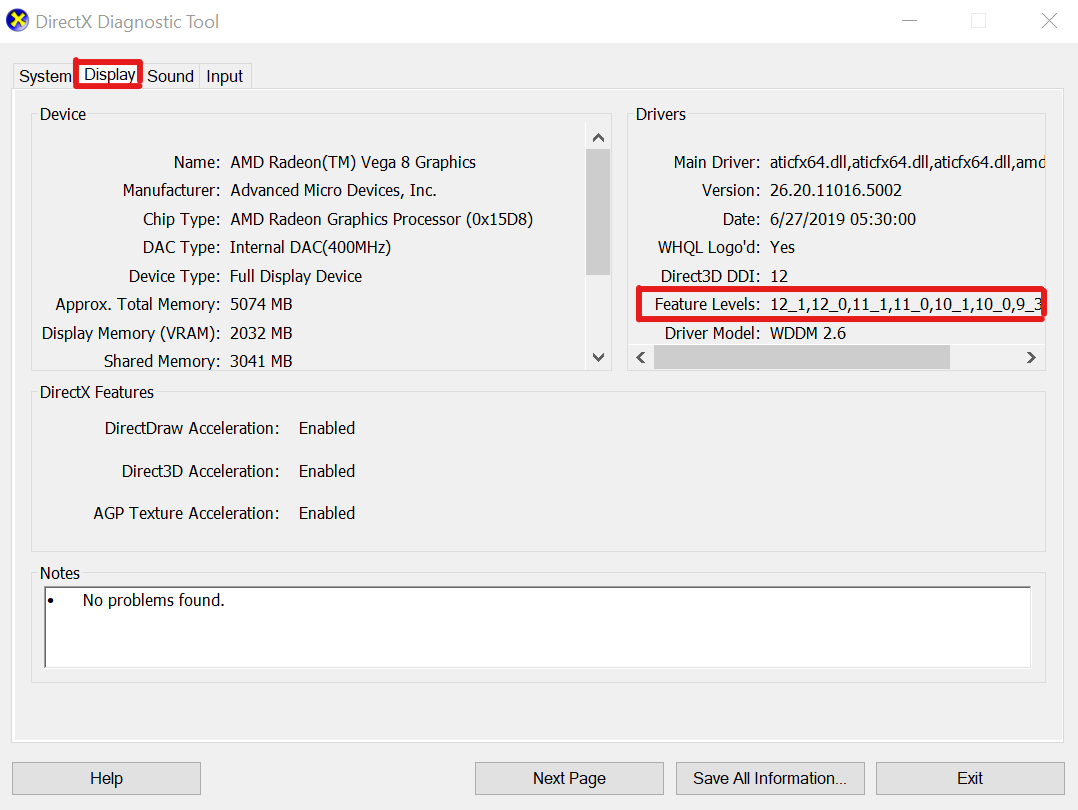
If it shows lower than DirectX version 12 then you should try following the next methods.
6. Tweak In-Game Graphics Settings
You can also try adjusting or optimizing the Age of Wonders 4 graphics settings to increase performance and reduce RAM usage. If your PC configuration isn’t good enough or becomes old and you’re using the highest possible settings then make sure to adjust the in-game graphics settings to resolve such an issue. Sometimes memory issues might also occur due to VRAM-related memory leaks. So, reduce the in-game visual settings to a medium level and set the FPS limit to 60FPS.
7. Reinstall DirectX
You should try reinstalling the latest version of DirectX from the official Microsoft website on your Windows computer. You’ll need to download and install the DirectX installer package on the PC and run it manually to ensure the latest version is installed.
8. Update Windows
An outdated Windows OS version or build number can eventually trigger performance issues, program crashes, device driver connectivity issues, and so on. Just like updating the game, it’s also always recommended to update the system software to the latest version. To do so:
- Press the Win+I keys to open Windows Settings.
- Click on Update & Security.
- Select Check for updates under Windows Update.
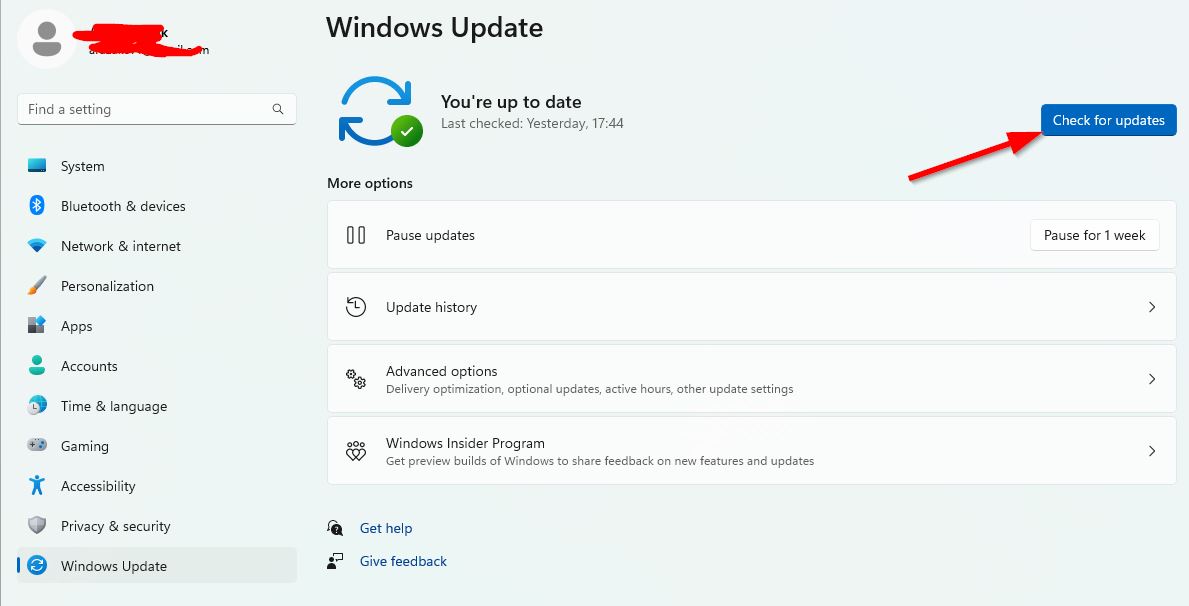
- If there is a feature update available, select Download and Install.
- Wait for a while to complete the software update process.
- Once done, restart your computer to install the update.
9. Run SFC
The System File Checker (SFC) is a utility in the Microsoft Windows system that’s located in the C:\Windows\System32 folder. This utility tool or command simply helps users to scan for corrupted Windows system files and restore them (if any). To do this:
- Click on the Start Menu > Type cmd.
- Right-click on the Command Prompt program from the search result.
- Now, choose Run as administrator > If prompted by UAC, click on Yes.

- Type the following command and hit Enter to execute the System File Checker process.
sfc /scannow
- Have some patience until the process completes.
- Once done, close the command prompt window and reboot your PC/Laptop.
10. Disable CPU and GPU Overclocking
It’s also worth mentioning not to enable CPU/GPU overclocking on your PC if your game is crashing or stuttering a lot. We can understand that overclocking CPU/GPU can make a huge impact in improving gameplay but sometimes it may also cause issues with the bottleneck or compatibility too. Just set the frequency to default for optimal performance.
11. Check for Background Tasks
Another thing you can do is simply close unnecessary background tasks on your PC to ensure there is no additional consumption of system resources happening in the background whatsoever. To clear out background tasks:
- Press the Ctrl+Shift+Esc keys to open Task Manager.
- Click on the Processes tab > Select the task that you want to close.
- Once selected, click on End Task.
- Make sure to do the steps for each task individually.
- Once done, restart your PC to change the effects immediately.
That’s it, guys. We hope this guide was helpful to you. For further queries, you can comment below.
