Windows 10 is the most advanced and smart version of Microsoft Windows, which generates many high expectations amongst the users. However, even after being better than all the older versions, it still has many bugs and errors that keep troubling the users every now and then. We will discuss one such similar issue today that is the “IDT High Definition Audio CODEC driver problem.”
Many users have reportedly complained about the IDT High Definition Audio problem while they upgrade to Windows 10 from Windows 7, Vista or 8. This problem starts occurring within a few hours of upgrading to Windows 10. If you are also going through the same issue and want a trusted solution for this, the fixes below will help you in this case. Let’s learn how:

Page Contents
What is the “IDT High Definition Audio CODEC driver” error?
The IDT High Definition Audio CODEC driver error occurrence means- no sound from the computer. It either occurs while the users try to upgrade to Windows 10 or install any latest Windows 10 update. The prime reasons for its occurrence are outdated or faulty drivers. And with the malfunctioning of the drivers, you might receive the error code 0x8007001f followed with the message
“Windows found driver software for your device but encountered an error while attempting to install it.”
Fixes for “IDT High Definition Audio CODEC driver” error
Below, you will find 3 methods to fix the IDT High Definition Audio CODEC driver problem. You can follow one by one to fix this issue.
FIX 1: Set the Audio Service to Automatic:
To fix the “IDT High Definition Audio CODEC driver problem,” the first method is about enabling some IDT Audio related services. For doing so,
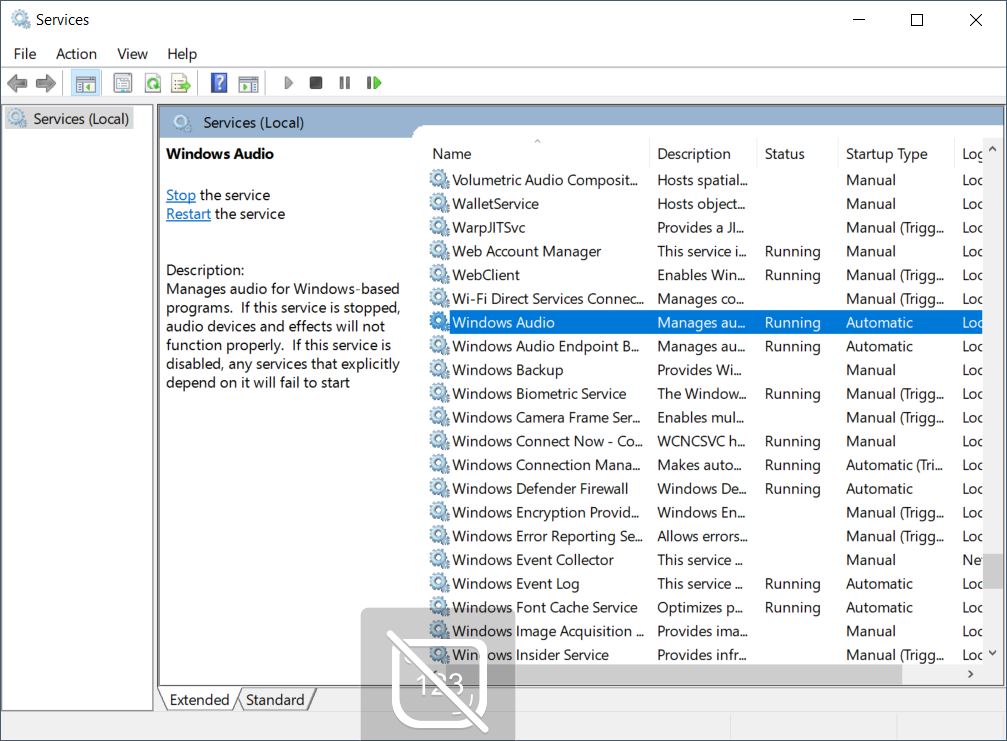
- Firstly, go to the Start menu and open Services.

- In the Services window, scroll down to locate Windows Audio, right-click on it and select Properties.
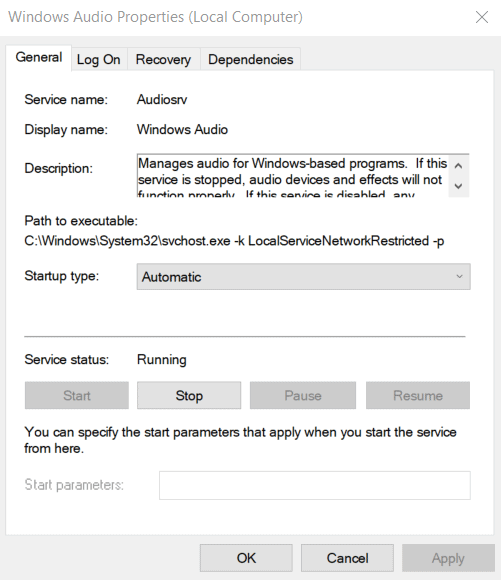
- The Window Audio Properties screen will appear on your screen now. Here under the General tab, set the Start-up type to Automatic.

- Finally, click on Apply and then select OK.
- Once done, restart your computer and check whether the audio issue is solved or if it persists.
FIX 2: Re-install the Driver to Fix IDT Codec Driver:
Re-installing the Audio CODEC driver is one of the most convenient process to fix the audio problem. For doing so,
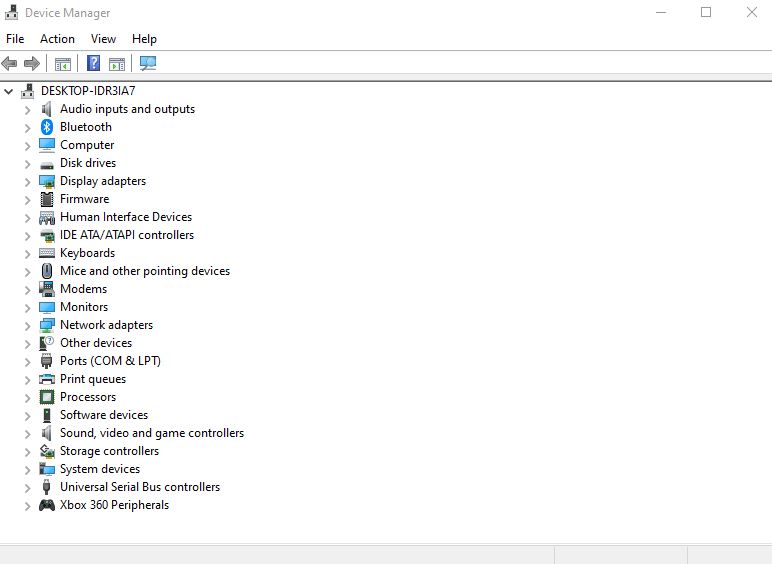
- Firstly, go to the Start menu and open Device Manager.

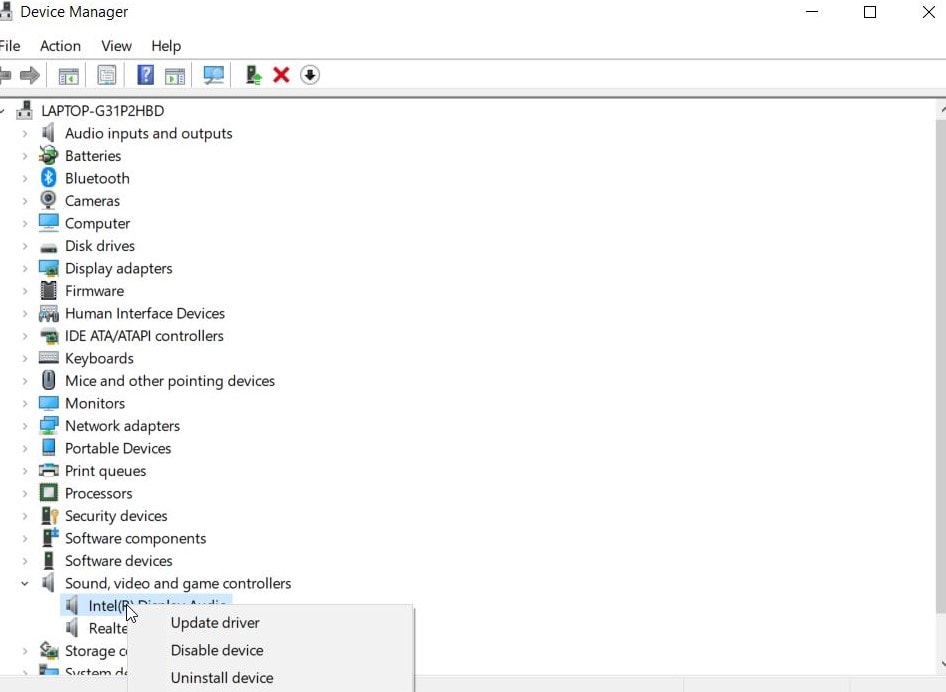
- Here expand the option Sound, video, and game controllers.
- Now right click on the option IDT High Definition Audio CODEC and select Update Driver Software.

- From the next prompt, select the option Browse my computer for driver software.
- Now click on the option Let me pick up a list of device drivers on my computer.
- From the next window, select the option High Definition Audio Device and then click on Next. A warning prompt will appear into your screen, here click on “Yes” and let the process gets completed on its own.
- Once the IDT audio Driver will re-install, consider restarting your system, and the audio issue might have resolved by now.
FIX 3: Install the Driver in Compatibility:
Installing the driver in compatibility mode is yet another method that can help you fix this audio problem. There’s a fair possibility that some drivers programmed for Windows 10 work pretty well for earlier versions of Windows. Whereas, some old drivers programmed for earlier Windows version works well with Windows 10. Considering this situation, you can install the driver in compatibility mode for an older Windows version. For doing that,
- Firstly, locate the Driver setup file in your Downloads folder, or you can even download it from the Manufacturer’s website (original).
- Once found, right-click on it and select Properties.
- Now click on the Compatibility tab and tick the checkbox located before the option Run this program in compatibility mode.
- Open the dropdown menu located below and select an older Windows version (Windows 7 or Windows 8, preferably). Click on OK.
- Now install the Driver by double-clicking on the Setup file and follow the instructions coming on your computer screen. The installation process might take a few seconds.
- Once the process gets completed, restart your computer and check for the Audio.
So, these were all the possible fixes that will help you get rid of the IDT High Definition Audio CODEC driver problem. If you, too, cannot hear any sound from your system after any Windows 10 update or upgrading any latest version to Windows 10, then try the fixes mentioned above.
By the end of this article, we hope you have answers to all your queries related to the Audio CODEC driver issue. After reading this article, if you have any queries or feedback, please write down the comment in the below comment box.
