Taking a screenshot on a Mac is a crucial function for many Mac users as it allows them to easily record or capture any important documents from their device. While MacOS Sonoma has some major changes and additions, some flaws still might hurt users’ experience. This can be unpleasant for Mac users, especially when there is an opportunity to grab a screenshot of the screen.
However, if you have the same issue on your Mac Sonoma and your usual screenshot shortcuts aren’t working, don’t brood – you are not alone. We’re here to help you. In this article, we’ll let you know how you can troubleshoot and fix the screenshot not working issue on your macOS Sonoma. So, without further delay, let’s get into it.

Page Contents
How to Fix macOS 14 Sonoma Screenshot Not Working Issue
Before attempting the mentioned solutions, let’s examine why the macOS Sonoma screenshot is not working. According to reports, the screenshot is not working on the macOS Sonoma because the screenshot keyboard shortcuts rely on the system settings. If it’s changed during the upgrade process, then it could cause the issue with the shortcuts to stop working.
Additionally, the new operating system on the MacOS can cause issues with screenshots due to bugs related to screenshots. Therefore, if you are facing issues regarding screenshots on the macOS Sonoma, try the below troubleshooting strategies to fix the problem. Pay attention to every solution to tackle the challenge without any problems.
Fix 1: Check the Keyboard Shortcut Settings
If you have recently updated your macOS Sonoma to its latest version, it could be possible that the Sonoma upgrade may have accidentally disabled the keyboard shortcuts settings. For such a case, you must check whether the shortcut settings are changed and verify that the usual ones are still enabled.
Generally, the common shortcut keys are Command + Shift – 3 to capture the full screenshot of the screen. You can use the Command + Shift – 4 key on the keyboard to capture the selection screenshots. However, if these shortcut keys are disabled, you can’t take a screenshot on your macOS Sonoma. Make sure to enable the shortcut key, and you should be able to take a screenshot accordingly.
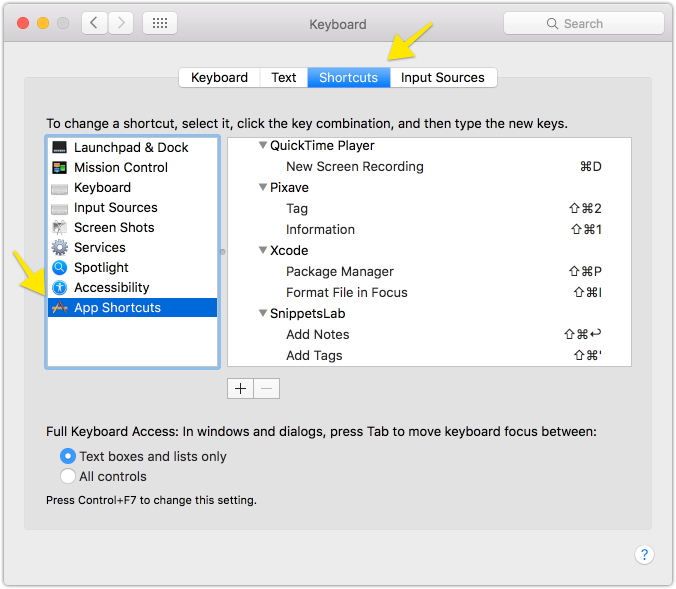
- Go to System Preferences > Keyboard > Shortcuts tab.

- Select the Screenshots tab in the left sidebar.
- Make sure the checkbox is enabled for all options on the screen.
- If disabled, check the box to enable the keyboard shortcut keys.
Fix 2: Restart Your Mac
When you have an issue with the screenshots on your macOS Sonoma, you can also try restarting your Mac. Most of the time, the screenshot is not working due to system issues and software bugs. Restarting the device is the simplest method you can apply in such a case. This clears out the temporary bugs and glitches that may have occurred during the Sonoma upgrade.
To restart your macOS Sonoma, you can follow the below steps:
- Click on the Apple icon in the top left corner of your Mac.
- Once the drop-down list appears on the screen, select Restart.
- Press the Restart option again from the pop-up window.
- Once your Mac is turned off, please wait a few seconds and it automatically turns back on.
Fix 3: Try Grab to Take a Screenshot
If you cannot capture a screenshot by using the keyboard shortcuts, you can also take a screenshot by using the Grab app. However, the Grab is built into macOS, providing an alternative way to take screenshots. Therefore, if the issue is with the hotkey commands or the screenshot function isn’t working in general, the Grab is a great option to capture a screenshot without using hotkeys on your macOS Sonoma. Here’s what you need to do.
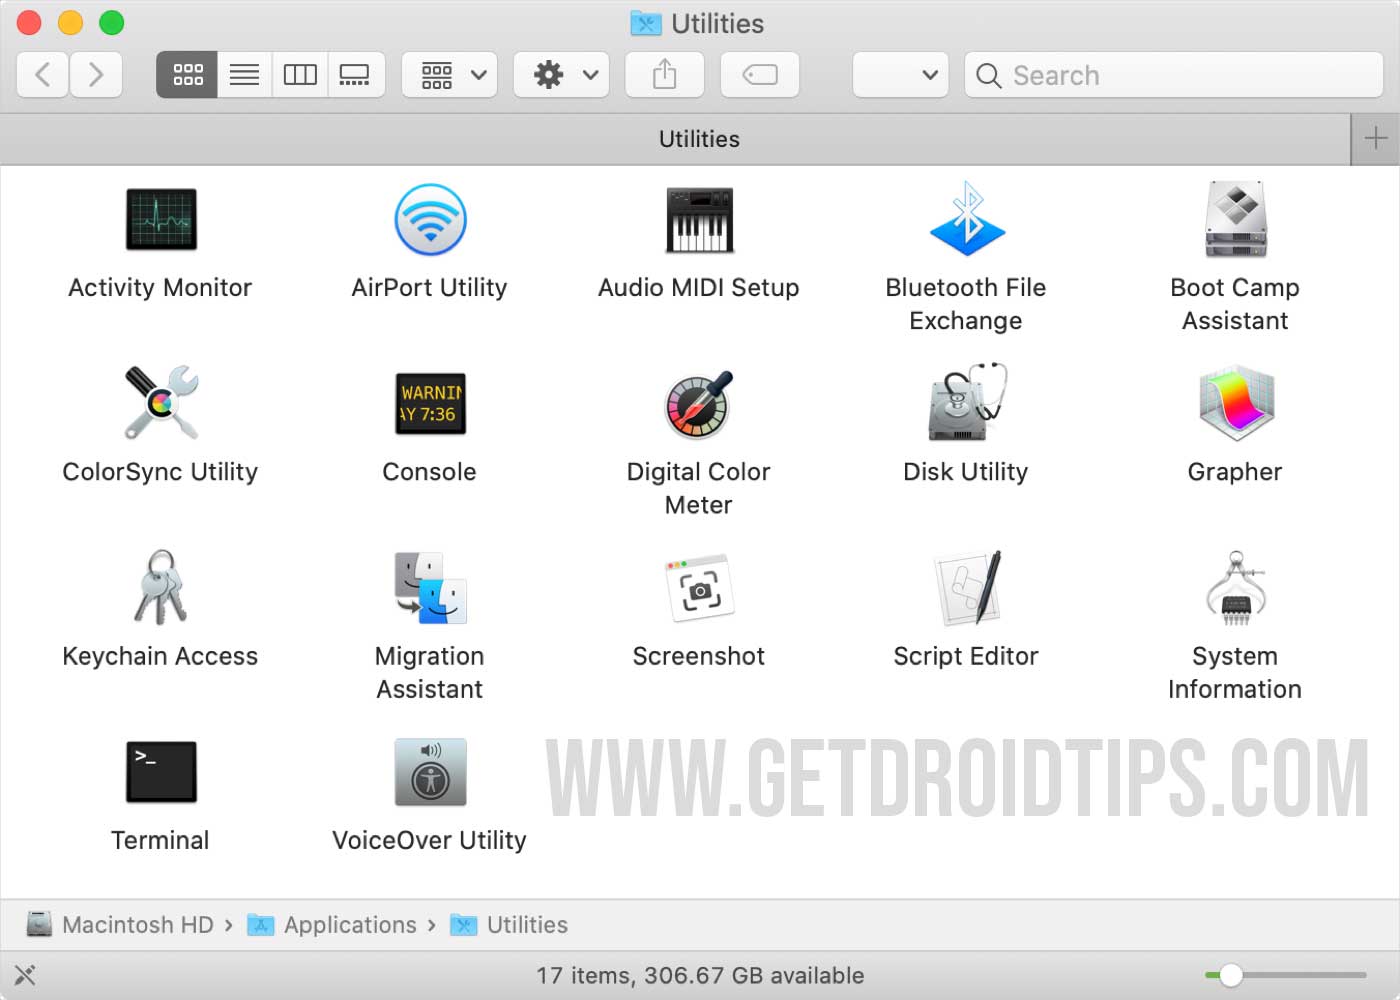
- Launch Finder on your Mac Sonoma.
- Click on the “Applications” from the sidebar and click on “Utilities.”

- Find and launch the Grab app.
- Click the Camera icon in the toolbar and take the screenshot you want.
- You can capture the whole screen screenshot, a window, or a selection screenshot.
Fix 4: Check Dropbox Settings
In case you use Dropbox on your macOS Sonoma, make sure to check that it is not set to save the screenshots you captured automatically. If it’s checked, then iy prevents the screenshots from showing up in your photos or usual location. Here’s what you need to do.
- Open Dropbox preferences.
- Navigate to the Import tab.
- Look for “Import screenshots to Dropbox” is checked. If checked, then uncheck the box by clicking on it.
By doing this, your screenshots won’t be saved directly to Dropbox. After that, take a screenshot and check if it’s showing in your usual location. If the issue persists, move to the next method.
Fix 5: Check Your Storage Space
There may be a chance that there is no storage space on your Mac, preventing you from taking a screenshot. Screenshots might seem innocent, but they’ll eat your available storage space, especially when you use the screen recording function.
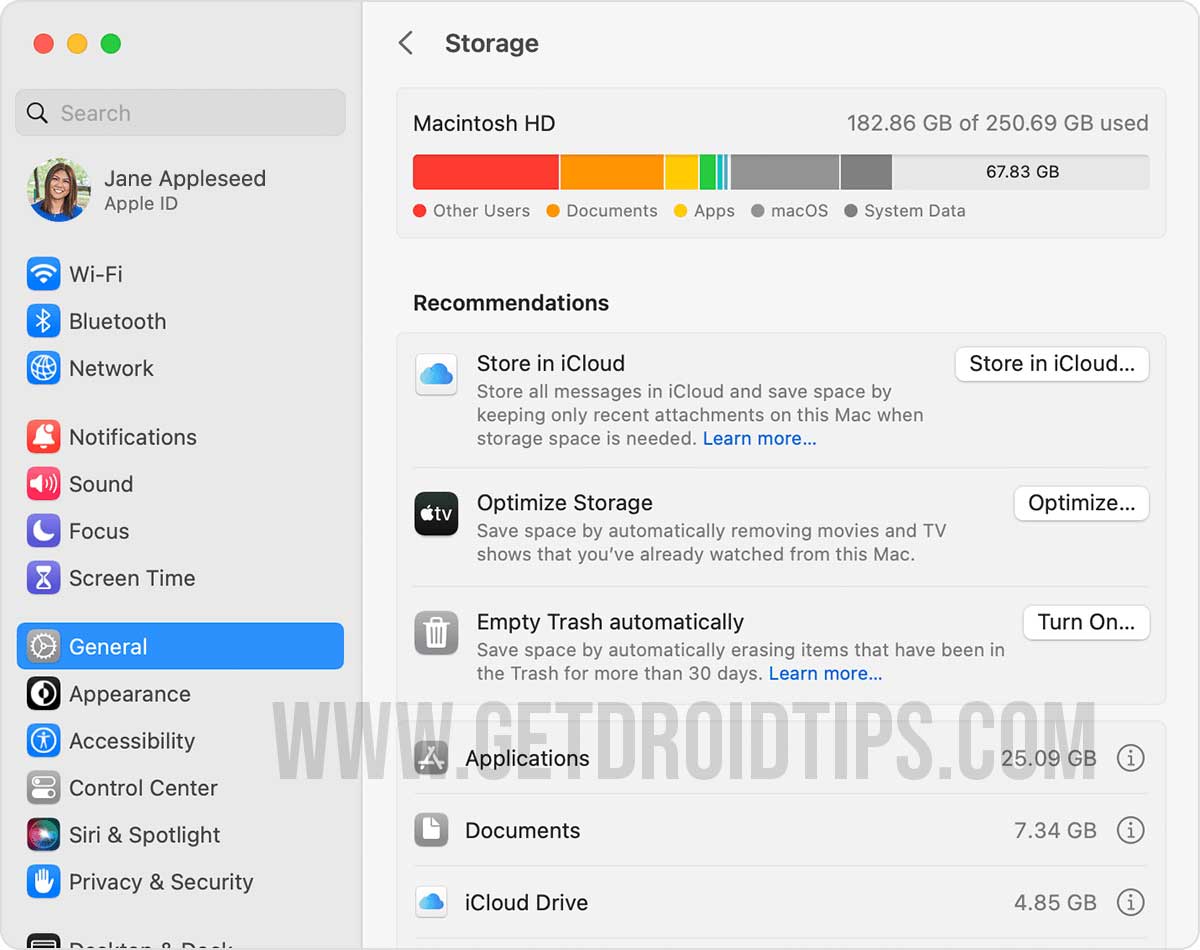
In case, if your Mac device starts running low on storage space,, you may encounter an issue with the screenshots, device performance and bug issues. Make sure to free some storage space by checking how much free storage your Mac has. Here’s how you can check the storage space.
- Click on the Apple menu icon at the top left corner of the screen.
- Select System Settings > General > Storage.

- Wait for a moment until you see how much storage space is available.
If your Mac has no storage space available or running on the low space, then storage space is the real culprit. However, if your Mac device is full of applications, files, and folders, then make sure to clean up by deleting it permanently from your Mac device. This will help your Mac to run smoothly without any freezing or lagging issue as well. Once you delete the unnecessary files and applications, take a screenshot and check if it’s working.
Fix 6: Reset the NVRAM
You can also try to reset the NVRAM on your macOS Sonoma. This will potentially solve the system settings issue like screenshots not working or not showing in your usual location, as well as corrupted issues and bugs related to screenshot.
To reset the NVRAM on your macOS Sonoma, you can follow the below steps:
- Firstly, shut down your Mac completely by holding the power button for a few seconds.
- Again, turn back on your Mac.
- Immediately press the Command Key + P + R Key on the keyboard after you hear the startup chime.
- Hold down the keys until you hear the startup chime again.
- This will reset the NVRAM and fix any issues related to the screenshots.
Fix 7: Try Safe Mode
If resetting the NVRAM doesn’t work, you can also try booting your device into safe mode. However, you can use safe mode as a diagnostic method without being infected with malware functions or third-party apps. If screenshots work in safe mode, an incompatible app is causing the issue, or your device may have malware functions. You can use this method without any hassle, as there is no risk in using this method.
To boot your Mac into safe mode, you can follow the below steps:
- Click on the Apple logo at the top left corner of the screen and click on the Shut Down button.
- From the pop-up window, click on the Shut Down button again.
- Now, your Mac will automatically turn off. Wait for about 10 seconds.
- Press and hold the power button to turn on your Mac.
- Now you should see the logo and the option to choose a Startup disk on your Mac.
- Eventually, when you press and hold the Shift key on the keyboard, you will see a login window.
- If you wish to login, you must enter the password to unlock your Mac.
- Now you’re in safe mode. Take a screenshot by using the hotkeys and check if it’s working.
- Luckily, if they work then it is likely possible that third-party software is the culprit.
Fix 8: Update Your Mac
If you run an outdated macOS version, you may experience an issue on your MacOS Sonoma. An outdated system version may cause several issues, including application and software settings. In such a case, you must update your macOS to the latest version if it’s available. Updating the device may easily fix the problem you’re facing. Here’s what you need to do.
- Click on the Apple menu icon at the left corner of your screen.
- Choose System Settings.
- Click the General on the left-hand side of the system settings window.
- Finally, click the Software Update option.
- If an update is available on the screen, download and install it.
So, that’s how you can troubleshoot and resolve the screenshot not working issue easily by following the mentioned solutions in this article we have listed. We hope that this guide helps you fix the issue you are facing. You can also perform a factory reset if the above solutions don’t work. Let us know in the comments section if you have any other queries.
