QuickBooks is one of the best in class accounting software that has been used in the US or UK. It has an advanced scan manager that can easily scan all the files or documents or even add them using attachments such as sales invoices, purchase bills, other transactions, and more. However, it seems that some users are encountering the QuickBooks Scanner Driver Error 281 while trying to scan receipts or invoices.
This particular error 281 is one of the issues that can arise for some users while attempting to scan invoices or other receipts or documents for accounting purposes. Talking about the possible reasons behind such an issue is that maybe the User Account Control feature is preventing the QuickBooks Scanner tool to run properly.

Page Contents
Fix: QuickBooks Scanner Driver Error 281
Meanwhile, an outdated QuickBook Scanner version or a corrupted one may cause several issues. Now, without wasting any more time, let’s jump into it.
1. Install TWAIN Scanner Drivers
The chances are high that if you install a TWAIN scanner driver on your Windows computer to use QuickBooks Scan Manager. You can download the latest TWAIN scanner driver directly from the respective manufacturer’s website.
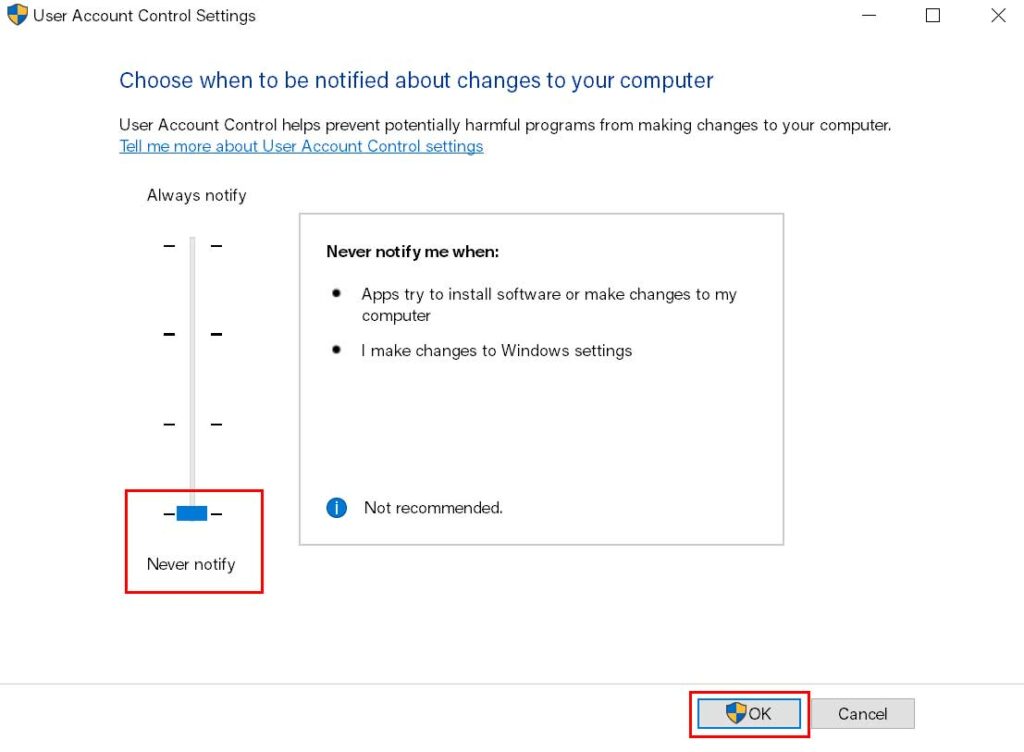
2. Turn Off UAC (User Account Control)
- Press Windows + S keys to open up the Windows Search bar.
- Now, type UAC and search for it.
- Click on Change User Account Control Settings.

- Drag the UAC slider down to the Never notify setting.
- Click on OK to save changes.
- Finally, try scanning invoices or receipts using the QuickBooks Scan Manager again.
Please Note: Once you’re done with your respective work, make sure to revert the changes in the User Account Control Settings which was set before (Always Notify).
3. Update QuickBooks Scanner
- Press Windows + S keys to open the Windows Search bar.
- Now, type QuickBooks in the search field and hit Enter.
- Right-click on QuickBooks Scanner to open and select Run as administrator.
- If prompted by UAC, click on Yes to grant the admin privilege.
- Once the software launched, click on the Help tab.
- Select Update QuickBooks Desktop…
- If there is an update available, the tool will automatically install it.
- Once done, make sure to restart the QuickBooks Scanner tool to apply changes immediately.
4. Repair QuickBooks Scanner
- Press Windows + R keys to open up the Run dialog box.
- Type appwiz.cpl and hit Enter to open the Programs and Features window.
- Here you’ll need to scroll down the list of installed programs and click on QuickBooks Scanner software.
- Now, select Repair and follow the on-screen prompts to complete the repairing process.
- Once done, click on Finish to exit.
- Make sure to restart your computer to apply changes.
- Finally, you should try checking whether the QuickBooks Scanner Driver Error 281 is appearing to you or not.
5. Run Hardware and Devices Troubleshooter
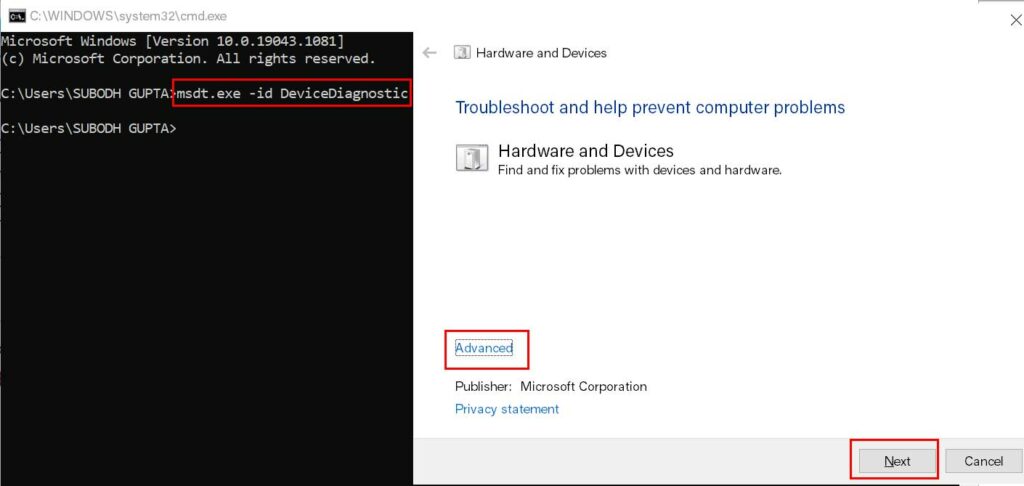
- Click on the Start menu > Type cmd and right-click on Command Prompt.
- Now, select Run as administrator > If prompted by UAC, click on Yes to grant admin privilege.

- Once the command prompt window opens, type the following command and hit Enter to execute it:
msdt.exe -id DeviceDiagnostic
- Hardware and Devices Troubleshooter window will open.
- Now, click on Advanced and select Next > Click on the Apply repairs automatically checkbox to select it.
- Then click on Next again to start the troubleshooting process.
6. Reinstall QuickBooks Scanner
- Press Windows + R keys to open up the Run dialog box.
- Type appwiz.cpl and hit Enter to open the Programs and Features window.
- Here you’ll need to scroll down the list of installed programs and click on QuickBooks Scanner software.
- Now, select Uninstall and follow the on-screen prompts to complete the uninstallation process.
- Once done, make sure to restart your computer to apply changes.
- Finally, visit the official website, and get the tool. [If you’ve already a DVD then you can install it from there]
That’s it, guys. We assume that you’ve found this guide helpful. For additional queries, let us know in the comment below.
