Windows error code 0X800F080C shows up in systems when users are trying to install a missing .NET framework package. This is an essential utility tool that is required by many Windows programs. Many gamers are not even able to launch games without this package. Again, some users see this error even when they are trying to launch an application or program in their Windows system.
Not installing the latest version of the .NET framework on a Windows system can lead to several compatibility issues for the other programs. And if you see this error even when you are trying to launch basic applications like a Web browser, then that is a problem. However, over time many Windows users were able to get rid of this error by trying a few solutions. And here in this article, we will take a look at all of these probable solutions. So without any further ado, let’s get into it.
Also Read
Page Contents
How to fix Windows update error code 0x800F080C?
The solutions mentioned here worked for different Windows systems. What worked for a particular user might not work for you. So we have included all the known solutions. If you try one solution after the other, then surely one of them will solve your problem with the system.
The error that pops up in the installation/update of the .NET framework package occurs due to some corrupted .NET framework dependencies. And a .NET framework repair tool can help you get rid of this problem. Furthermore, there is a particular instance in the .NET framework that is disabled by default. Having it disabled results in the error code 0X800F080C. But enabling it using the Windows Features screen has solved this problem for many Windows users.
In some cases, having corrupted or missing system files also results in this Windows error. This is because some third-party applications that are dependent on system files are unable to function properly. So as mentioned above, launching some applications also sometimes brings up the error code 0X800F080C. But this can be fixed simply by using a repair utility tool.
Again, the error code 0x800F080C is something we encounter even when installing a new windows update. This update is sometimes related to the .NET framework sometimes but not all the time. So here, among all the solutions mentioned above, we will also see what we can do if the error is not related to the .NET framework.
Let’s take a look at the possible solutions for all the probable causes behind this error.
Clean the Windows Update temporary cache folder:
IF you are encountering this error while performing a Windows update, the first thing that you should do to stop this error from popping up repeatedly is to disable the Windows Update service entirely. For that, press the Windows Key + R to open up the Run dialog box and then enter “services.msc” in the dialog box. Then click on Ok. Here, look for the service “Windows Update”, and once you find it right-click on it. In the list of options that show up, choose “Stop.”
Now it’s time to clean the Windows Update temporary cache folder.
- Press Windows Key + R to open up the Run dialog box.
- Enter “%windir%\SoftwareDistribution\DataStore” in the dialog box and click on Ok.
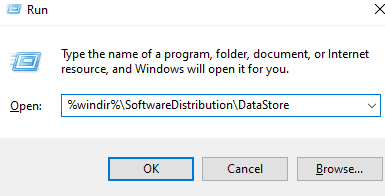
- Select all the files in the directory that pops up in a Windows Explorer window after this. After selecting all the files, delete all of them.
After you have successfully cleared the Windows Update temporary cache folder, enable the Windows Update Service again. For that, press the Windows Key + R to open up the Run dialog box and then enter “services.msc” in the dialog box. Then click on Ok. Here, look for the service “Windows Update”, and once you find it right-click on it. In the list of options that show up, choose “Start.”
If clearing the Windows Update temporary cache folder does not solve your Windows Update error code 0x800F080C, go for the next solution mentioned below.
Enabling missing .NET Framework via Windows Features:
If you are witnessing this error code while updating the .NET framework, then there could be a dependency disabled in the .NET framework installed on your computer. Enabling a missing .NET Framework dependency directly from the Windows Features screen has solved the error code for many users.
- Press Windows Key + R to open up the Run dialog box.
- Enter “appwiz.cpl” in the dialog box and click on Ok.
- The Programs and Features menu will show up on your screen. Here, click on the “Turn Windows features on or off” option on the left of this window.
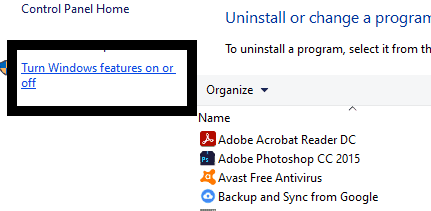
- Click on Yes when the UAC(User Account Control) popup window shows up.
- A list of windows features will show up in a new window now. Here, look for the feature “NET Framework 3.5 (this package includes .NET 2.0 and 3.0)” and check the box next to it.
- Click on Ok to save the changes.
- Click on Yes again to confirm your action. Wait for the package to install successfully.
- After the installation is complete, restart your computer.
Now, if you get the error code 0X800F080C again while operating with the .NET framework package, then go for the next solution mentioned below.
Use the .NET Repair Tool:
If enabling the feature did not work for you, then the next step is to try and repair the .NET redist packages on your computer using the Microsoft .NET Framework Repair Tool available for the Windows system. This is a tool that you will find on Microsoft’s website.
- Go to this Microsoft .NET Framework Repair Tool link page. Here, click on the download button under the repair tool.
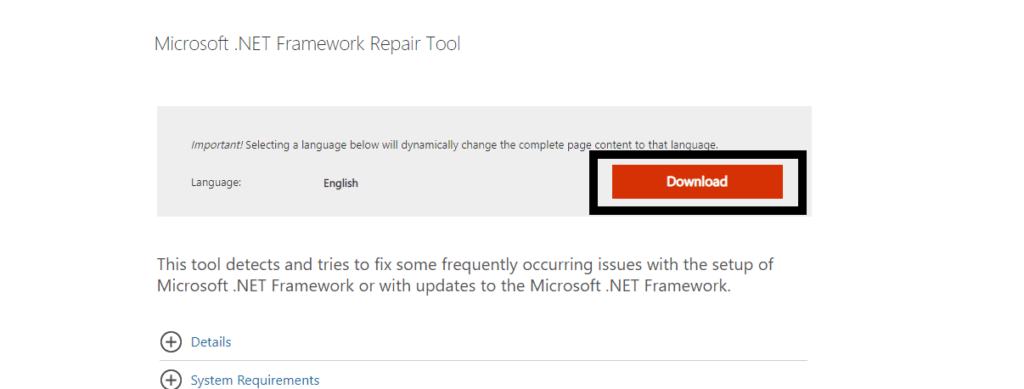
- On the next page, check the box next to ” NetFxRepairTool.exe” and click on the Next button down below. You don’t need to check any other box or file. You might even get the setup file on the first try when you click on the download button.
- Your download will initiate. Once the download of the setup file is complete, double-click on it. Click on Yes when the UAC(User Account Control) popup window shows up.
- Now follow the on-screen instructions and check the box net to ” I have read and accepted the license terms” on the terms page. Then click on Next.
- The repair utility will begin its work in the background, and it will bring up a list of all the corrupted and missing .NET framework dependencies. Click on Next here to let the utility program fix all the problems associated with the .NET framework packages installed on your computer.
- Once the repairing process is performed by the Repair tool, you will see a Finish button down below. Click on it and then restart the system.
These two solutions can be used to eliminate the error if the error is showing up due to the .NET framework packages. If none of them helped you with the error code 0X800F080C, go for the next solution mentioned below.
Run SFC:
SFC or System File Checker is a built-in Windows utility that checks the entire system for any possible corruption of system files. If any of the system files are corrupted, any third-party program will have problems functioning properly. Even with corrupted system files, installing any .NET framework packages on your computer is not possible.
- Press Windows Key + R to open up the Run dialog box.
- Enter “cmd” in the dialog box and press Ctrl+Shift+Enter.
- Choose Yes when the UAC(User Account Control) popup window shows up.
- In the command prompt window, enter the following command and press Enter.
sfc /scannow
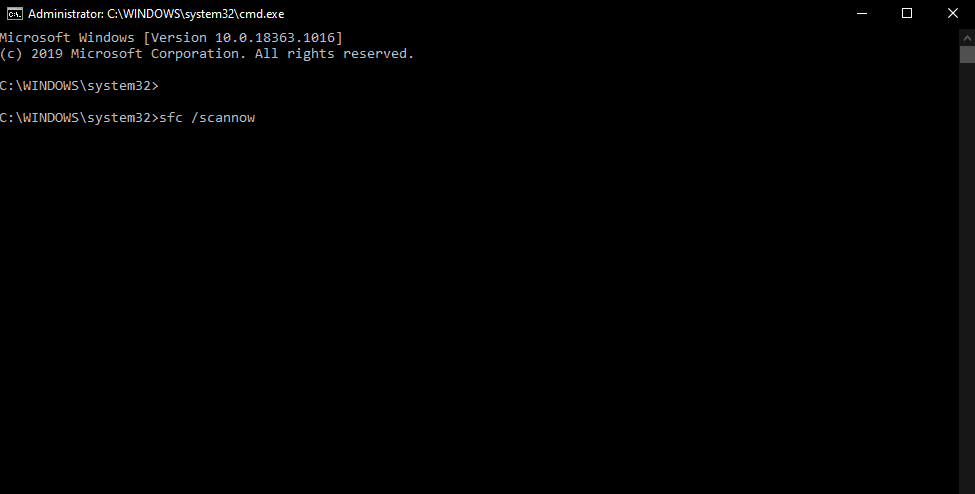
- Once the scan is complete, restart your computer.
Now, if you see the error code 0X800F080C while operating with the .NET framework packages or opening a third-party program, go for the next solution mentioned below.
Run DISM:
If the System File Checker did not do you any good, then DISM or Deployment Image Servicing and Management is your next option. It is also a repair utility tool in Windows that can repair Windows images, Windows Setup and Windows PE.
- Press Windows Key + R to open up the Run dialog box.
- Enter “cmd” in the dialog box and press Ctrl+Shift+Enter.
- Choose Yes when the UAC(User Account Control) popup window shows up.
- In the command prompt window, enter the following command and press Enter.
Dism /Online /Cleanup-Image /CheckHealth
- Again enter another command in the command prompt window and press Enter.
Dism /Online /Cleanup-Image /ScanHealth
- Finally, run this last command prompt window and press Enter.
Dism /Online /Cleanup-Image /RestoreHealth
These scans will take a while, and depending on your system specifications, the time can range from a few minutes to a few hours. If you still see the error code 0X800F080, go for the final solution mentioned below.
Perform a clean install:
If none of the solutions mentioned above worked for you, then your problem lies at a deeper level. In that case, a simple repair won’t be enough. The only option you have now to get rid of this error is to install Windows on your computer all over again. But before going ahead with the clean install, you should back up your entire data on to an external storage device or a cloud storage service. Once you have ensured that all your important files and folders are backed up, go for the clean install. You can use a bootable CD or USB stick with Windows installation files and then cleanly install Windows on to your computer all over again.
Once the clean install is complete, move all your backed up data back to your system and go back to using your system like before, that is, without the Windows error showing up again and again.
So this is how you can fix Windows error code 0X800F080C. If you have any questions or queries about this article, then comment down below, and we will get back to you. Also, be sure to check out our other articles on iPhone tips and tricks, Android tips and tricks, PC tips and tricks, and much more for more useful information.
