Competitive Esports is now bigger than ever before. And NVIDIA has its place as the manufacturer of the best GPUs for any PC. They want their users to have the best experience in online gaming and hence introduced the G-Sync feature to make it a reality. G-Sync allows players to attain the maximum performance while maintaining the best image quality.
But recently, many Windows users have reported they are having troubles with G-Sync on their Windows 11 PCs. They can’t get it to work at all. If you are one of those users, this article will help you out. Here, we have included the fixes that will fix your G-sync problem with Windows 11. So without any further ado, let’s get into it.
Page Contents
What to do if G-Sync is not working in Windows 11?
NVIDIA’s G-Sync was introduced to help with the screen tearing issue that occurs while playing demanding titles. So having this feature not working at all is a troublesome issue for people who are into competitive gaming. So if you are confused about what you can do if G-Sync is not working on your PC, follow the steps for the solutions mentioned below.
Before we get to the solutions, you should know that for G-Sync to work, you need monitors that support this feature. If you don’t have a monitor with this feature built-in, the solutions mentioned below won’t work.
Ensure that your G-Sync is properly configured:
- Restart your computer and turn on the connected monitor with the G-Sync feature. If you have multiple monitors, don’t turn on the monitors that don’t have this feature. You can turn them on later.
- Go through the different modes and settings in your monitor and ensure that G-Sync is turned on.
- Right-click on your desktop and click on “Nvidia control panel.”
- Turn Off and On the G-Sync option in the Setup G-Sync tab.
- Click on “Manage 3D settings” and turn off and on G-sync here too.
Now launch the game in which you had G-sync not working issue on your Windows 10 PC. In the game’s settings menu, turn off settings like fixed refresh, V-Sync, frame rate limit and other similar options.
If G-Sync is still not working on your PC, try the next solution.
Change V-Sync Settings:
Some users could fix the G-Sync issue by turning on Vertical Sync in the Nvidia Control panel.
- Right-click on your desktop and click on “Nvidia control panel.”
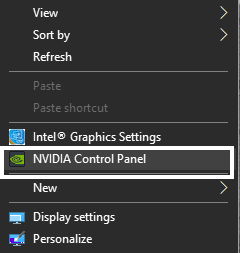
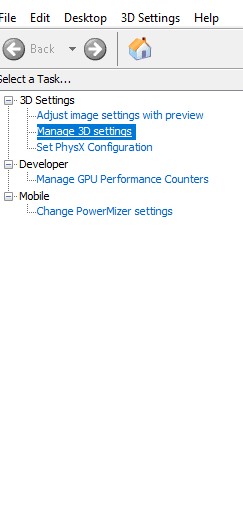
- Click on “Manage 3D settings” in the left pane.
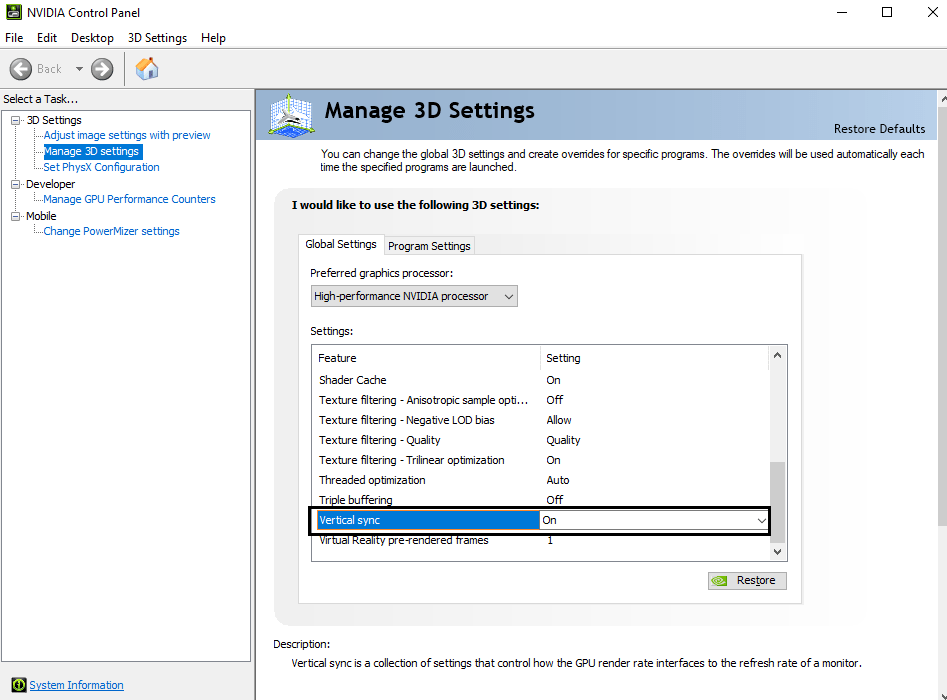
- Click on the “Global Settings” tab in the right pane.
- Go through the list of settings here and set “Vertical Sync” to On. Click on Apply to save the change.
- Now click on the “Program Settings” tab in the right pane.
- Select the program file for the game you have on your PC.
- Set Nvidia’s GPU as the preferred graphics processor for this program below it.
- Scroll through the settings for this program and set “Vertical Sync” to On. Click on Apply to save the change.
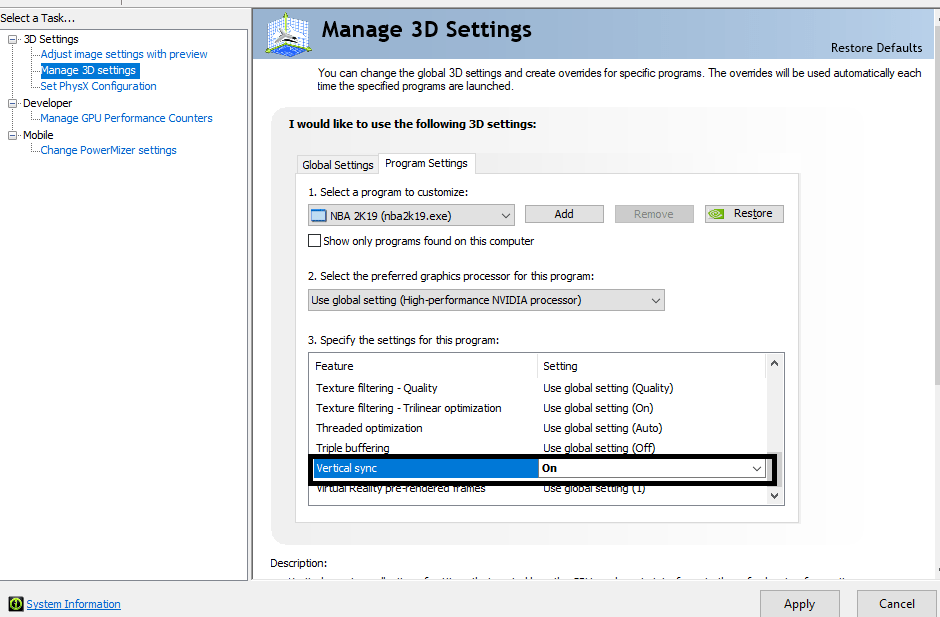
Now close the Nvidia control panel and launch the game where you were having troubles. If G-Sync is still not working on your PC, try the next solution.
Update driver:
If you have an old version of the graphics drivers installed on your PC while your Windows is up to date, you will have to update the graphics driver as well. There are three ways to update the graphics driver. You can do it manually, automatically, or by using a third-party application.
To perform the update automatically,
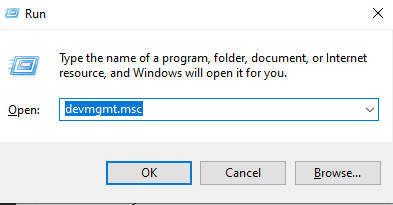
- Press Windows key + R to open up the Run dialog box.
- Enter “devmgmt.msc” in the dialog box and click on Ok. The Device Manager window will open up.
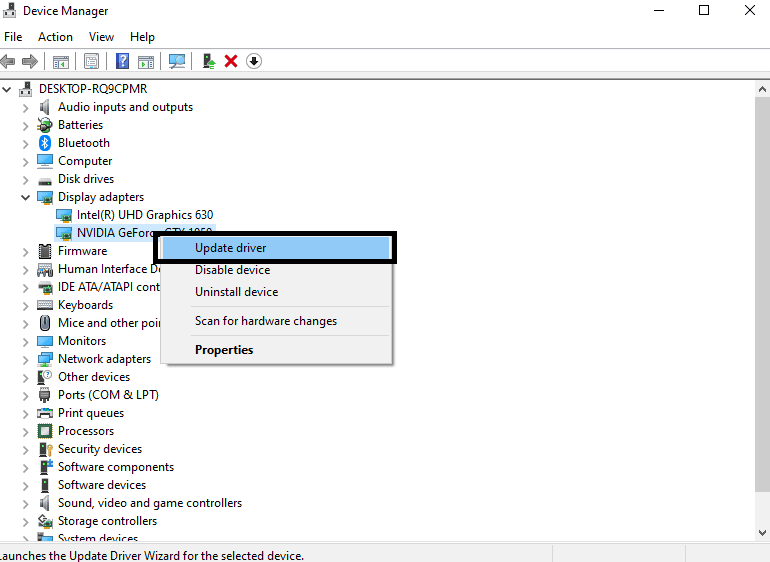
- Double-click on the Display adapter to expand it. Right-click on the NVIDIA graphics processor and choose the “Update Driver” option.
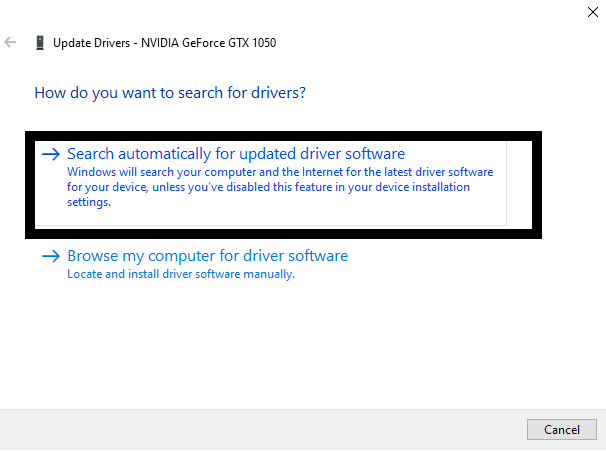
- Click on “Search automatically for updated driver software” and then follow the on-screen instructions to let your Windows PC download the latest driver setup from the web and install it on your PC.
To perform the update manually,
- Click on this link to open Nvidia’s driver download page.
- Set the list of options according to your PC’s configuration. Click on Search.
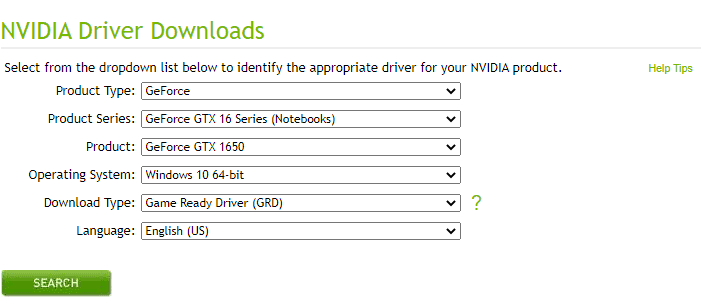
- Download options for the latest drivers will show up on the webpage. Download the latest version and then install it on your PC.
You can choose to perform the update using a third-party utility tool too. Several such applications can scan and install missing drivers on your computer. Use one of those programs to install the latest graphics drivers on your computer.
Once you are done installing the latest graphics drivers, restart your computer.
If the G-Sync feature still does not work on your Windows 11 PC, try the next solution mentioned below.
Rollback to previous driver version:
Some users started encountering issues with G-Sync after updating their Nvidia Graphics drivers to the latest version. This means that the new version of the graphics driver is not compatible with the version of Windows on your PC. You need to roll back your version of the graphics driver to the previous version. This solution would get G-Sync working again if it was working before the update.
- Press Windows key + R to open up the Run dialog box.
- Enter “appwiz.cpl” in the dialog box and click on Ok.
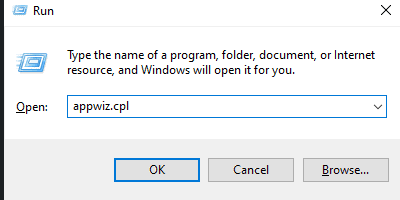
- Find “Nvidia Graphics driver” in the list here. Once you see it, click on it and then click on the “uninstall” button at the top.
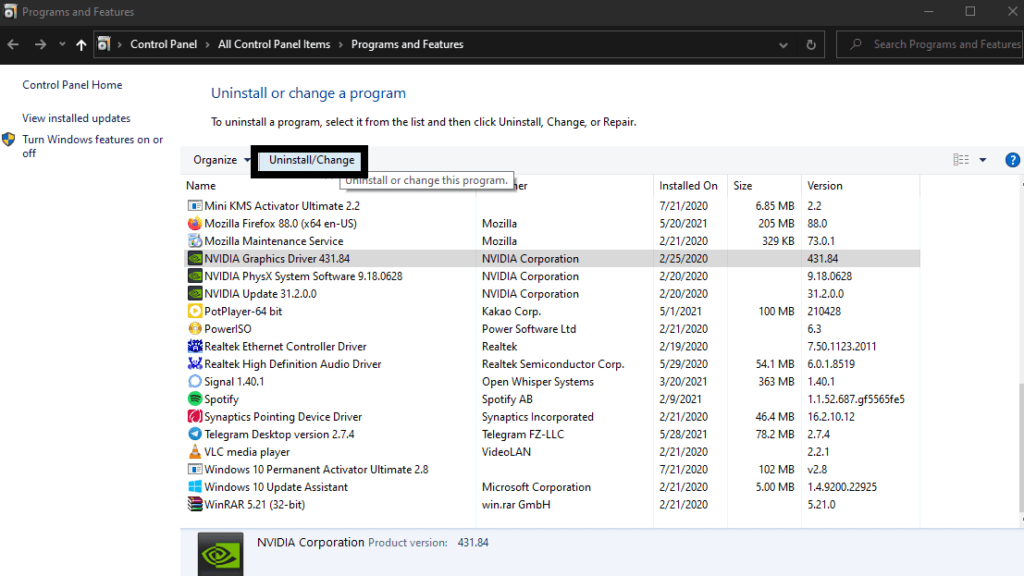
- Follow the on-screen instruction to uninstall that version of the graphics driver.
- After the uninstallation is complete, restart your computer.
- Now you need to install the older version of the graphics driver. For that, you need to visit Nvidia’s download page. Click on this link to open Nvidia’s driver download page.
- Set the list of options according to your PC’s configuration. Click on Search.

- Download options for the latest drivers will show up on the webpage. Download the older version and then install it on your PC.
Now restart your PC and try opening up the program in which you want the G-Sync feature to work. If G-Sync is still not working on your PC, go for the next solution.
Reset Windows:
Resetting Windows works for some users if there is something wrong in the Windows settings preventing the G-Sync feature from functioning properly. Resetting Windows will restore everything to its default value.
- Press Windows Key + I top open Windows Settings page.
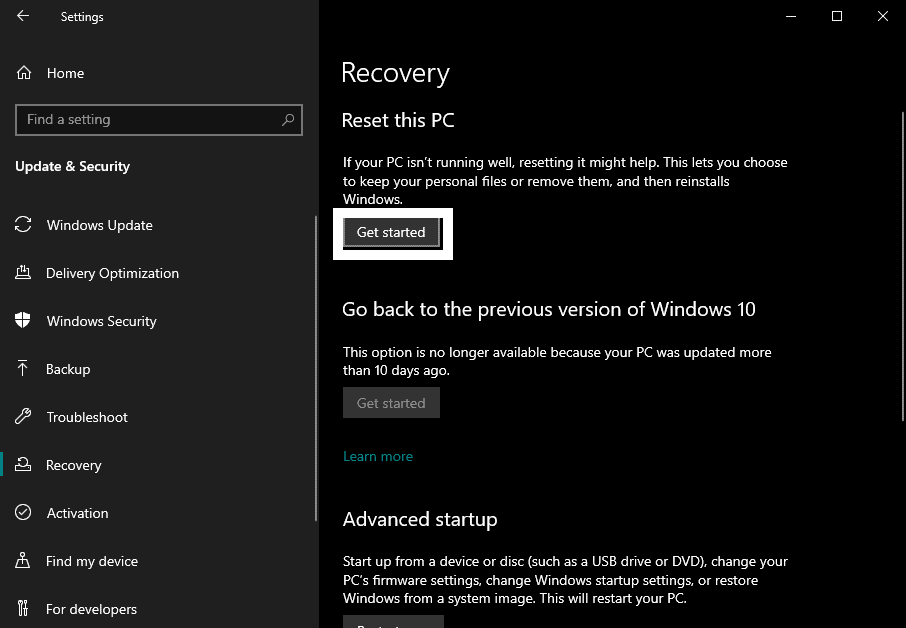
- Click on “Update & Security.”
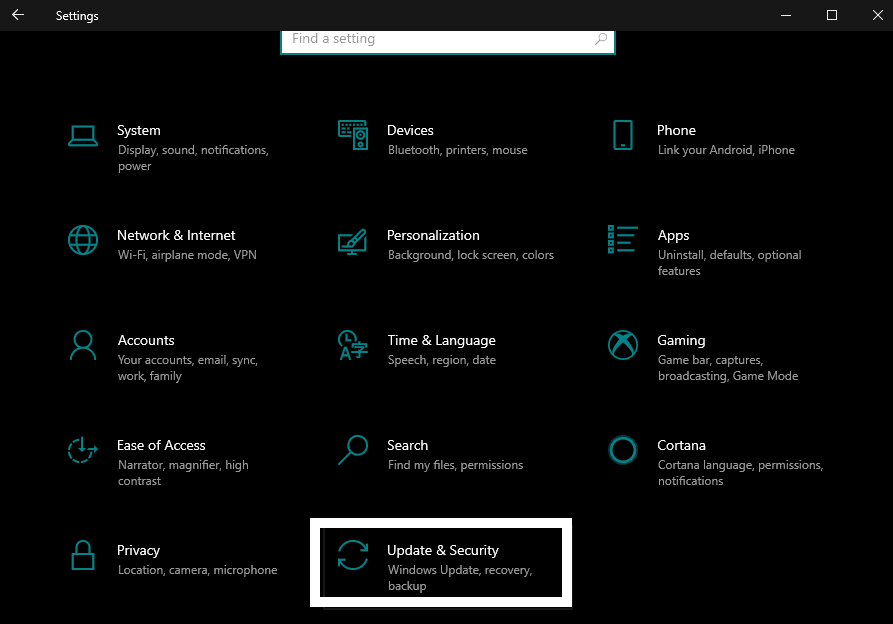
- Click on the “Recovery” tab in the left pane.
- On the right-pane, you will see the option “Reset This PC.” Click on the Get started button below it.
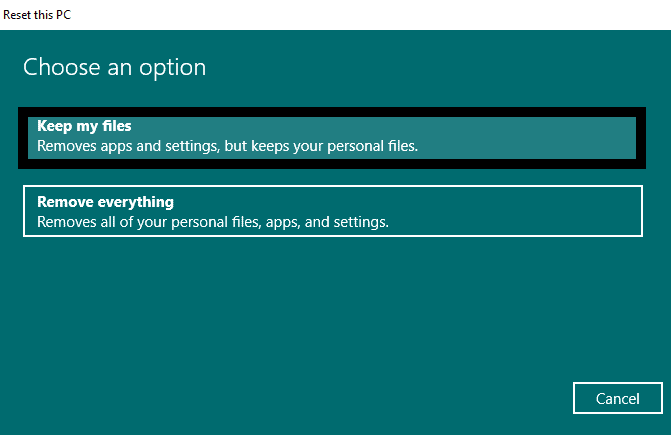
- Choose “Keep My files” and then follow the on-screen instructions to complete the Windows reset.
If the G-Sync feature still does not work on your Windows 11 PC, try the final solution mentioned below.
Replace RAM:
In some rare cases, faulty hardware could also cause the G-Sync feature to not work on your PC. For this reason, changing the RAM would be enough to fix the problem. Depending upon your motherboard and system configuration, purchase a new RAM module and install it on your computer.
If you don’t know how to do it, take it to your nearest service center. Tell them you want to update and change the RAM, pay them for the RAM and installation charges, and they will do it for you.
Hopefully, one of these solutions helped with the G-Sync not working on your Windows PC issue. If you have any questions or queries about this article, then comment below, and we will get back to you. Also, be sure to check out our other articles on iPhone tips and tricks, Android tips and tricks, PC tips and tricks, and much more for more useful information.
