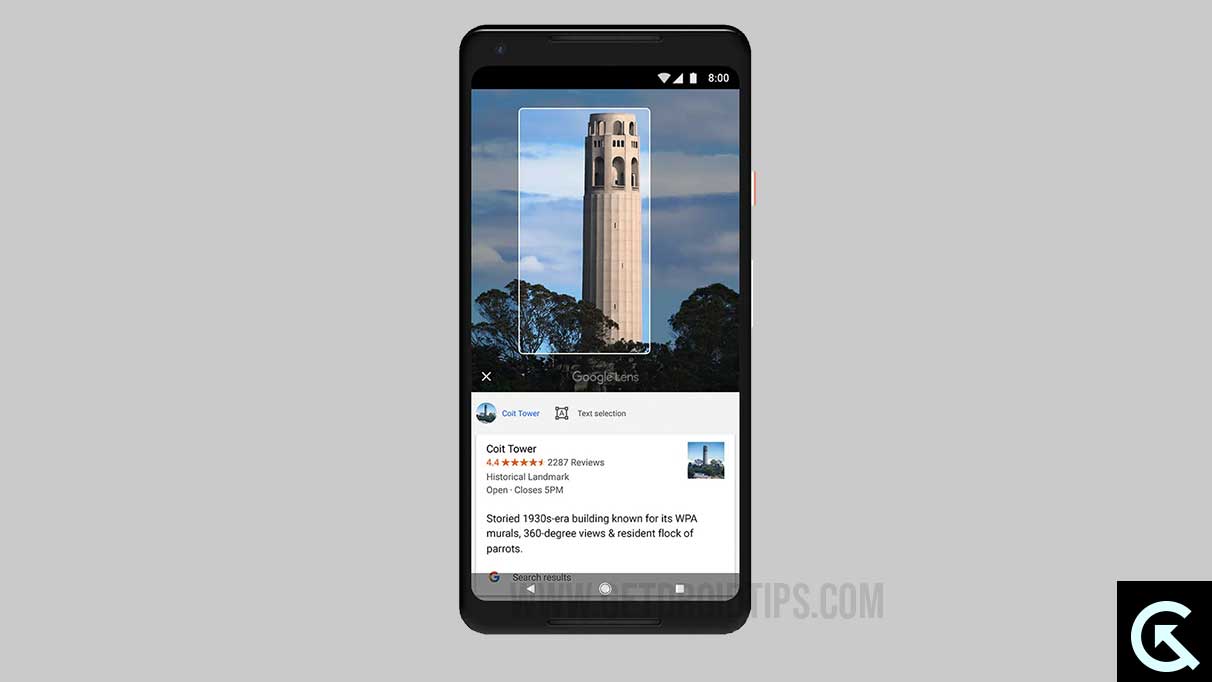
Google Lens is a great companion to search images and find what you need quickly. You can shop for products, translate and extract text, get help with your homework, and find places in an image. Google Lens lets you capture images and upload them from your gallery.
Google Lens is truly a great tool for our everyday needs. However, after the Android 13 update, or even the recent Android 14 update, Google Lens doesn’t seem to be working as expected for some users.
While the new update is mostly to be blamed for this issue, there can be other reasons, too. Here, we will look at these reasons and provide you with fixes to resolve this issue and get Google Lens back to work. So, without any further ado, let’s get started!
Page Contents
- Why Is Google Lens Camera Not Working After Updating to Android 13/14?
- Why Is Google Lens Camera Not Working After Updating to Android 13/14
- Fix 1: Check Your Internet Connection
- Fix 2: Open Google Lens from the Google Search Bar
- Fix 3: Check App Permissions
- Fix 4: Make Sure Your Camera Is Working
- Fix 5: Restart Your Device
- Fix 6: Clear App Cache and Data
- Fix 7: Check for App Updates
- Fix 8: Disable and Re-enable Google Lens
- Fix 9: Reinstall Google Lens
- Fix 10: Wipe Cache Partition
- Fix 11: Test in Safe Mode
- Fix 12: Check for Server Status
- Fix 13: Check for Device Software Updates
- Fix 14: Factory Reset Your Device (Optional)
- Fix 15: Contact Google Support
- Frequently Asked Questions
- Final Words
Why Is Google Lens Camera Not Working After Updating to Android 13/14?
First, let’s dig into why the Google Lens camera might not be working after the Android 13/14 update. The most obvious reason that comes to everyone’s mind is compatibility issues.
With each new release of Android, compatibility issues arise with some apps that may not be optimized well for the operating system. The Google Lens camera is no different. It is also prone to such compatibility issues.
Apart from the compatibility issues, there is another thing that could be causing the issue with your Google Lens camera not working. Starting with Android 13, Google has taken app permissions very seriously.
With Android 13 and Android 14, you have to grant the permissions for each app manually. This makes sure that no app can access your data without your permission. So, if Google Lens doesn’t have the necessary permissions like Camera and Media access, it might not work properly.
Besides these issues, there can be some other more common reasons behind this issue. Some of these are:
- Internet Connection Issue: Google Lens cannot work without access to the internet.
- Device Camera Issue: Google Lens will not work if the camera is malfunctioning.
- Corrupted Cache and Data: A corrupted cache or data can cause the app to slow down or even stop working normally.
- Outdated App: If your app is outdated, it might not work as there might arise a compatibility issue.
- Corrupted System Cache: The cache partition can cause system-related problems, causing the Google Lens camera to stop working.
- Server Outage: There might be a server outage with Google Lens as it relies on Google’s servers to work.
- Outdated Software: Your device’s software version could be causing issues with the Google Lens camera.
Why Is Google Lens Camera Not Working After Updating to Android 13/14
Now that we are aware of the reasons behind the Google Lens camera not working issue, we can begin the troubleshooting. This is a comprehensive guide to fixing the issue, so rest assured that you will find the right solution for you. Make sure to try all of the solutions mentioned below.
Fix 1: Check Your Internet Connection
To function properly, Google Lens requires constant access to the internet. Google Lens depends on the reliability of your device’s internet connection. Make sure Google Lens has access to the internet and the data and resources it needs to produce accurate results.
Follow the steps below to troubleshoot your Wi-Fi connection:
- Restart your router by simply turning it off and then turning it back on.
- Make sure there are no obstructions around your router.
- Forget and reconnect to your Wi-Fi network.
- Check if your router’s firewall is blocking your device’s MAC address.
- Reset your router by pressing and holding the reset button on the back of your router.
Follow the steps below to troubleshoot your cellular data connection:
- Turn on Airplane mode and then turn it off again to reset the network signal.
- Move to a place where there is better cellular reception.
- Remove your smartphone’s case.
- Reset your network settings. Go to Settings > General management > Reset > Reset network settings > Reset settings.
Fix 2: Open Google Lens from the Google Search Bar
If you want to use the built-in version of Google Lens, just launch it from the Google Search Bar. If you’re using the Google Search Bar, this option almost always provides an easy way to access Google Lens.
- Simply open up the Google app and tap on the Google Lens icon on the right-most corner of the search bar.
- This will launch the Google Lens. Tap on the shutter to capture an image or upload something from your gallery to search.
Also, you can add the Google Lens icon to your Home screen from here. Follow the steps below:
- Open Google Lens from the Google Search Bar.
- Tap on the three dots in the top right corner of the screen.
- Tap on Add to Home screen.
- The Google Lens icon will appear on your Home screen now.
Fix 3: Check App Permissions
Google Lens requires app permissions to access your device’s camera, microphone, images, and videos. If these permissions are not granted, this will prevent the Google Lens camera from working as expected. Check and enable these permissions to give Google Lens access. Follow the steps below:
- Open the Settings app on your phone.
- Tap on Apps.
- Then, tap on See all apps.
- Tap on Google Lens. If you can’t find it here, add it to your Home screen first.
- Tap on Permissions. Here, you will find a list of all the permissions that can be given to the app.
- Ensure permission for the Camera, Microphone, Photos and videos are allowed.
- App on each of them one by one and then select Allow only while using the app.
Fix 4: Make Sure Your Camera Is Working
Google Lens relies heavily on your device’s camera to function properly. Your camera’s inability to function properly will prevent Google Lens from capturing photos or analyzing visual data. For Google Lens to perform properly, your camera must be in good working order.
If you’re having issues using Google Lens, try checking your camera. Firstly, open the default camera app on your phone and make sure everything is working and that the images are clear. If something is wrong, you can try resetting the camera app to double-check.
If the issue persists, even after resetting the camera app, then there is probably a hardware issue with your device’s camera. In this case, you should try to wipe off the lens to remove any fog or dirt that might have been causing the trouble.
If doing so doesn’t help, there is some serious issue with your device’s camera that needs to be checked at a service center by a professional. Contact your device manufacturer for further assistance.
Fix 5: Restart Your Device
If the cameras are fine and Google Lens is still not working, you should restart your device. This can fix the issue if it is due to a temporary bug or conflict. It also fixes any minor software problems that were slowing down the app. Follow the steps below:
- Press and hold the Power button and the Volume Up button or just the Power button to open the Power Off menu.
- Once the power off menu appears, tap on Restart.
- After the restart, check if Google Lens is now working properly.
Fix 6: Clear App Cache and Data
If you are still having issues with the Google Lens camera, you should clear the cache and data of the app. This rolls back the program to its factory settings and removes any problematic cache files. Follow the steps below:
- Open the Settings app on your phone.
- Tap on Apps.
- Then, tap on See all apps.
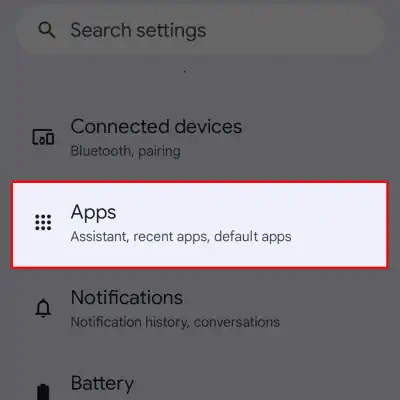
- Tap on Google Lens. If you can’t find it here, make sure you add it to your Home screen first.
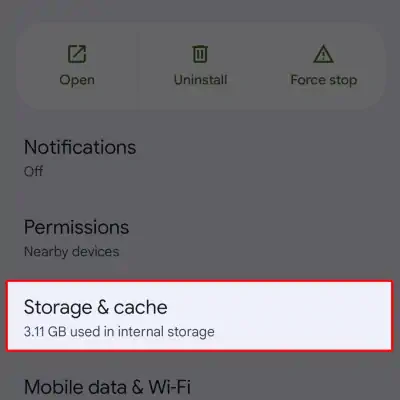
- Tap on Storage or Storage and data, depending on your device.
- Finally, tap on Clear cache and then Clear data.
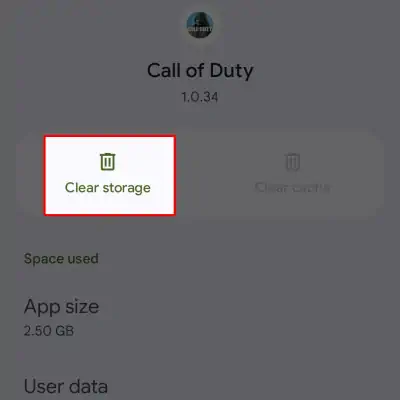
- Tap on OK if prompted.
Note: If you are using a Xiaomi device, then you have to first tap on Clear data to be able to tap on Clear cache.
Fix 7: Check for App Updates
App updates often consist of bug fixes and functionality additions. Checking for and installing the latest version of Google Lens is a good idea if you’re having problems with your camera. If you want the latest features and the best possible performance, you should update the app often. Follow the steps below:
- Open the Google Play Store on your device.
- Tap on your profile picture in the top right corner of your device.
- Then, tap on Manage apps & device.
- Under Updates, tap on See details to see all the app updates available.
- Find Google Lens on the list and tap on Update next to it. If you can’t find it on the list, then the app must be up to date.
- Restart your device once the app is updated.
Fix 8: Disable and Re-enable Google Lens
Simply disabling Google Lens and re-enabling it will restore the default settings. This can sometimes help fix issues with the app and get it back to working. Follow the steps below to disable and re-enable Google Lens:
- Open the Settings app on your phone.
- Tap on Apps.
- Then, tap on See all apps.
- Tap on Google Lens. If you can’t find it here, make sure you add it to your Home screen first.
- Tap on Disable and then OK.
- Restart your device and follow Steps 1 – 4 again.
- Tap on Enable and then OK.
Fix 9: Reinstall Google Lens
If disabling and re-enabling Google Lens didn’t help, try uninstalling the app and then reinstalling it. You can effectively start over with Google Lens if you uninstall it and then reinstall it. This can be useful for fixing software issues that have cropped up over time. Follow the steps below:
- Open the Settings app on your phone.
- Tap on Apps.
- Then, tap on See all apps.
- Tap on Google Lens.
- Tap on Uninstall and then OK.
- Now, open the Google Play Store and search for Google Lens using the search bar at the top.
- Tap on the Install button.
- Once the app is installed, check to see if the issue has been resolved.
Fix 10: Wipe Cache Partition
You can go even further by wiping the cache partition on your device. Wiping the cache partition will remove any incompatible or slowing transient system files and data. This will boost your system and fix any minor issues with your system, including the issues with the Google Lens camera. Follow the steps below:
Note: If you have a Samsung device, you need to connect your phone to a laptop or a computer using a cable first.
- Press and hold the Power button and the Volume Up button or just the Power button to open the Power Off menu. (The exact key combination may vary from device to device.)
- Once the Power Off menu appears, tap on Power Off.
- Now, press and hold the Power button and both the Volume buttons simultaneously until the Recovery Mode options appear.
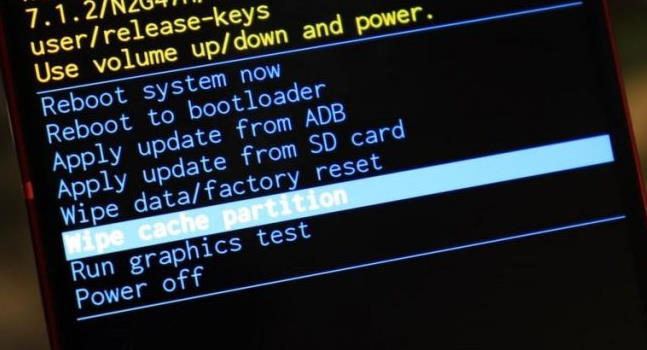
- Use the Volume Up and Down buttons to navigate to Wipe Cache Partition.
- Then, press the Power button to select it. Wait for the process to complete.
- Once completed, use the Volume buttons to navigate to Reboot System Now.
- Select it using the Power button. Your device will now restart.
Fix 11: Test in Safe Mode
You can check if a third-party app is causing Google Lens to malfunction by testing it in Safe Mode. When you enter Safe Mode, no third-party apps are loaded, and only the essential system apps are loaded.
If Google Lens starts to function normally when in Safe Mode, a currently installed app may be interfering with its normal operation. You can try uninstalling any suspicious apps and see if the issue is resolved. Follow the steps below:
- Press and hold the Power button and the Volume Up button or just the Power button to open the Power Off menu.
- Once the Power Off menu appears, tap and hold the Restart or Power Off option.
- Tap on Safe Mode.
- If Google Lens works normally when in Safe Mode, then you need to uninstall any suspicious apps.
- Restart your phone to exit Safe Mode. Now, uninstall any suspicious apps one by one and check to see if the issue has been resolved.
- If the issue is resolved after uninstalling a specific app, then it is likely the culprit.
Fix 12: Check for Server Status
If Google Lens isn’t working on your device, you may see if the problem is widespread by checking the status of the Google Lens servers. While Google Lens is directly connected to Google’s servers, you can check if this specific service is down or not on SaaSHub.
You can also check the status of Google’s servers on DownDetector, although it is highly unlikely for Google’s servers to go down. You can check for other users’ complaints on platforms like X (Twitter) and Reddit.
Fix 13: Check for Device Software Updates
If you want to continue using apps like Google Lens without any issues, it’s essential to keep your device’s software up to date. Updates to the software on a device typically include enhancements and bug fixes that, among other things, make for better compatibility. Follow the steps below to update your device’s software:
- Open the Settings app on your phone.
- Tap on System.
- Then, tap on System update.
- If available, then tap on Check for updates.
- If any updates are available, tap on Download and install.
- Restart your device once the update is installed.
Fix 14: Factory Reset Your Device (Optional)
If all of the above solutions fail to fix the issue, then you can try to reset it to factory settings. Resetting your device to factory settings will delete all of your data and apps, giving it a fresh start.
This can be useful when complicated software conflicts are to blame for the app’s malfunction. A factory reset will delete all of your information, so be sure to make a backup copy first. Follow the steps below:
- Open the Settings app on your phone.
- Tap on System.
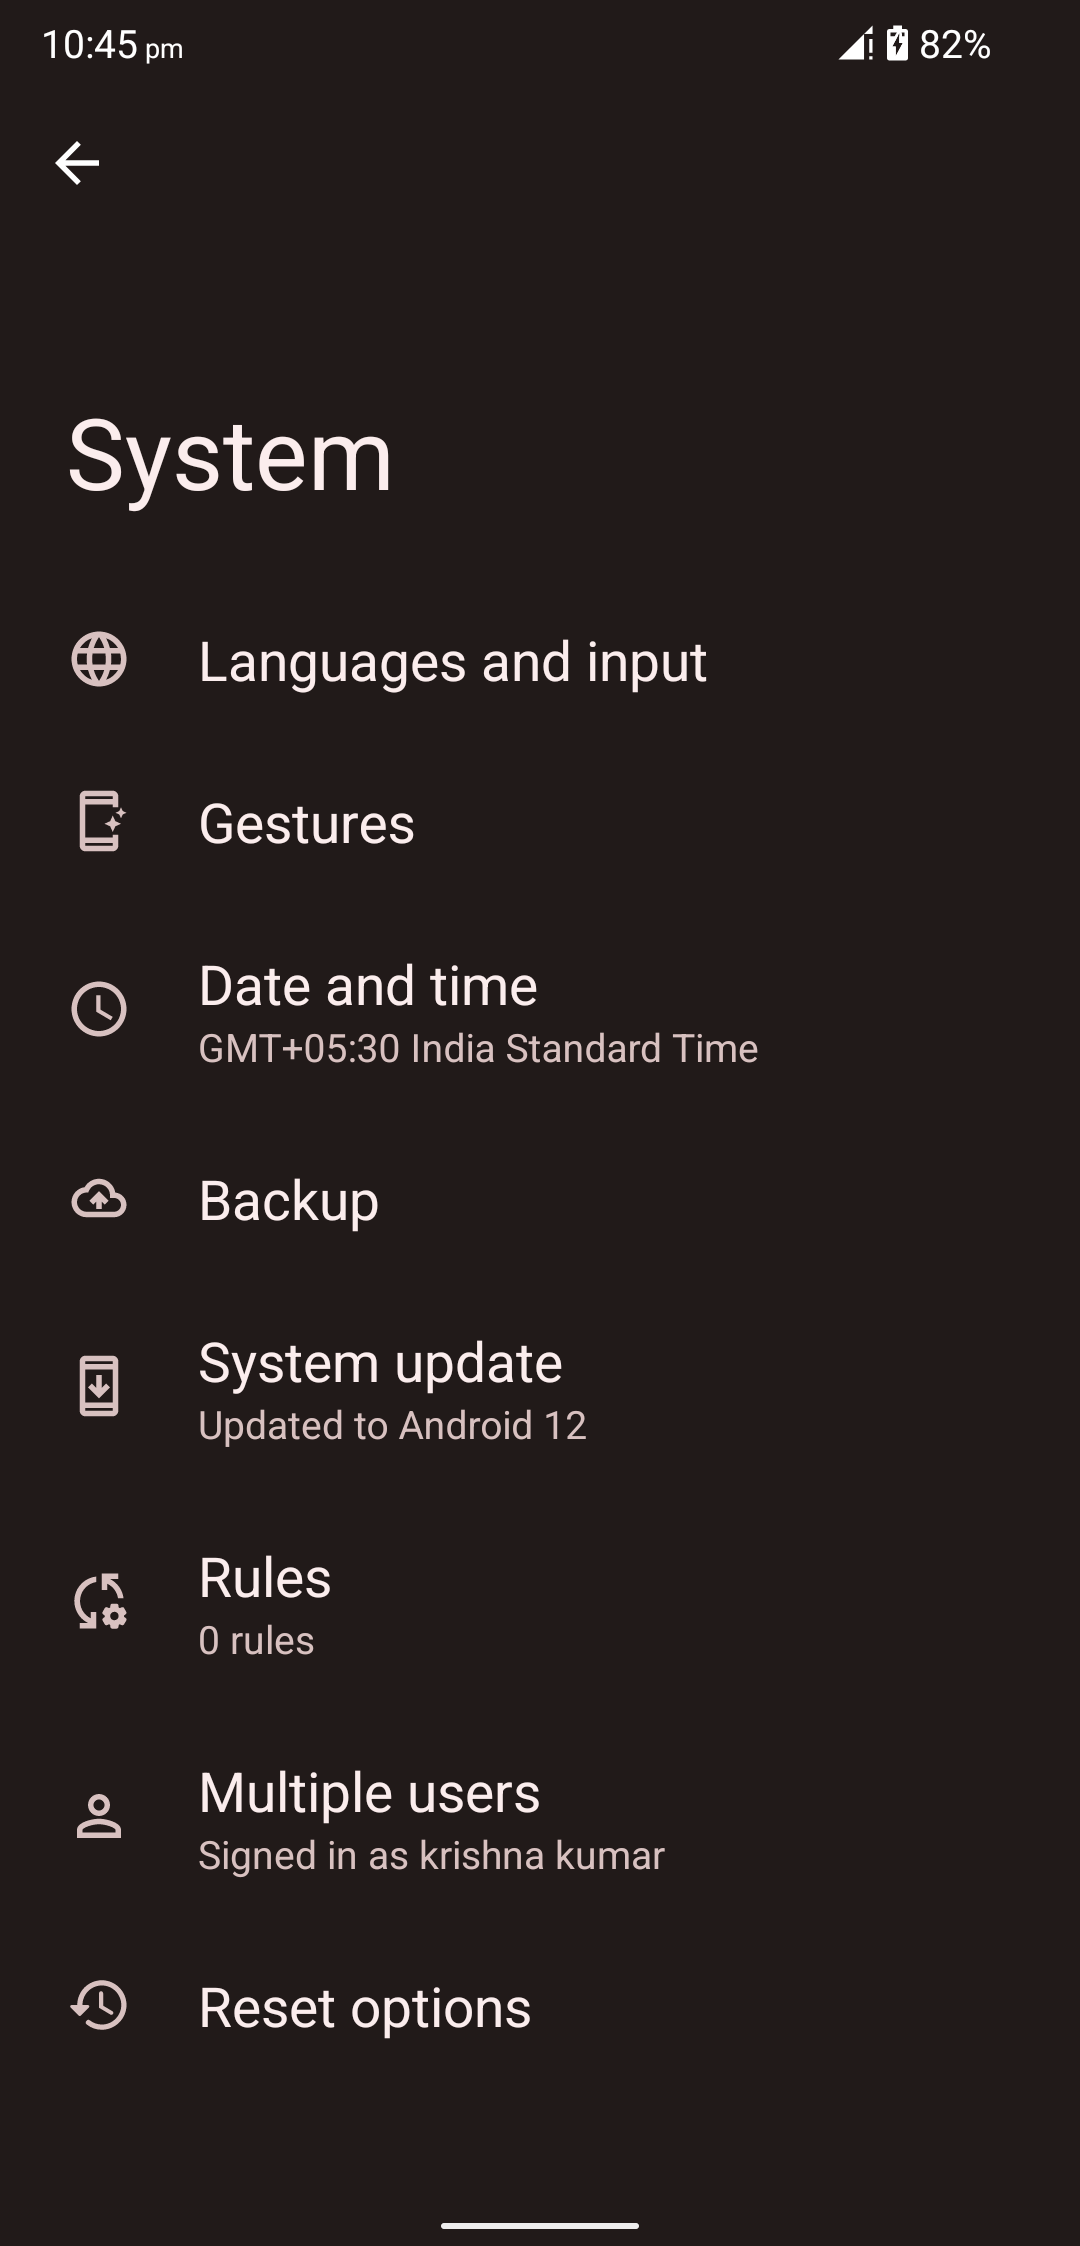
- Then, tap on Reset options.
- Here, tap on Erase all data (factory reset).
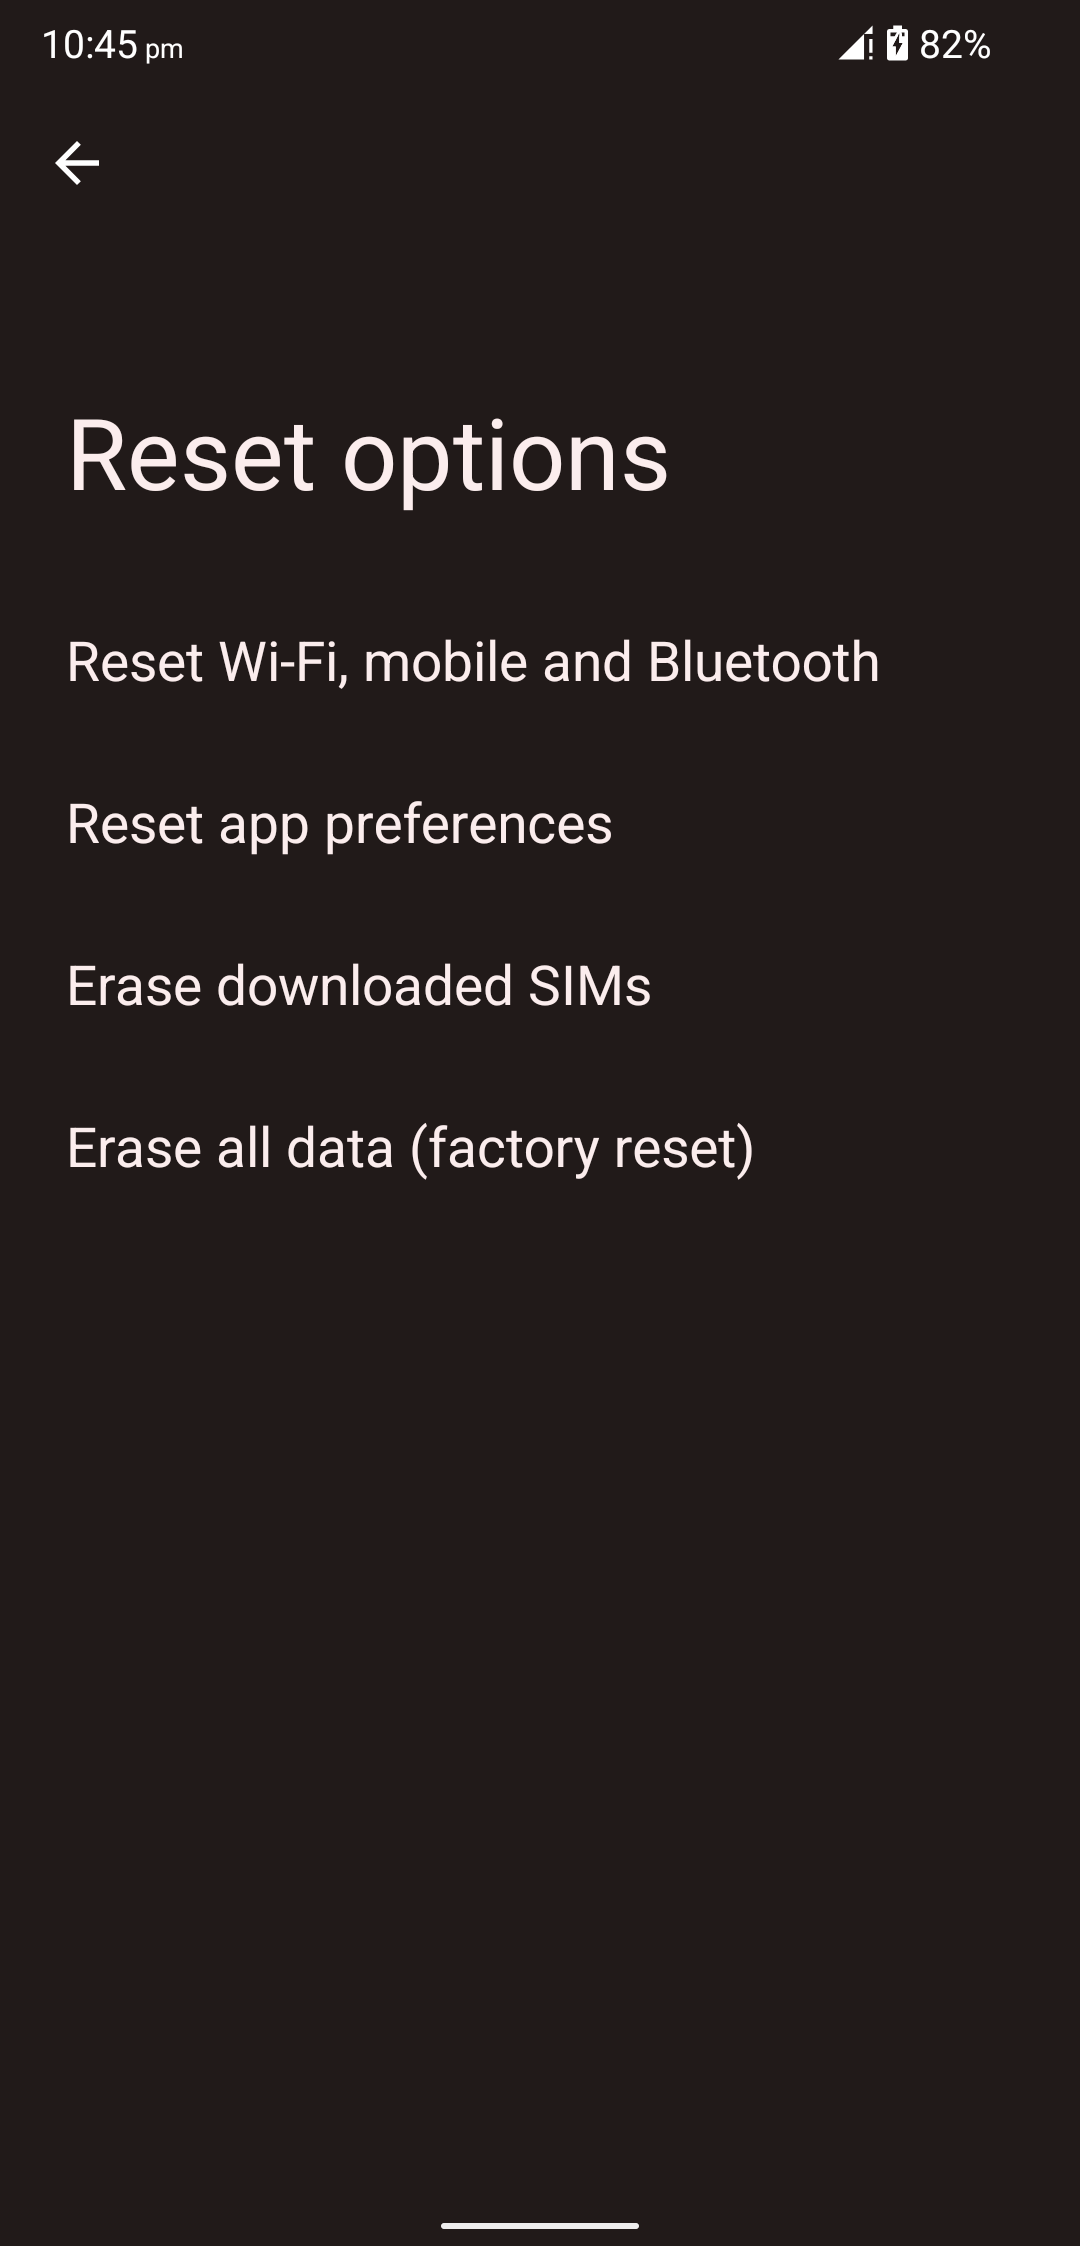
- Tap on Erase all data at the bottom.
- Now, enter your phone’s password, PIN, or pattern.
- Tap on Erase all data.
- Finally, tap on Restart.
- Once the device has been reset, set it up and see if the issue has been resolved.
Fix 15: Contact Google Support
After exhausting all other options for getting Google Lens working, the last resort is to contact Google Support. If you have a problem, the people at Google can point you in the right direction and help you troubleshoot and find a solution.
They might also be aware of any system-wide issues and be able to provide you with expert advice to get Google Lens functioning properly on your device. You can contact Google via the phone or their website. You can even visit the nearest service center if that is feasible for you.
Frequently Asked Questions
How do I activate Google Lens?
You can activate Google Lens by saying “OK, Google. Activate Google Lens” to your Google Assistant. Alternatively, you can also open the Google app and then tap on the “Lens icon” next to the “mic icon” on the search bar to activate or open Google Lens.
How can I add the Google Lens shortcut to my home screen?
First, activate Google Lens by opening the Google app and then tapping on the “Lens icon” next to the “mic icon” on the search bar. Then, tap on the three dots on the top-right corner and select “Add to Home screen.”
Does Google Lens require an internet connection to work?
Yes, Google Lens needs an internet connection to work. If you don’t have an internet connection on your device, the app will not work.
Why is Google Lens not working after the Android 14 update?
There might be some compatibility issues that could be causing the problem. Moreover, this can also be because Android 13 and 14 require you to grant app permissions manually. Check out the solutions in this guide to resolve this issue.
Final Words
Google Lens is a great tool to search images and do much more. However, the app doesn’t seem to be working after updating to Android 13 or Android 14. Don’t fret; we have compiled a list of solutions that will help you fix the issue and get back to using Google Lens. Make sure that you try all of them.
In the meantime, we can expect for Google to roll out an update to fix this issue permanently. And yes, if the issue persists, you can definitely contact Google Support or your manufacturer. Let us know if you know of any other solutions that might help fix the issue.
