Google Photos is a photo-sharing and storage service that has been developed by Google since May 2015. It’s used to be one of the best online image storing services on the internet that can be accessed via a Google account on any device. No matter you use a Photos application or the browser, just log into the Google account and you’re done. However, some users are facing the Google Photos app being stuck on ‘Setting up your photo library’.
It seems that after or during creating a new photo album and backing up a bunch of photos from the phone’s camera, it says something like ‘getting ready to back up items’. But somehow the Photos app gets stuck on the photo library setup which is annoying. Turning off the backup and sync option on the Google Photos didn’t help. Now, if you’re also encountering issues like Google photo backup stuck on getting ready to backup, you can check this fix.
Page Contents
- Why did Google Photos Stuck on Setting up your Photo Library?
- FIX: Google Photos Stuck on Setting up your Photo Library
- Restart Android Device
- Charge the Android Phone
- Turn Off Power Saving Mode
- Remove Connectivity Limiters
- Choose Broadband Cellular Network
- Disable Third-party Cleaners
- Turn Off Additional Features
- Grant Google Photos Permissions
- Clear Google Photos Cache
- Uninstall Google Photos Update
Why did Google Photos Stuck on Setting up your Photo Library?

It’s not a coincidence that your Android device stuck the Photos app at the setup process. It is happening to thousands of Google-developed software users, and you are not alone in the boat. The scenario might be the same on your device, but the root cause differs from device to device. What works for you may not work for someone else. Allow me to give you a few reasons why the Google Photos app is tuck at the setup process.
a. Android bugs and glitches
it’s common for Android mobile software to have bugs and glitches. I have a smartphone running on custom skin on top of Android 11 OS, as I have mentioned earlier. It has bugs, RAM management issues, input lag, etc.
b. Junk
You are the #1 reason why the storage is filled with junk and the time has come to flush it out. Many reviewers suggest that users consider storage options when buying a new device, and I’m not talking about SD card expansion.
Internal storage is not the same as storage expansion via SD card. Nowadays, we have UFS technology that is superior in terms of reading/writing speeds. I don’t believe that SD cards have come far enough to compete with the UFS technology.
c. Restrictions
I won’t repeat the fact that privacy is a myth, and we have these limiters that pretend to preserve our freedom to choose. I’m not citing battery saver mode, and that’s a potential culprit here.
d. Limited Bandwidth
Google Photos is not an image viewer for smartphones. It’s a Google product offering image viewing capabilities and editing features in exchange for integrating cloud services. They are trying to bind the cloud services with the Google Photos app. In short, it’s going to download tons of photos, images, and scanned pictures from the internet, and bandwidth limitation won’t do justice here.
e. Broken App Update
Big-time developers make mistakes and end up releasing broken updates for the users. You have to uninstall the new update and go back to the earlier version. I will show you how to roll back the app update, and you don’t have to worry about compatibility issues.
I will put an end to the reasons and start diving into the solutions so you can access the photos as soon as possible.
FIX: Google Photos Stuck on Setting up your Photo Library
You won’t lose any photos stored in the device, by the way. Read the solutions, then understand their effectiveness, then apply them in order.
Restart Android Device
I haven’t rebooted the smartphone in ages, and I could say the same for you. Millions of smart devices stay on standby for months and don’t see a shut-eye time. The manufacturers may have packed the phone with high-quality components, but the software needs a periodic shutdown.
1. Close apps running in the background.
2. Press and hold the power key for four seconds.
3. Release the key when a few options appear on the screen.
4. Tap on the “Restart” or “Reboot” key.
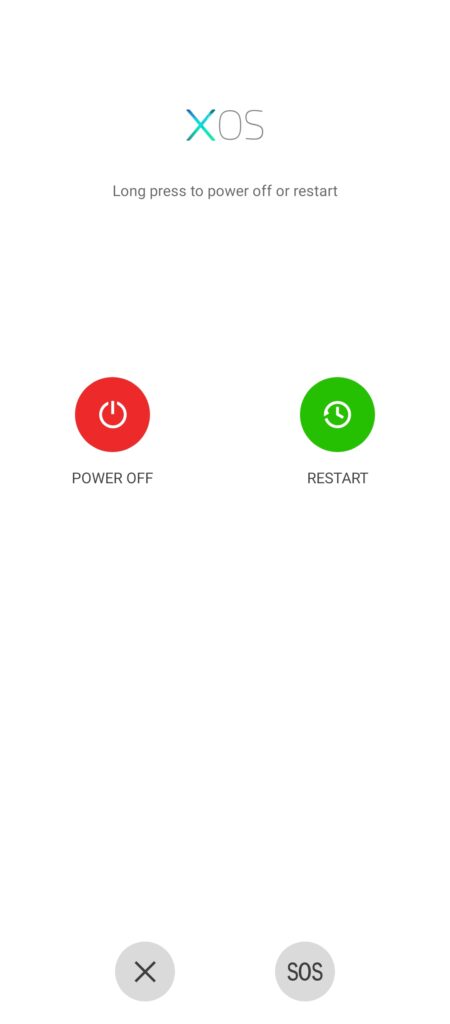
I recommend the uses shut down the phone and let it rest for five minutes. Standby time has gotten better in modern phones, but you should take that as a blessing and let the Android device go on for months.
Clean Internal Storage
Your smartphone is shouting to free internal storage, and I’m not talking about the external storage option. In 2022, I don’t think the affordable storage expansion solution can replace the UFS technology, and I have said that earlier. Internal storage have higher read/write speeds, and you won’t have the performance on a slower SD card.
1. Open the “Settings” app.
2. Swipe down and tap the “Storage” setting.
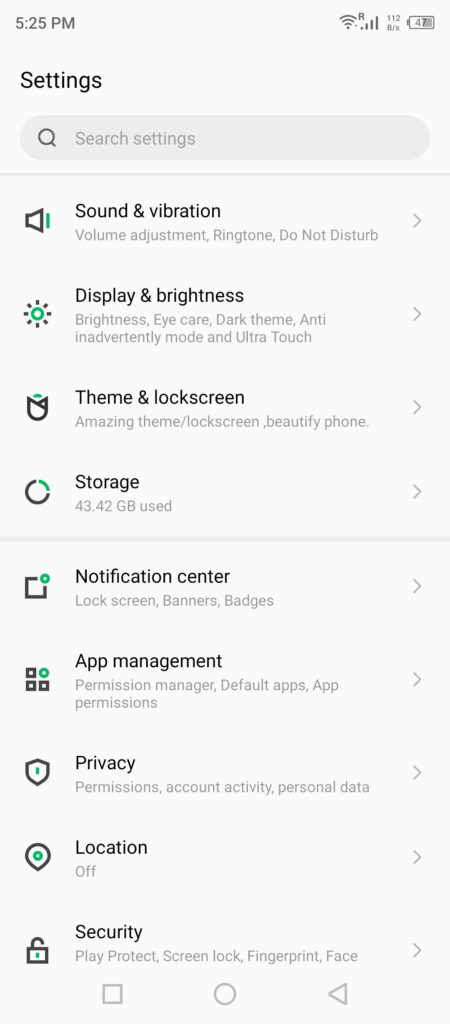
3. Tap the “Internal shared storage” option.
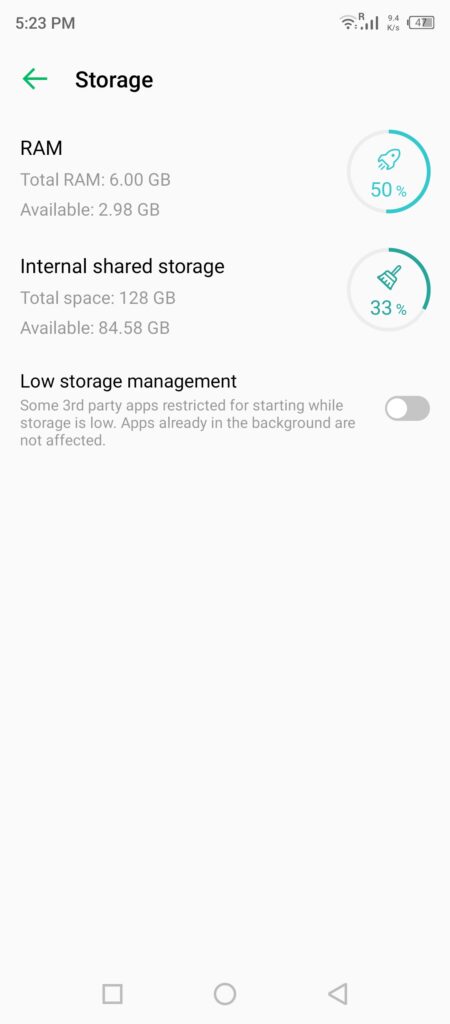
The device will list the apps, videos, photos, documents, and others occupying the internal storage. Find the unwanted apps and content stored and get rid of them at once.
Charge the Android Phone
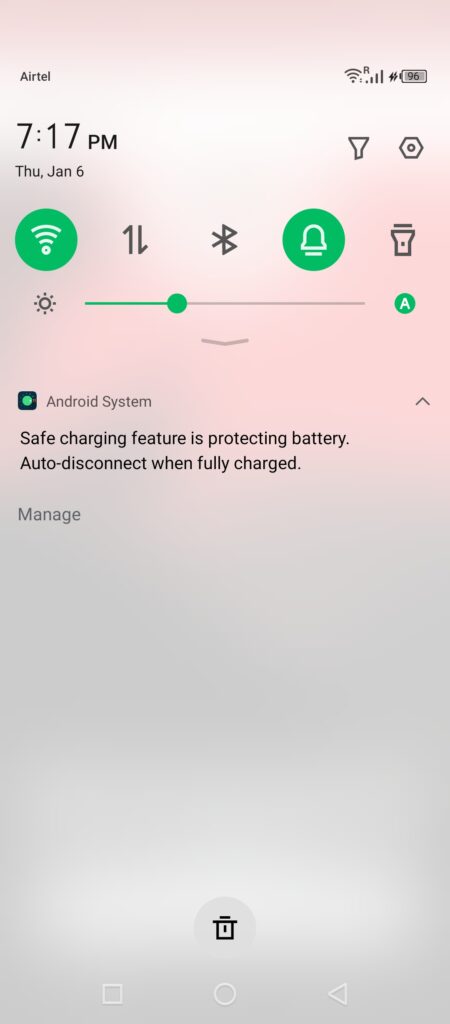
Newer software is tweaked to conserve battery life when it reaches a certain percentage. Of course, the lower battery charge won’t shut down the device, but it restricts the background running apps. Google Photos is trying to download the content from the internet, and it is considered unnecessary by the priority system. So, charge your device and stop the energy-conserving feature to restrict the smartphone.
Turn Off Power Saving Mode
The Chinese software developers have taken the battery saving mode to the next level, and they are leveraging from the custom skin or custom UI. Disable the power saving mode or ultra-power saving mode in the Android smartphone or tablet. Let me show you where to find the advanced power-saving mode in the device.
1. Open the “Settings” app.
2. Swipe down and tap “Power Mode” or the setting starts with power in the name.
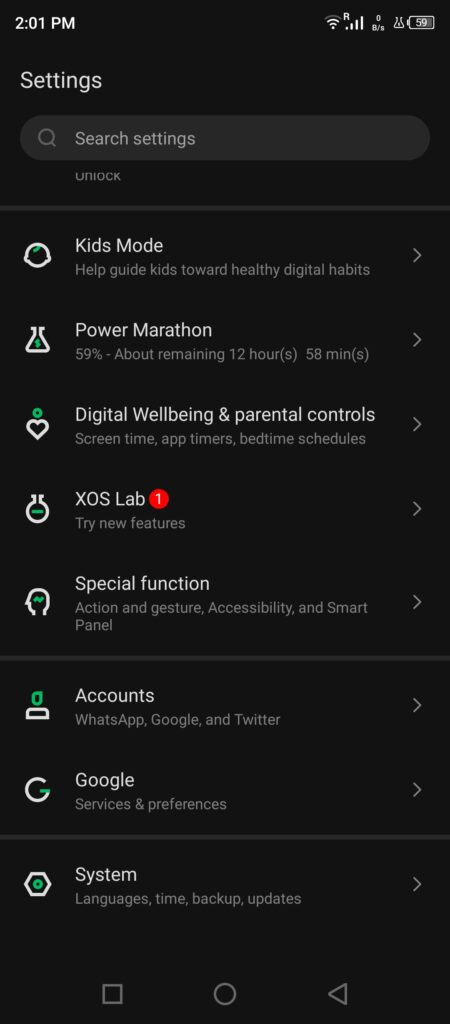
3. Tap “Change power boost settings” to turn off the feature.
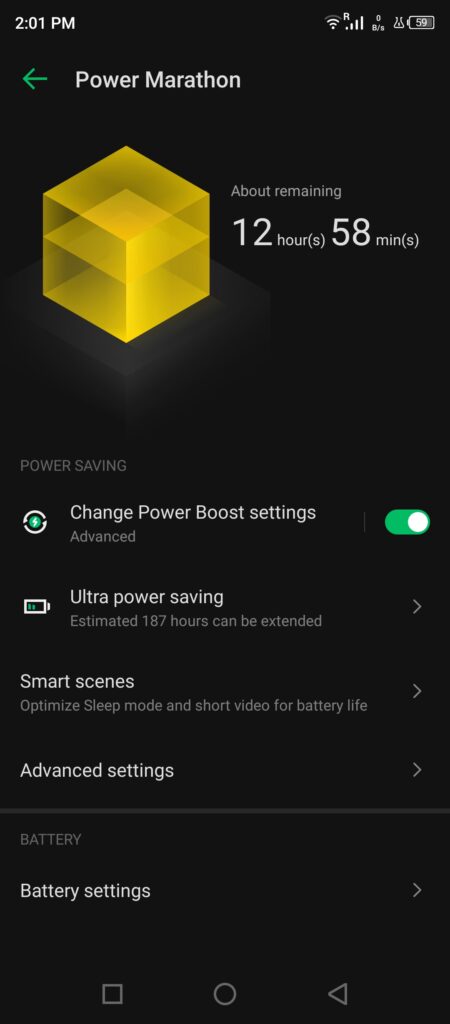
4. Tap “Close anyway” to confirm the changes.
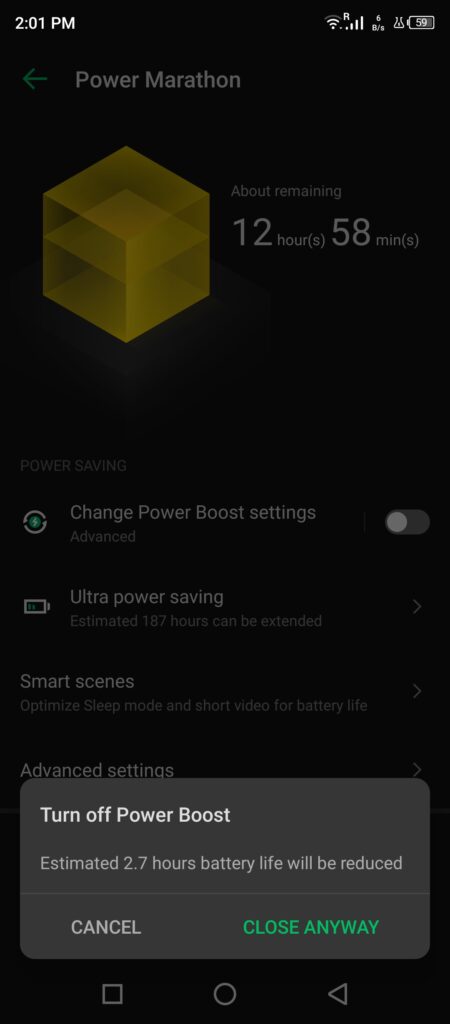
The Photos app can download the pictures from the Google servers since nothing restricting the service anymore. However, I suggest the readers charge instead of using a power outlet or power bank, which resolves the issue.
Remove Connectivity Limiters
Wi-Fi connectivity can download/upload over 500 Mbps in practical usage. The majority of the experts suggest you switch from mobile data to a Wi-Fi network. You should look out for the limiters in the Wi-Fi feature, and most of the custom software allows the users to add a limit on it.
You must have added a limiter in the Wi-Fi network, or it is present there by default. Allow me to show you how to find the Wi-Fi limiter and set preferred settings manually.
1. Tap “Settings” from the menu.
2. Choose “Wi-Fi” from the settings.
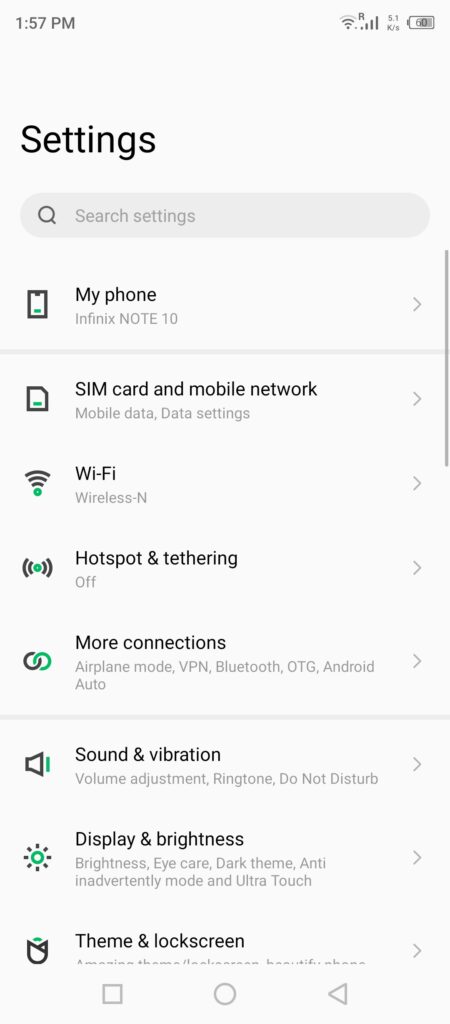
3. Tap on the connected network to reveal more options.
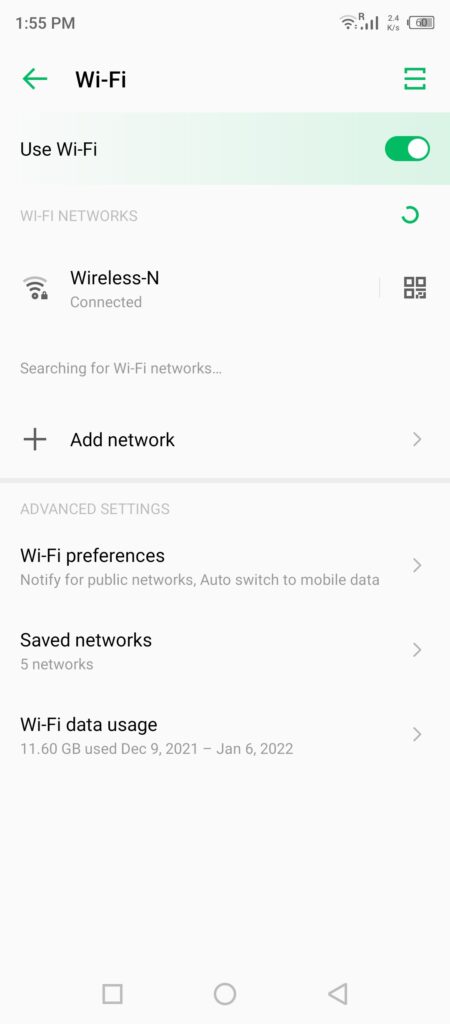
4. Tap “Network Usage” or the relevant option on your device.
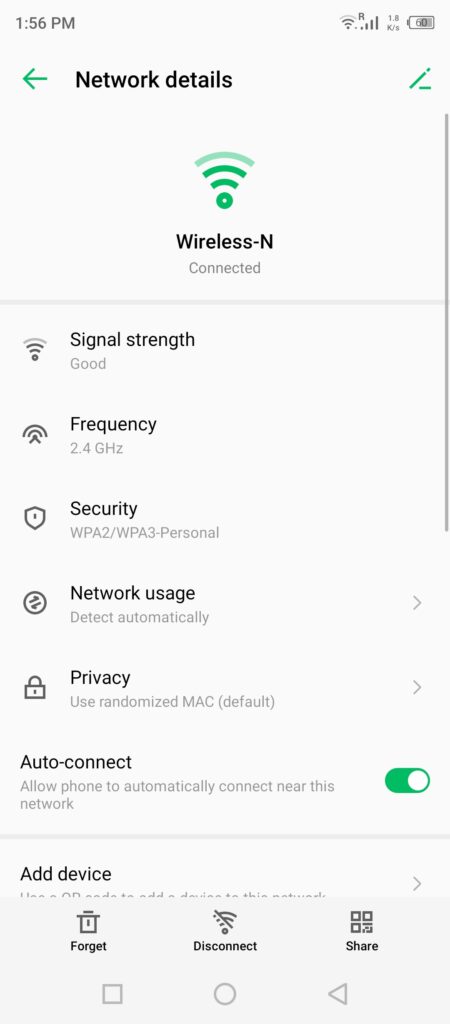
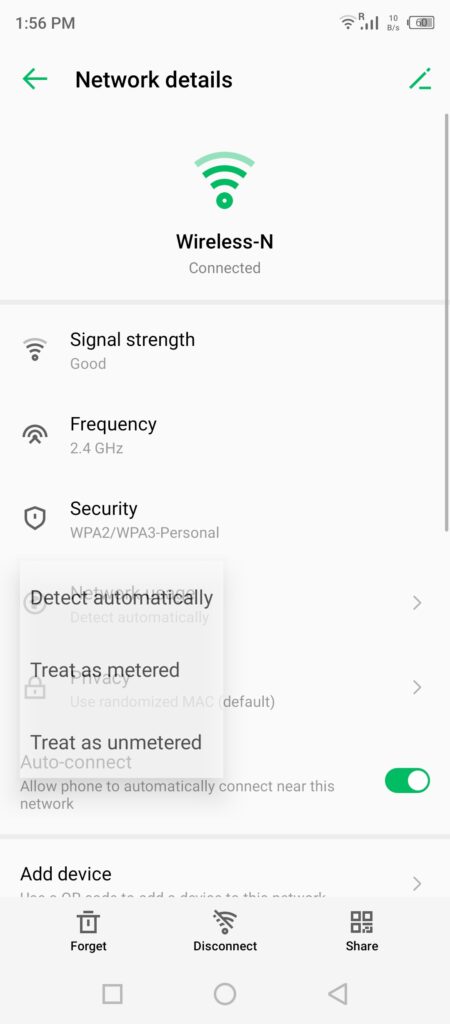
5. Choose “Treat as unmetered” from the drop-down menu.
6. Now, your network is treated as unmetered.
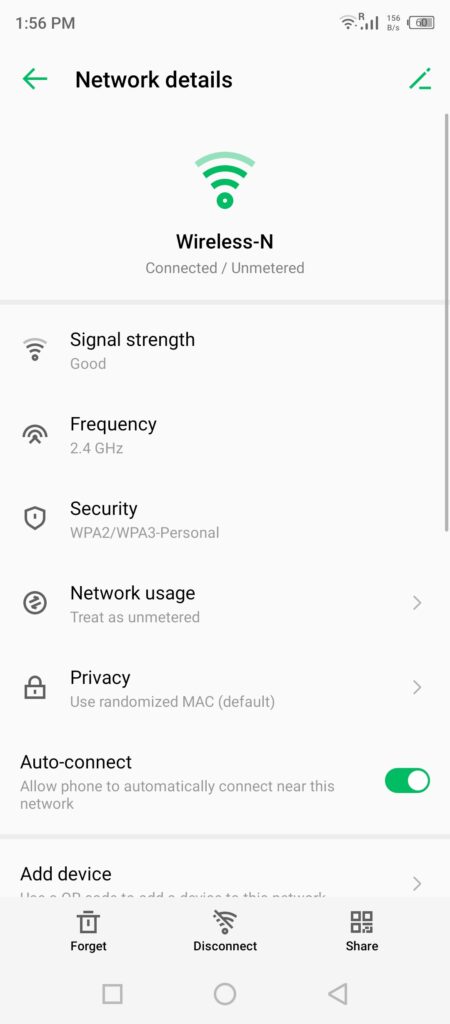
You can close background apps and shut down your phone. Let your Android device sleep for five minutes, then turn it back on.
Choose Broadband Cellular Network
Several developing countries don’t have sophisticated infrastructure like the United States of America. Many telecommunication companies have started to adapt 4G networks and implement 5G spectrum in different parts of the regions. Let me show you how to choose a broadband cellular network manually in the Android software.
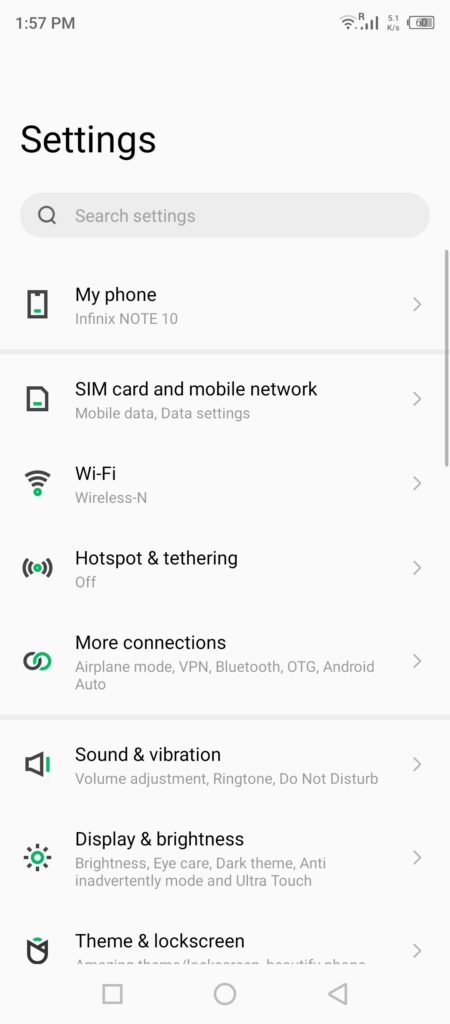
1. Tap “Settings” from the menu.
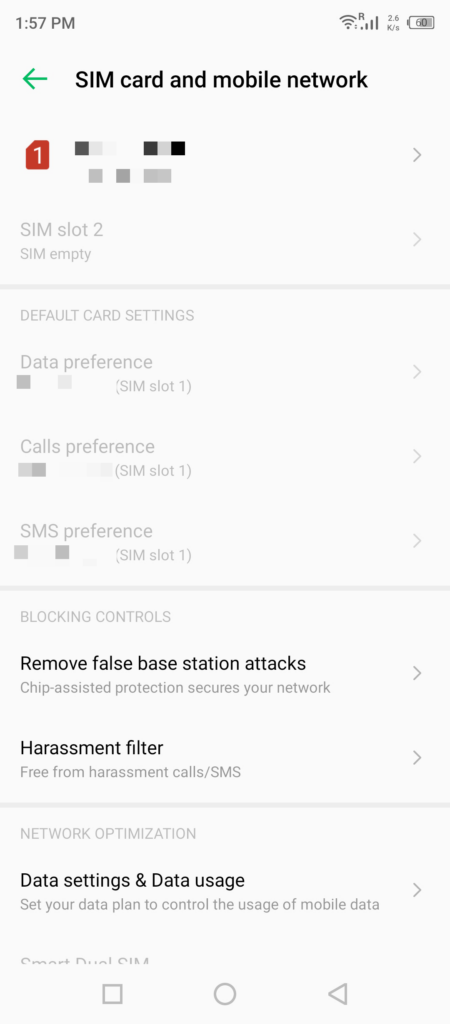
2. Choose “Sim card and mobile network” from the options.
3. Tap to reveal the SIM card options.
4. Tap “Preferred network type” to reveal more options.
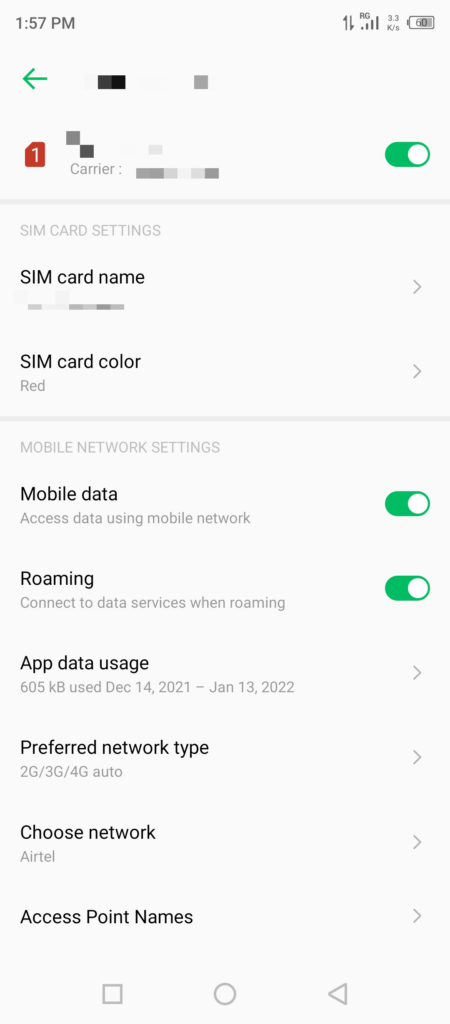
Note: Turn on roaming, if possible.
5. Choose the 4G or 5G manually.
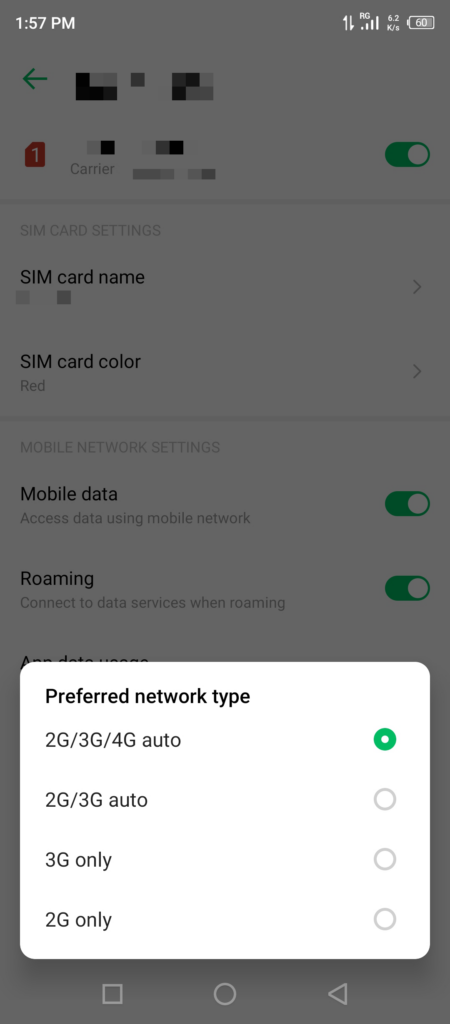
Unfortunately, the XOS software developer didn’t allow me to manually select the cellular option. The situation may not be the same for your smartphone software developer, so you can focus on applying the solutions.
Disable Third-party Cleaners
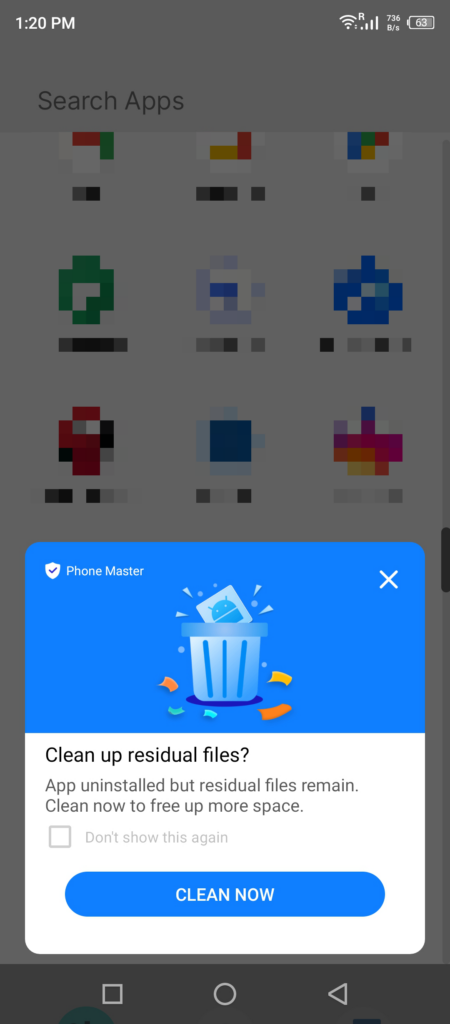
Manufacturers boast about the specification sheet and try to sell the product to potential prospects. The Android software comes with pre-installed cleaners, and I don’t see a reason why they exist in the device. Uninstall or disable the third-party cleaners because they might be affecting the device instead. We don’t know the true purpose of the irrelevant Chinese cleaning apps, so I’m asking you to disable them.
Turn Off Additional Features
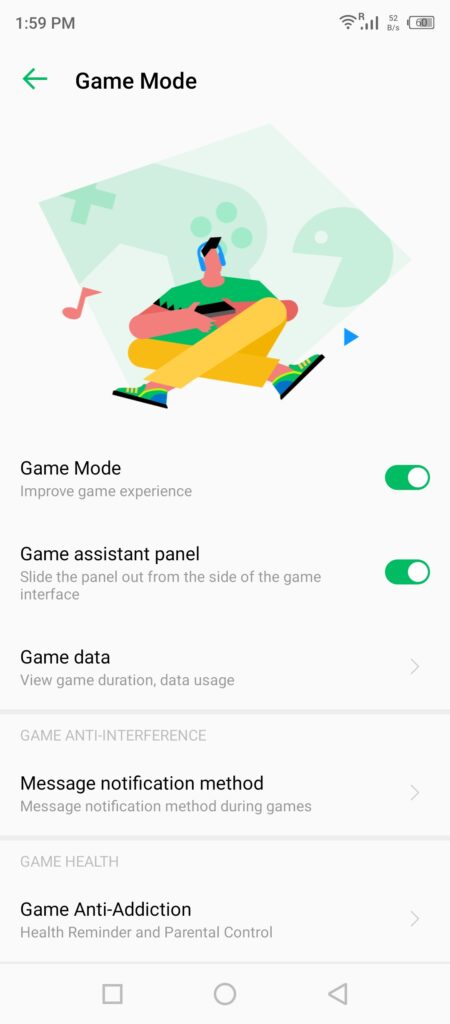
Android custom user interface designed to give you a different experience from the competition. Or at least the brands are selling advertisements, pop-up notifications, and display advertisements in the device with the custom skin on the Android base. Many manufacturers are adding intuitive features and it makes the users feel different from the competition.
Turn off the additional features in the Android device, and it could be anything, so I will let you figure it out. I will give you an example, and it is becoming a trend in the market right now. There is an advanced feature introduced in every Android device, and it’s called “Gaming Mode”.
The game mode restricts background internet usage by the other apps. You may have minimized a game in the background, but the gaming mode is conserving the battery, internet, and other functions in the device.
Grant Google Photos Permissions
Why do you think Google Photos want from you? They want permission to access your photos, images, screenshots, etc. The Mountain View-based search giant wants to take a peek into your library. You have to grant permission for the app to access the internal storage or library and close the Photos app from the background.
1. Open “Settings” from the menu.
2. Swipe down and tap “App management” from the setting.
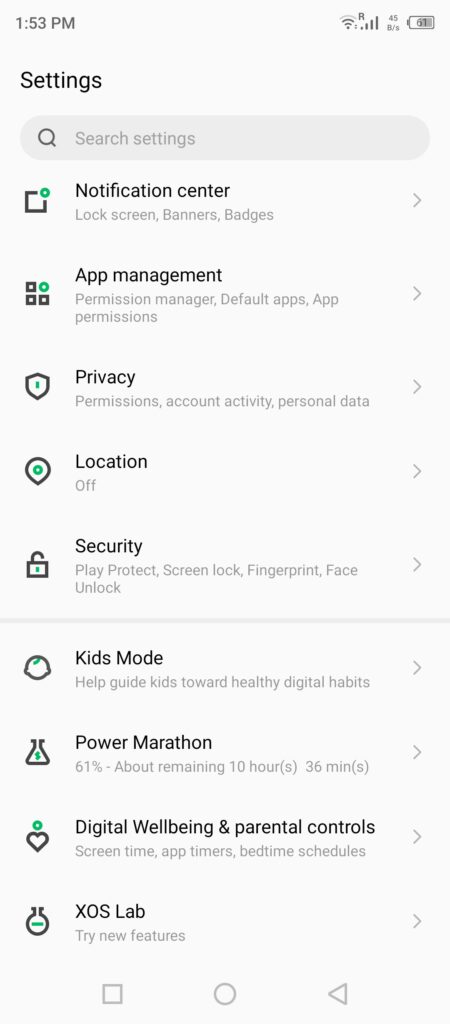
3. Tap “App settings” from the options.
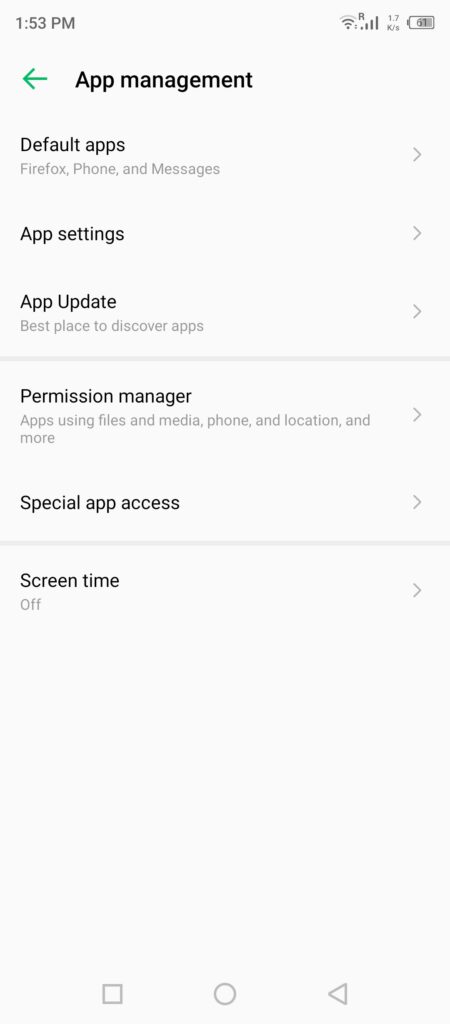
4. Swipe down and open the “Photos” app.
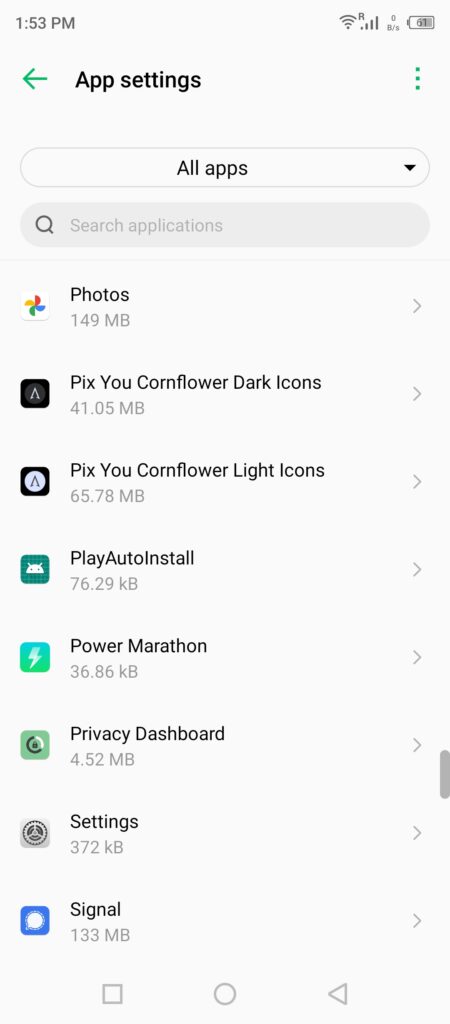
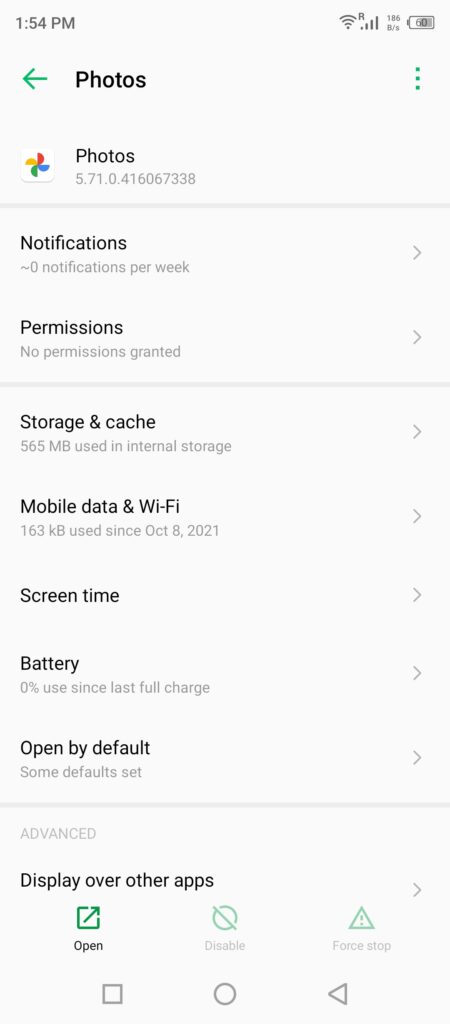
5. Tap “Permissions” from the list.
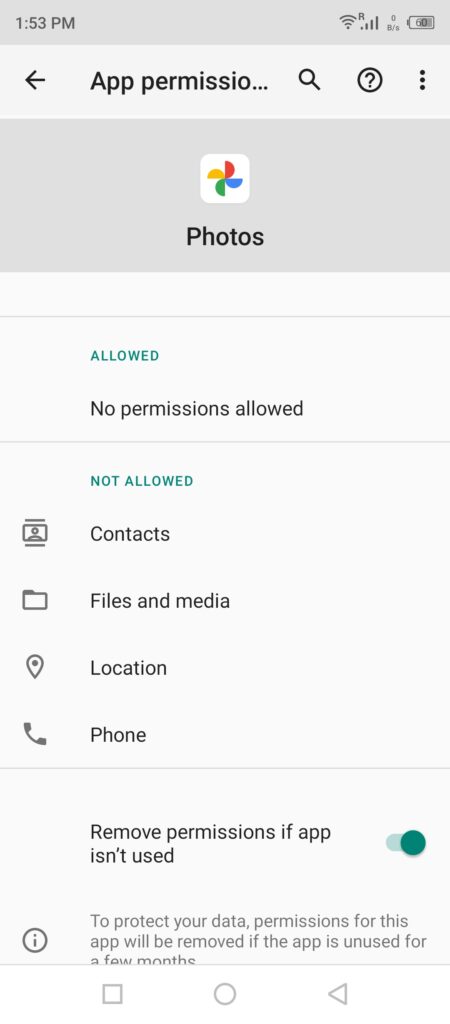
6. Tap “Files and media” under the “not allowed” section.
7. Tap the “Allow access to media only” option.
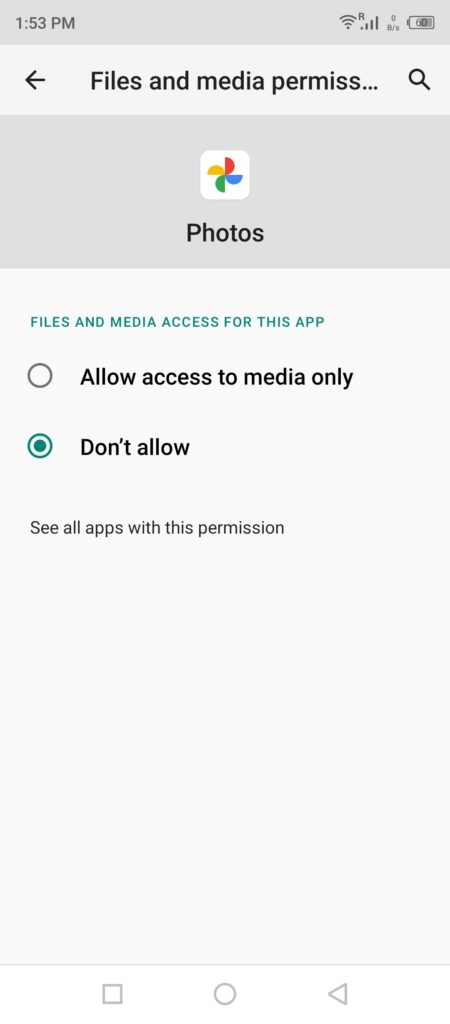
8. You have successfully allowed the app to access the internal storage/library.
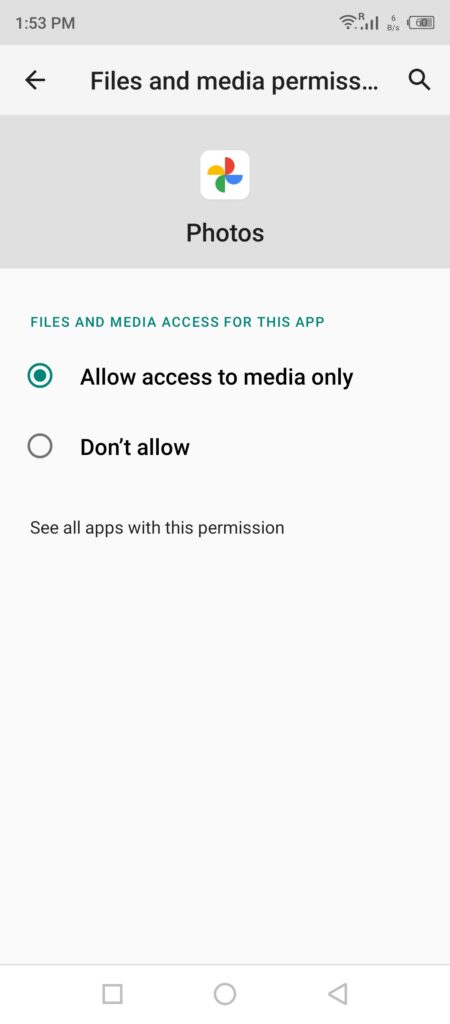
You can revoke the permission anytime, but the app won’t work properly next time. Make sure to close the Photos app from the background, then apply the solution.
Clear Google Photos Cache
Have you ever heard about Android junk? Yes, your device piled up lots of caches and unwanted junk in the internal storage. Remove junk from the Google Photos app in the device, and it may resolve the issue.
1. Open “Settings” from the menu.
2. Swipe down and tap “App management” from the setting.
3. Tap “App settings” from the options.
4. Swipe down and open the “Photos” app.
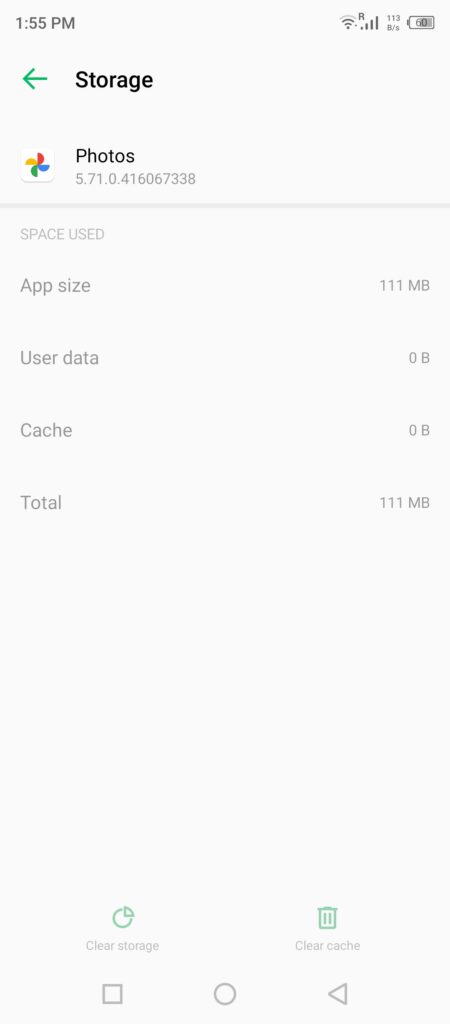
5. Tap “Storage & cache” from the list.
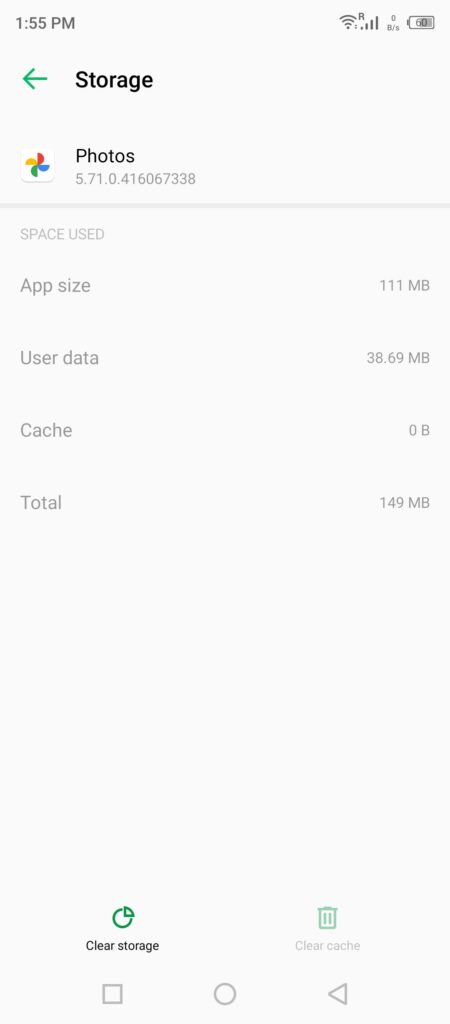
6. Tap the “Clear cache” button located at the bottom.
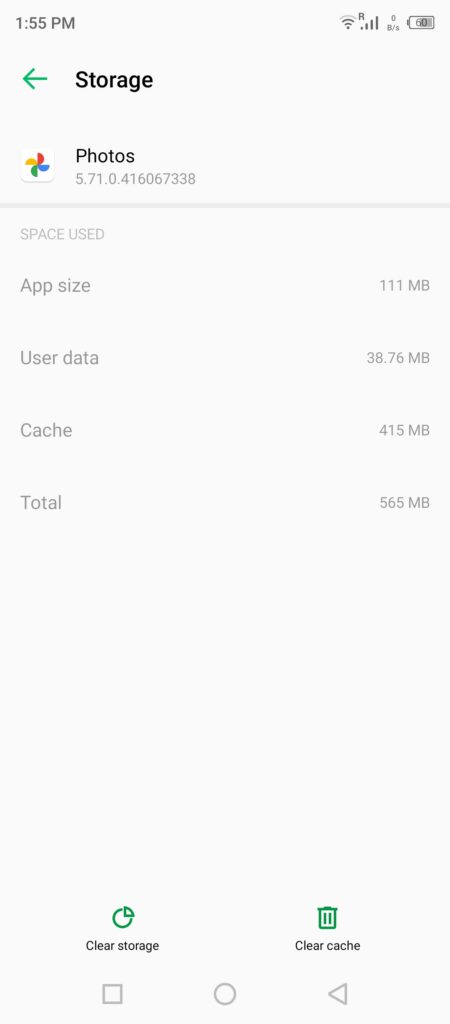
7. Tap the “Clear storage” option at the bottom.
8. Tap “Delete” to clear storage and remove Photos app data in the internal storage.
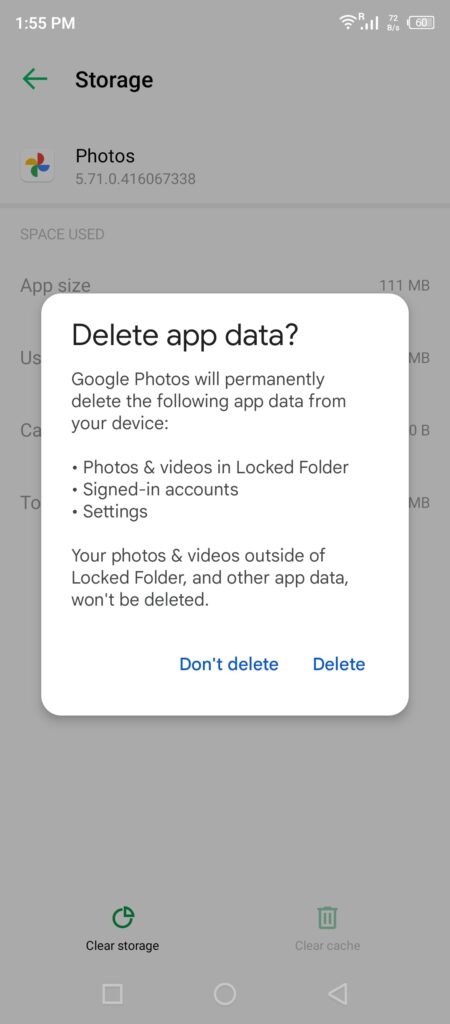
Note: Clearing the storage doesn’t affect other apps and stored data in the smartphone. Google
Photos data will be removed permanently, and it will force the app from restoring it to the device.
9. Google Photos saved data is removed from the internal storage.
10. Launch the app and choose the option again.
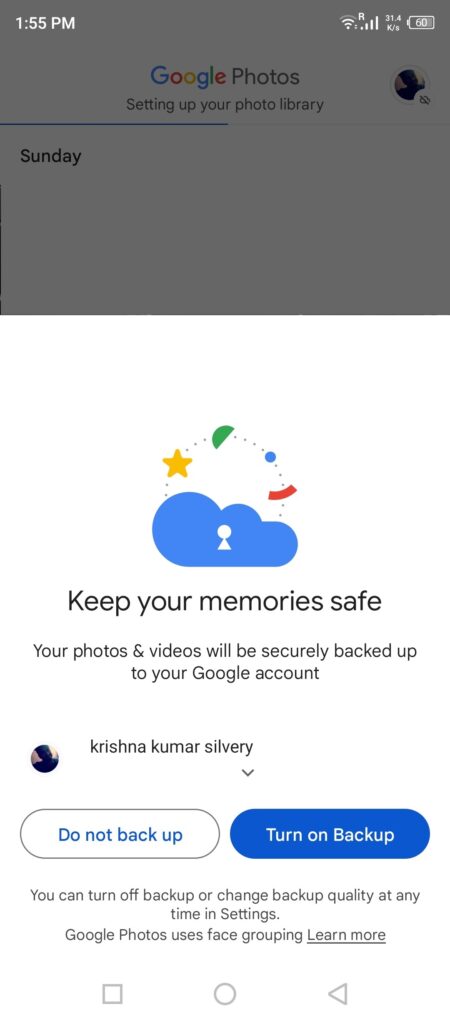
11. The “Setting up your photos library” shows up again.
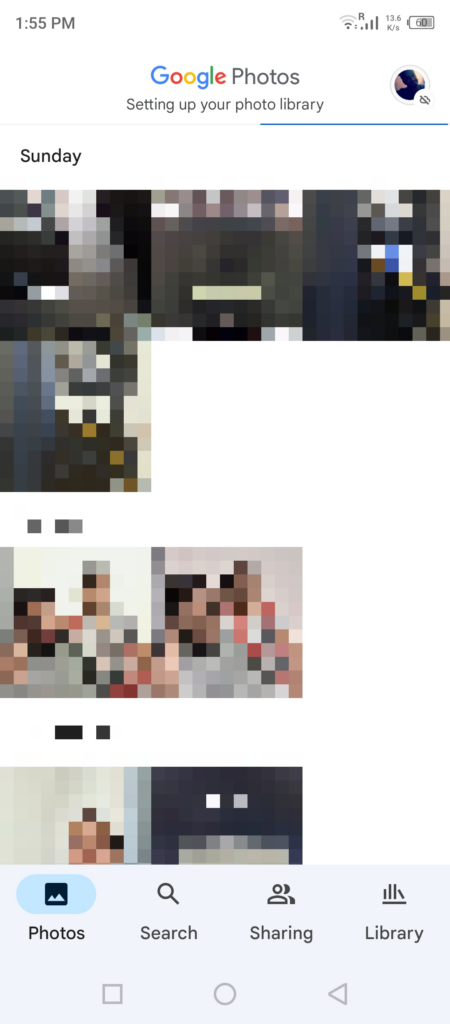
I have 1GB worth of photos in Google Photos and it will be saved in the device in a few minutes. Your internet or broadband download speed matters here, so be patient throughout the download process.
Uninstall Google Photos Update
Google Photos is pre-installed on many Android devices, and you don’t have an option to uninstall it permanently. It’s a shame that Google doesn’t give an “uninstall” option from the device. However, you can uninstall the recent update from the Android device, and let me show you how to do it.
Close the Photos app from the background, so it doesn’t mess up the major changes.
1. Open Google Play Store and open Google Photos from the search results.
2. Tap the “Uninstall” button.
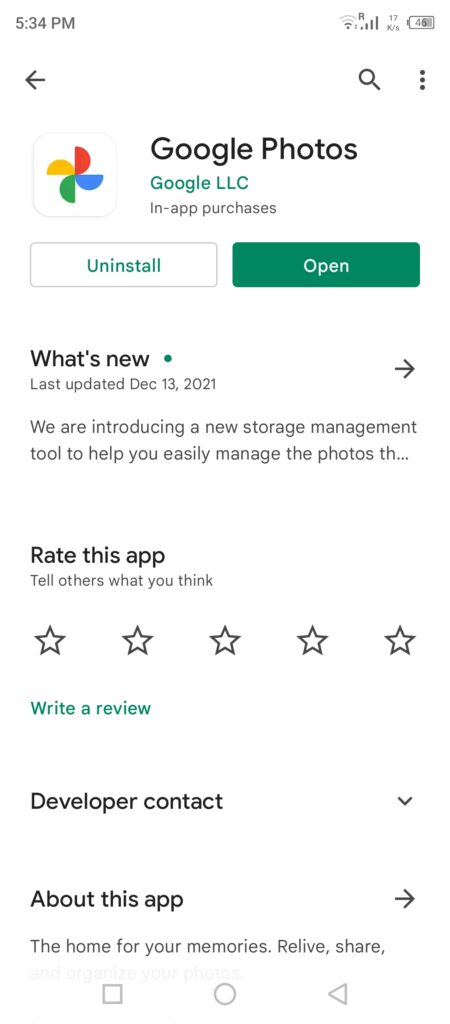
3. Tap the “Uninstall” option in the confirmation dialog.
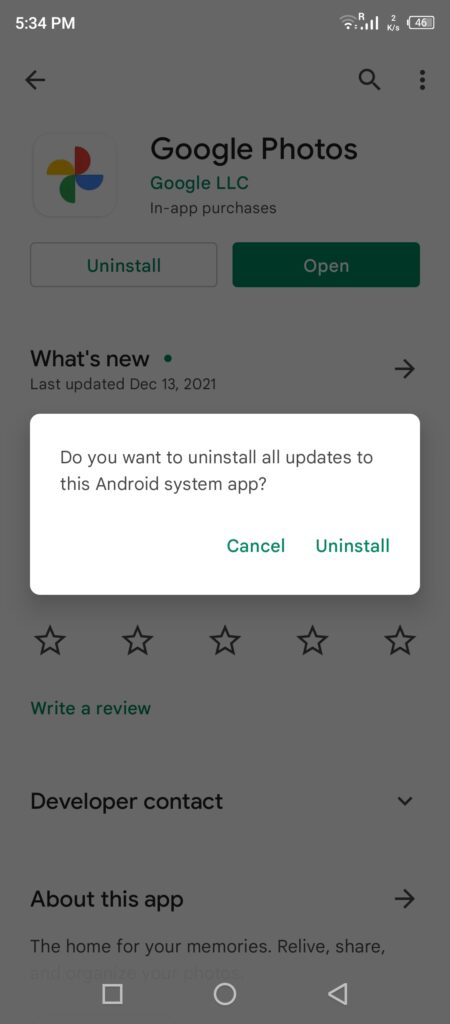
4. You have uninstalled the recent update, and that should fix Google Photos Stuck on Setting up your Photo Library.
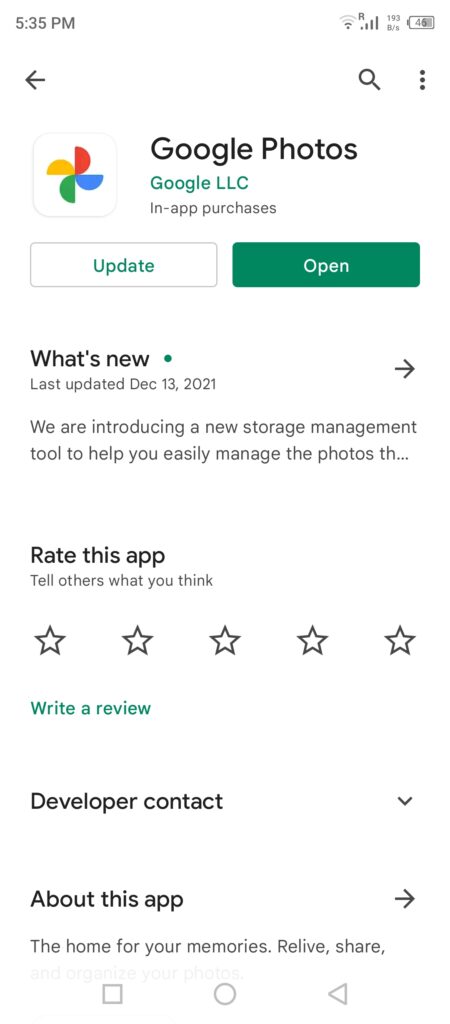
5. Open Photos app.
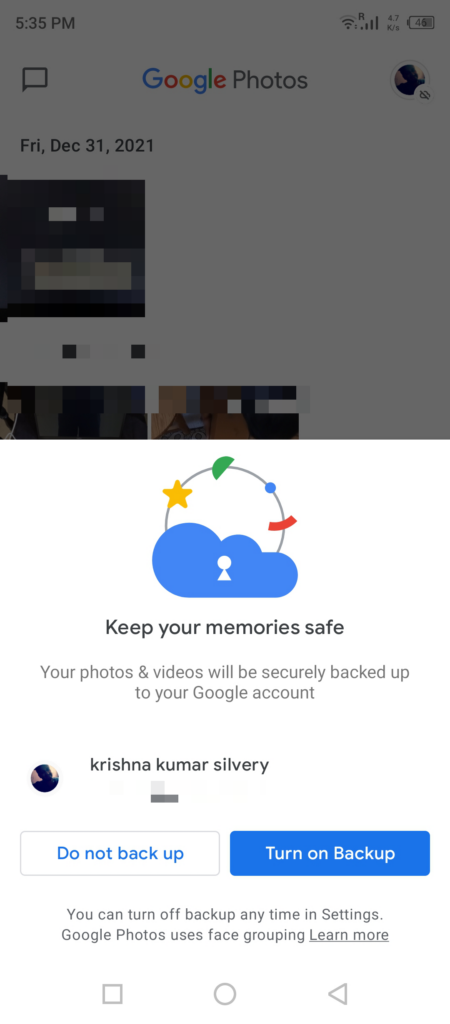
Repeat the same task multiple times until the problem doesn’t resolve, and you can always update the package on the device.
Bottom Line
Resetting the Android phone is the last resort to fix Google Photos Stuck on Setting up your Photo Library. Create a data backup in the local storage, so you don’t have to take a blow from the cloud storage and its limitations. I prefer to move the data in the SD card or USB-C flash drive, and you can move the data in the Windows PC if you own one. Let us know how you solved Google Photos Stuck on Setting up your Photo Library issue in the comment section below.
