Flashing a Samsung device with the help of the Odin tool is pretty easy. It lets the user update to the latest available software. When you open the Odin tool on your computer, you must have noticed a feature called ‘NAND Erase’ or ‘NAND Erase All’. So what is it? Well, here we will be discussing everything you need to know about the NAND Erase feature in Odin and if it is useful or not. We will also answer a lot of questions including if you should enable it before flashing with a phone with any firmware or not? What to do if the feature is enabled accidentally before flashing?. Check out this blog post to know-it-all including the re-partition and how to install Samsung firmware with Nand Erase enabled.
What is Odin NAND Erase?
To simplify it, if you have ever installed a custom ROM or mod in your Samsung or any Android smartphone, you must be knowing Nandroid Backup which is offered by TWRP custom recovery.
Here, Nandroid Backup takes an exact mirror copy of your device which includes everything stored on your device including the Android OS the exact copy of various sections and partitions that EFA, cache, data, system, recovery, boot, kernel and others. Here, once you have removed all these partitions on your phone, you are left with nothing but a phone that won’t turn on and thus, you need to install stock firmware to do it.
Note that you can perform a NAND erase on your device but it will turn on and therefore, you will still a firmware to install. You can use Odin to install and firmware sourced from another tool called Frija firmware download tool.
When you perform a flash without NAND clean, you encounter certain problems. Since Samsung has a different firmware build for each model based on country, downloading the right firmware is crucial since a ROM used in country ‘X’ will encounter problems if you install it in the country ‘Y’. Frija helps find the right ROM for your device and Odin helps in flashing the device with the NAND Erase feature.
Should You Select Re-Partition in Odin?
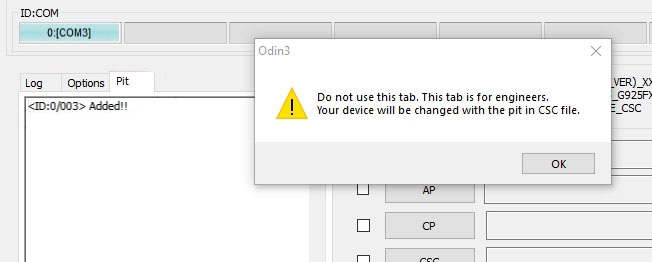
The answer is it depends. If you are performing a standard firmware, you don’t have to perform re-partitioning. When it comes to Samsung’s firmware, the PIT (Partition Information Table) file is stored under the CSC file. When you click on the PIT tab on the Odin tool, you will get the said warning that says “Do not use this tab. This tab is for engineers. Your device will be changed with the pit in CSC file”.
To simply it, if your phone has 512GB of storage. However, if you install a stock firmware with the wrong PIT file of 256GB, your phone will be flashed with 256GB storage and the rest of the memory will be corrupted. Here, re-partitioning could solve the problem where you download the right firmware with the right PIT according to your phone and use the same flashing method as you would on Odin to install the firmware and rectify the issue. Also, go to the PIT tab on Odin to enable it when adding the right PIT file so that the whole process is complete without any glitch.
Requirements
- USB Cable
- Windows PC with XP/ 7 / 8 /10
- Samsung Driver must be installed on your computer
- WinRAR or 7Zip
Installing Firmware with Odin NAND Erase Enabled
At times your Samsung smartphone might not boot after installing a stock firmware which is when a factory reset can fix the problem. Here, if you need to access the factory reset feature, you need to enter the recovery mode. In case if you are unable to go to the recovery mode, a swift NAND Erase option is a great way to fix this and in fact, many such issues on your device. It also fixes issues like if IMEI is not showing or the device isn’t working properly.
I have simplified the method by adding steps to follow in a neat and tidy manner that you need to follow.
Step 01: Download Odin tool and firmware from Frija
- First of all, you need to download the Odin tool on your PC so check the compatibility and download accordingly.
- Next, you need to use the Frija Firmware download tool to get the official firmware for your Samsung phone or tablet based on your model and region and other specifics if required.
- Once you have downloaded the firmware, you need to download Samsung USB Drivers on your computer too that will help obtain connection of the PC with the device and also enable USB debugging on your smartphone.
- Next, you need to download the appropriate PIT file for your Samsung smartphone or skip if you don’t know or have the PIT file yet.
Step 02: Wipe out the phone
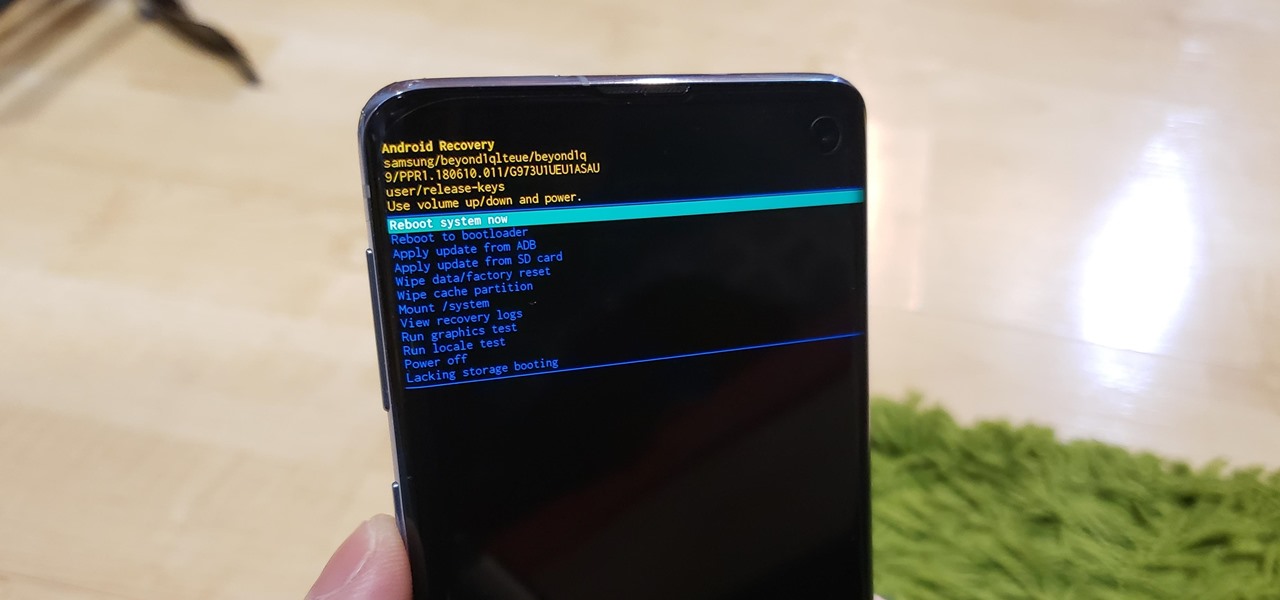
- Now, you need to access the recovery mode on your phone which you can do using this method.
- Hold Volume Up + Bixby + Power button for a few seconds until the recovery mode is accessed for flagship smartphones.
- Hold Volume Up + Volume Down + Power button to access recovery mode on midrange devices.
- The next step is to proceed to ‘Wipe Data/Factory Reset’ using volume rocker and tap the power button to select the option and tap on ‘Yes’ so that the phone will get wiped and then, turn off the phone.
- Now you need to turn on the phone in Odin or Download Mode.
Step 03: Installing the Odin tool on your PC
- You need to extract the downloaded Odin file.
- Run “Odin3 v***.eve” that should install the software on your PC.
Step 04: Flashing the device with NAND Erase enabled
- Next is to connect the phone and the computer using a USB cable.
Odin tool on your PC will auto-detect the phone and ID: COM port highlights on the screen that shows the device is not connected. - Next up, you need to extract the Firmware file that you downloaded and open the firmware folder, click on PDA or AP button on the Odin tool and add “.tar.md5” extension to it.
- Note that there could be multiple-file firmware with files like AP, BL, CSC, .PIT, etc as well where you need to browse the firmware folder to find the file and ensure that “.tar.md5” is added as an extension if not already added.
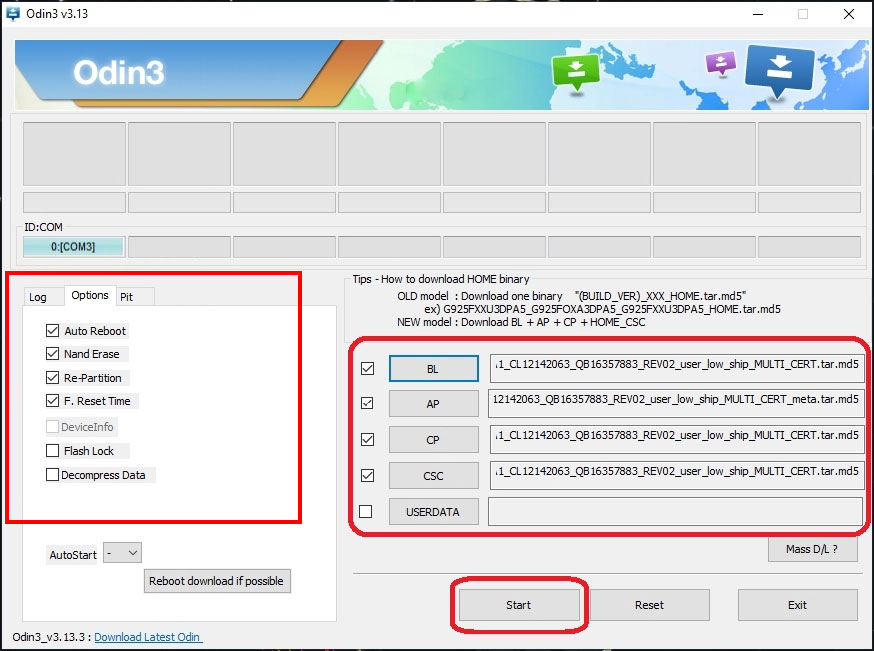
- Finally, on the left side of the Odin tool, you should see an Options tab where you need to tick ‘Auto Reboot’, ‘Nand Erase’, ‘F. Reset Time’ options.
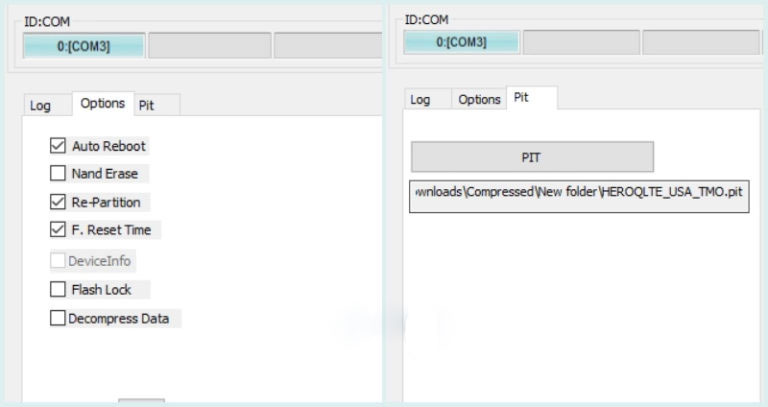
- You need to tick ‘Re-Partition’ to enable it and browse the proper.PIT file in the firmware you just extracted and finally, hit on the ‘Start’ button.
- This will begin the flashing process and you should see ‘Erasing NAND’ process going by in the log box as well.
Finally, reboot your Samsung smartphone and it is done.
I hope this guide on NAND Erase Samsung Devices in Odin Tool and other supporting details do help you to flash ROM with NAND Erase.
Discussion
1 CommentI installed firmware SM-A515F EUR from sammobile but is still Service provider ver. in SER
how to fix this?