In an increasingly connected world, internet privacy and access to unrestricted information have become paramount. This is where configuring a proxy on your Android device can be immensely beneficial. Whether you’re aiming to bypass geo-restrictions, enhance security, or simply speed up your connection, setting up a proxy is a straightforward process.
Page Contents
Understanding Proxies and Their Importance

A proxy server acts as an intermediary between your device and the internet. It can help you mask your IP address, access region-locked content, and improve online privacy. Particularly, residential proxies are known for their legitimacy and reliability. They use IP addresses attached to physical locations, making them less likely to be flagged by websites compared to datacenter proxies.
Why You Might Need a Proxy
The reasons for using a proxy on an Android device vary. You might be looking to access content that’s not available in your region, improve your online privacy, or even do some secure browsing in a public Wi-Fi network. In certain cases, particularly for professionals who handle sensitive data, a proxy is an essential tool for maintaining security.
Step-by-Step Configuration Guide
Configuring a proxy on your Android device is easier than you might think. In this step-by-step guide, we’ll walk you through the process to ensure your online activities are secure and unrestricted. Whether you’re a beginner or a tech-savvy user, these clear instructions will make the setup a breeze.
Step 1: Choose the Right Proxy
Before you start, you’ll need to choose a proxy. For Android devices, it’s recommended to buy residential proxies due to their stability and lower risk of being blocked. Once you have your proxy details, including the server address, port number, username, and password, you’re ready to set it up on your device.
Note: Some of the steps below can be different, depending on the device and Android version you have.
Step 2: Accessing Your Android Device’s Wi-Fi Settings
- Open your Android device’s Settings app.
- Tap on ‘Wi-Fi’ to see the available networks.
- Long-press the Wi-Fi network you’re connected to, and tap on ‘Modify Network’.
- On some devices, you might need to tap on ‘Advanced options’.
Step 3: Setting Up the Proxy
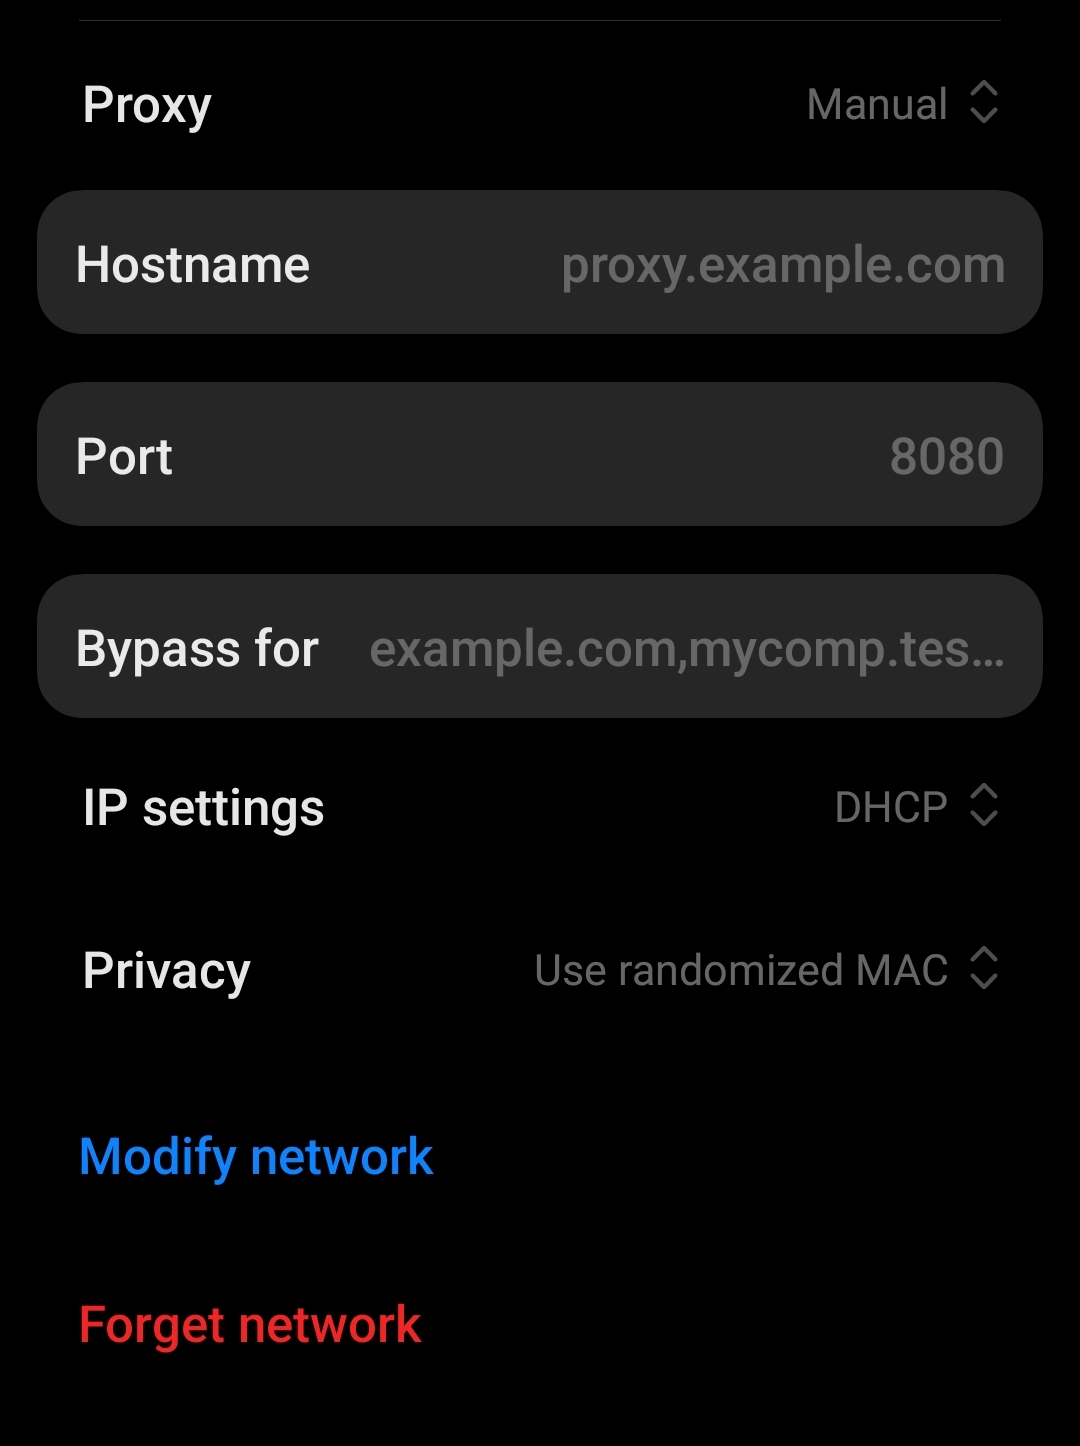
- Scroll down to the ‘Proxy’ settings and select ‘Manual’.

- Enter the proxy server’s IP address in the ‘Proxy hostname’ field.
- Enter the port number in the ‘Proxy port’ field.
- If your proxy requires a username and password, enter these details as well.
- Once you have entered all the necessary information, tap ‘Save’.
Step 4: Verifying the Proxy Connection
After setting up the proxy, it’s crucial to verify that it’s working correctly:
- Open your web browser and visit any website.
- If the website loads without issues, your proxy setup is likely successful.
- For a more thorough check, you can visit a site like ‘WhatIsMyIPAddress.com’ to confirm that your IP address has changed to that of the proxy server.
Troubleshooting Common Issues
If you encounter problems, consider these troubleshooting steps:
- Double-check the proxy settings you entered for accuracy.
- Restart your Wi-Fi connection by turning it off and then back on.
- If possible, try a different proxy server to determine if the issue is with the server.
Conclusion
Setting up a proxy on your Android device can open up a new realm of internet accessibility and security. It’s a simple yet effective way to enhance your online experience, especially when using a reliable residential proxy. By following these steps, you can ensure a seamless setup and enjoy the benefits of a proxy on your Android device.
