The Raspberry Pi smart mirror is a futuristic digital mirror which displays a wide array of information ranging from the time and date, to the weather, selected news headlines, scheduled appointments, and so on. While smart mirrors are not an exclusive reserve of Raspberry Pi, they are made considerably cheaper when you use the low-cost hacker-friendly Raspberry Pi.
The Raspberry Pi is a miniature computer that runs on the Linux operating system, kept alive by a large community of developers. In this article, we will show you how you can build your own personalized smart mirror from scratch using the innovative cheaply-available Raspberry Pi software.
Building Your Own Raspberry Pi 4 Smart Mirror
Building your own Raspberry Pi 4 smart mirror is a relatively easy and straightforward process. Follow the instructions below if you would like to know how to make a Raspberry Pi 4 smart mirror.
Step One – Gather Required Tools
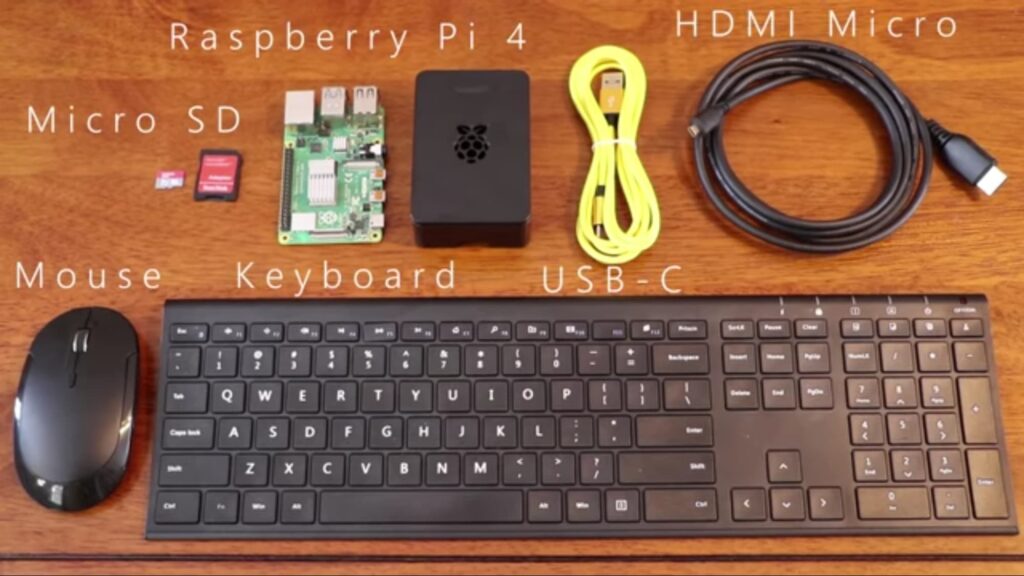
To build our own Raspberry Pi-based smart mirror, you will need the following tools:
- An LCD Monitor
- A USB Type C Cord
- A Micro SD Card and an Adaptor
- A Raspberry Pi
- A Raspberry Pi Case (Optional)
- A Micro HDMI Cable
- A Keyboard
- A Mouse
Step Two – Download Required Files & Software Programs
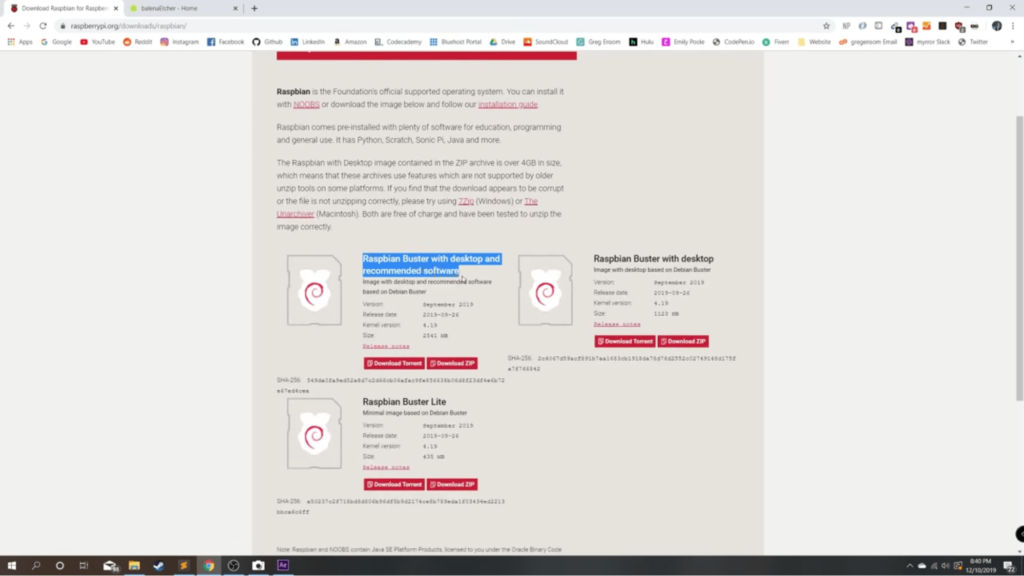
Go online and log on to raspberrypi.org, navigate to the downloads page and choose the Raspbian operating system. Select the “Raspbian Buster with desktop and recommended software” option, and click the “Download ZIP” button.
Next, log on to balena.io/etcher and select the option to download for your particular operating system (Windows, Mac, or Linux).
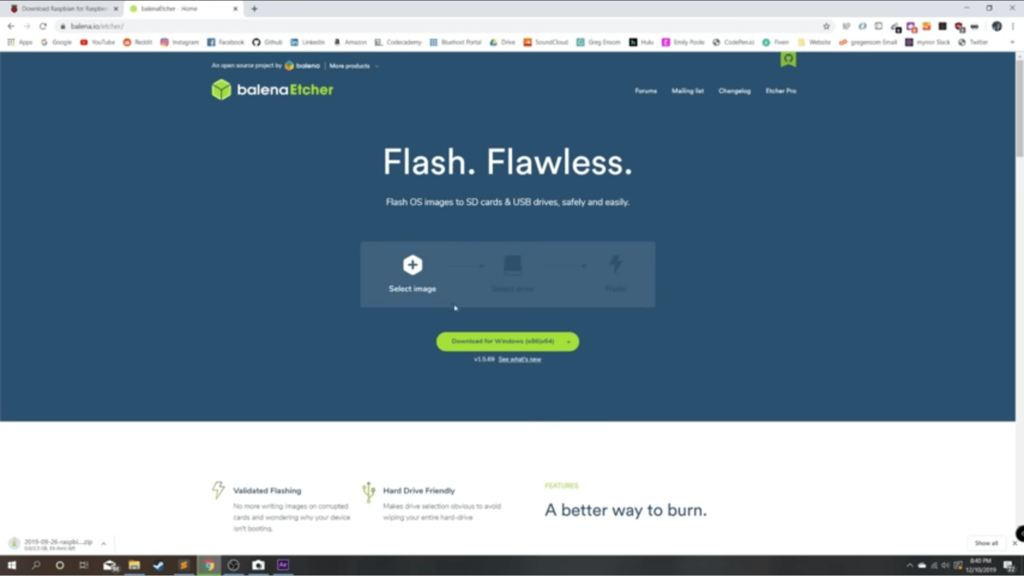
When both documents have finished downloading, open the BalenaEtcher app and set up the program. Next, go back to your downloads folder and select the earlier downloaded image which is named “Raspbian-buster-full”. Open it and select your target as the Micro SD Card, and select “flash”.
When the process is complete, eject your SD card from your PC, remove it and place it in the micro SD card slot in the Raspberry Pi.
Step Three – Setup Necessary Connections
Plug your micro HDMI cable as well as your USB Type C cord into the available ports on the Raspberry Pi. Take the other end of the USB Type C cord and insert it into a wall adaptor and plug it into a power source (usually about 120 volts). When you finish setting up these connections, connect the other end of your Micro HDMI cable to a display source, such as an LCD monitor or any other type of screen available to you.
Step Four – Ready your Raspberry Pi
Power up your display or monitor and you should be met with a welcome screen. Click the “Next” button and you will be asked to provide information regarding your country, your language, and your time zone. Make sure you answer these questions accurately because the Raspberry Pi smartwatch won’t function properly if these pieces of information aren’t provided accurately.
On the next page, you would be asked to create a new password. You may choose to leave it as it is, but instead, we recommend you create a new password – one that is easy enough for you to have no trouble recalling, but also difficult enough to keep your account secured from unwanted parties. When you have set up a satisfying password, click the “Next” button.
On the next page, you would see a checkbox next to a message which reads “This screen shows a black border around the desktop.” We recommend you check that checkbox and hit the Next” button again.
On the following page, you would be asked to set up your Wi-Fi network. Do that if you haven’t done so already before this point. Click “Next” when you are done setting up your Wi-Fi network.
On the next page, you would be asked to update your software. This is only optional and you are not mandated to do so. You choose to skip this step if you want to. However, if you decide to update the software, it would take about ten minutes to do so, depending on your internet connection speed.
After all these steps have been done, the next page will show you a “Setup Complete” message and then you can click the “Restart” button to restart the Raspberry Pi.
Step Five – Couple it all Together
This is the final step in the entire process of setting up your Raspberry Pi 4 smart mirror. Here, you are expected to open up your browser and type “MagicMirror” (no whitespace, please) in the Google search bar. The first link you would see when the results are loaded should be magicmirror.builders. Click this link and on the MagicMirror main page, navigate to the “Easy to Install” header under which there is a written command which you are to run in the Raspberry Pi. Highlight and copy this command, minimize your browser window, then open the Raspberry Pi terminal and paste the command in it and press the “enter” key on your keyboard.
This would begin the MagicMirror installation process, which should take a little less than ten minutes, depending on the strength and the speed of your internet connection. About three or four minutes into the installation process, you would receive a prompt asking you whether or not you want to “use PM2 for the auto-starting of your MagicMirror.” Press the “y” key on your keyboard for yes and this would enable PM2 auto-starting for your MagicMirror software. If you do not want this, press “no” for no to disable PM2 auto-starting.
It’ll continue the installation process and then prompt you again asking if you would like to disable the screensaver. Once again, press “y” or “n” for yes or no, depending on your preference, and then press enter.
Then, just wait a few seconds and voila, you are done! The MagicMirror software would be auto booted on to your display screen and you are all set. To increase the size of the text on your display screen, press the “Ctrl” + “Shift” + “+” keys on your keyboard, and to reduce the size of the text on your display screen, press “Ctrl” + “Shift” + “-“ keys on your keyboard. This would allow you to adjust your text size to be optimized with whatever screen size you are using to display your Raspberry Pi 4 magic mirror.
If these steps have been useful in helping you set up your very own Raspberry Pi 4 smart mirror, let us know what you think about this wonderful piece of “magical” technology in the comments section below. We would also like to hear you share your stories on what you do with your smart mirror, your favourite features, and what as yet unavailable features you would like to see in the Raspberry Pi 4 smart mirror in the nearest future.