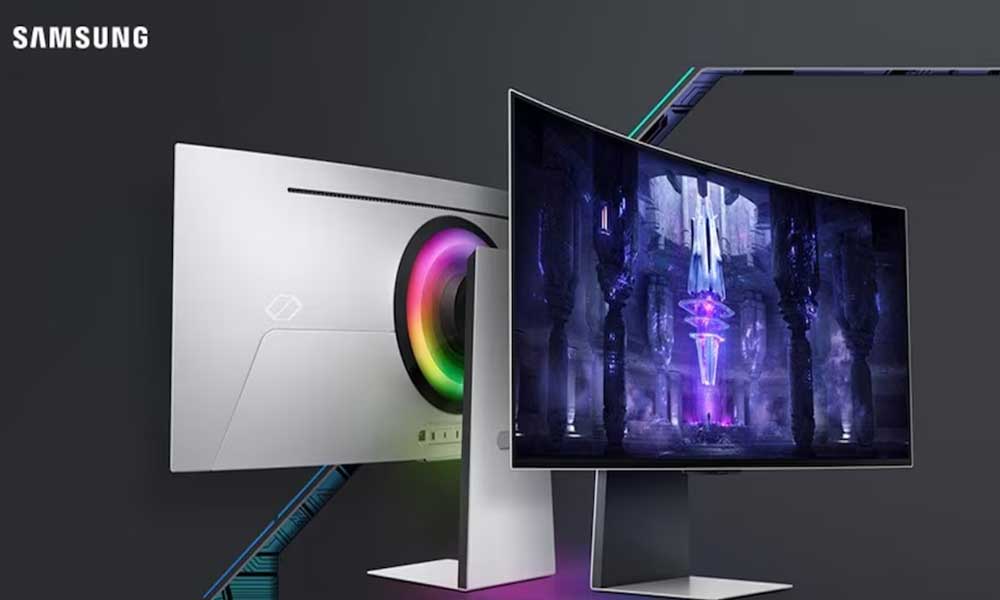
Samsung is known for its great lineup of display monitors including gaming monitors like Odyssey where the quality and precision meet the expectations. However, some issues are present in the Samsung Odyssey monitors regarding the display and signal connectivity out of the box. Affected users are quite worried about such issues for example; the Samsung Odyssey Monitor No Signal HDMI issue that appears a lot out of nowhere. Now, if you’re also facing such an issue then don’t worry.
As per multiple reports, several Odyssey monitor users are experiencing the not detecting HDMI connection issue (No Signal) even though the monitor is turned on. This isn’t a new issue to the monitors irrespective of the brands. Some recommendations surfaced online regarding addressing the issue specifically. It seems some workarounds are useful enough to fix the HDMI detection issue among the Samsung Odyssey monitors that you’ll need to know.

Page Contents
- Fix: Samsung Odyssey Monitor No Signal HDMI
- 1. Restart the Monitor and PC
- 2. Check the HDMI Cable Connectivity
- 3. Ensure the HDMI Cable isn’t Physically Damaged
- 4. Check the Correct HDMI Port
- 5. Try Using Another HDMI Cable
- 6. Reset the HDMI Connection to the Monitor
- 7. Set the Correct Input
- 8. Update the Graphics Driver
- 9. Adjust the Monitor Resolution Settings
- 10. Change the Display Monitor
- 11. Ensure the HDMI Cable is Connected to the Graphics Card
- 12. Try Reinserting the RAM Sticks
- 13. Reset CMOS or BIOS on the Motherboard
- 14. Request for Repair or Replacement Service
Fix: Samsung Odyssey Monitor No Signal HDMI
Fortunately, here we’ve shared with you some troubleshooting methods that should come in handy. Make sure to follow all workarounds until the problem has been fixed. Now, without further ado, let’s jump into it.
1. Restart the Monitor and PC
The first thing you can do is reboot the Samsung Odyssey monitor and the computer manually to ensure there is no issue with the HDMI connectivity. Sometimes conflicts with the display glitch or the system cache can also trouble you a lot.
2. Check the HDMI Cable Connectivity
You should try checking out the HDMI cable connectivity with your PC and the Samsung Odyssey monitor because the physical connection can trigger multiple issues. Any kind of loose or wobbly cable connection may cause issues with the no signal HDMI warning on the screen.
3. Ensure the HDMI Cable isn’t Physically Damaged
Ensure to check the HDMI cable whether it’s physically damaged or not. Any kind of physical damage or the torn condition of the cable may trigger multiple issues. In case, the cable is in poor condition then get it repaired or buy a new one which should be compatible with the Samsung Odyssey monitor.
4. Check the Correct HDMI Port
Another thing you should do is check out the correct HDMI port on the Samsung Odyssey monitor as well as the computer to properly connect the HDMI cable at both ends. Any kind of conflict with the HDMI port or incorrect display port might trouble you a lot.
5. Try Using Another HDMI Cable
You can also try using another HDMI cable to cross-check the issue. Sometimes it’s better to use a new HDMI cable to make it more suitable. If you’ve another HDMI cable then try using the same to check for the problem further.
6. Reset the HDMI Connection to the Monitor
You can try resetting the HDMI connection to the monitor by turning off the monitor and then unplugging the HDMI cable from the monitor. Next, press the Power button on the Samsung Odyssey Monitor for around 15-30 seconds. Then reconnect the HDMI cable again and turn on the monitor to check for the issue. If the Samsung monitor has no signal HDMI screen, check the input source properly.
7. Set the Correct Input
Try using the correct display input to the computer as well as the monitor to ensure there is no issue with the input. Sometimes loose connectivity can also trigger monitor not turning on issues.
8. Update the Graphics Driver
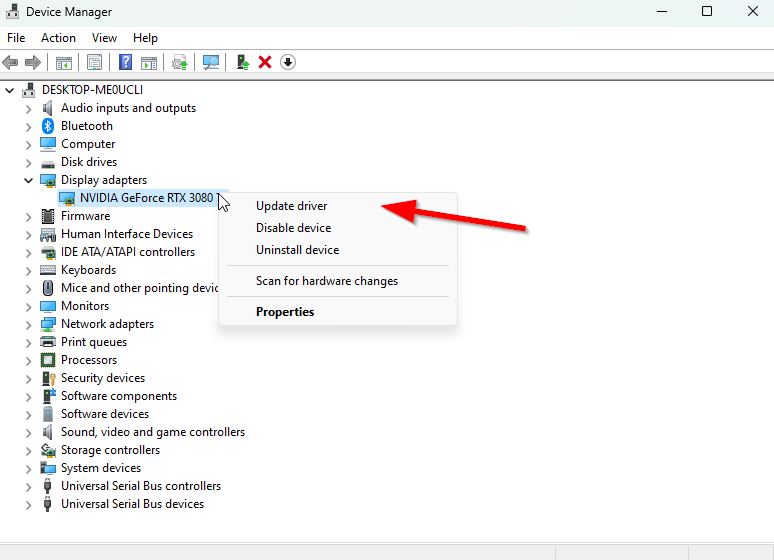
An outdated graphics driver on the Windows computer may trigger display-related glitches or monitor connectivity conflicts to some extent. It’s better to manually update the graphics driver on your PC by following the steps below.
- Press the Win+X keys to open the Quick Link Menu.
- Click on Device Manager from the list.
- Now, double-click on the Display Adapters.

- Right-click on the dedicated graphics card.
- Select Update driver > Choose Search automatically for drivers.
- If there is an update available, it’ll automatically download and install the latest version.
- Once done, reboot your computer to change the effects.
Alternatively, you can manually download the latest version of the graphics driver and install it directly from the official website respective to your graphics card manufacturer as follows.
9. Adjust the Monitor Resolution Settings
You should also check for the accurate display resolution and scaling on the Windows PC manually to make sure the basic configuration is set up properly. To do so:
- Press the Win+I keys to open Windows Settings.
- Click on System from the left pane.
- Now, click on Display > You can find the Scale option.
- Click on the drop-down menu and select 100% (Recommended).
- Next, choose the correct Display Resolution on the PC.
Please Note: You can also make sure to set the default 60Hz refresh rate to avoid display-related glitches from the Advanced Display section.
10. Change the Display Monitor
Make sure to change the connected display device manually on the PC settings menu by following the steps below. Mostly the Windows system might not gonna detect external display devices automatically. To do that:
- Press the Win+I keys to open Windows Settings.
- Click on System from the left pane > Click on Display.
- Now, click on Advanced Display > Select the specific display device from the drop-down menu.
- Once done, check for the monitor’s no-signal HDMI issue again.
11. Ensure the HDMI Cable is Connected to the Graphics Card
The chances are high that somehow the HDMI cable isn’t connected to the external graphics card and it has been connected to the motherboard’s HDMI port instead. In that case, if your processor doesn’t have the integrated graphics card to display the screen then you may encounter the same issue. Make sure to connect the HDMI cable of the monitor to the compatible HDMI port of the graphics card. This is a simple thing that plenty of first-time users might mistake.
12. Try Reinserting the RAM Sticks
It’s also suggested to our readers to unplug the RAM sticks from the slot of the motherboard and then reinsert the RAM sticks after gently removing the dirt. Do remember to shut down your computer properly and then unplug the power cable from the computer to avoid any chances of getting electrocuted. This is a basic safe measure that every user should follow. Then gently pull out the RAM sticks > Use a soft cloth or brush to clean the sticks/slots gently > Reinsert the RAM sticks again and make sure they’re fitted properly.
13. Reset CMOS or BIOS on the Motherboard
Make sure to manually reset the CMOS battery or BIOS on your computer depending on which motherboard you’re using. Try to follow the user manual or contact the specific manufacturer of the motherboard support to get better guidance on resetting the CMOS or BIOS which will fix multiple issues with the motherboard-related glitches.
14. Request for Repair or Replacement Service
If none of the above methods didn’t come in handy then you should visit the Samsung Support Center to get it checked by the professionals thoroughly. Next, you can get it repaired or ask for a replacement if your Samsung Odyssey monitor has some manufacturing defects and it’s under warranty claims.
That’s it, guys. We assume this guide was helpful to you. For further queries, you can comment below.
