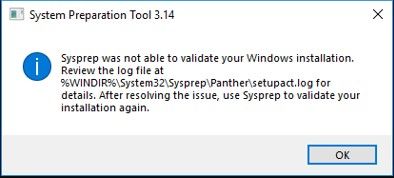
Microsoft Windows is an effective operating system in itself. But still, the Microsoft system preparation tool is developed to enhance the functionality of Windows OS. It is intended to duplicate, test, and deliver the latest installation for Windows OS based on the established installation. Similarly, its audit mode allows you to perform all such actions without entering the welcome screen.
However, while trying to use the audit mode a lot of users have reportedly faced the “Sysprep audit mode can’t be turned on” error. So, today we have brought this article for discussing the fixes for “Sysprep audit mode can’t be turned on” error. Have a look at them below:
Solutions to fix “Sysprep audit mode can’t be turned on” Error

The error “Sysprep audit mode can’t be turned on” may occur for various reasons. Though, mainly if the Windows release has a glitch it may prevent the tool from completing the operations. In such cases the quick fixes you can try are mention below:
Solutions 1- Look for Windows 10 Cumulative update
In case the error “Sysprep audit mode can’t be turned on” is occurring due to the installation kit then you can check for Windows 10 Cumulative update. Once you successfully update the Cumulative, Microsoft will take no longer to fix the error issue.
Cumulative updates are a bundle of multiple updates (both new and previously released). These updates include improvement that enhances the performance of programs and applications on Windows OS. They were natively introduced with Windows 10 but were later added to Windows 8.1 and 7 as well.
For updating Windows 10 cumulative follow the steps given below:
- From the Windows search bar type and locate “Settings”.
- Look for the “Update & security” tab and click to Select.
- Here tap on the icon “Check for updates”. Windows will now search for every latest available update and display into your screen.

- Download every available update to avoid any other error in the coming future. Specifically, look for an Update regarding the audit mode.
- Lastly, Reboot your system to make all the updates functional.
Once done, you can check whether the issue has got solved or persist.
Solutions 2- Pause the Windows 10 update
A running Windows update could also be a reason for the error occurrence in some cases. Here it is better to pause the Windows 10 update for some time. For doing so, follow the steps below:
- Go to “Settings” from the start menu.
- Locate and select “Update and security”.
- Now on the Windows update tab, click on “Pause the update for 7 days”.

Once done, you must again use the System preparation tool and check for any improvements.
Solutions 3- Replace or Exchange the Spopk.dll file
In many cases, users have reportedly admitted that replacing or exchanging the Spopk.dll file has solved the error for them. And if, with the error log, you find the root cause of “Sysprep audit mode can’t be turned on” occurrence, then it is better to quickly fix it.
However, for replacing the Spopk.dll file you will have to exchange it from your system with another Windows 10 computer. Also, before exchanging the file you would require to “take the ownership” of ‘Spopk.dll’ file and “grant the permission for exchange” as well. Once you change the owner you can then use the file in your system.
To take the ownership to follow the steps given below:
- Launch the File Explorer and navigate to the location “C: WindowsSystem32”.
- Now locate the “Spopk.dll” file, and right-click on it to select “Properties”.
- Here you would require to take ownership of the file. For doing so, change the ownership and transfer it to yourself.
- Again, follow the 2nd step- right-click on “Spopk.dll” and select “Properties”.
- Now open the Security tab and select the username you want to permit them to.
- Here on the “Permission for Administrator” table, you will find a list of options.
- From there, tick the “Allow” checkbox located beside “Full control” option.
- Lastly, click on Apply and proceed with selecting the OK button to make the changes applied.
For replacing or exchanging the “Spopk.dll” file, follow the steps given below:
- Firstly, on the new Windows 10 computer, locate and launch “File explorer”.
- Go to the “C: WindowsSystem32” location.
- Now copy the “Spopk.dll” file and then save it on the flash drive.
- In the new Windows 10 system, move the “dll” file to the “C: WindowsSystem32” location.
- A dialogue box will pop up asking you for permission stating, “Replace the file in the destination”. Select it and then proceed further by clicking on OK.
Once successfully replaced, you must restart your system to make the changes applied. You may now run the Syspreparation utility tool and check for improvements.
We have tried listing a few of the most useful, easy, and quick solutions that you can use to get rid of the Sysprep audio off error. All the three ways mentioned in the article above will help you get successfully rid of the “Sysprep audit mode can’t be turned on” error.
Generally, in most cases replacing the “Spopk.dll” file will help. If not, then the last resort is re-installing your entire Windows operating system. However, this situation will arise in the least of cases and we are sure that the methods above will help you. After reading this article if you have any queries or feedback, please write down the comment in the comment box.
