In this tutorial, we will show you how to force 90Hz in every app in Realme X2 Pro. Launched late last year, the device boasts of some pretty impressive features. To being with, it has an octa-core Qualcomm SM8150 Snapdragon 855+ chipset under the hood, with Adreno 640. Furthermore, it comes in three different variants, namely 64GB/6GB RAM, 128GB/8GB RAM, and 256GB/12GB RAM. The quad-camera setup consisting of 64MP+13MP+8MP+2MP also manages to click more than decent images. Likewise, there is an equally impressive 16MP front selfie camera. All these features are supported by a 4000mAh battery which supports 50W fast charging as well. Moreover, the 6.5-inch screen has a 90hz refresh rate. However, you cannot enable the same for every app, in its pure form.
But thanks to the open-source nature of Android, there’s always a handy way around. In this guide, we will be making use of such tweak, Today we will show you how to force 90Hz in every app on your Realme X2 Pro device. There is an underlying code left behind in the device’s firmware which we will be exploiting in this tutorial. But before we do so, there are a few prerequisites to keep in mind. Please go through the requirements section and make sure your device qualifies all the mentioned-points. Follow along.

Page Contents
How to Force 90Hz in every app on Realme X2 Pro
First and foremost, since we are making changes to the system files (Android service called SurfaceFlinger), you will need administrative privileges. In other words, your device should be rooted. We already have a detailed guide on how to root Realme X2 Pro, refer to it. Once done, proceed ahead with the below steps. Furthermore, we will have to execute an ADB command. You could do the same from your PC or mobile itself. Apart from that, there are two other methods lined up for you. Check out all these four methods and proceed with the one which you find most useful and easy to execute.

Method 1: Executing ADB Commands via PC
- Download and install the ADB and Platform Tools on your PC.
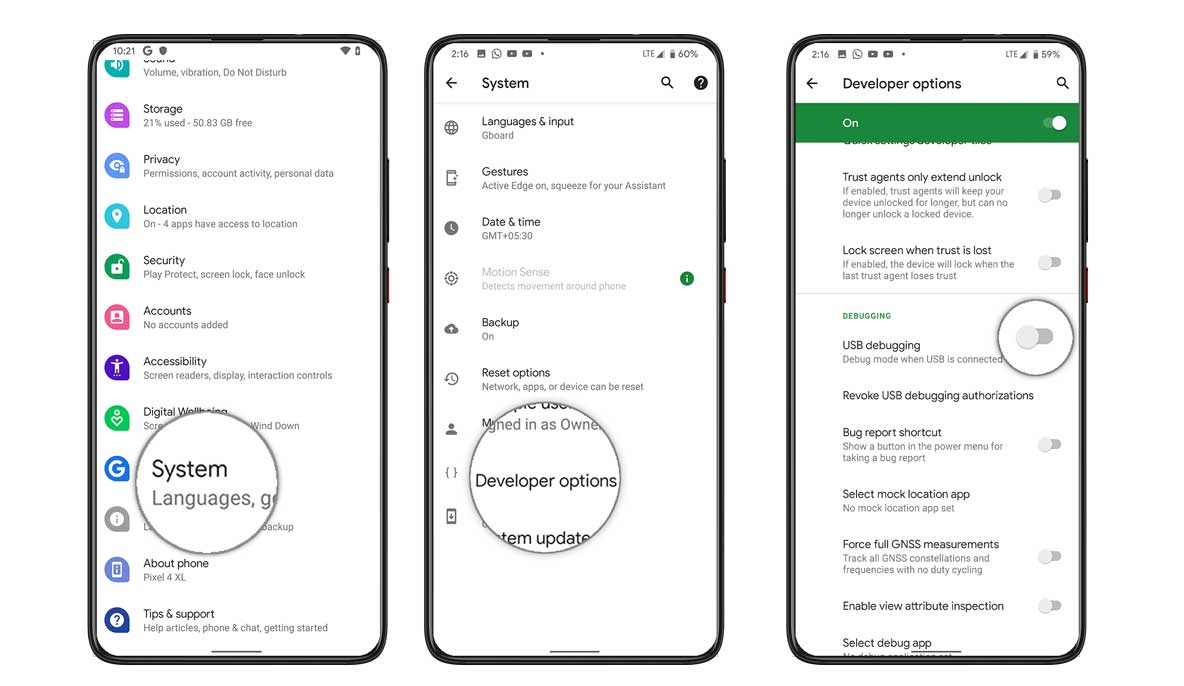
- Enable USB Debugging on your rooted device. To do so, head over to Settings > About Phone > Tap on Build Number 7 times, head back to Settings > System > Advanced > Developer Options > USB Debugging.

- Head over to the platform-tools folder, type in CMD and hit Enter. This should launch the Command Prompt.
- Now connect your device to PC via USB cable.
- Enter the below command in the CMD window:
su -c service call SurfaceFlinger 1035 i32 0
- That is it. Now let’s check out how the same could be done via mobile itself.
Also Read: List of Best Custom ROM for Realme X2 Pro [Updated]
Method 2: Execute 90Hz Command on Realme X2 Pro itself
- Download and install a terminal emulator app on your rooted device. There are many such apps, including the one we have mentioned below:
[googleplay url=”https://play.google.com/store/apps/details?id=jackpal.androidterm&hl=en_IN”] - Launch the app and you should see the Magisk Prompt, hit the Allow/Grant button.
- Now copy-paste the below command in the window:
su -c service call SurfaceFlinger 1035 i32 0
- That’s it. Let’s now check out another way of doing so.
Method 3: Via APK
You could also try the below-attached APK (thanks to XDA senior member rkmadotra). It should also enable the 90Hz for all third-party apps on your Realme X2 Pro device. Just download and install the app and give Magisk the necessary permission. But this app might only work on the stock Realme UI. Regarding custom ROMs, refer to the next method.
Method 4: On GSI ROMs
If you are using phhusson’s custom AOSP Project Treble GSI on your Realme X2 Pro device, then you don’t need to carry out any of the above-mentioned steps. This feature is baked right inside the ROM itself. Just head over to the Misc Settings option and enable Force FPS.
So with this, we conclude the guide on how to enable 90Hz on all apps on the Realme X2 Pro device. We have shared four different methods for the same. Do let us know in the comments which method you ultimately settled down for. Rounding off, here are some iPhone Tips and Tricks, PC tips and tricks, and Android Tips and Trick that you should check out as well.
