In this guide, we will show you the steps to add a signature in Microsoft Outlook Email. Adding a signature to your email gives it a more professional outlook. You could add your name, contact details, address, and even a hyperlinked image. Likewise, you could also customize the texts by making them bold, italics, underlined, or switching to different text colors. Another important usage of these signatures is that they end up saving a considerable amount of time.
You would no longer need to manually type in these details at the end of every mail. Well, you wouldn’t even have to add your signature at the end of every mail. As soon as you compose a new mail, your signature will be automatically added at the end. With so many perks attached, no doubt it is among the most useful aspects of an email. So with that said, this guide will show you how to add a signature in Microsoft Outlook Email. Follow along for the detailed instructions.

How to Add Signature in Microsoft Outlook Email
There are two different approaches to this. First off, you could instruct Outlook to automatically add your signature at the end of every email. However, for some, that might not be the best route forward. Rather some prefer to manually add their signature only in the email that they deem fit. And our second method will focus on just that. So without further ado, let’s start off with this guide.
STEP 1: Create a New Signature
No matter which of the two approaches you end up choosing, firstly you will need to create a new signature for yourself. Here are the required instructions for the same:
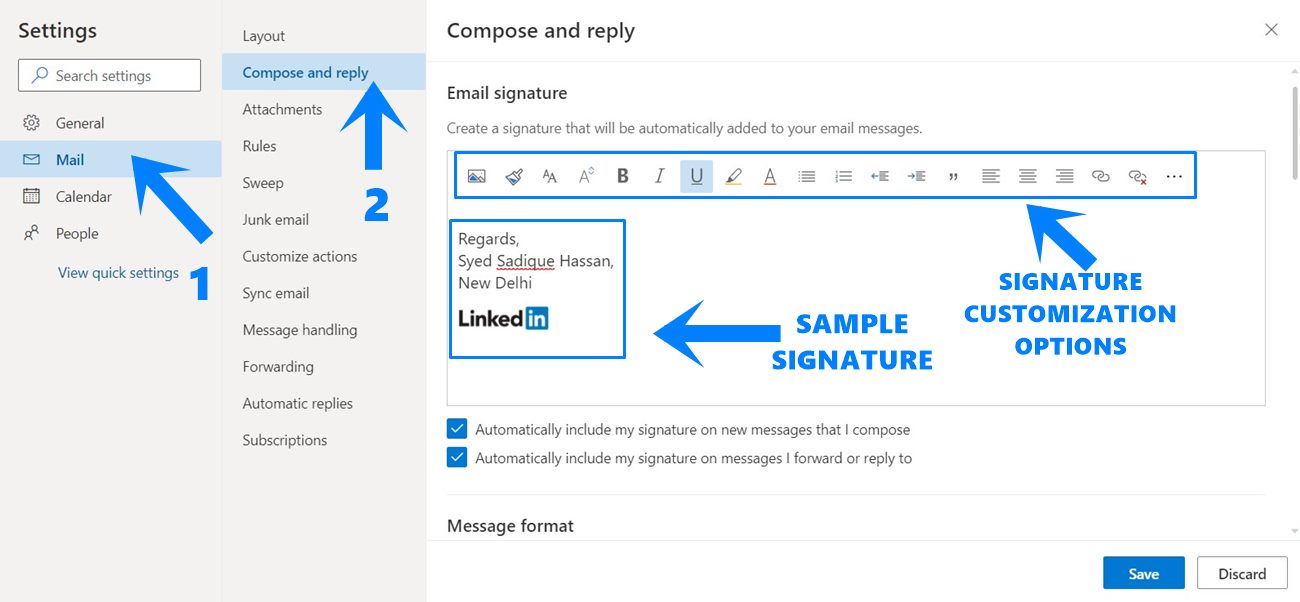
- Head over to Outlook and sign in with your credentials. Then click on the Settings icon situated at the top right.
- Scroll to the bottom and click on View all Outlook settings.
- Now go to the Compose and reply section and you could now create your signature.
- There are a plethora of customizations that you could try out. Likewise, you could even add a digital business card or a hyperlinked image to your profile. As is evident from the above screenshot, I have added my LinkedIn Profile URL behind the LinkedIn logo.
- Now before saving this signature, please refer to the below two sections and decide how you would like to embed it to your Outlook email.
STEP 2A: Automatically Add Signatures
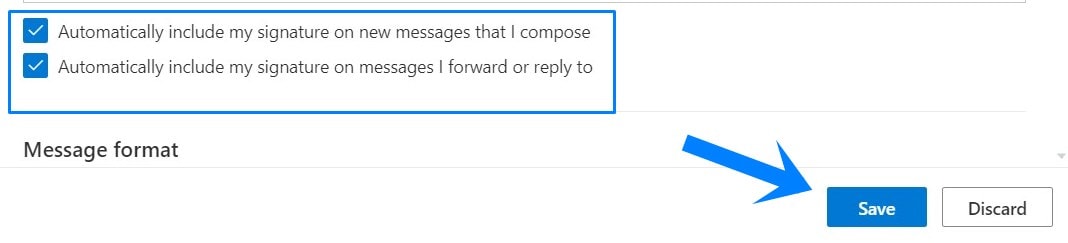
- There are two options that deserve your attention. The first one is “Automatically include my signature on new messages I compose”. Enable this feature and Outlook will add your signatures at the end of every email. Keep it disabled if you wish to do it manually.
- Likewise, you could instruct Outlook to add a sign at the end of every message that your forwards or reply to. For that, enable the “Automatically include my signature on messages I forward or reply to” option.
- Once you have made your selections, hit the Save button at the bottom. If you have disabled both the above options, then you might be interested in knowing the steps to manually add your signatures. Check it out from the below section.
STEP 2B: Manually Adding Signatures to Outlook Emails
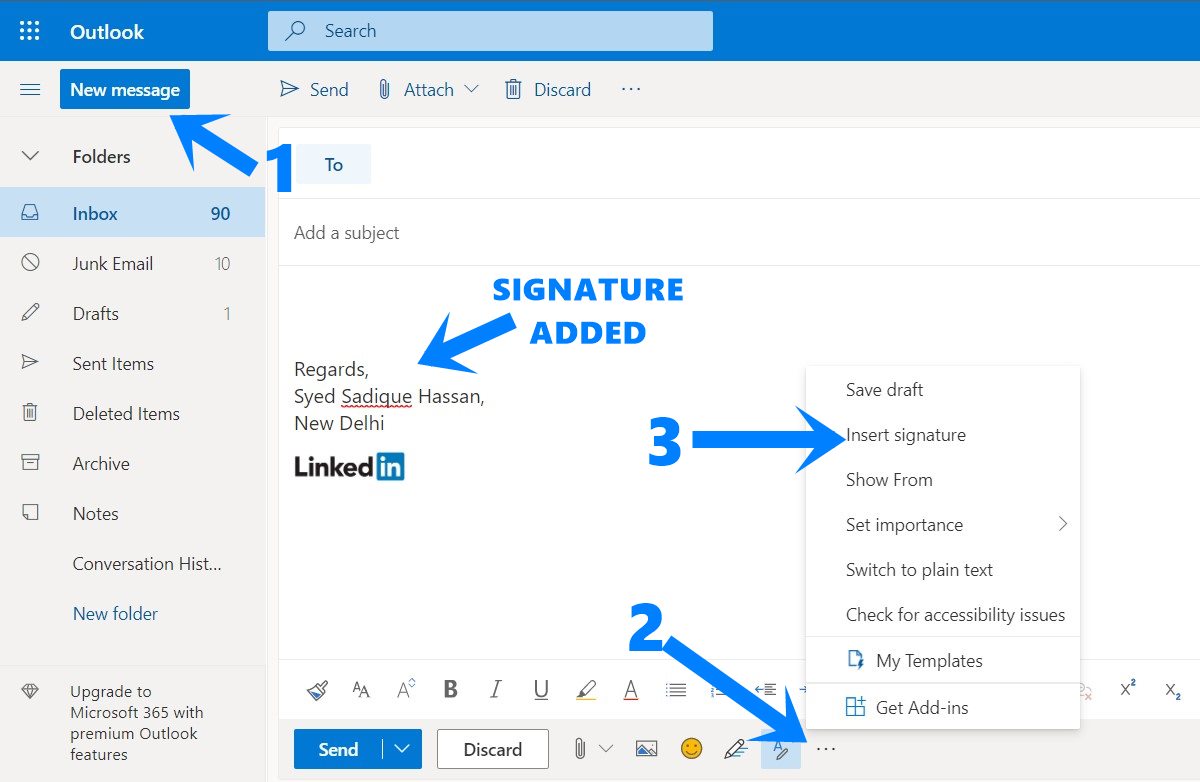
- To begin with, sign in to Outlook with your ID and Password.
- Then click on the New Message option situated at the top left.
- Now type in your message and click on the three horizontal dots situated at the bottom right.
- Select the Insert Signature option and it will be added to your email.
- Finally, hit the Send button and that’s it.
These were the steps to add a signature in Microsoft Outlook Email. We have shared two different approaches towards the same- automatic and manual insertion of your signs. You may refer to the one that meets your requirements. Rounding off, here are some iPhone Tips and Tricks, PC tips and tricks, and Android Tips and Tricks that deserve your attention as well.