QuickBooks is a popular accounting software based on cloud computing and developed by Intuit Incorporative, an American business, and financial software company. Usually, it is used to maintain all the data of any business or company like financial records, transactions, etc. Some of the main features are making a purchase order, Bills, Inventory, Product rates, and Cash flow management, and with the help of cloud computing, you can access all the reports anytime and from anywhere.
QuickBooks is one of the trusted software used in all types of business, and you can find all business documented solutions in one place, including invoices. It also has Invoices temples that can be used to generate bills, but many users can’t able to change the invoice template due to these users having trouble customizing as per their requirements. Here is a guide that can help you know how to fix when you can’t change the invoice template on QuickBooks.
Page Contents
Fix: Can’t Change Invoice Template on QuickBooks
Nowadays, many people are in business or doing start-ups, and it has its challenges. Suppose you are also a business person or working in any business. In that case, you may have searched for software that can solve all the accounting and record maintenance applications that can access from any device.
It will provide all account and bookkeeping-related solutions to save time and staffing for any medium-size business. There are many invoice templates in the QuickBooks library, but like other software, it also has some glitches or issues with editing the templates. Invoices are the documents that detail the sale or purchase of any products and services and also help to keep the records.
Here are the steps to change or customize any invoice template without going to any professional and free of cost.
Step 1: Select Default Template
You can choose from four different QuickBooks templates: Intuit Packing Slip, Intuit Product Invoice Slip, Intuit Professional Invoice, and Intuit Service Invoice.
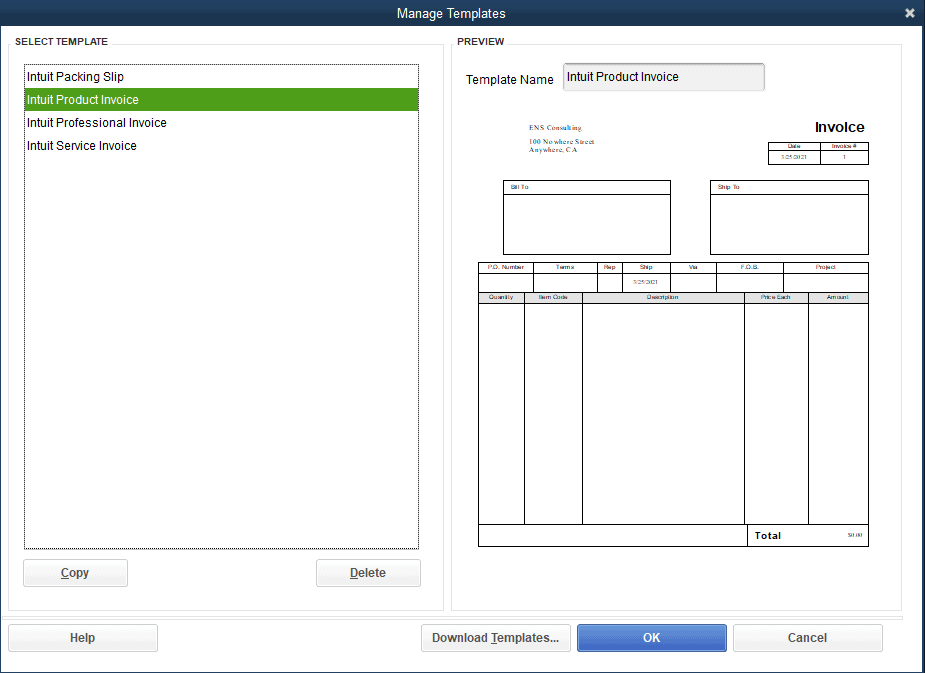
Select as per your requirement and then press Ok to confirm. Then it will go on the edit page of the selected template.
Step 2: Insert Business Logo
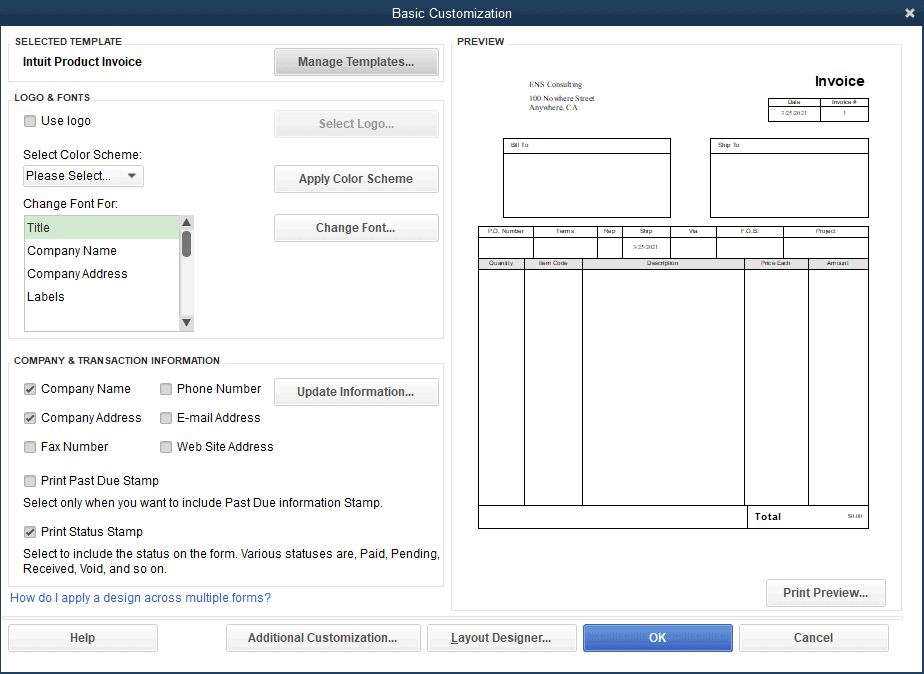
You can customize almost everything in the template, but we start from the basic customization necessary for invoices.
![]()
- First of all, to insert any logo, tick the mark on the check box in front of the Use logo, then click on Select logo.
- Now browse the logo in your system to inert on the invoice.
Step 3: Selecting Color Scheme
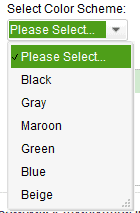
There are several pre-defined like Black, Grey, Maroon, Green, and Beige. Save the color scheme you want to put in your invoice. You can see the preview of the selected color scheme on the right side of the customizing screen. Moreover, after choosing the color scheme, you can click on Apply Color Scheme.
Step 4: Select Font for Invoice
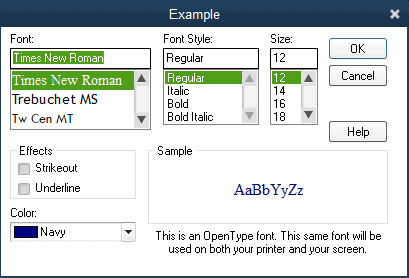
The next part is the font, as it is also necessary to choose the font wisely as all the invoice information should be a visible character. In the edit screen, you can change the font for all heads of the invoice, such as Invoice title, Company Name, Company Address, Labels, Data, etc.
Select any of the titles in the invoice and then click on Change Font, and it will take you to the font tab, where you can select the font, font size, and font style. After selecting all the tabs, click on Ok to save the change you made for the invoice.
Step 5: Select Company Information
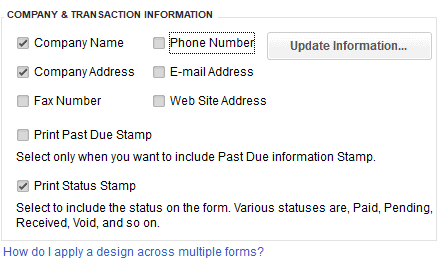
After that, it’s time to select the company information you want to include in the invoice, like Company address, contact number, website info, etc. Then, click on the check box in front of the information you want to add to the invoice. Also, after selecting the report, click on OK.
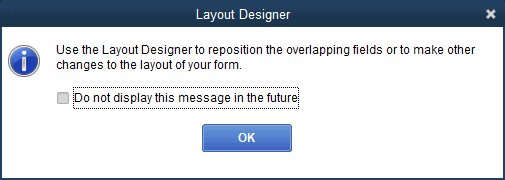
It will notify that some data will overlay other things in the invoice with a warning message. Ignore it for now; in the following steps, you will be able to arrange all of them.
Step 6: Insert Other Information
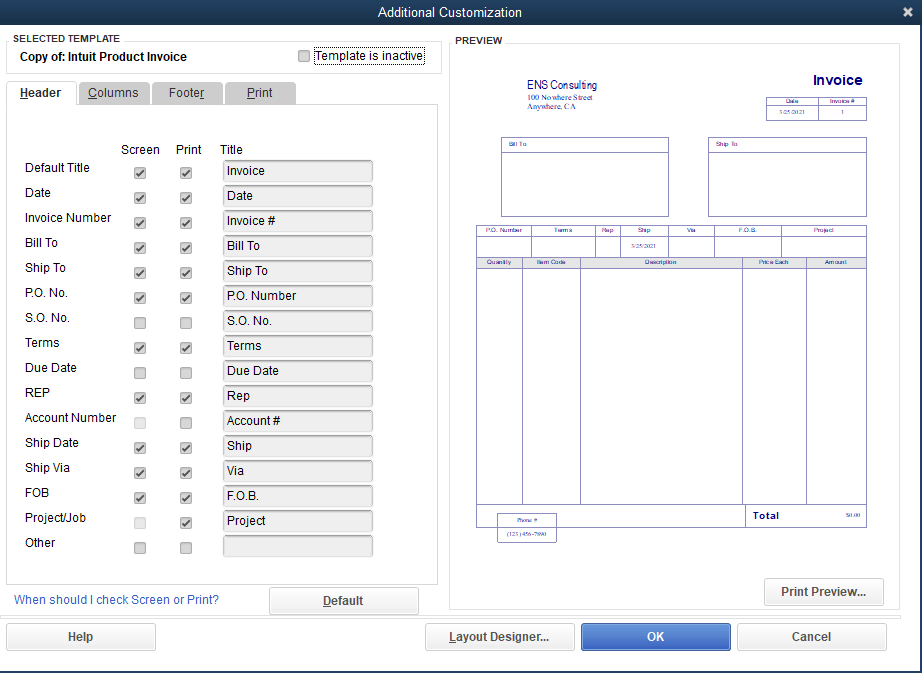
Now it’s time to include other important information in the invoice like headers, columns, footers, etc. Click to check the box from each title you want to add to the invoice, and after selection, press OK to apply the changes.
Step 7: Edit the Invoice Layout
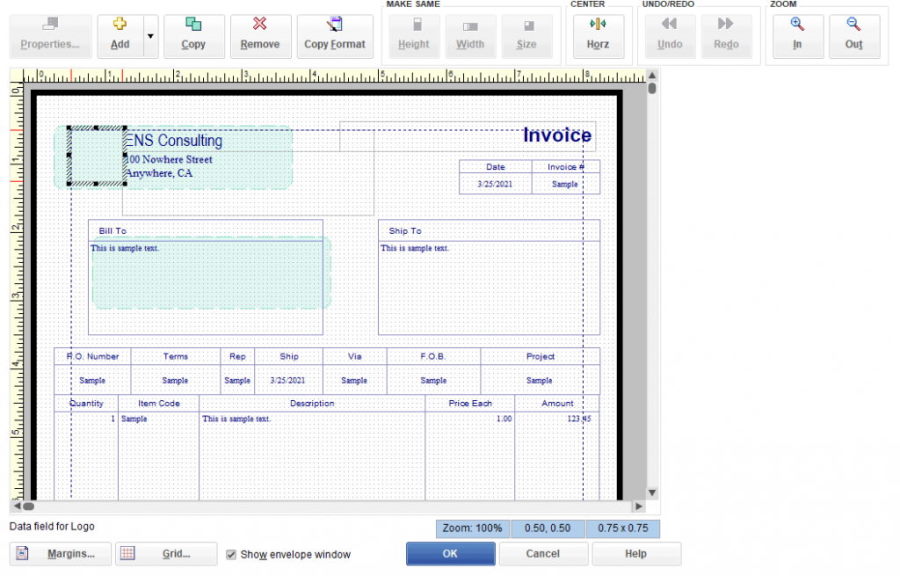
Finally, one of the most important things is to edit the layout of the invoice. Click on the Layout designer, and it will redirect you to the layout editor page. Moreover, it will all depend on your creativity. You can change the size or the position of any information in the invoice except the green colored boxes as they all indicate envelop windows.
You can simply drag to the location or right-click on the select box for more customization options like fonts, color border, etc. However, you can copy the layout of any other previous invoice by opening the invoice and clicking on the Copy format button.
Step 8: Save the Invoice
After all the changes are made, check the invoice preview, and click on the blue colored OK button to save the invoice file if everything looks good. If anything is wrong with the invoice, you can again edit it and save the file.
Conclusion
Here are all the steps to edit or customize any online invoice in QuickBooks. While editing, you can comment on your query or post it in the QuickBooks community if you have any issues. Moreover, suppose you didn’t get the answer. In that case, you can directly call to QuickBooks helpline number, and for more tech-related information on the how-to guide, visit our website regularly to keep updated.
