There are a bunch of reasons why you might want to change your login screen name. If you often work in public places and you are concerned about revealing your name to people unknown, or maybe you just got a PC with the name set to the user. Whatever may be the reason for you wanting to change your login name, we will help you through it.
This is not a straightforward process, and no matter which process you choose, it will take some tweaking. You can change your name either through settings or by using the Control Panel. So let’s take a look at both these processes here in this article.
Also Read
Page Contents
How to change your login name in Windows 10?
Using Setting(Microsoft account):
If you are using Microsoft account to login to your PC, then you can change your login name through the Settings menu.
- Press and hold Windows Key + I to open up your Windows settings screen.
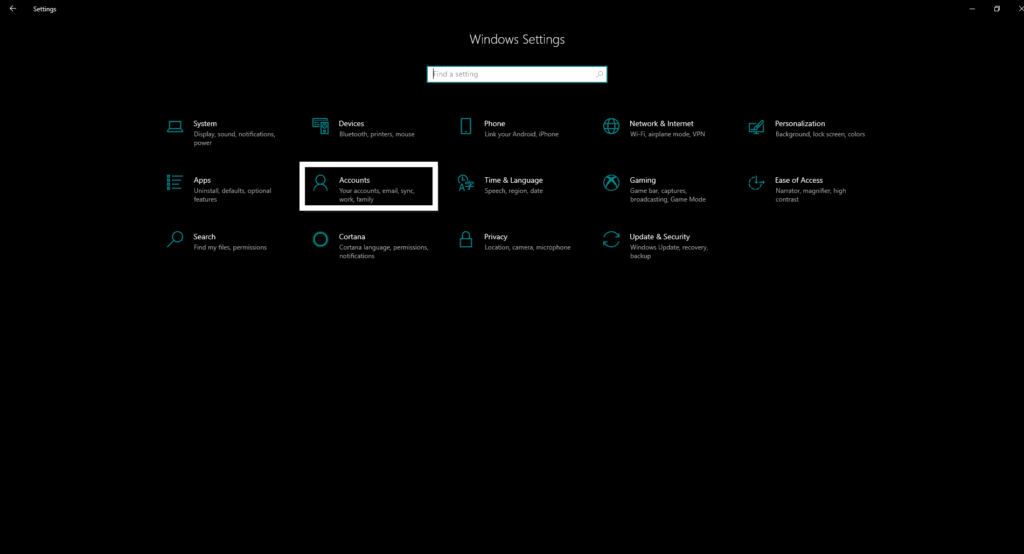
- Then click on Accounts.
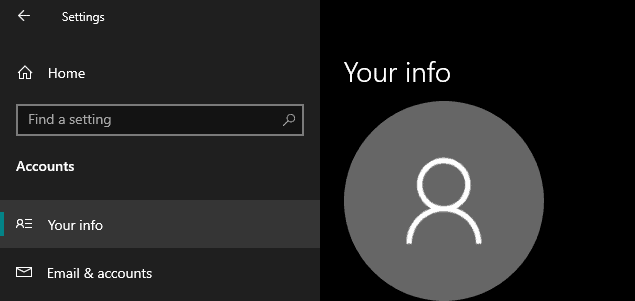
- Click on Your info in the left pane of the next window.
- Now click on Manage my Microsoft account option.
- Sign in with your Microsoft account login credentials if you are asked for it.
- Then click on the More actions menu.
- Click on the Edit profile option.
- Then click on Edit name and then enter the name that you want to set.
- Confirm the change by performing a small human verification process.
- Click on save and then finally restart your PC.
This will change your account name across all your devices, though, and you will see the new account login name in your email and other Microsoft services too.
Using Control Panel(local account):
If you are logged in to your system through a local account that is not linked to a Microsoft account, then you will have to use the control panel to check your login name.
With User Accounts:
- Click on the windows search bar and look for the Control Panel. Open it up.
- Under User accounts, you will find a change account type option. Click on it.
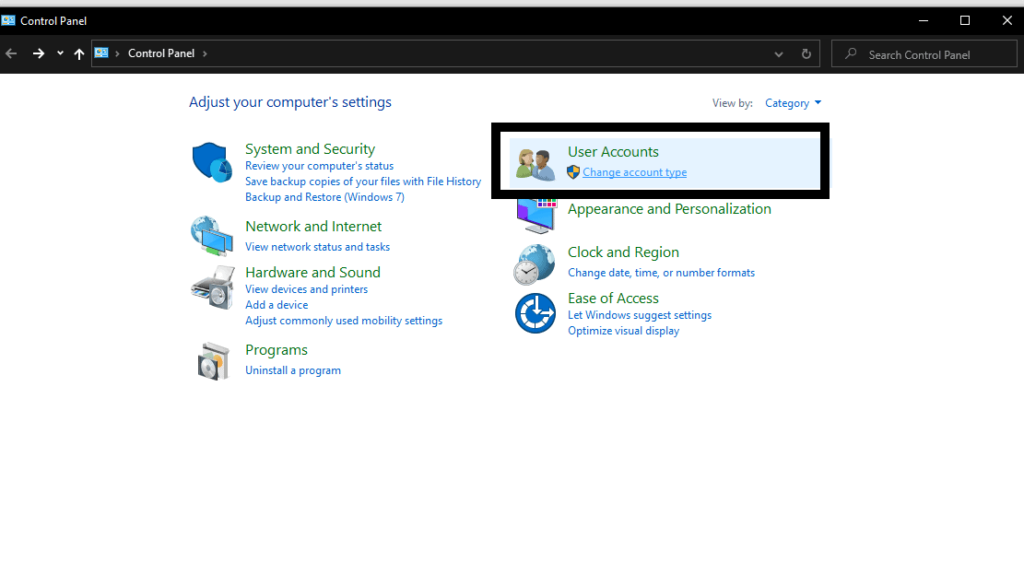
- Select the local account whose name you want to change and then click on Change the account name option.

- Set the name that you want for your account.
- Click on Change Name and then restart.

You should see the new name now on the login screen.
With netplwiz:
You can change the name using the User Accounts settings too.
- Click on the windows search bar and look for netplwiz. Open it up once you see it in the results.
- It will open the legacy user accounts settings. Click on the Users tab.
- Select the account whose name you want to change. Then click on Properties.
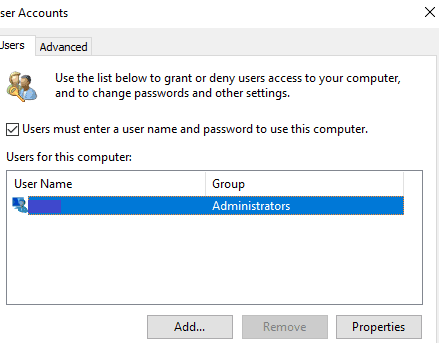
- Update the “User name” by clicking on it and enter a new name in the Full Name field.
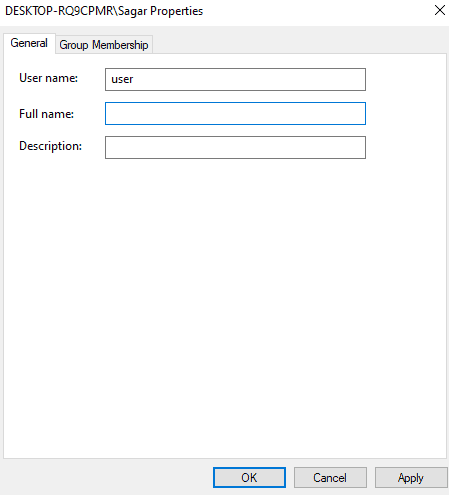
- Click on Apply > Ok > Ok.
- Once you are done till here, you can restart your system, and you will see the new name now on the login screen.
So there are several ways to change your login name in Windows 10. Just pick one from above as per your wish. If you have any questions or queries about this guide on changing the login name in Windows 10, then comment down below, and we will get back to you. Also, be sure to check out our other articles on iPhone tips and tricks, Android tips and tricks, PC tips and tricks, and much more for more useful information
