In this guide, we will show you how to change your preferred network type with Tasker. This app is probably among the most feature-rich tool for your Android devices. It holds a plethora of options that automate near-about all the important functionalities of your smartphones. But for most of its tasks to be effectively carried out, it required access to the system partition aka root. However, the app has undergone some changes in recent times and now allows for the execution of many different system-level tasks even without the need to root your device.
And in this guide, we will be making use of one such task. Today, we will show you how to change your preferred network type with Tasker. Just to make things easier for the end-user, we will also list out the steps to transfer this task right onto the Quick Settings panel itself. But before that, let’s try and understand what exactly is happening in the background and how Tasker is able to carry out these tasks without root.
The Permissions Required for this Task
So how are we able to create and execute core level tasks without root? All this is made possible via the Android Debug Bridge or more popularly known as ADB. Using a couple of ADB commands, we would be able to change the network type right from the Tasker without the need for admin rights. In this regard, the first command will be WRITE_SECURE_SETTINGS. This gives the required permissions to any app to read or write secure system settings.
This permission isn’t made available to any third-party app including Tasker. So we will execute an ADB command alongside the Tasker’s package name to grant it read/write permission. Then we will be using the ADB WiFi permission. This permission will create an open network port on your device for the third-party app to access it. But the thing is that this port is now accessible to all the third-party apps and isn’t just limited to Tasker. This might prove to be risky.

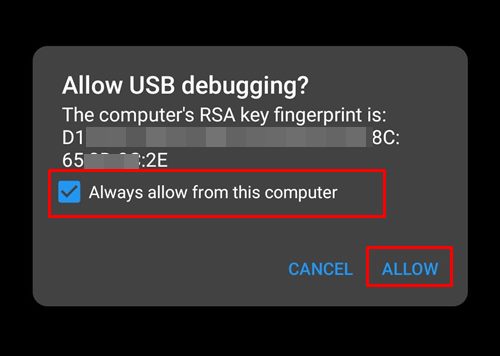
So keep in mind that whenever this ADB WiFi permission is executed, you will get an Allow USB Debugging prompt on your device. If you have manually requested the same, then it is well and good. On the other hand, if it pops up all of a sudden, then some third-party app is making use of this open port, hence you should deny this connection right away. So these are the two permissions that we will be using in order to change your preferred network type with Tasker. Follow along.
The Prerequisites for this Task
- First and foremost, download and install the Android SDK Platform Tools on your PC. This will provide us with the necessary ADB binaries.
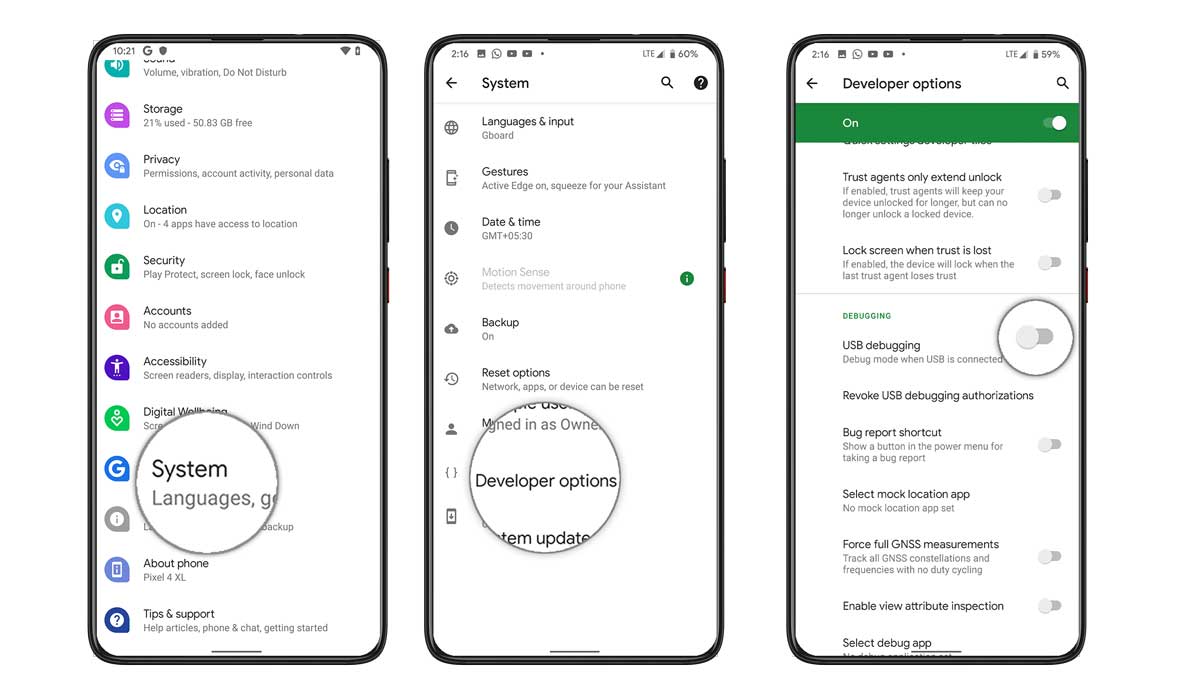
- Next up, enable USB Debugging on your device. This will be needed so that your device is able to recognize the ADB commands executed from the PC. To enable it, head over to Settings > About Phone > Tap on Build Number 7 times > Go back to Settings > System > Advanced > Developer Options > Enable USB Debugging.
That’s it. You may now proceed with the steps to change your preferred network type with Tasker.
How to Change the Network Type via Tasker
The below instructions will be broken down into two different sections. In the first one, we will be granting the Write and WiFI Settings Permissions to Tasker. Whereas the second half discusses the steps to create the network switch task via the app and put it to use.
STEP 1: Grant Necessary Permissions to Tasker
- To begin with, download and install the Tasker app on your device.
- Then connect your device to PC via USB Cable.
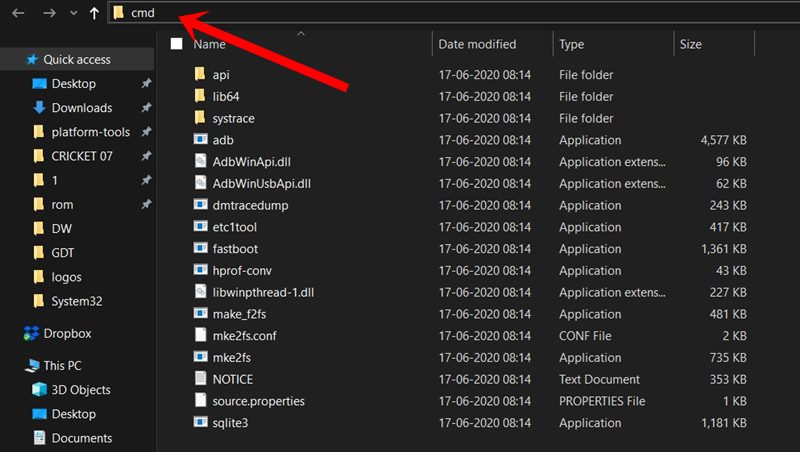
- Head over to the platform-tools folder, type in CMD in the address bar, and hit Enter. This will launch the Command Prompt.
- Execute the below command and if you get an alphanumeric code, it means the device has been successfully connected to the ADB mode:
adb devices
- Now type the below command to grant Write Secure Settings permission to Tasker.
adb shell pm grant net.dinglisch.android.taskerm android.permission.WRITE_SECURE_SETTINGS
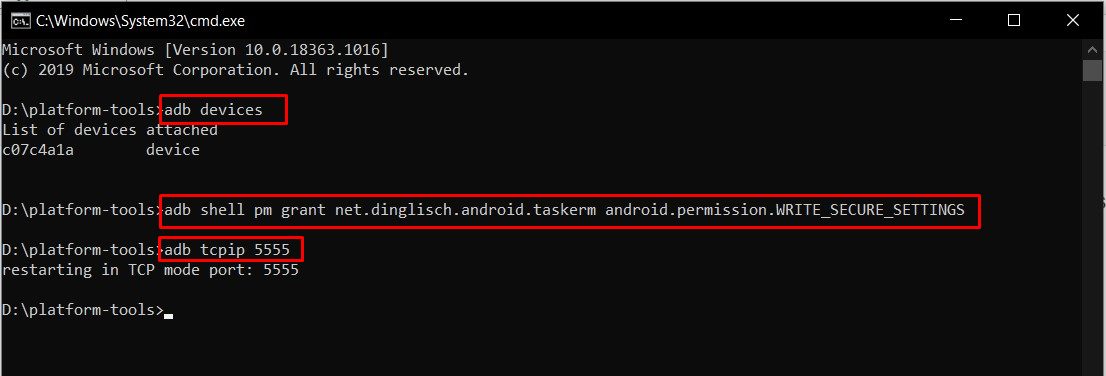
- Next up, grant the ADB WiFi Permission via the following command:
adb tcpip 5555
- You may get an Authirizze ADB Command on your device, tap on Allow. If this is your own device, you may also select the Always Allow from this computer.
- Once that is done, you may now disconnect your device from the PC.
STEP 2: Change the Network Type via Tasker
- Launch the Tasker app on your device and go through the Disclaimer and Quick Overview Page.
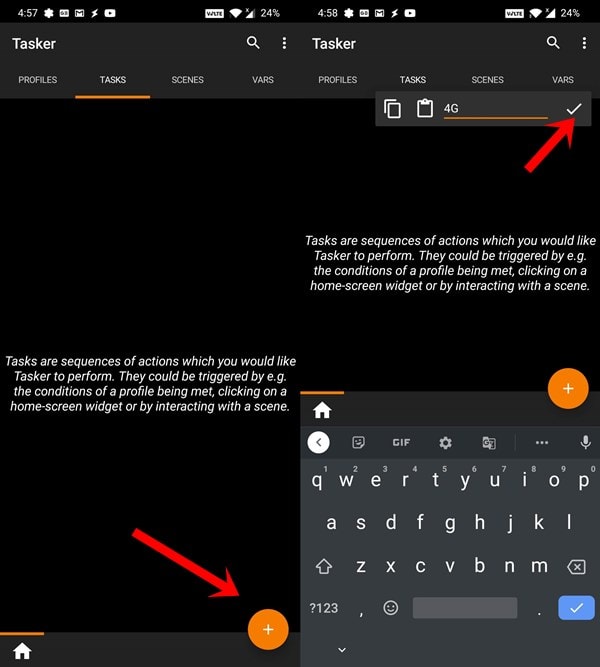
- Head over to the Task section and tap on the Yellow + button situated at the bottom right.
- Give this task a name and hit the tick mark to confirm it. For this guide, we have named it 4G.
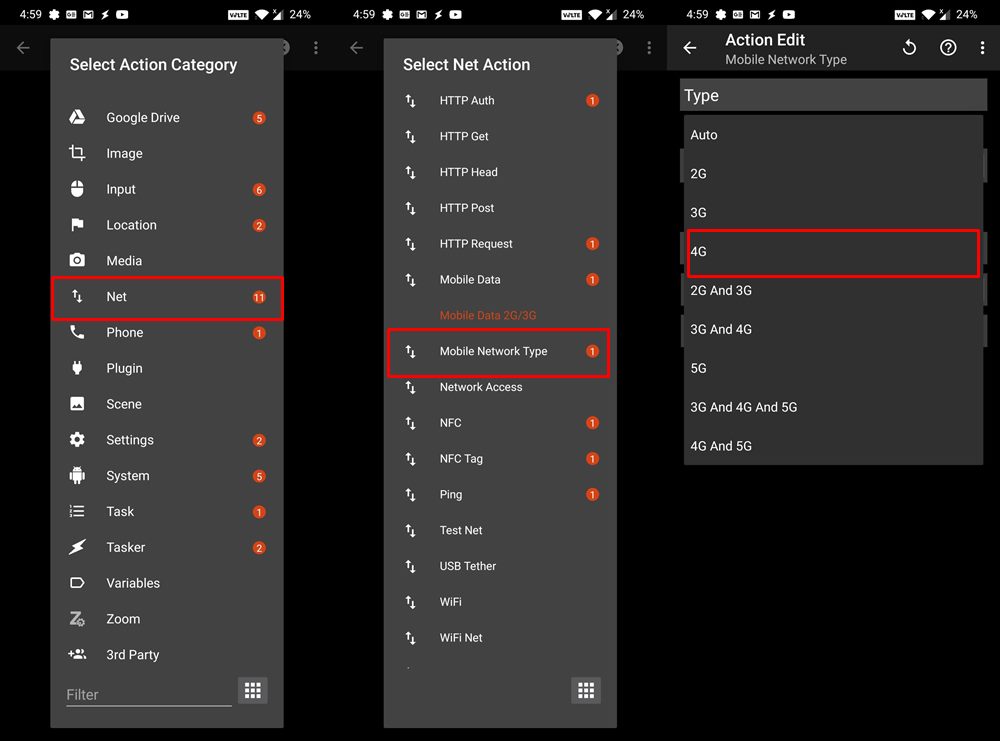
- Next up tap on the plus icon and select Net from the Action Category. From the Net Action menu, tap on Mobile Network Type.
- Then go to the Type drop-down menu and select 4G.
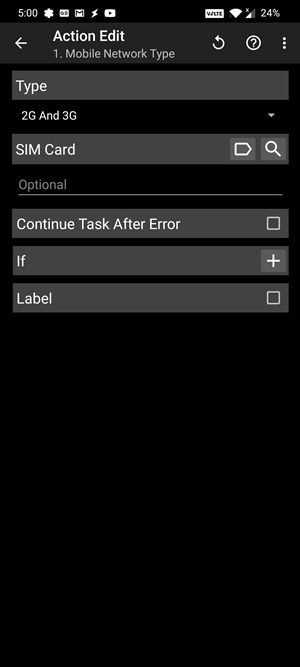
- Along the same lines, you could also create a 2G/3G task. Create a new task, name it 2G/3G, and select the Mobile Network Type from the Net Action menu. Then from the Type menu, assign it 2G And 3G.
- So you have now created two different tasks, one to switch to 4G and the other to switch to 2G/3G.
- Now from the Task main menu tap on the overflow icon situated at the top right. Select Preferences.
- Go to the Actions section. Then under the Quick Settings Tasks, the first will be assigned to Toggle. The other two will however be blank (Unset).
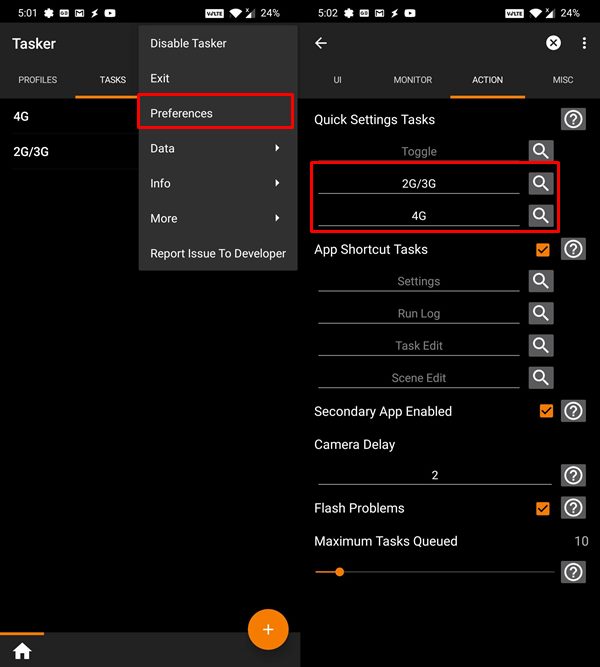
- So tap on them and assign the 2G/3G and 4G tasks to both the unassigned quick settings fields respectively.
- Now drag the Notification Panel from the top and tap on the pencil icon to edit the Quick Settings toggle.
- You will now see two Unset Tasker toggles, drag, and move them to the Quick Settings area. As soon as you do so, you will see them renamed to the original task names (2G/3G and 4G).
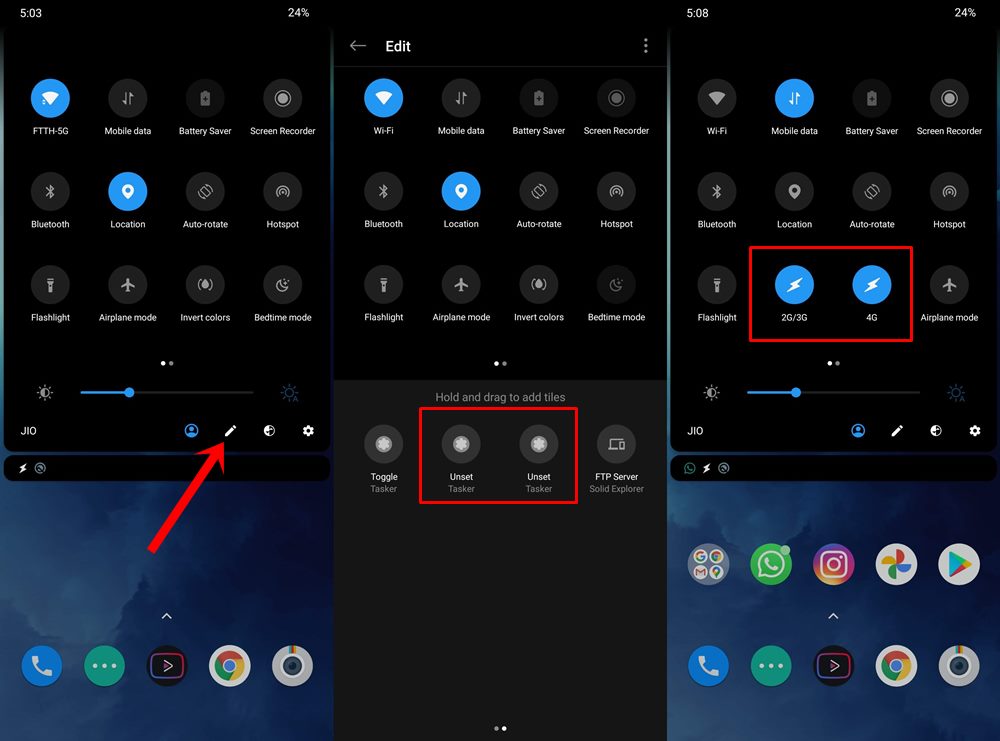
- By default, you might see both these options highlighted. but that does not mean that they have been enabled. You will have to tap on the said toggle to enable them.
Concluding Remarks
That’s it. With this, we conclude the guide to change your preferred network type with Tasker. While the steps might seem daunting at first, but the efforts are definitely worth the rewards. With that said, do let us know your views about this task created via the Tasker app. Rounding off, here are some equally impressive iPhone Tips and Tricks, PC tips and tricks, and Android Tips and Trick that you should check out as well.