Android is a widely used mobile operating system that is based on the Linux kernel. It is open-source and free software that is compatible with touchscreen smartphones and tablet devices. The operating system is developed by Google, and most Android smartphone manufacturers customize their own skin for their device models. For advanced users, there is a hidden Developer Options menu that offers plenty of features and customizations, including USB Debugging.
Talking about USB Debugging, it’s also a quite popular and useful feature for an Android handset to connect the phone with a PC/Laptop for data syncing or flashing any file, etc. When you develop an Android kit or install any file or perform any ADB & Fastboot command using the computer on your device, USB’s debugging mode comes in handy.
Also Read

Page Contents
What is USB Debugging?
USB Debugging is a mode that allows Android devices to communicate with computers to use advanced options by using the Android SDK platform. Here SDK stands for Software Development Kit. This feature offers some secure access to some of the specialized areas on the Android device that most people don’t need on daily usage. That’s why it’s placed under the Developer Options, and similarly, the ‘Developer Options’ is also generally hidden for the normal Android users.
When Android App Developers or advanced users install the Android SDK on the computer, the SDK offers developers or users some of the required access or tools to create apps by using the Android Studio. However, if you don’t need Android Studio, you can only install Android SDK to enable root access on your device or perform other tasks. Now, let’s take a quick look at some of the advantages of USB Debugging on an Android device.
Also Read
Advantages of USB Debugging:
- USB Debugging mode gives you an advanced layer of access to your Android device storage and system.
- Using this mode, users can easily connect their device to the PC/Laptop using a USB cable and can access files. Without USB Debugging enabled, those processes can’t be done or fluid enough.
- You can run the terminal commands on your computer to flash firmware or any other files to your device.
- Additionally, you can use ADB and Fastboot commands in order to uninstall files/apps or even disable them on your handset.
- Alternatively, you read the log files of your phone.
How to Enable USB Debugging on any Android device?
Video Guide:
Refer to our in-depth video guide for visual assistance.
Ensure that every Android device from budget to flagship has the same option and process to enable this feature.
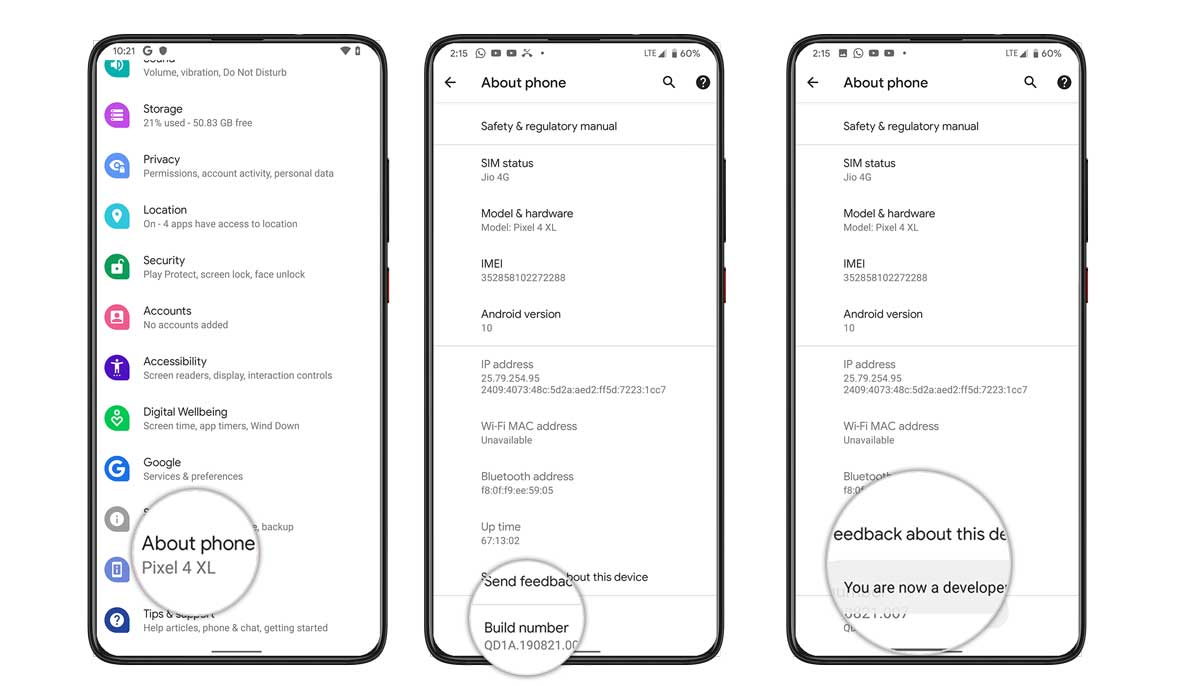
- From the home screen or app drawer, tap on the Settings menu on your handset.
- Tap on About phone> Build Number > Quickly tap 7 times on the Build number.
- The Developer Options menu will be activated.

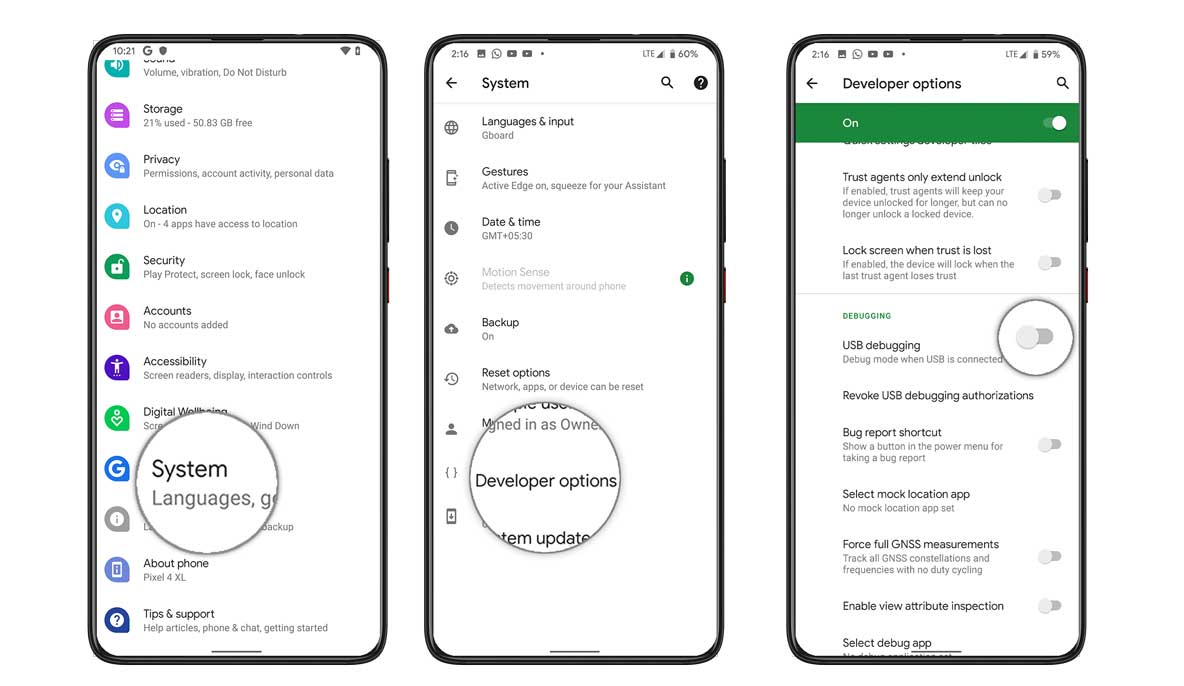
- Now, Go back to the Settings menu again > Tap on Developer Options next to the About Phone. [For Android 8.0 Oreo or earlier]
- While for Android 9.0 Pie or later, you need to go to Settings > System > Advanced > Developer Options.
- Under the Developer Options menu, you will see the USB Debugging toggle. Turn on the toggle.

- It will ask Allow USB Debugging? > tap on OK to confirm it.

- That’s it. You’re done.
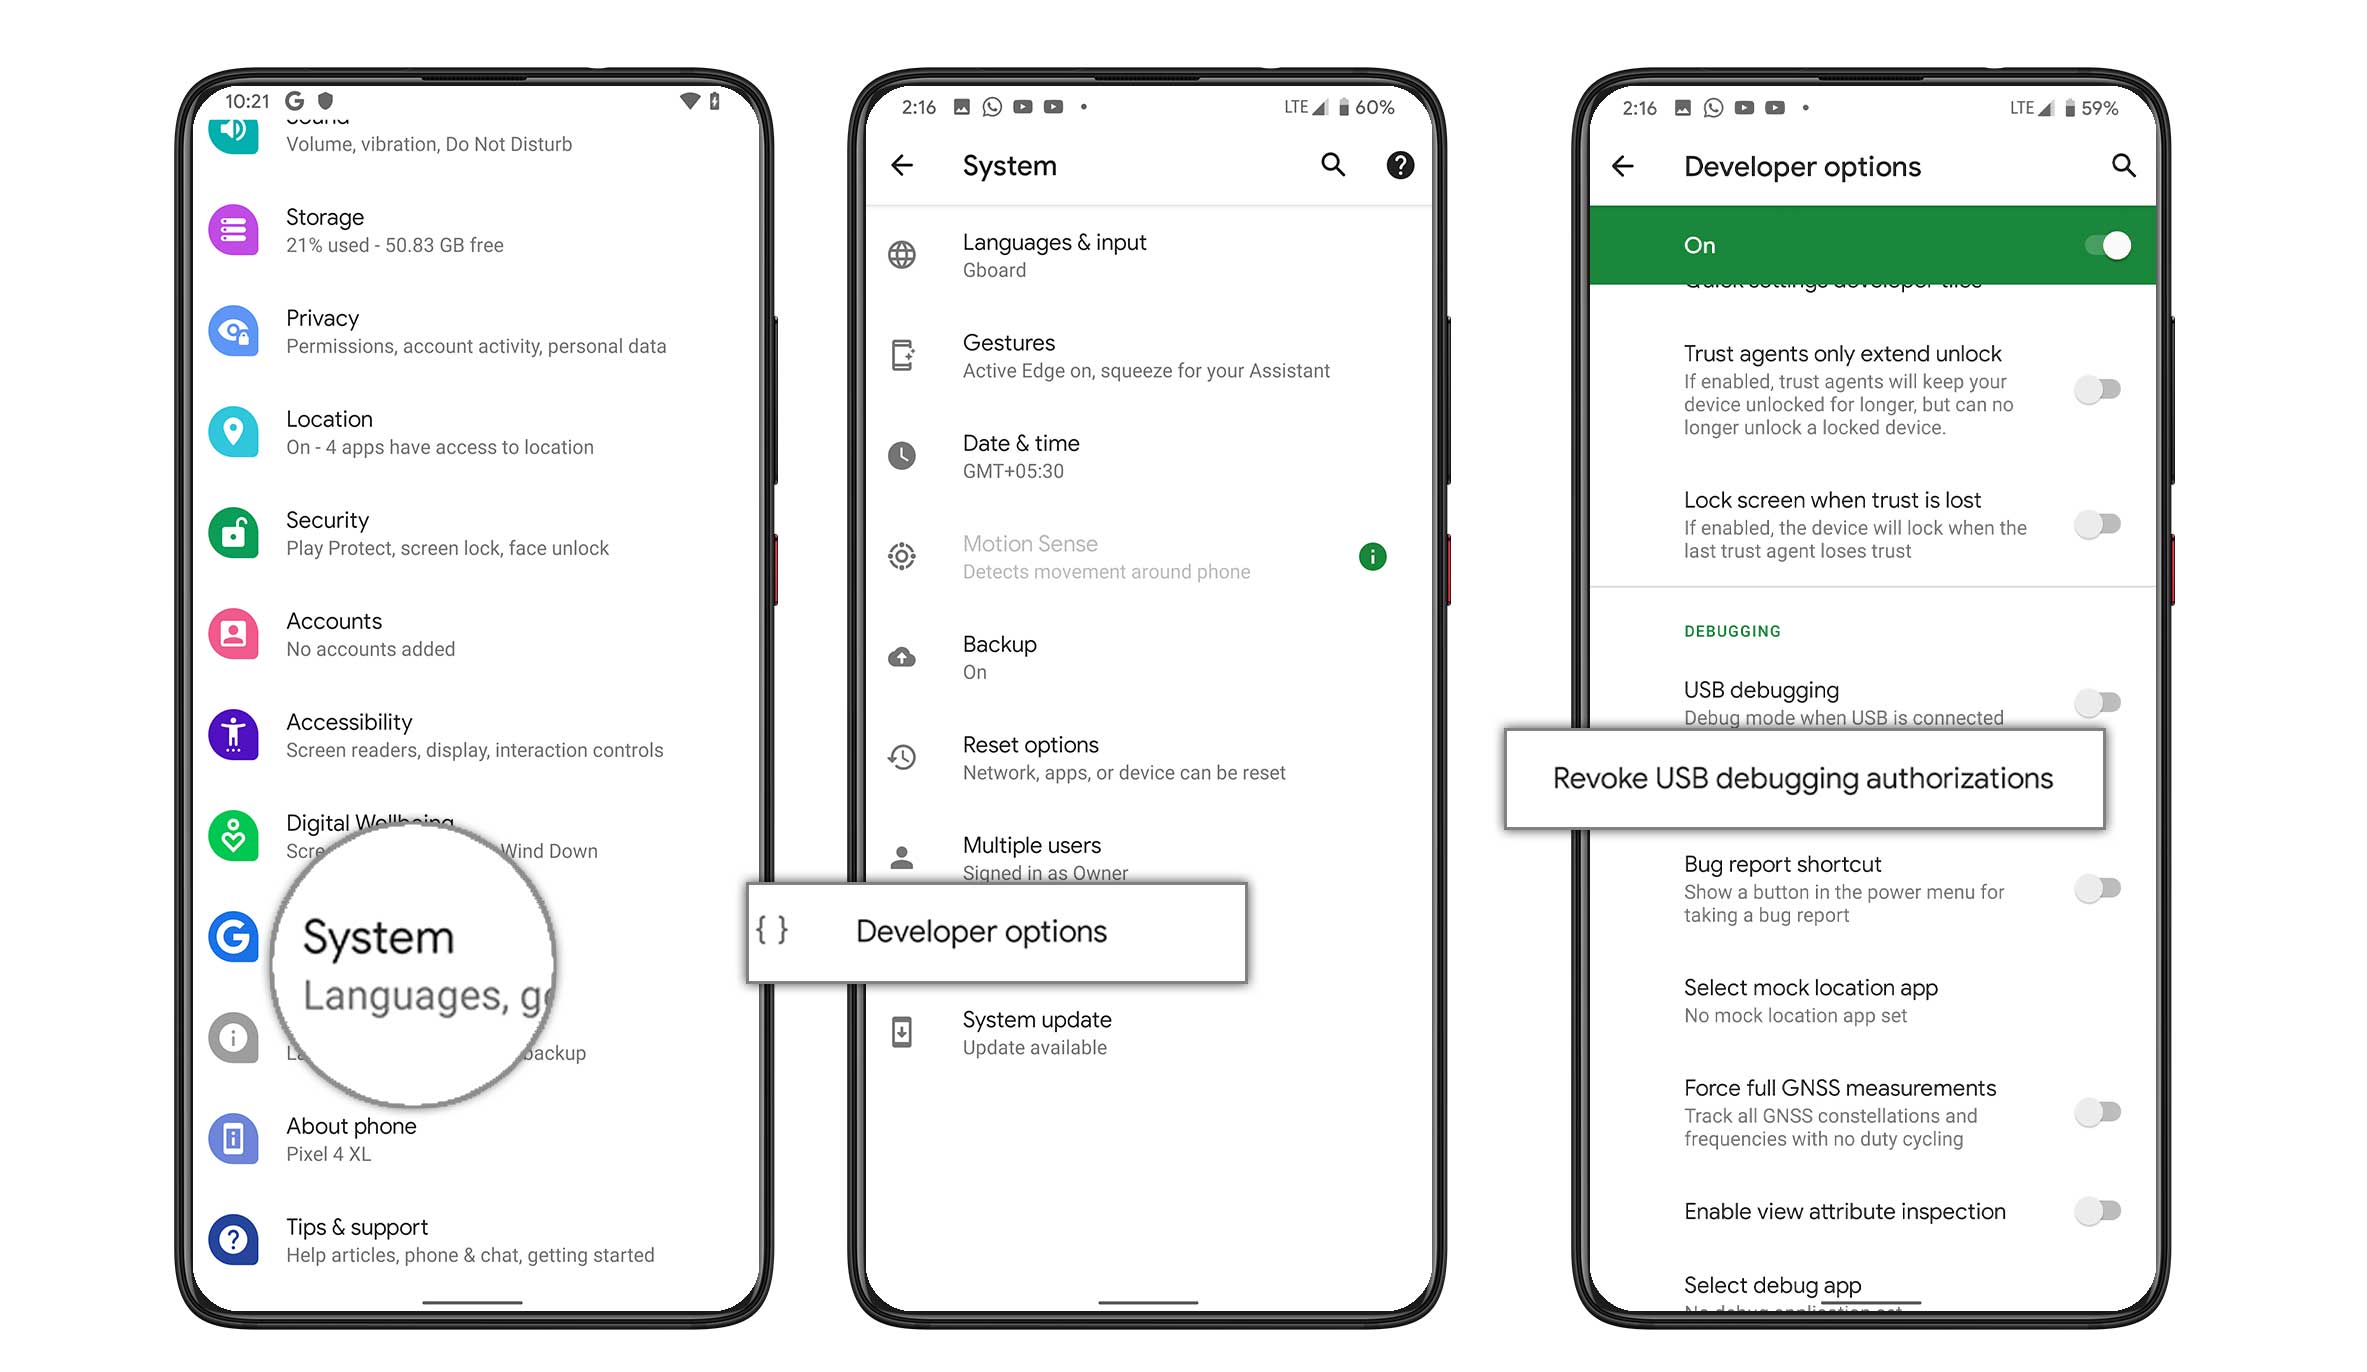
Once you’ve turned on the debugging, you can easily connect the device to a PC using a USB cable. When your computer detects your connected device, you will have to enable the debugging permission on your phone screen. Confirm it to add the computer to a trusted device list and start using it.  However, if in case, you’ve rejected the prompt on your device by mistake, you can fix it. Select Revoke USB debugging authorizations to revoke previous access to all computers.
- First of all, disconnect the USB cable from your device.
- Go to the Device Settings again > System > Developer Options > Tap on Revoke USB debugging authorizations and select OK.

- You’re done. Now, connect your device again to the PC and allow the Debugging permission.
What does USB Debugging do on Android?
As we mentioned earlier, USB Debugging offers both you and the system to access or perform special tasks or commands to your phone via the computer. Therefore, the developers and some of the advanced Android users can push apps to their devices for testing or even can install root or unlock bootloader or flash any third-party file or install any flashable image file, and more.
Meanwhile, if you’ve built an Android Studio app and want to test out on your connected Android device, you can easily push it to the device with some steps, and it will run & appear on your device. Therefore, you don’t need to do extra things like port the APK file, copy it to the device, and manually sideload that APK.
Is Android USB Debugging Safe?
Usually, you can use debugging mode on your Android device if necessary. If the USB Debugging mode is enabled and you’ve connected your handset to any public or unknown charging port or any computer, it can affect you. Because if someone has access to that computer or the charging port, your device data can be compromised.
Alternatively, if you leave the device at the debugging enabled condition, your phone becomes easily vulnerable. Therefore, we will recommend you to turn it off while not using this feature. Make sure to revoke the access of previously used computers from your device in a couple of weeks or months to keep your device system and personal data secure.
That’s it, guys. We hope this guide was helpful to you. You can comment below for any queries.
Also Read

Thank you for giving this helpful info. Be good.
kokota vam
yes , really helpfull to gain knowledge