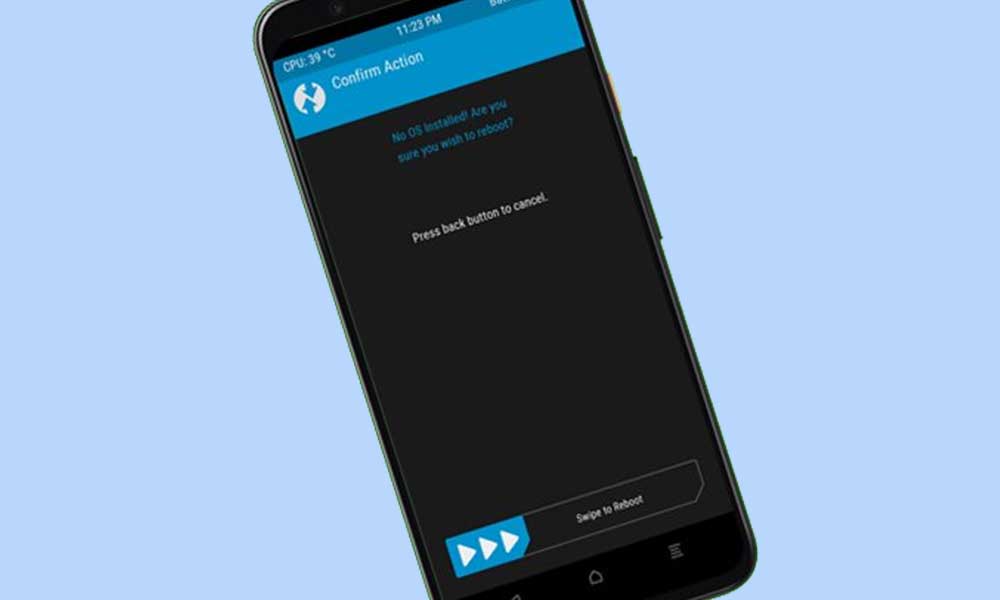
It seems that the No OS Found Error in TWRP recovery becomes one of the common issues among Android device users while flashing the firmware zip file via TWRP. If you’re getting into the custom development segment or trying to flash external stock firmware, you’ll require a custom recovery. Well, TWRP (TeamWin Recovery Project) recovery is one of them, and it should work without any help from other programs such as Magisk.
It’s always recommended to take Nandroid backup of the device data and wipe out other device partitions before flashing a new firmware file via TWRP. Now, if we talk about the custom firmware flashing, wiping out partitions includes Data, Dalvik, System, Boot, Vendor, etc. So, if you’re also facing the same no OS found error that means there is a boot partition issue on the device and the recovery program can’t detect the installed system whatsoever.
Also Read

Page Contents
No OS Found Error in TWRP: How to Fix
So, only erasing the system partition on the device might not work for you every time. It’s also worth mentioning that wiping out partitions might end up deleting internal storage too. Now, if your TWRP is stuck with the no OS error then you can follow the steps below to fix it.
1. Change Slots (For A/B Devices)
If your device does have a dual partition option then make sure that you’re booting to the active slot rather than booting to the inactive slot. The inactive slot doesn’t have the system.img file installed. In that scenario, you’ll just need to switch to the active slot and then check for the results. To do so:
- Go to the Reboot option in TWRP. It’ll now list out the current slot.
- If it’s an A slot, tap on the Slot B button or select B if the current slot is A.
- Now, you’ll get the No OS error message in TWRP once again.
- Just skip it and perform a right swipe to proceed further.
- Then your device will boot to the other slot > Go to Reboot and select System.
- If your device gets booted to the OS then all is good.
Still, facing the same error? Well, you can follow the next method.
2. Restore Nandroid Backup
If in case, you’ve already created a Nandroid backup before having such an issue then you can easily restore the Nandroid backup file on the device. There is nothing to do extra. To do so: Go to the Restore option in TWRP > Select your Nandroid backup file > Perform a right swipe to restore it. Once it’s done, go to Reboot and select System. Your device should now boot to the OS.
3. Use MTP
You can also mount your device’s storage via TWRP and transfer the firmware zip file which you want to flash directly on your device. Once done, make sure to install it via TWRP. To do that:
- Simply connect your device to the PC via the USB Cable.
- Now, go to the Mount option in TWRP > Checkmark the Data partition.
- Then tap on the Enable MTP button placed at the bottom right corner.
- Your device will now show on your PC > Transfer the ROM zip file into it.
- Next, flash the ROM file as per the instructions mentioned on the XDA Developers blog.
- If you can’t find out any instructions then go to Wipe in TWRP.
- Select Data, System, and Cache partitions one by one > Perform a right swipe to wipe those partitions.
- Go to Install > Select the ROM ZIP file > Perform a right swipe to flash it.
- Once it’s done, you may boot to the newly installed OS via Reboot > System.
Finally, check for the No OS found error in the TWRP Recovery.
4. Use ADB Sideload
Sometimes the data partition may get encrypted and the chances are high that you wouldn’t be able to identify any file on your device which can conflict with such issues. It’s better to use ADB sideload method by following the steps below to install the Custom ROM on Android.
- Download and extract the Android SDK Platform Tools on your PC.
- Transfer your ROM file to the platform-tools folder where it’s installed.
- Go to Advanced in TWRP > Select ADB Sideload.
- Now, perform a right swipe to start the sideload process.
- You’ll have to connect your device to the PC via a USB cable.
- Next, go to the platform-tools folder address bar > Type cmd and hit Enter to open Command Prompt.
- Then just type in the below command and hit Enter to flash the file via sideloading: [Replace file.zip with the actual file name and add .zip at last]
adb sideload file.zip
- Now, go to the Reboot section in TWRP > Select System.
- If your device is able to boot to the system successfully that means the No OS Found Error in TWRP issue has been fixed.
5. Flash Stock Firmware
If none of the methods worked for you then make sure to flash the stock firmware via Fastboot Commands or device-specific tools such as SP Flash Tool, Mi Flash Tool, Android Flash Tool, etc. To do so:
- Go to Reboot in TWRP > Select Bootloader.
- You’ll again get the No OS error message > Skip it and perform a right swipe to confirm.
- Your device will now boot to the Fastboot Mode.
- Now, you’ll have to flash Stock Firmware via Fastboot Commands according to your OEM or model number.
- Have some patience and perform all the steps correctly to boot your device into the newly installed OS.
That’s it, guys. We assume this guide was helpful to you. For further queries, you can comment below.
