As you know that when you change a process’s priority in the Task Manager, you can determine how much memory space and resources the CPU should give to that process. A higher priority level means the process will get more resources. Most apps start with the “Normal” priority level by default.
But you can speed up or slow down the process by manually changing the priority level. If you want to know how to change the priority in the Task Manager on your Windows 10 computer, then don’t worry. This article will show you some useful steps and everything that you need to know about the priority settings.
Also Read

Priority Levels in Windows 10:
Before we move down to the steps, you should know some important information about the priority levels in Windows 10. There are six priority levels as given below:
- Low
- Below normal
- Normal
- Above normal
- High
- Realtime
As you already know “Normal” is the default priority level, and it makes all the process run without any issues. Even when you manually change the priority level, it comes back to “Normal” after the app’s process terminates. Only some applications have a setting to change their priority level automatically. The apps can change their priority to “Above Normal” to speed up the process. For example, media players like Winamp have the ability to raise their process priority during playback.
Keep it in mind that a user should never set the priority level at “Realtime.” If you set the priority level at “Realtime”, the application will start consuming 100% of CPU. It will intercept both the keyboard and mouse input resulting in system instability.
Steps to change the priority in Task Manager on Windows 10:
- Go to the Start menu.
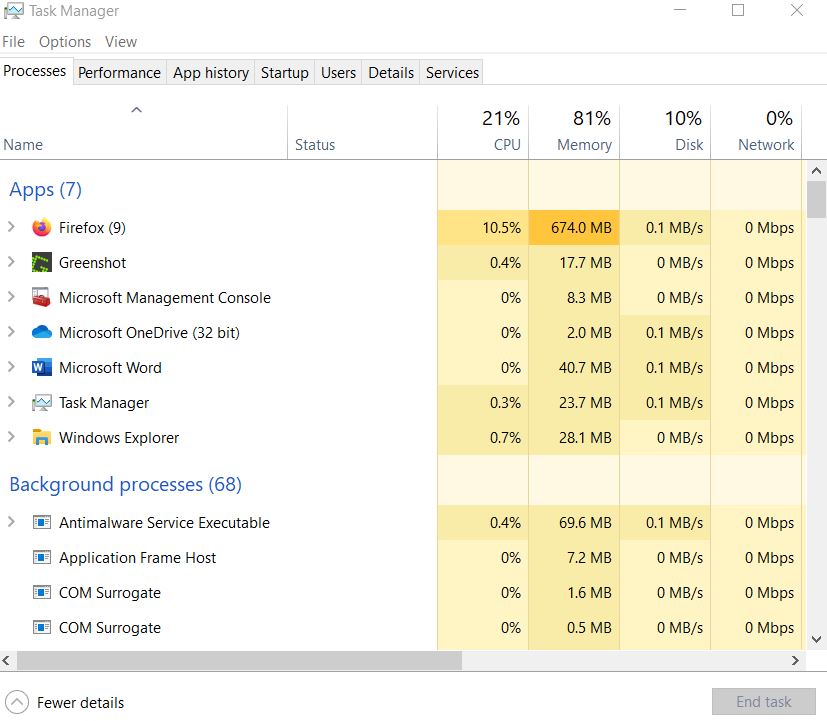
- Type “Task Manager” in the search bar and click on the Task Manager app from the search results.

- You can alternatively press Ctrl+Shift+Esc to open Task Manager.
- If you’re not logged in as the “Administrator” user, right-click on the Task Manager and choose the Run as administrator option.

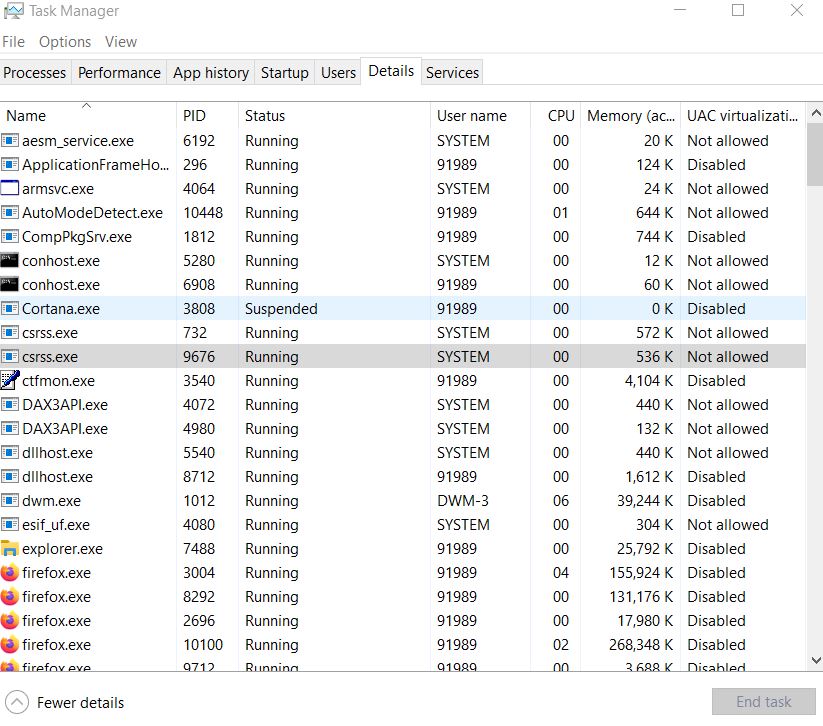
- Click on the “Details” tab at the top of the Task Manager window. Scroll down the Details tab until you find the process whose priority you want to change.
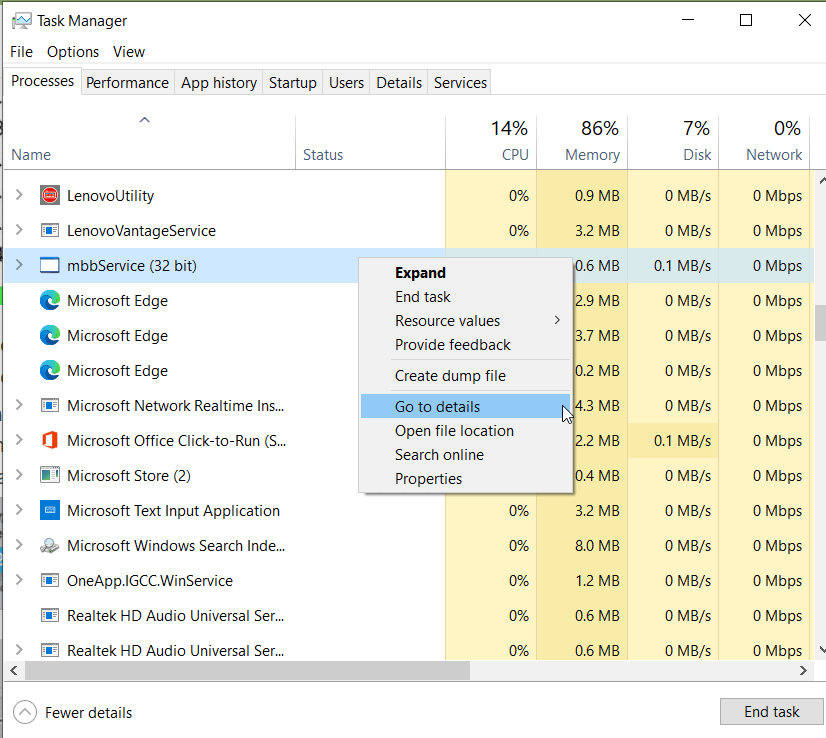
- If you want to change the priority of a currently running program, go to the Processes tab.

- Find the program whose priority you want to change and right-click on the program. Select the Go to details option from the drop-down menu.
- If you enter here from the Processes tab, your process should be highlighted.
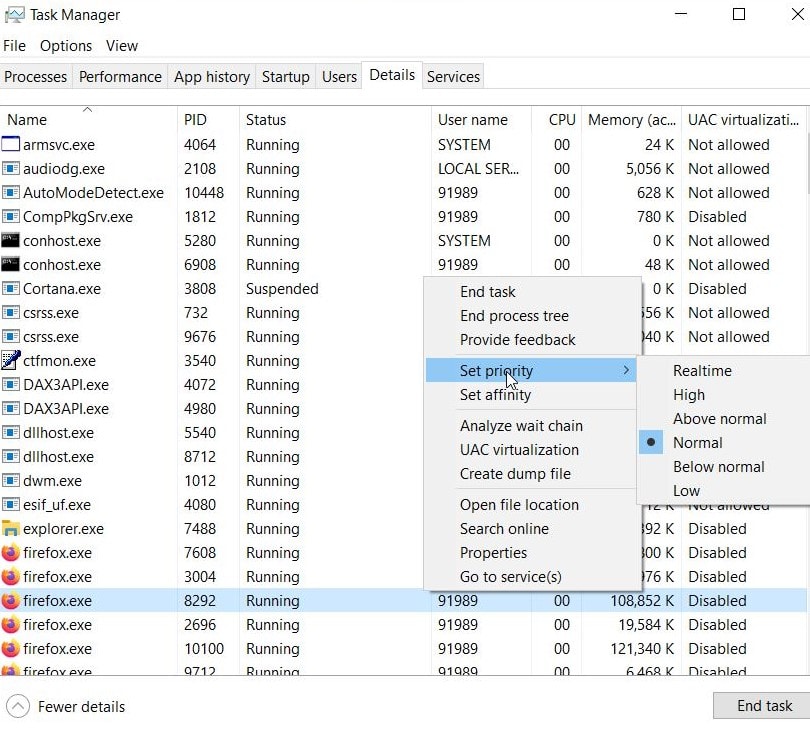
- Right-click on your selected process and choose the “Set priority” option from the drop-down menu.

- Now, you can select a priority level. Choose one of the following options given as from fastest to slowest:
- Realtime (Highest priority)
- High
- Above normal
- Normal
- Below normal
- Low (Lowest priority)
- When a prompt appears asking your permission, click “Change priority.”
- After you change the priority successfully, close the Task Manager window.
Changing a process’s priority can be a risky task. You should be careful during the procedure. Otherwise, you can make your computer crash. Especially be careful with slower computers and high memory usage programs.
You can follow our steps given above to change a process’s priority without any issues. The steps are easy, and you can perform them on your own. We hope you were able to find all the answers regarding priority levels in this article. If you have any queries or feedback, please write down the comment in the below comment box.
