Are you having trouble with your Windows 11 PC such as shuttering graphics, lagging gameplay, and dropping performance, don’t worry. This problem usually occurs on your computer due to a hidden cache file called the DirectX Shader Cache. However, many users assumed that this issue happened due to hardware or connectivity issues, which is inaccurate.
Do you know what DirectX Shader Cache is? It is a feature that comes in-built on Windows 11 that stores shader programs, which acts to improving performance by detracting load times in certain applications and video games. In some scenarios, the cache can collect outdated data over time, resulting in performance issues. To avoid the issue, you have to clear out the DirectX Shader Cache on Windows 11.
If you’re looking for a guide on how to clear DirectX Shader Cache then you’ve came to the right place. In Windows 11, there is an option available to clear the DirectX Shader Cache which you can follow to reduce the device performance and fix the issue. Here, in this guide, we will discuss the two most effective methods to clear DirectX Shader Cache on Windows 11. Let’s get started.
Page Contents
What is DirectX Shader Cache?
As mentioned before, the DirectX Shader Cache is a file which are created by the graphics system to improve the load time and performance of the applications and software. As you know, the video games utilize the DirectX shader cache instead of regenerating the game shaders each time, and the time that takes to appear images and videos on the screen can be reduced while loading the games.
To avoid the loading issue while playing an individual games, you should clear DirectX Shader cache on your Windows 11 PC. It’ll help you in improving the games and apps performance, and you will get back to play games anytime.
Ways to Clear DirectX Shader Cache on Windows 11
Over time, the DirectX shader cache on the computer accumulated while running apps or playing video games each time. This can consume a lot of storage space, giving the worst experience while running any apps or individual games on the screen. Therefore, if you are running out of storage space or you recognize the performance issues with certain apps or games, you need to clear DirectX shader cache on your computer.
Clearing the DirectX shader cache on the Windows 11 computer is a straightforward and easiest process. Below we have listed the two effective methods to clear DirectX Shader cache on Windows 11. Let’s look at them.
1. Clear DirectX Shader Cache Using Windows Settings
In Windows Settings app, there’s an in-built function exists to clear out DirectX shader cache. It’s a simple process you can try out to clear the shader cache. Here’s how to do it.
- Navigate to Windows search menu and type in Settings and click Open. Alternatively, press Windows + I key together on the keyboard to launch Settings immediately.
- Click on System on the left-hand side and choose Storage option.
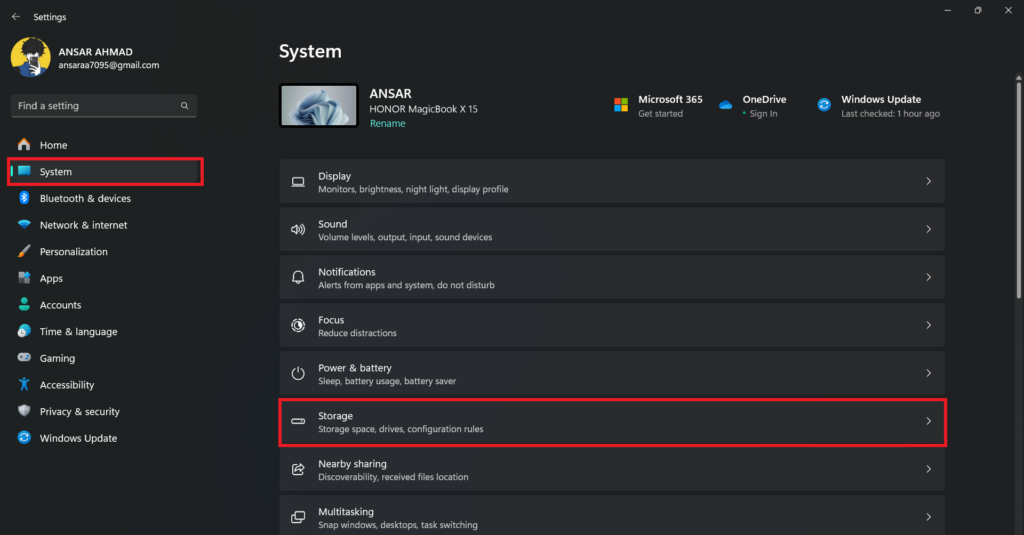
3. Now, Windows will automatically scan and report all the files and apps that use storage. This includes installed apps, log files, Windows Update files, etc.
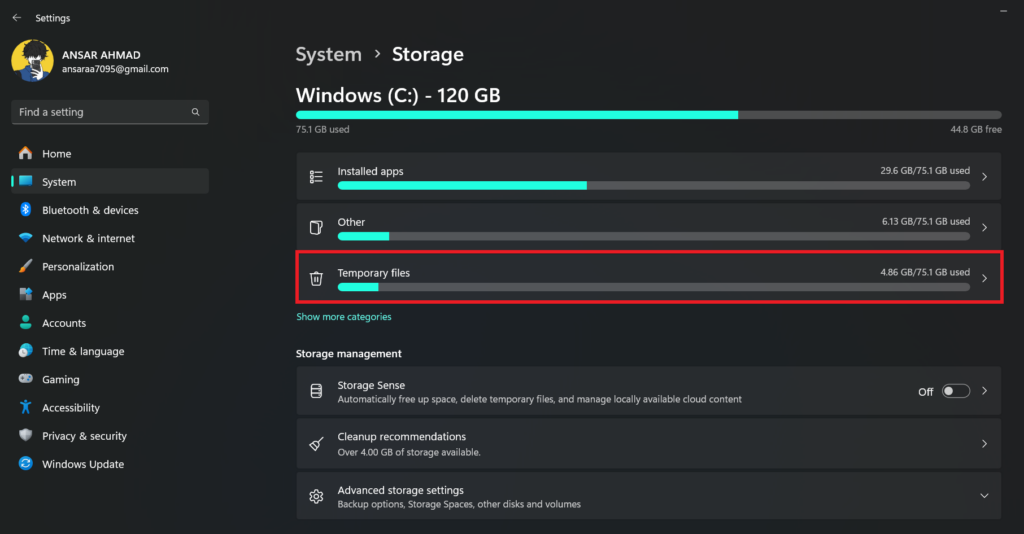
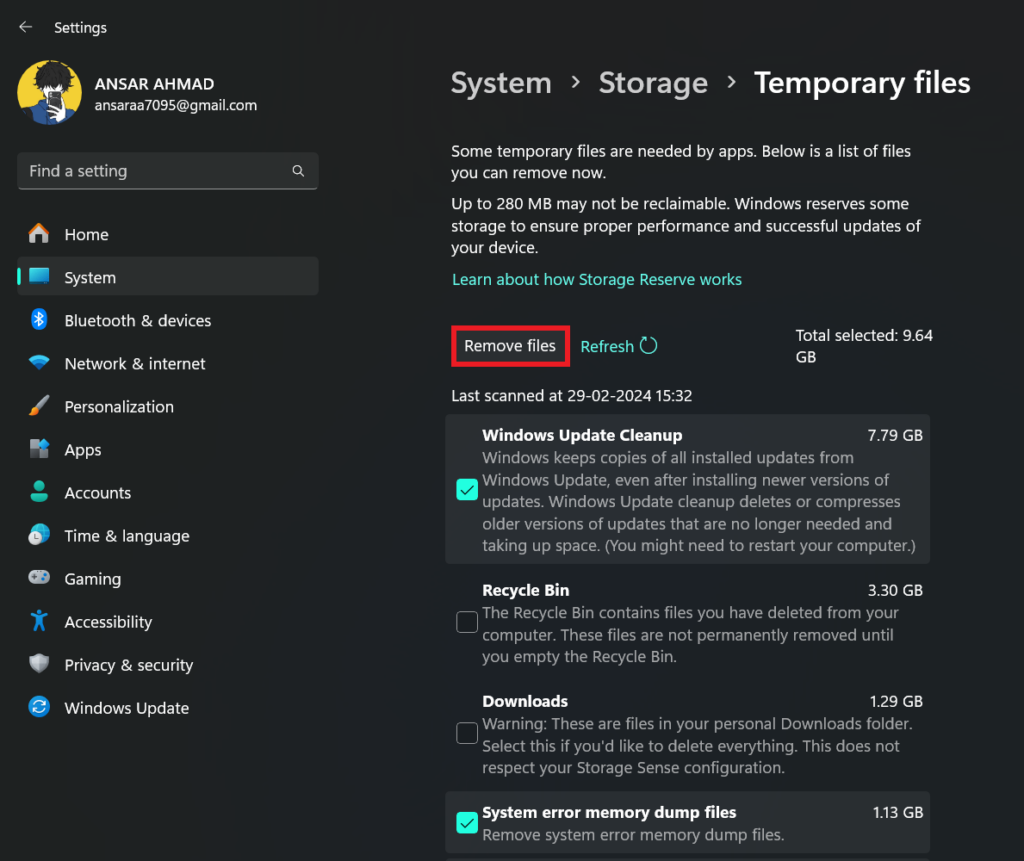
4. Once the section is loaded, click on Temporary files.
5. Scroll down and ensure the “DirectX Shader Cache” option is checked. If not, click on it to check the option.
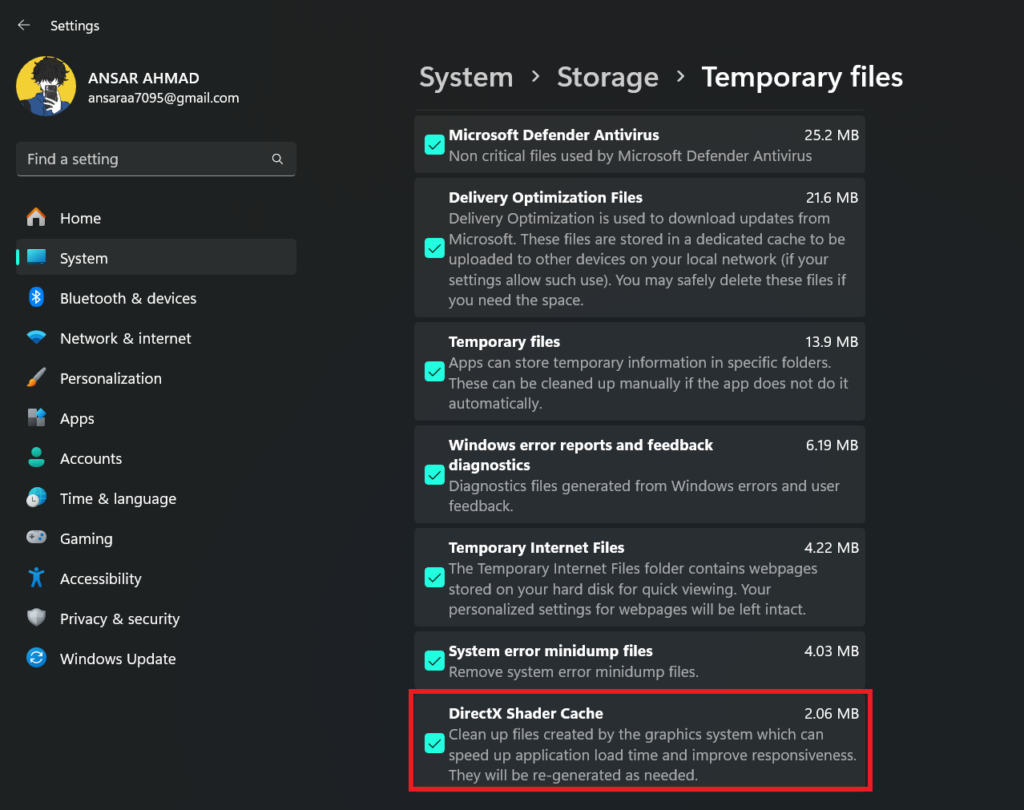
6. Go back to top and then click on the “Remove files” option.
7. From the pop-up menu, click on the Continue button.
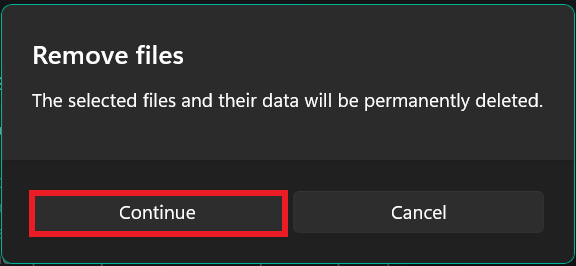
Now you have successfully removed the temporary files along with the DirectX Shader cache from your Windows 11 PC.
2. Clear DirectX Shader Cache Using Disk Cleanup
Disk Cleanup is an in-built Windows feature that allows you to clear junk files including DirectX Shader Cache. If any applications are not performing well then you can clear the DirectX shader cache to delete the junk files from the computer system. Here’s how to do it.
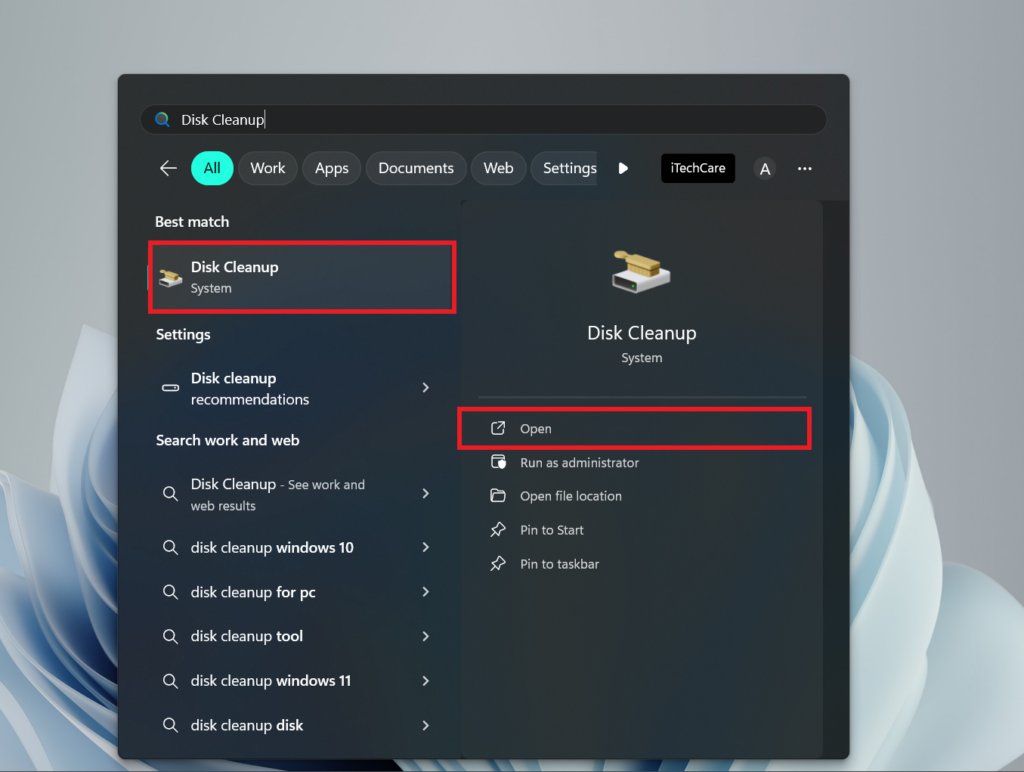
- Navigate to the Windows search menu and type in “Disk Cleanup” and click Open.
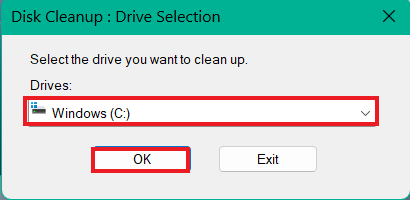
2. In the Disk Cleanup: Drive Selection window, ensure that Windows(C:) or system drive is selected and then click OK. (Now the system will scan depending upon the files size).
3. The “Disk Cleanup for Windows (C:)” menu pop-up on the screen.
4. Check the box next to DirectX Shader Cache by clicking on it and click OK.
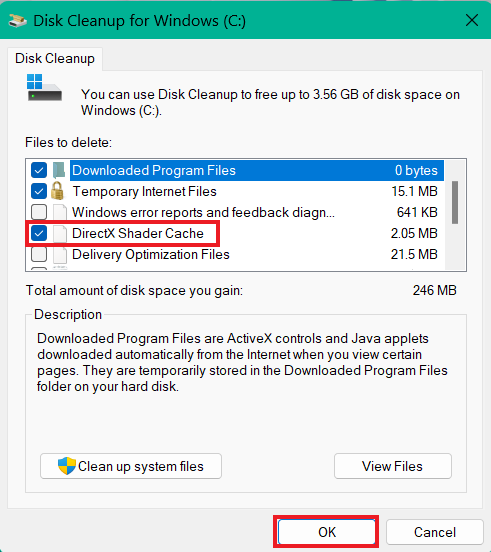
5. Now you will be asked to confirm the process to delete the file. Click on the “Delete Files” option.
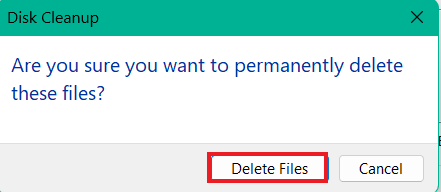
That’s it. Now the disk cleanup process will automatically start, and the DirectX Shader Cache will be cleared from your Windows 11 computer.
Conclusion
That’s it; this is how you can clear the DirectX Shader Cache on Windows 11 by following the outlined steps above. We’ve listed the two effective methods that you should try out to clear the DirectX shader cache in order to increase the performance of the apps and software. This will improve the performance even in gaming, giving you the best experience ever and you won’t feel any lags and stuttering issues.
We hope you have found this guide helpful to you. However, if you have any queries or thoughts related to this, let us know in the comments section below.
