Valve Corporation did come up with a free-to-play MOBA (Multiplayer Online Battle Arena) video game called ‘Dota 2‘ back in 2013 that allows millions of players worldwide to enter the battle as one of over a hundred Dota heroes. Though the title has received more than millions of positive reviews on Steam, some players are reporting that their Dota 2 game is not using 100% GPU. In this guide, we will help you troubleshoot to fix the Dota 2 game.
Well, it becomes one of the widespread issues among PC gamers for some titles whatsoever. Developers haven’t provided any specific reason or patch fix for this issue yet. However, you don’t need to worry about it because here we’ve shared a couple of possible workarounds for you that should gonna help. According to several reports, players are getting in-game stutters, game crashes, lags, frame drops, other graphical glitches, and so on.
Also Read
How to Fix If Dota 2 Not Using GPU
In most scenarios, such issues might gonna appear whenever the specific game doesn’t use the dedicated or external graphics card on the PC. Well, that doesn’t mean your graphics card isn’t working or it has some issues. Though the graphics card is working fine and it’s connected properly, sometimes the game itself has some configuration issue that you’ll have to adjust manually. So, without wasting any more time, let’s jump into it.
1. Use a Dedicated Graphics Card
Make sure that your computer system is actually using the dedicated or external graphics card to run the Dota 2 game. It’ll eventually reduce game stutters, lags, and frame drops without any doubt. If you don’t know which settings you need to adjust then follow the steps below.
For Nvidia:
If you’re using the Nvidia graphics card then you can do the following.
- Right-click on the desktop blank screen > Click on NVIDIA Control Panel.
- Click on 3D settings > Select Manage 3D settings in the left pane.
- Select the Program Settings tab > Choose Dota 2 from the drop-down list.
- Now, select a High-performance NVIDIA processor.
- Save changes and reboot the PC to apply changes.
For AMD:
AMD graphics card users can do the following.
- Right-click on the Desktop blank screen > Select AMD Radeon Settings from the context menu.
- Now, click on System > Select Switchable Graphics.
- Make sure to save changes and reboot the PC to apply changes.
2. Update GPU Drivers
Mostly an outdated or corrupted graphics card driver can trigger multiple issues with the games or system performance. It’s highly recommended to check the graphics driver update. To do so:
- Press the Windows + X keys to open the Quick Link Menu.
- Click on Device Manager from the list > Double-click on Display adapters.
- Right-click on the dedicated graphics card that you’re currently using.
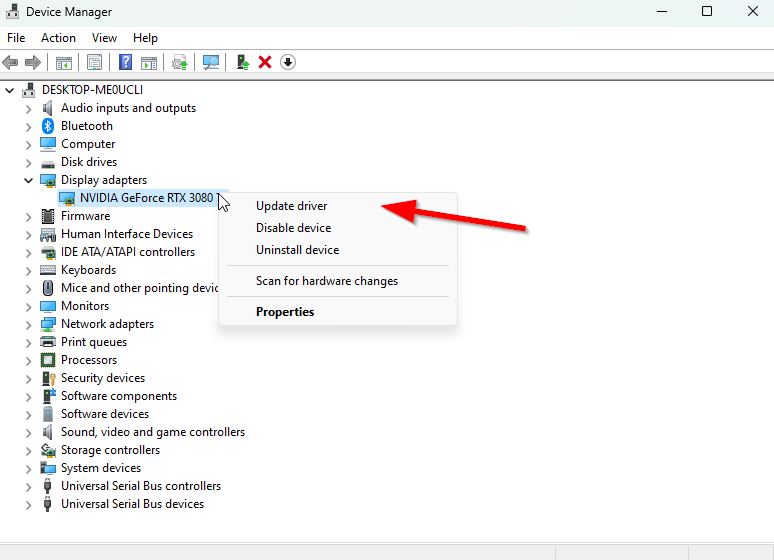
- Click on Update driver > Choose Search automatically for drivers.
- If there is the latest update available, it’ll automatically download & install the latest version.
- Once done, restart the computer to apply changes immediately.
Alternatively, you can manually download the latest version of the graphics driver and install it on the PC via the official website. Make sure to download the graphics driver file respective to your graphics card model and manufacturer. Nvidia graphics card users can update the GeForce Experience app via the Nvidia official site and AMD graphics card users can visit the AMD website for the same.
3. Close Background Running Tasks
Unnecessary background running tasks or programs can eat up a lot of system resources like CPU or Memory usage literally reducing system performance. Hence, the startup crashing, lagging, and not loading issues appear quite often. Simply, close all the unnecessary background running tasks completely. To do this:
- Press Ctrl + Shift + Esc keys to open up the Task Manager.
- Now, click on the Processes tab > Click to select tasks that are unnecessarily running in the background and consuming enough system resources.
- Click on End Task to close it one by one.
- Once done, restart your system.
4. Change Power Plan
It’s also highly recommended to change the power plan on the computer because the Windows system basically uses the Balanced power plan by default. But it reduces performance which can be improved by changing the power plan. Keep in mind that the performance plan can consume higher power. To do so:
- Press the Windows + R keys to open the Run dialog box.
- Type Control Panel in the field and click on OK from the search result to open it.
- Now, search for Power Options (Power & battery) and open it.
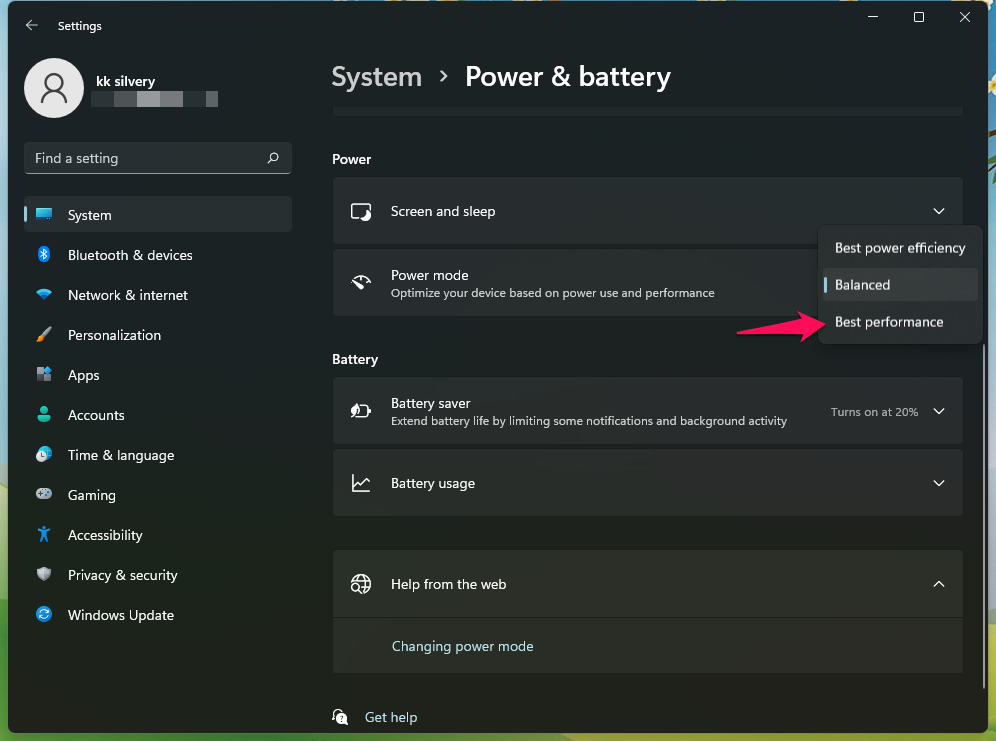
- Click on Best Performance > Reboot your PC to save changes immediately.
5. Tweak In-Game Graphics Settings
You can also change the in-game graphics settings to check if the problem is still appearing or not.
- Launch the Steam client and then open Dota 2 from Library.
- Click on the gear icon inside the Dota 2 game to enter the Settings menu.
- Now, make sure to select ‘Turn off VSync’.
- Then set each option under Advanced Settings to the low or medium.
6. Verify Game Files via Steam
Corrupted or missing game files may trigger some issues with the game launching or running smoothly. Make sure to verify the game files and repair them via the Steam client by following the steps below:
- Open the Steam client on the PC and log into the account > Head over to Library.
- Right-click on the Dota 2 game from the left pane.
- Click on Properties > Click on the Local Files tab.
- Then click on Verify Integrity of game files…
- Now, wait for the process to complete, and close the Steam client.
- Finally, restart the PC to apply changes.
7. Reinstall Dota 2
If none of the methods worked for you then try reinstalling the Dota 2 game on the PC to check if that helps you to fix the lagging or FPS drop issue due to not using a dedicated GPU (graphics card).
- Open the Steam client on your PC.
- Go to Library > Right-click on Dota 2.
- Select Uninstall > Click on Delete to confirm.
- Wait for the uninstallation process to complete > Exit the Steam client.
- Now, open the File Explorer application > Copy-paste C:\Program Files (x86)\Steam\steamapps\common on the address bar and hit Enter to search for the location.
- Go to the Dota 2 folder and simply Delete the folder completely.
- Reboot the PC to apply changes > Open Steam Store and Reinstall the Dota 2 game again. [Obviously, this may take enough time but you should try it out]
- It should fix the lag or FPS drop issue completely.
That’s it, guys. We assume this guide was helpful to you. For additional queries, you can comment below.