2013’s Dota 2 is a multiplayer online battle arena video game as a free-to-play strategical title by Valve that is considered to be a sequel to Defense of the Ancients. To be precise, Defense of the Ancients is a community-created mod for Blizzard Entertainment’s Warcraft III: Reign of Chaos. Though the Dota 2 title is quite popular and has positive reviews, it seems that several players are encountering the Dota 2 Error DX11 Not Working issue on the PC.
Now, if you’re also one of the victims to encounter such an issue then you can follow this troubleshooting guide to fix it. As per multiple reports, it looks like the DX11 is either not supporting Dota 2 or the out-of-video memory error is troubling a lot of players. Therefore, while launching the Dota 2 game on the PC, players are facing the startup crashing issue which feels frustrating. Mostly it’s happening due to the low memory which leads to the startup crashing.
Also Read
How to Fix Dota 2 Error DX11 Not Working
Luckily, here we’ve shared a couple of possible workarounds for you that should come in handy. The chances are high that issues with the outdated game version, missing or corrupted game files, outdated system software, outdated graphics drivers, and compatibility issues with the DirectX version run the Dota 2 game. Whereas issues with the Microsoft Visual Studio on the PC, corrupted game cache data, lowering the virtual memory, etc can be a reason.
1. Run DirectX Diagnostic Tool
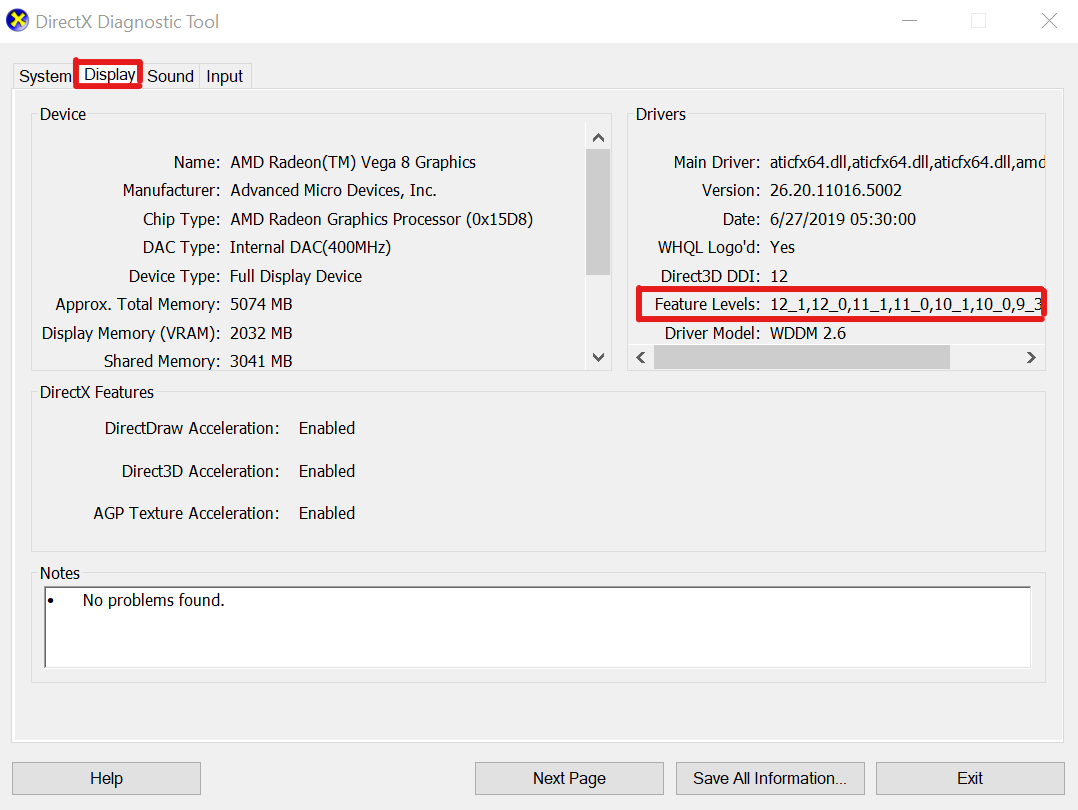
First of all, you should check the DirectX version and DirectX Feature Levels on your PC by following the steps below. Sometimes an outdated DirectX version or the incompatible DirectX Feature Level for the system can trouble you a lot to run video games. To do that:
- Press the Win+R keys to open the Run dialog box.
- Type dxdiag and hit Enter to open DirectX Diagnostic Tool.
- You can check the DirectX Version from the System tab under the DirectX Diagnostic Tool window.

- Next, you can go to the Display tab.
- You can additionally check DirectX 3D Feature Levels and other DirectX Features.
2. Run the game as an Administrator
If you’re not running the game file as an administrator on your PC then make sure to do the same. Otherwise, the user account control (UAC) might gonna prevent the game file to run properly without the system administrator account access.
- Open the Steam client on the PC > Click on Library.
- Now, right-click on Dota 2 > Click on Manage.
- Select Browse local files > Right-click on the Dota 2 file.
- Choose Properties > Click on the Compatibility tab.
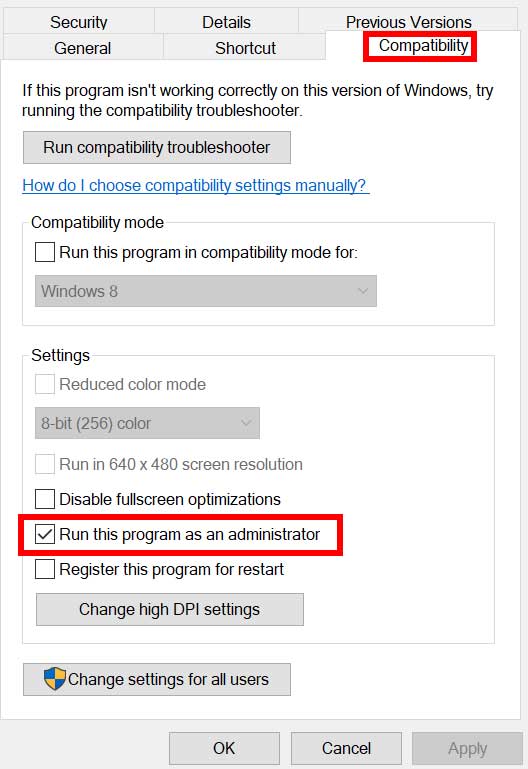
- Ensure to click on the Run this program as an administrator checkbox to checkmark it.
- Click on Apply and select OK to save changes.
3. Update DOTA 2
You should check for the DOTA 2 game update because an outdated game version can trouble you a lot. So, if you haven’t updated your game for a while, then follow the steps below to check for updates and install the latest update. To do so:
- Open the Steam client > Go to Library.
- Click on DOTA 2 from the left pane.
- It’ll automatically search for the available update. If there is an update available, click on Update.
- Wait for some time to install the update > Once done, close the Steam client.
- Reboot your PC to apply changes and launch the game again.
4. Verify and Repair DOTA 2 Files
In some cases, corrupted or missing game files on the PC may eventually occur several issues with the game running properly. You should verify the installed game files and repair them by using the Steam launcher automatically to reduce launch crashes and other errors. To do so:
- Launch the Steam client > Click on Library.
- Right-click on Dota 2 from the list of installed games.
- Click on Properties > Go to Local Files.
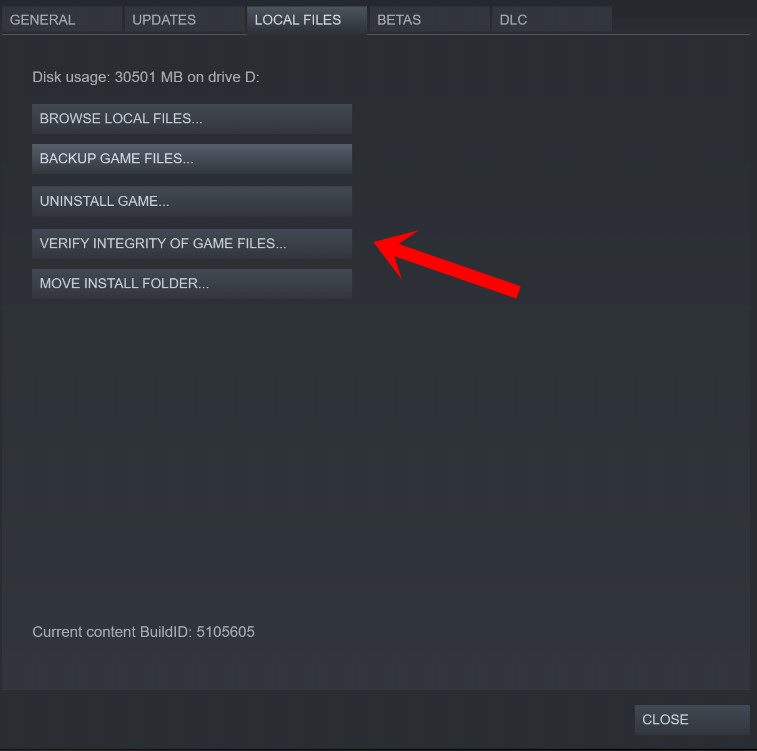
- Click on Verify Integrity of Game Files.
- You’ll have to wait for the process until it gets completed.
- Once done, just restart your computer.
5. Force Run DX11 for DOTA 2
It’s also recommended to forcefully run the DirectX 11 version on the Steam client for Dota 2 via the ‘set launch options’. To do so:
- Open the Steam client > Go to Library.
- Locate and right-click on Dota 2 from the list of installed games.
- Click on Properties > From the General tab, press the Set Launch Options button.
- Make sure to type the following command line in the field:
-dx11
- Click on OK to save changes.
- Finally, run the Dota 2 game again via Steam to check for the issue.
6. Update Graphics Driver
It may also be possible that an outdated GPU drive is causing a couple of issues with your Windows computer whatsoever. It’s always recommended to simply update your graphics driver manually if you haven’t done it for a while. To do so:
- Press the Win+X keys to open the Quick Start Menu.
- Click on Device Manager > Now, double-click on Display adapters.
- Right-click on the dedicated graphics card that you’re using.
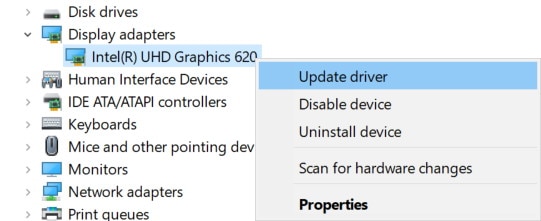
- Select Update driver > Choose to Search automatically for drivers.
- If there is an update available, it’ll automatically download & install the latest version.
- Once done, reboot the system to check for the issue.
However, if you can’t find any update then make sure to go to the official graphics card website and search manually for the latest update. If a new version is available, just download the file on your PC and install it. Whatever graphics card you use, jump to the link below as per the manufacturer.
7. Update Windows OS Build
Sometimes an outdated Windows system version can cause several issues with the program launching or running the game properly on the PC. You can follow the steps below to check for the system update.
- Press the Win+I keys to open Windows Settings.
- Click on Update & Security > From the Windows Update section, click on Check for updates.
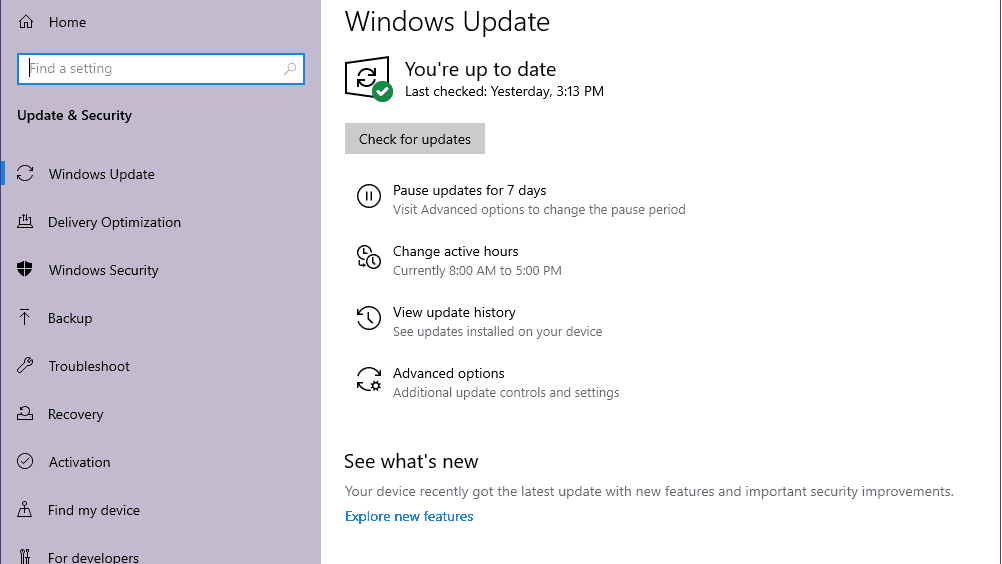
- If there is an update available, you can click on Download and Install.
- Wait for the process to complete the update process.
- Once done, make sure to reboot your computer to apply changes.
8. Try Installing Microsoft Visual Studio
Some affected Dota 2 players have suggested installing or updating the Microsoft Visual Studio on the Windows PC to fix potential issues with the Microsoft .NET or Microsoft Visual C++ Redistributables file.
9. Clear Game Cache Data
Sometimes issues with the game cache data can cause game crashes in most scenarios. It’s recommended to clear the game cache data on your PC by following the steps below:
- Close the Dota 2 game and exit the Steam launcher on your PC.
- Press the Win+R keys on the keyboard to open the Run dialog box.
- Type %public%\Documents and press Enter.
- Now, right-click on the Steam folder > Select Delete.
- Restart the launch and Dota 2 to check for the issue.
10. Disable CPU/GPU Overclocking
Ensure to disable the CPU or GPU overclocking on your PC to ensure there is no issue with the bottleneck because incompatibility conflict can easily trigger crashes, lags, slow loading of textures, and more. You should always try to use the default factory clock speed of both the processor and graphics card on the PC to get optimal performance whatsoever. You can get free and reliable overclocking software to set a default CPU/GPU overclocking.
11. Increase Virtual Memory
You should try increasing the virtual memory on your PC to check for the issue and whether it has been fixed or not. Sometimes the lack of free memory in the system may cause such issues. To do so:
- Click on the Start menu > Click on Control Panel.
- Click on Performance and Maintenance > Go to System.
- From the Advanced tab, click on Settings under Performance.
- On the Advanced tab, click on Change under Virtual memory.
- Under Drive [Volume Label], click on the drive that contains the paging file you want to change.
- Under Paging file size for the selected drive, click on System Managed Size > Click on Set.
- If this option hasn’t been flagged previously, restart the PC after flagging it.
- If the system paging file size is used to be System Managed then under Paging file size for selected drive, click on Custom size.
- Now, type a new paging file size in megabytes in the Initial size (MB) or Maximum size (MB) box.
- Finally, click on Set > Restart the PC to apply changes then check for the Dota 2 Error DX11 not working issue.
That’s it, guys. We assume this guide was helpful to you. For further queries, you can comment below.