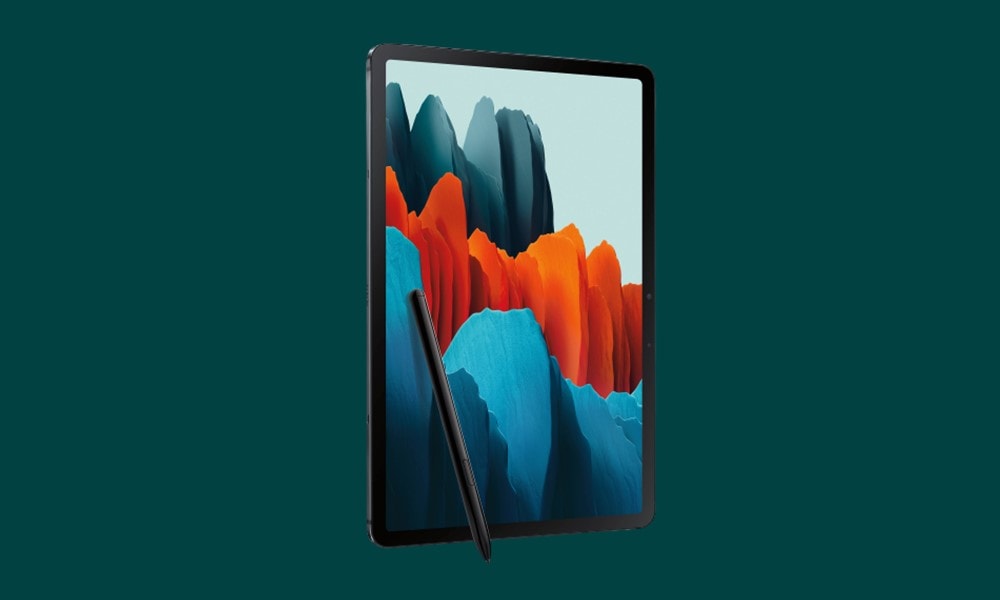
In this guide, we will show you how to enable 4K resolution on Galaxy Tab S7/S7+ using ADB. The recent addition to the Tab family, this one has received quite a few positive receptions from across the globe. And its specs sheet speaks volumes in justifying the above statement. With the latest Snapdragon 865+ chipset coupled with Adreno 650 and 8GB RAM, there’s going to be no complaints on the performance front. Plus its mammoth 8000 mAh battery supporting 45W fast charging would be sufficient to let your battery last an entire day on normal usages.
Likewise, its display has also caught a few eyeballs. The 11 inch IPS LCD screen, coupled with HDR10+ and 120Hz refresh rate is definitely quite impressive. Then the 1600 x 2560 pixel resolution is a treat to the eyes as well. In this regard, its 2K screen should be sufficient enough for everyday users. But what if you come across a 4K video? Well, if that happens, you shouldn’t be left disappointed as there’s a handy way out. Given here are the steps to enable 4K resolution on Galaxy Tab S7/S7+ using ADB. Follow along for the detailed instructions.
Also Read

Page Contents
How to Enable 4K Resolution on Galaxy Tab S7/S7+ Using ADB
While a few years back, 4K videos were a rarity, that is no longer the case. Well, even YouTube now has a rich collection of such videos. So if you ever wished to stream such videos on your S7/S7+ tablet, then this guide is all that is needed. We would be using the ADB commands to carry out the aforementioned task.
After doing so, your tablet will be able to render the video in 4K and will then output it on your display, similar to what Retina Displays or Nvidia DSR (Dynamic Super Resolution) usually does. So without further ado, let’s get on with the steps to enable 4K Resolution on Galaxy Tab S7/S7+ tablet.
STEP 1: The Prerequisites for 4K Resolution on Galaxy Tab S7
- To begin with, enable USB Debugging on your device. Head over to Settings > About Phone > Tap on Build Number 7 times > Go back to Settings > System > Advanced > Developer Options > Enable USB Debugging.
- Next, install the Android SDK Platform Tools on your PC.
STEP 2: Establish ADB Connection
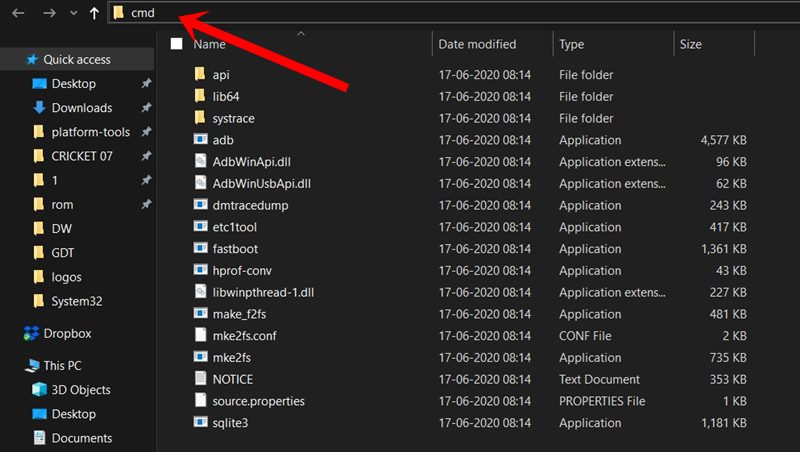
- Head over to the platform-tools folder, type in CMD in the address bar, and hit Enter. This will launch the Command Prompt.

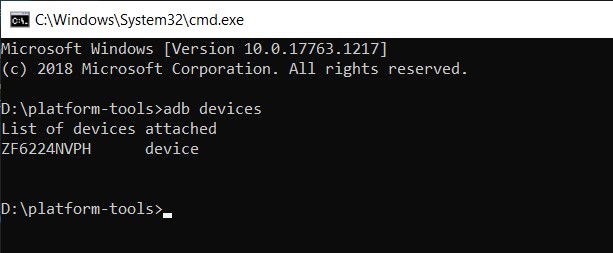
- Type in the following command in the CMD window to verify a successful ADB connection
adb devices

- If you get an alphanumeric command followed by the device keyword, then the connection has been established. Otherwise, reinstall the necessary drivers.
STEP 3: Enable 4K Resolution
You will now just have to execute the below two commands to enable 4K Resolution on Galaxy Tab S7/S7+. Do keep in mind that in the second command, we have set density as 1024, you may change it and set the one that meets your requirements. With that said, here are the two commands (thanks to XDA Member Stryker_Echo9er for these commands )
adb shell wm size 2400x3840
adb shell wm density 1024
STEP 4: Clear App Data

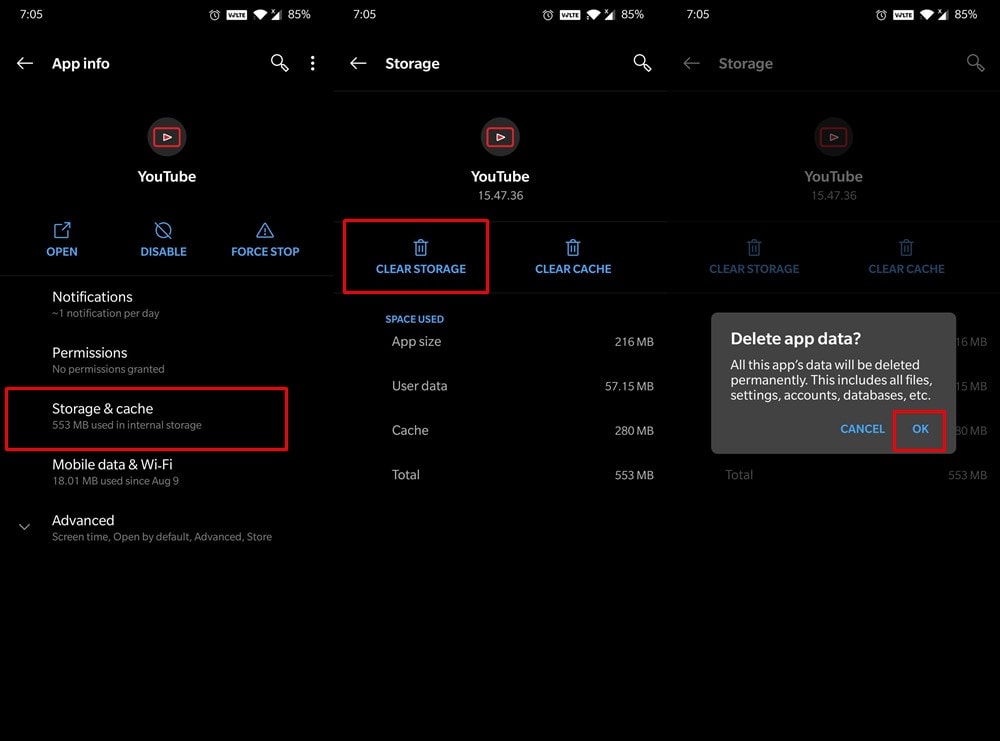
Finally, you will have to clear the app’s data. For example, if you wish to watch 4K videos on YouTube, then head over to Settings > Apps and Notifications > See all Apps > YouTube > Storage and Cache > Tap on Clear Storage. Doing so will log you out from YouTube, sign in back with your account credentials, and enjoy the videos in 4K!
How to Revert the Changes
If you wish to switch back to original settings, then you could undo the above tweak by just resetting the values. This could be done by entering the following two commands in the CMD window (with the device connected in ADB Mode):
adb shell wm size reset
adb shell wm density reset
With this, we conclude the guide on how to enable 4K resolution on Galaxy Tab S7/S7+ using ADB. The general saying that “a 4K video will look better on a 2K screen than 2K on a 2K screen” fits perfectly in this aspect. What are your views on the same? Do you feel any considerable improvements in the display’s sharpness and edges or rather you were more satisfied with the original settings. Let us know in the comments. Rounding off, don’t forget to check out our iPhone Tips and Tricks, PC tips and tricks, and Android Tips and Tricks as well.
