With the arrival of the May 2019 Windows 10 update, we have received an exciting change in terms of security in Windows OS. A new feature, Tamper Protection, is added, which is enabled by default in Windows 10. This feature may not be present in your system if it is not updated right now. But if it is, then we will show what this feature is all about and how you should enable it if it is turned off now due to any reason.
Tamper protection arrived with the release of version 1903, and it helps prevent security bypasses in Windows Security and Windows Defender antivirus settings. If it is enabled, then no Registry changes, group policies, malware, or command-line tools can temper with the security of the system. Malicious programs try to reduce the functionality of the windows security features using PowerShell commands and Registry changes. But Tamper protection resets or ignores such attempts completely. So let’s see how you can enable this feature in your system.
Also Read

Page Contents
How to enable Tamper Protection in Windows 10?
The malware that specifically disables Windows Defender programs, the anti-malware solution, cloud-delivered protection, and several security intelligence updates will be taken care of by this new Tamper protection feature. Now there are two ways to enable it depending on your system configuration. If you have a third-party antivirus program, then the process would be different.
How to enable Tamper Protection when you don’t have an Antivirus program?
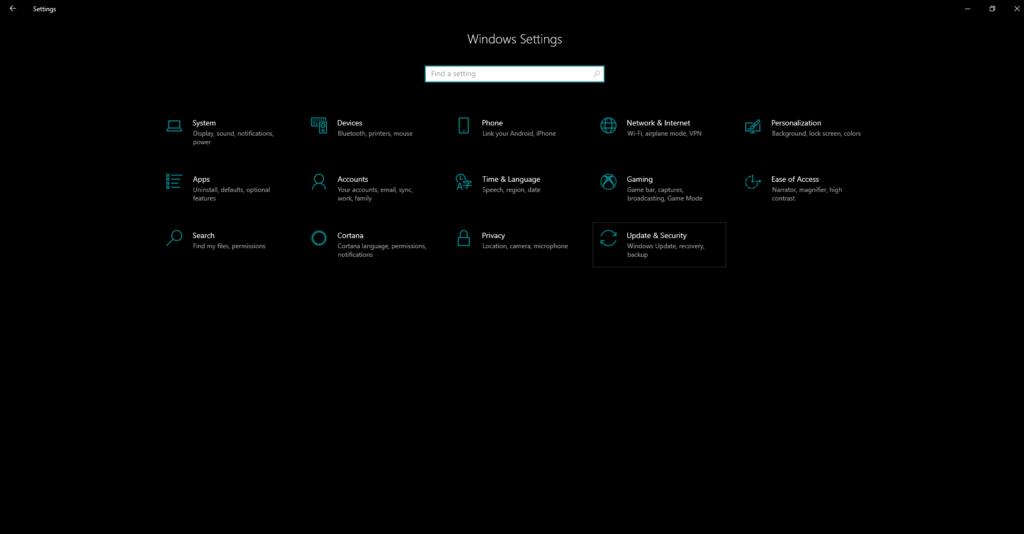
- Press and hold Windows key + I, and it will open your settings.

- Then click on Update & Security.
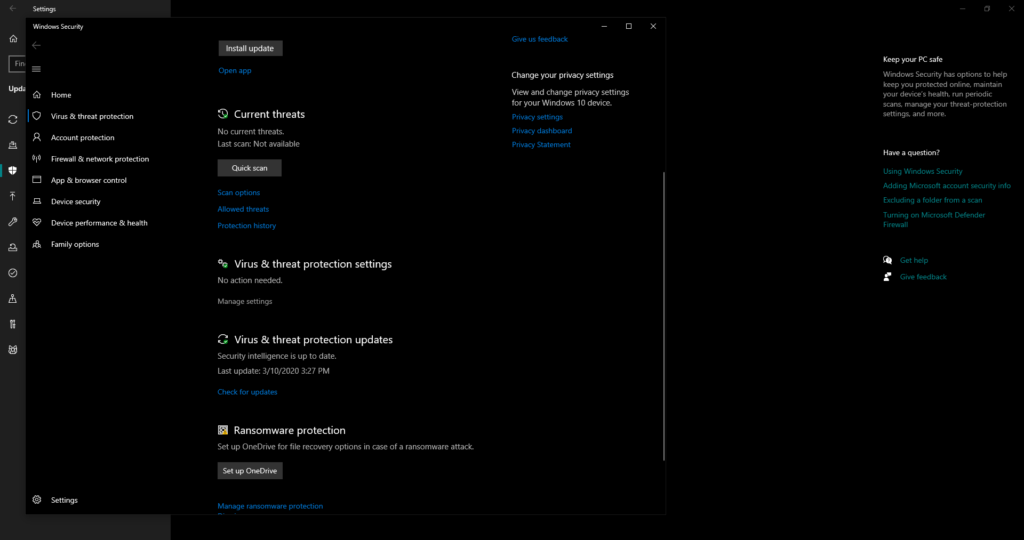
- Then on the left pane, click on Windows security and then click on Virus and Threat Protection.

- Under the Virus and Threat Protection settings, click on Manage Settings.

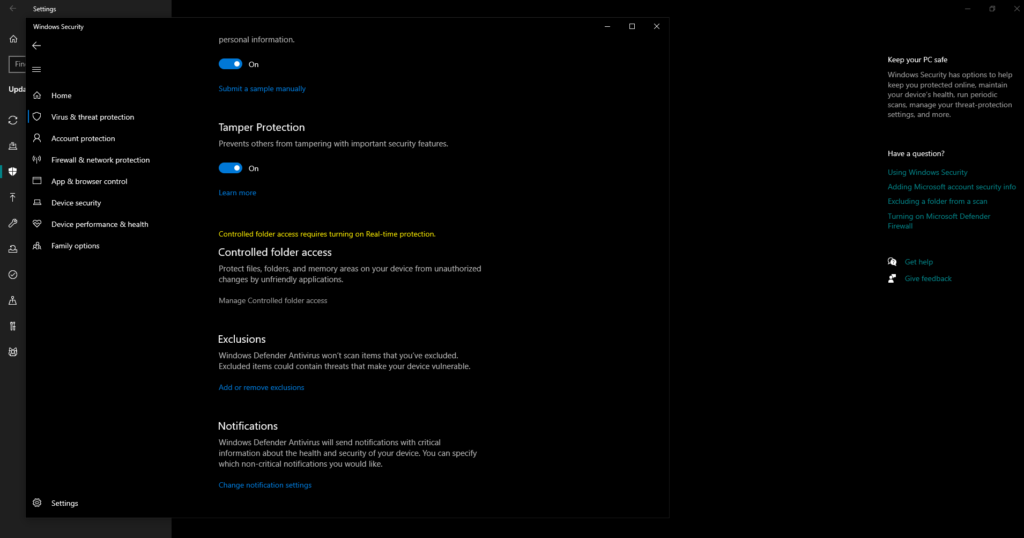
- Find Tamper protection in the next window and then turn on the toggle for it if it’s off.
This method will not work if you have a third-party antivirus program as the antivirus program settings take over this windows security feature.
How to enable Tamper Protection with a third-party Antivirus program?
If you have an antivirus program already installed on the system, then follow the instructions given below.
- Press and hold Windows key + I, and it will open your settings.
- Then click on Update & Security.
- Then on the left pane, click on Windows security and then click on Virus and Threat Protection.
- Click on Windows Defender Antivirus options.
- Then enable periodic scanning with Windows Defender antivirus.
- Scroll and find the Tamper Protection and turn the switch on if it’s off.

Along with the security from the Antivirus, you will also get the added tampered protection from Windows.
So that is how you enable Tamper protection in Windows. If you have any questions or queries about this guide on enabling tamper protection in Windows, then comment down below, and we will get back to you. Also, be sure to check out our other articles on iPhone tips and tricks, Android tips and tricks, PC tips and tricks, and much more for more useful information.
