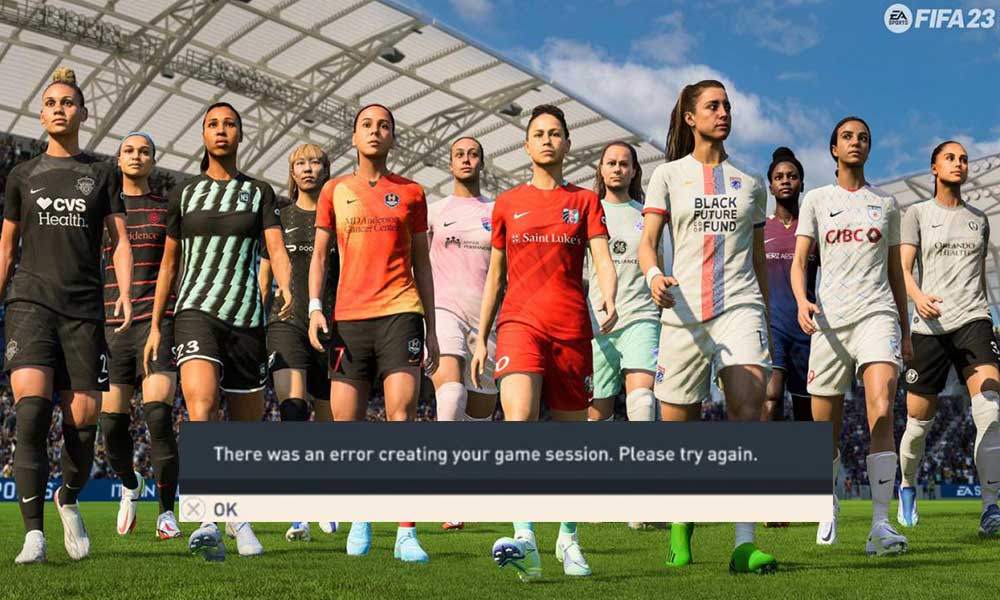
Electronic Arts has done a tremendous job by releasing FIFA 23, bringing the gaming experience with HyperMotion2 technology, men’s and women’s FIFA World Cup, women’s club teams, cross-play progression, etc. EA SPORTS FIFA 23 brings The World’s Game to the pitch with next-gen HyperMotion2 Technology, women’s club football, and two FIFA World Cup tournaments. However, several players face the FIFA 23 Error Creating Game Session in the multiplayer sessions.
However, like any other online multiplayer game, FIFA 23 is prone to server connectivity glitches or errors. If we look at the specific “There was an error creating your game session. Please try again.” error, it eventually prevents players from enjoying the gaming experience properly. It becomes frustrating enough because affected players are unable to play a match. More importantly, not only in creating a game session but also joining gets affected by this error.
Page Contents
Fix: FIFA 23 Error Creating Game Session
Luckily, here we’ve shared with you a couple of possible workarounds to easily fix this error. Make sure to follow this troubleshooting guide until the problem gets resolved. Now, without wasting any more time, let’s jump into it.
1. Restart the PC or Console
First, you’ll have to restart the gaming device manually depending on whatever you use to ensure there is no issue with the temporary system glitch or cache data whatsoever.
2. Run FIFA 23 as an Administrator
Run the game app file on your PC as administrator access to allow the User Account Control (UAC) access to the system. In some cases, your system requires the UAC access permission to run a program which is quite important. By following the steps below you’ll have to allow the admin access for once and it won’t ask you for the same again. To do so:
- Go to the installed FIFA 23 game directory.
- Right-click on the game application file on your PC.
- Click on Properties > Click on the Compatibility tab.

- Click on the Run this program as an administrator checkbox to enable it.
- Once done, click on Apply and then OK to save changes.
- Finally, run the game to check for the issue.
3. Check Your Internet Connection
You should also check for the network connection at your end to ensure there is no issue with the internet connectivity. Sometimes a poor and unstable network can cause several issues with the game server connectivity and other gaming tasks. It would be best if you also tried switching the wireless network to wired or vice versa to cross-check the issue. Make sure to power cycle the Wi-Fi router to refresh any kind of networking glitch whatsoever.
4. Clear the Alternate MAC Address
The Alternate MAC Address is a unique identifier that the Xbox console uses to connect to a network. However, if you enter an incorrect MAC address, it could cause issues with connectivity.
- Press the Xbox button on your controller to open the guide.
- Go to Settings > Choose Network.
- Select Network Settings.
- Choose Advanced Settings > Select Alternate MAC Address.
- Select Clear > Go back to the Network Settings menu.
- Select Network Reset > Follow the prompts to reset your network settings.
- Your Xbox console will restart and set up your network connection again.
5. Use a VPN or Proxy Server
Try using the VPN (Virtual Private Network) service or proxy servers at your end to reduce game server connectivity issues in most cases. It looks like using a VPN may trigger multiple issues with the server connectivity or getting kicked out of the matchmaking.
6. Check the EA Server Status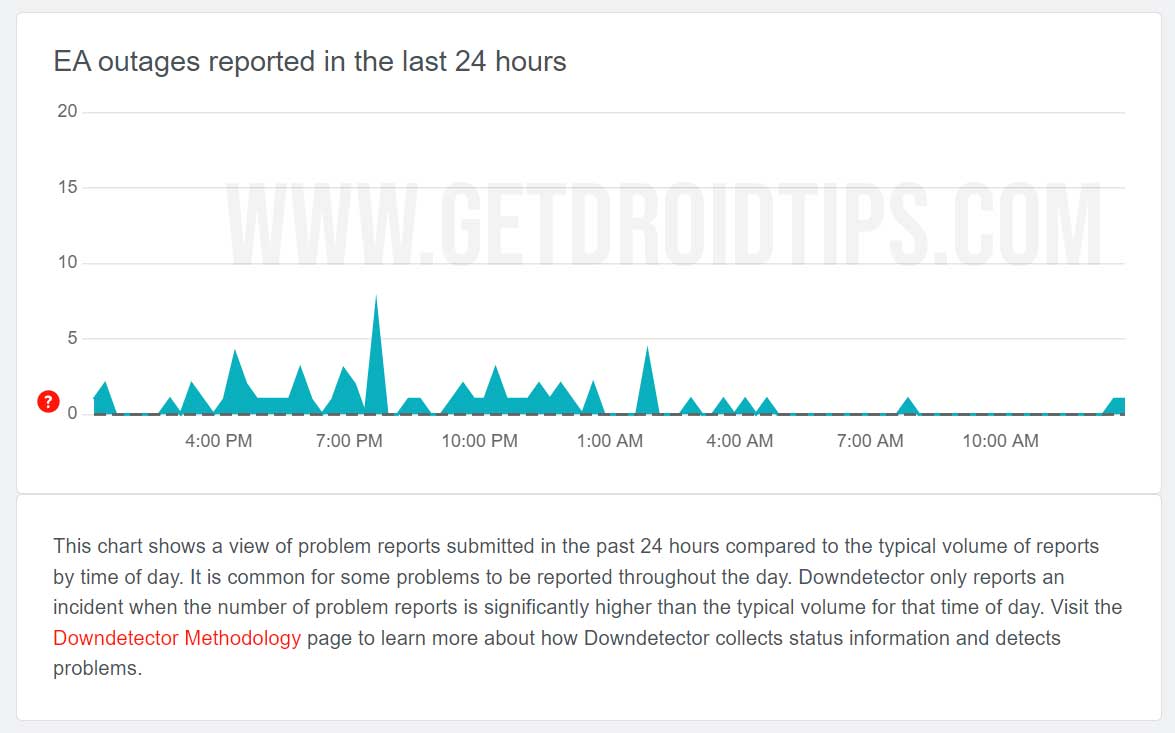
You should check the EA game server status to ensure online services are running well. If, in case, you’re experiencing the server connectivity error for any specific game, then make sure to game’s server status. Sometimes server outages, downtime, or scheduled maintenance issues might occur in service interruptions. You can also check out the DownDetector EA Status webpage to see if EA servers work.
At the time of writing this article, it seems that many EA App users are experiencing server connectivity issues apart from the EA account login issues and gameplay issues. So, you might need to wait a couple of hours or more and then try using the EA App again to check for the issue. You can also follow the @EAHelp Twitter handle to get all the real-time updates and info regarding server outages, etc.
7. Update FIFA 23
It’s recommended to update the game version to the latest because an outdated patch can trigger multiple issues with the game running in some cases. To do so:
For Steam:
- Open the Steam client > Go to Library.
- Click on FIFA 23 from the list of installed games on the left pane.
- Now, the client will automatically search for the available update.
- If there is an update available, click on the Update option.
- Wait for a couple of minutes or so until the game update completes.
- Once done, make sure to close the Steam client.
- Finally, reboot your PC to apply changes.
For Epic Games Launcher:
- Open the Epic Games Launcher > Head over to Library.
- Now, click on the three-dot icon next to FIFA 23.
- Make sure the Auto Update option is turned on.
- It should automatically install the available update of the game.
For EA Play:
- Open the EA Play client app.
- Next, click on the three horizontal lines located in the top left corner of your screen.
- Click on the Settings option.
- Select the Download tab.
- Under the Updates tab, Turn On the Update games automatically toggle.
- You can also turn on the Enable background downloads option.
For Xbox Series S|X:
- Press the Xbox button on your controller.
- Next, choose My Games & Apps > Select See All.
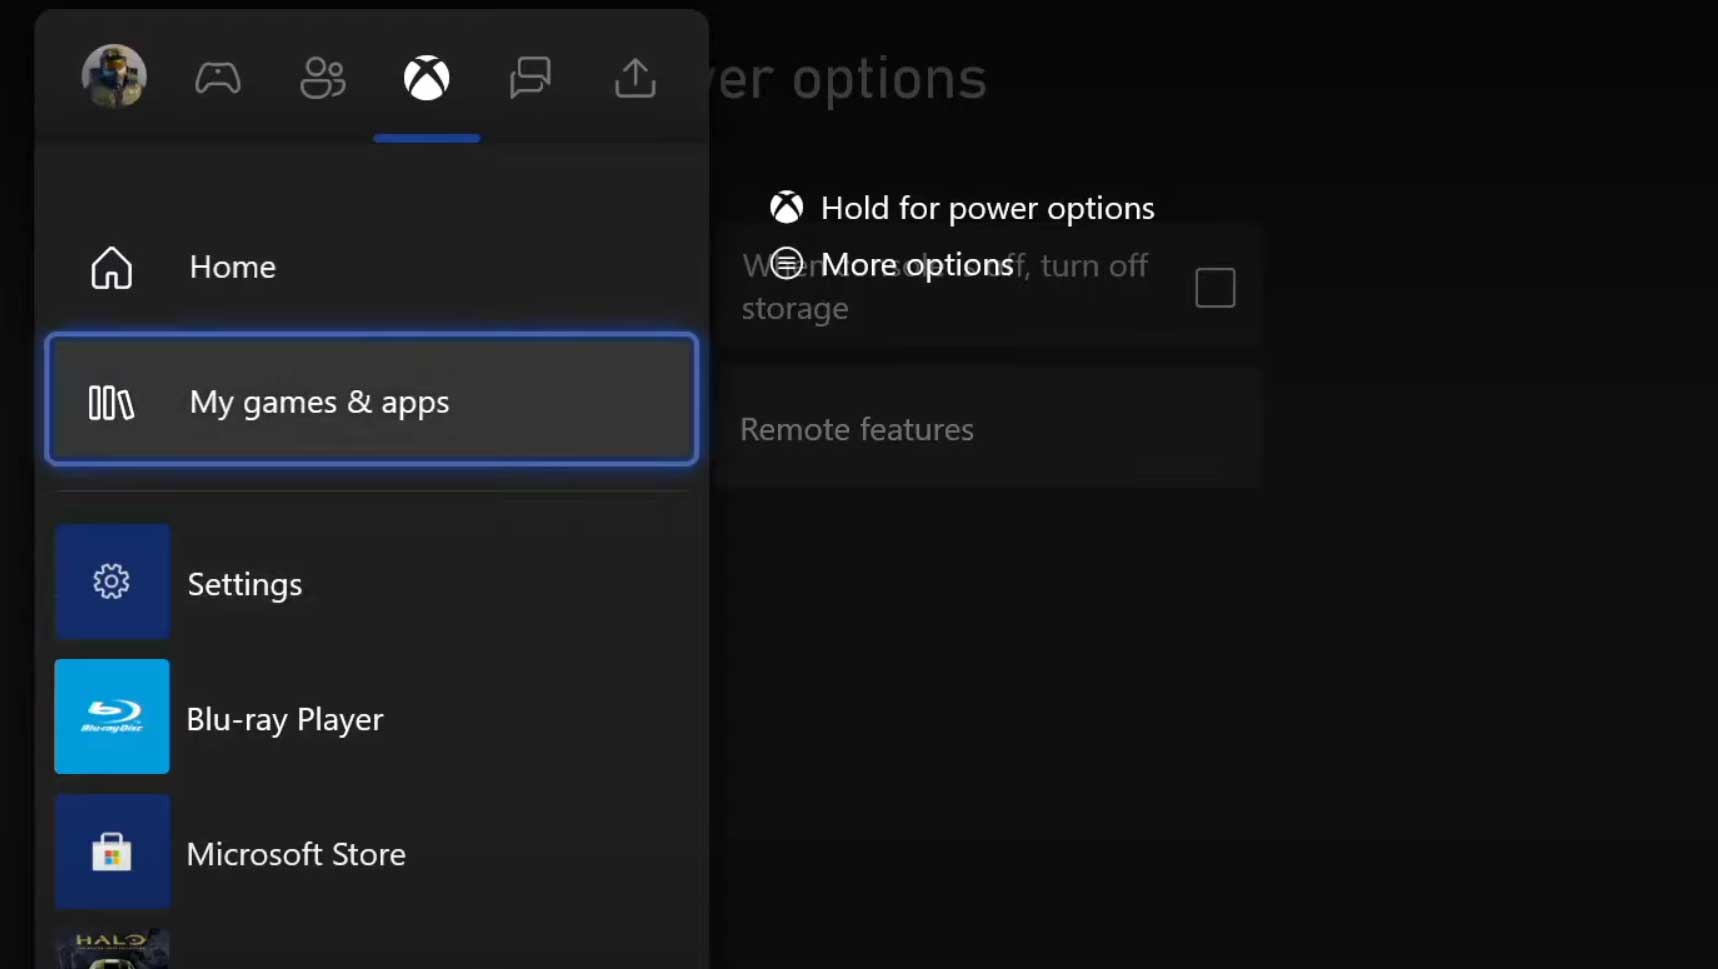
- Select Manage and then Updates.
- If an update is available, your console will automatically start downloading & installing the new patch.
Please Note: It’s worth recommending going to the Settings page > Choose Systems > Select Updates to update your game automatically whenever the console is connected to the internet.
For PlayStation:
- From the dashboard interface, open the game Library.
- Choose the FIFA 23 game.
- Press the Options button > Select Check for Update.
- If there is an update available, make sure to install the update.
8. Scan and Repair the Game Files
Sometimes corrupted or missing game files on the PC may trigger some issues with the game running smoothly. Make sure to verify the game files and repair them via the client by following the steps below.
For Steam:
- Open the Steam client on the PC and log into the account.
- Head over to the Library.
- Right-click on the FIFA 23 game from the left pane.
- Click on Properties > Click on the Local Files tab.
- Click on Verify Integrity of game files.
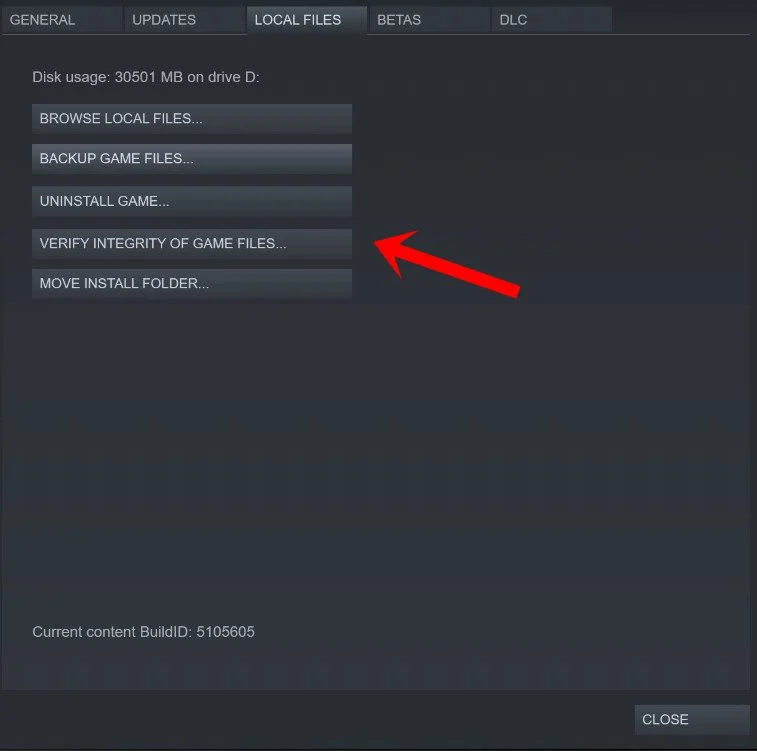
- Now, wait for the process to complete, and close the Steam client.
- Finally, restart the PC to apply changes.
For EA Play:
- Open the EA Play on your PC.
- Right-click on the FIFA 23 game tile in your Games Library.
- Click on the Settings cog icon > Select Repair.
- Finally, reboot the PC to apply changes.
For Epic Games Launcher:
- Open the Epic Games Launcher > Click on Library.
- Click on the three-dots icon next to FIFA 23.
- Now, click on Verify > Wait for it to complete.
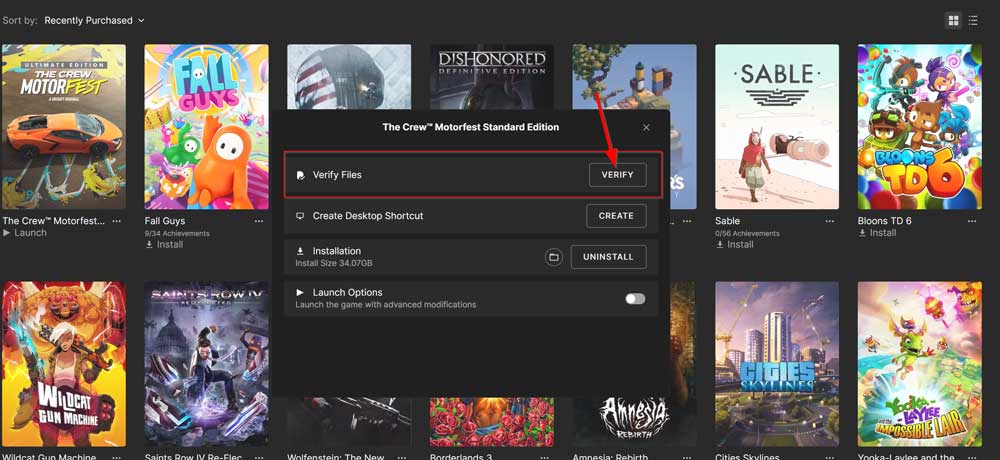
- Reboot the PC and check for the issue again.
9. Use a Public DNS
It seems that somehow your specific DNS address is having some blocking issues with the FIFA 23 game server. So, you should try using the public DNS address on the PC or router manually adding DNS server addresses which will let you connect and synchronize the game servers easily.
For PC:
- Press the Win+R keys to open the Run dialogue box.
- Now, type ncpa.cpl and hit Enter to open Network Connections.
- Double-click on the Wi-Fi or Ethernet network from the list.
- Click on Properties > Double-click on Internet Protocol Version 4 (TCP/IPv4).
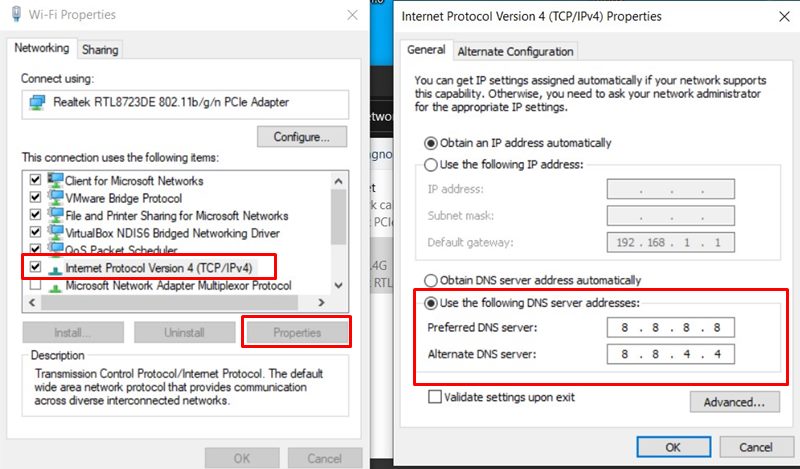
- Click to select Use the following DNS server addresses.
- Next, enter 8.8.8.8 for the Preferred DNS server and 8.8.4.4 for the Alternate DNS server.
- Once done, click on OK to save changes.
- Make sure to restart your computer to apply changes.
For PlayStation:
- Go to the dashboard and select the Settings menu.
- Select Network > Choose Set Up Internet Connection.
- Then select Wi-Fi or LAN Cable according to your active network.
- Choose Custom > Select Automatic for the IP Address Settings.
- Choose Do Not Specify for the DHCP Host Name.
- Select Manual for the DNS Settings.
- Enter 8.8.8.8 for the Primary DNS and 8.8.4.4 for the Secondary DNS.
- Choose OK > Select Do Not Use for the MTU Settings.
- Select Do Not Use for Proxy Server.
- Finally, reboot the console to apply changes.
For Xbox:
- Press the Xbox button on your controller to open the Guide menu.
- Go to the System tab > Select Settings.
- Choose Network > Select Network Settings.
- Select Advanced Settings.
- Select DNS Settings > Select Manual.
- Enter 8.8.8.8 for the Primary DNS Address and 8.8.4.4 for the Secondary DNS Address.
- Once done, reboot the console to apply the changes.
10. Contact EA Help
If the issue still persists even after attempting all the above troubleshooting methods then you should consider contacting the EA Help team for further assistance. Make sure to submit the support ticket for the same to allow developers to investigate the issue.
That’s it, guys. We assume this guide was helpful to you. For further queries, you can comment below.
