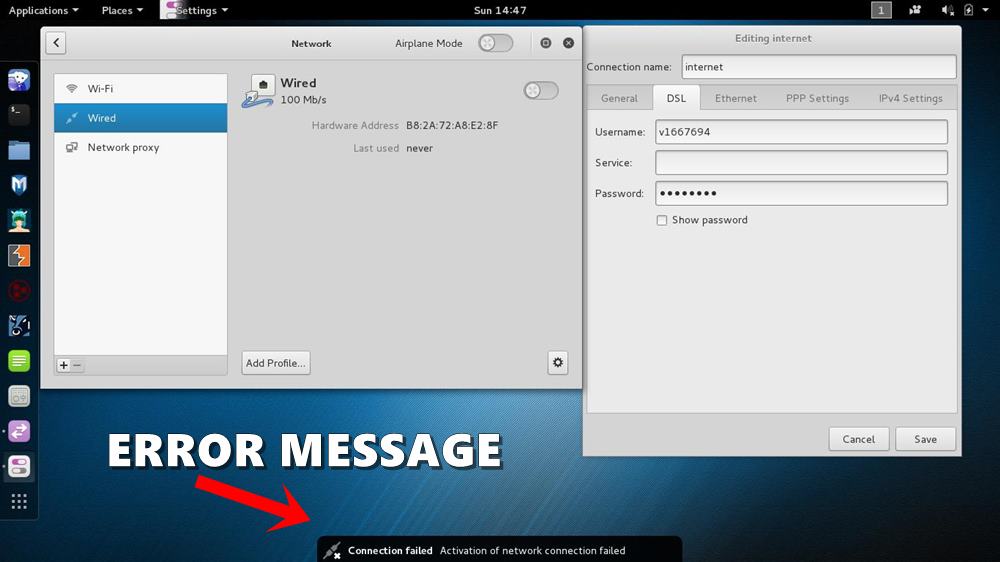
The Debian based Linux distribution Kali has been designed for digital forensics and penetration testing. Many users have tried this onto their set up via the VMWare, Dual Booting, Emulators, or other such ways. However, while they can successfully install it, the real issue arises as soon as they try and make an online connection. They get greeted with an error message that the activation of network connection has failed in Kali Linux.
Activation of Network Connection Failed ||| Solution? from Kalilinux
This isn’t any rare case, but rather quite a few users seem to be bugged with this error as of late. Many have voiced this concern across various online forums including the Kali Forum, Unix Stack Exchange, Quora, and even Reddit (see above). So if you are also among the set of users who are continuously facing this error, then you have come to the right place. Today, we will show you how to fix the activation of network connection failed issue in Kali Linux. Follow along.
How to Fix activation of network connection failed in Kali Linux Error
The objective that we are trying to achieve could be carried on via two different methods: File Explorer and Command Window. In this tutorial, we will be explaining both of them. You should try any of the two environments in which you feel more comfortable. The ultimate fix will be the same in both these cases, it’s just the path taken will be different. On that note, here are the instruction steps to fix the activation of network connection failed issue in Kali Linux.
Method 1: Via File Explorer
- To begin with, click on Places and from the drop-down menu that appears select Computer.
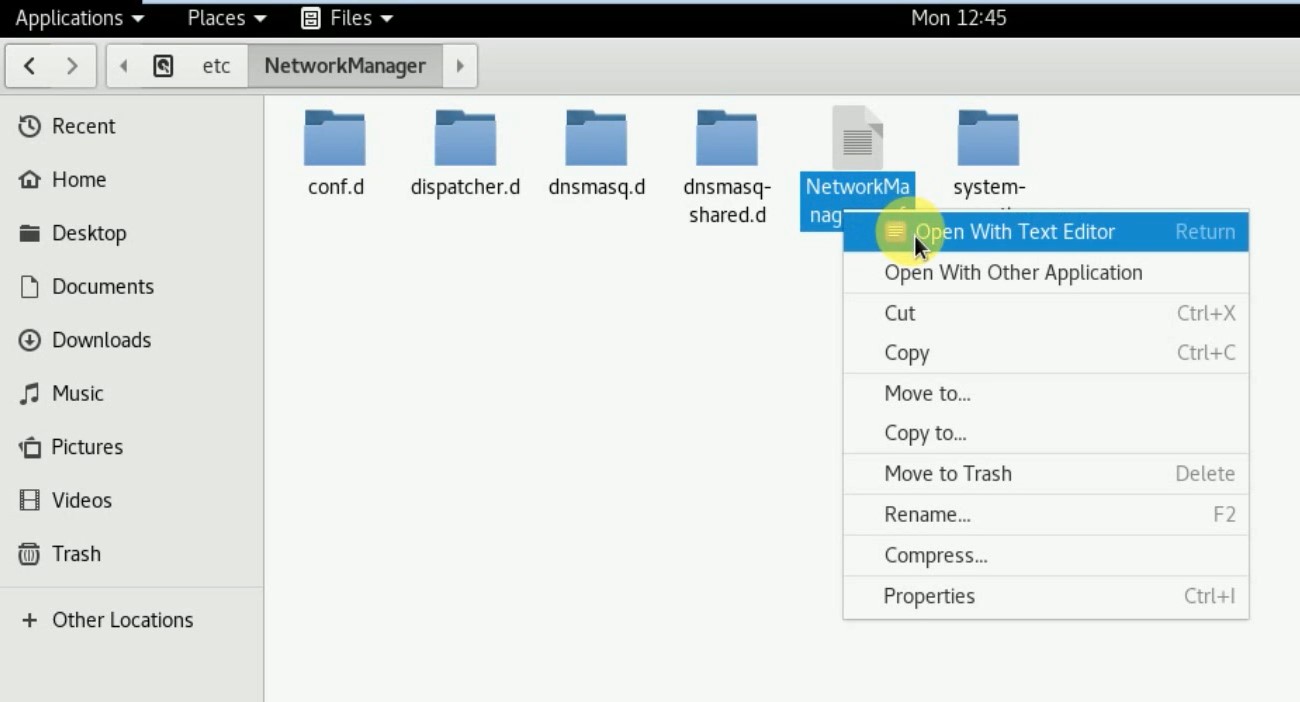
- Then browse to the etc folder and within that, search for the NetworkManager folder.
- Search for the NetworkManager.conf file. It is a configuration file. Right-click on it and select Open with Text Editor.
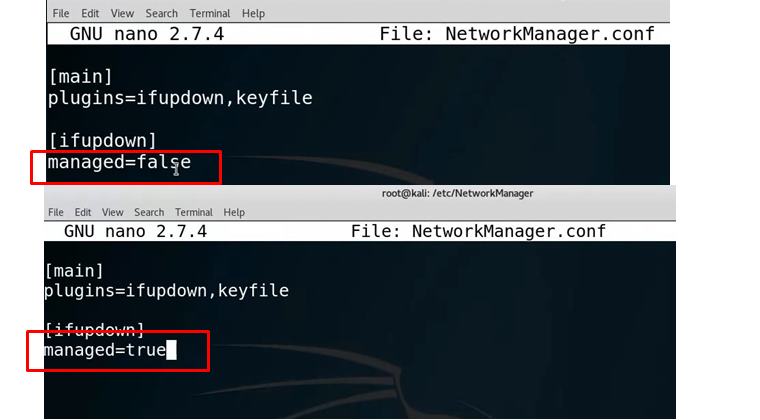
- There you will find a line managed=false. Change it as follows:
managed=true
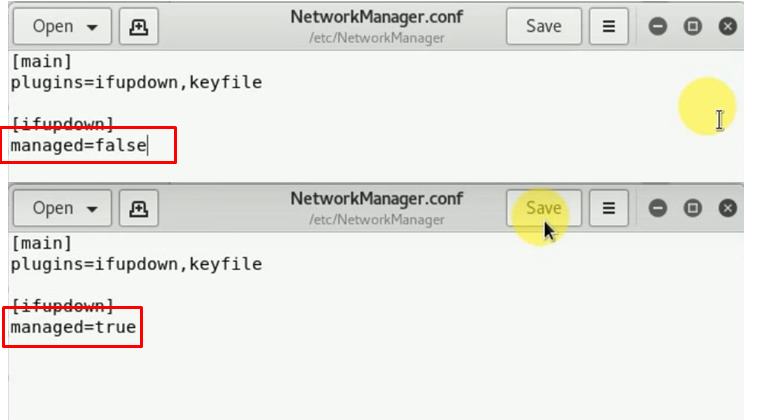
- Then click on Save in the top right to save this modification.
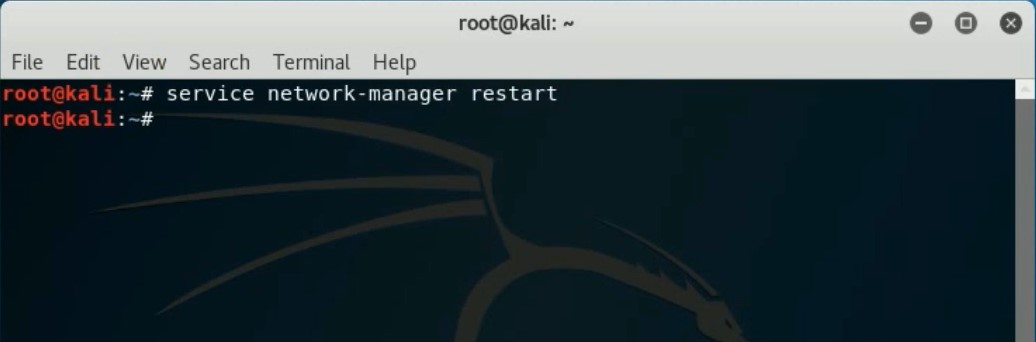
- We will now have to restart the network manager. For that, launch the Terminal window and execute the below command:
service-network manager restart
- That is it. You should have successfully fixed the activation of network connection failed issue in Kali Linux. However, if you are facing any issues with the above method, try out the next workaround shared below.
Method 2: Via Terminal Window
The entire process, right from searching for the NetworkManager.conf file to changing the “managed” value, will be carried out right from the Command Window itself. Follow the below steps:
- To begin with, you will have to launch the Terminal window. There are many ways of doing so, the easiest of which involves right-clicking on the desktop and selecting the Open Terminal window option.
- We will now change the directory and access the NetworkManager.conf file. Type in the below command to do so:
cd /etc/NetworkManager
- Next up, we will be listing out all the files of this directory via the below command:
ls -l
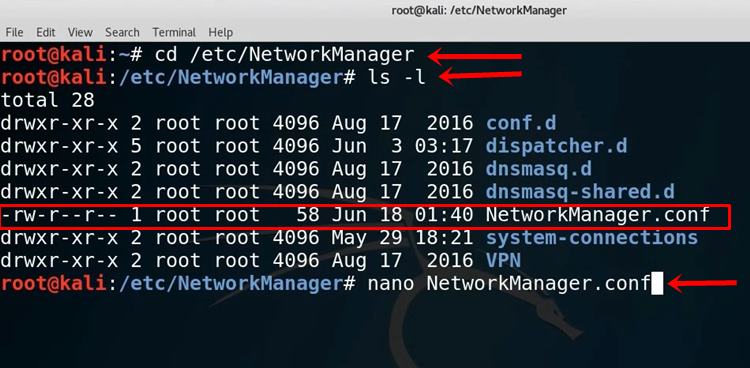
- In the list that appears, you should see the NetworkManager.conf file. We will try and access that as follows:
nano NetworkManager.conf
- Now you should see the managed=false keyword. Make the following changes:
managed=true
- Hit the Ctrl+O to save this modification, then hit Enter followed by Ctrl+X to exit.
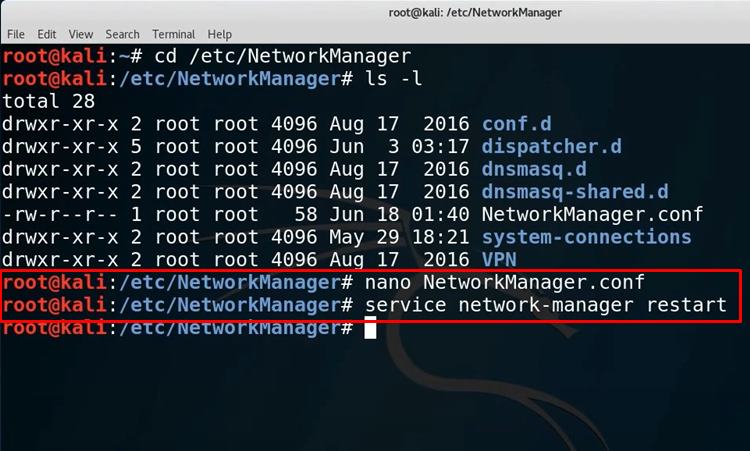
- As before, we will now have to restart the network manager. Use the below command to do so:
service-network manager restart
- That is it. If you wish to check whether the connection is successful or not, we could ping a website and see if the data packets are being transferred or not. Let’s ping Google.com via the below command
ping google.com
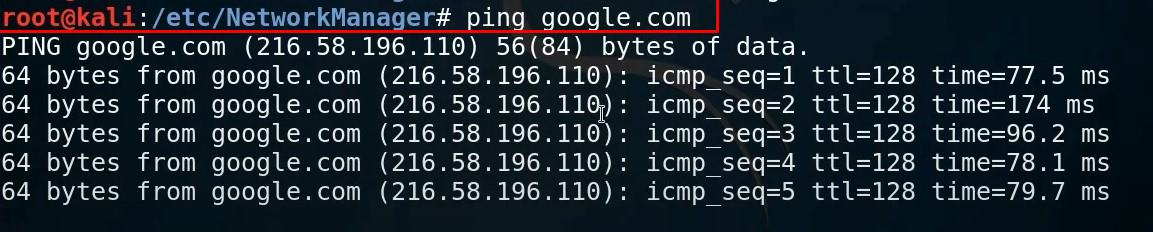
- You should now see x number of bytes being received from Google.com. This signifies that the connection has been successfully established.
And with this, we have also fixed the activation of network connection failed issue in Kali Linux. Well, this was one such tip. There exist a plethora of more such tips including iPhone Tips and Tricks, PC tips and tricks, and Android Tips and Trick that deserves your attention. Do check them out as well.