Have you ever encountered issues with the Audio Services Not Responding on Windows 10? If yes, then you’re in the right place as plenty of Windows 10 users may receive the same error message while having problems with the sound devices. It basically indicates that your connected sound device isn’t responding properly to the Windows system commands.
Well, this is one of the most common Windows OS issues that anyone can experience once or multiple times in their lifetime. Now, you may ask in which scenarios this particular error message appears? It’s worth mentioning that the audio services not responding error mostly appear due to the Windows system update or after upgrading the Windows OS build. But you don’t need to worry about it as we’ve mentioned a couple of troubleshooting steps below to quickly fix this issue.
Also Read
Page Contents
How to Fix Audio Services Not Responding on Windows 10
Mostly rebooting the computer as well as the audio devices completely will fix the issue. However, if this process doesn’t help you out then you should follow some other methods. So, without wasting any more time, let’s get into it.

1. Reboot Audio Services
- Press Windows + R key shortcut and to open up the Run dialog box.
- Now, type services.msc and hit Enter to open up the Services option.
- Scroll down and look for the Windows Audio services.
- Right-click on it and click on Restart.
- Next, right-click again and click on Properties.
- Choose the Startup type Automatic.
- Click on Apply and OK to save changes.
- Go back to the previous page and look for Windows Audio Endpoint Builder services.
- Again right-click on it and select Restart. (If not started, click on Start)
- Again right-click on it and select Automatic for the Startup type > Apply > OK.
- Finally, restart your computer to take immediate changes.
2. Check Sound Services
- Press Windows + R key shortcut and to open up the Run dialog box.
- Now, type services.msc and hit Enter to open up the Services option.
- Search for all three audio services below one by one and make sure to Start them up, if not running already:
RPC Endpoint Mapper
Remote Procedure Call (RPC)
DCOM Server Process Launcher
- Also, make sure to set the Startup type as Automatic > Click on Apply and OK.
- Restart your PC and check for the issue again.
3. Run Local and Network Service Command
- Press Windows + R key shortcut and to open up the Run dialog box.
- Now, type cmd and hit Enter to open up the Command Prompt.
- Add Local Service by typing the command below and hit Enter:
net localgroup Administrators /add localservice
- Next, add the Network Service as well by inputting the below command and pressing Enter:
net localgroup Administrators /add networkservice
- Once done, restart your computer to check whether the Audio Services Not Responding on Windows 10 issue has been fixed or not.
4. Reinstall Sound Drivers
- Press Windows + I key shortcut to open up the Windows Settings menu.
- Now, click on System > Scroll down from the left pane and click on About.
- Then click on System info from the right side of the page.
- Next, you’ll need to click on the Advanced system settings from the left pane.
- Click on the Hardware tab > Click on Device installation settings.
- Then click on No (Your device might not work as expected) > Click on Save Changes.
- Restart your computer.
However, if in case, this method doesn’t fix the issue, make sure to go back to the Device installation settings, select Yes, and then Save Changes. (Important)
- Now, click on Start > Type Device Manager and click on it from the search result.
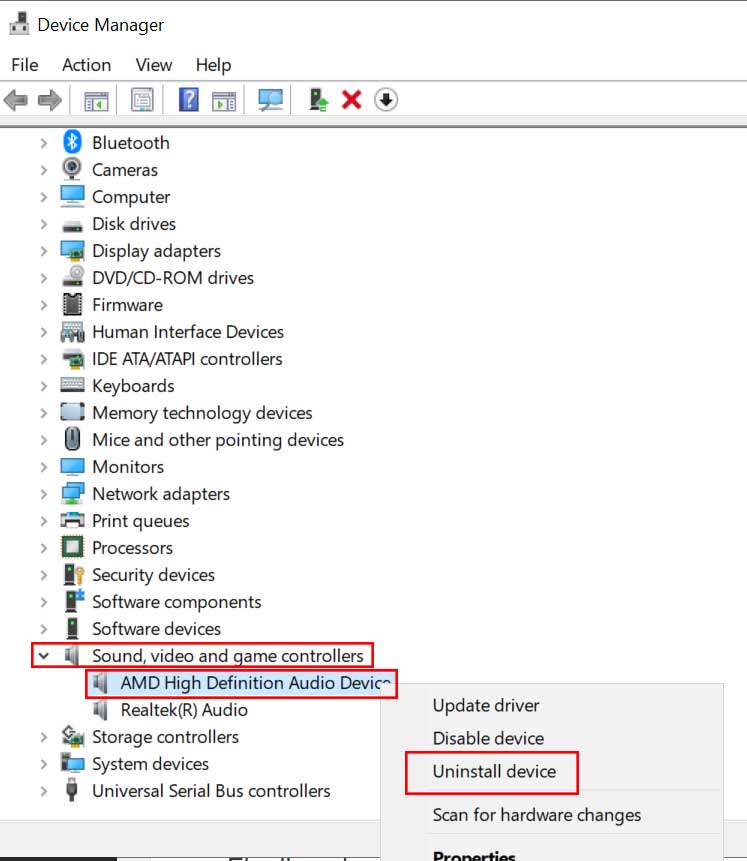
- Click on the Sound, video, and game controllers to expand the list.

- Right-click on the sound device and choose the Uninstall device.
- Enable the uninstall driver checkbox and proceed.
- Once uninstalled, right-click on the blank space on the Device Manager and click on Scan for hardware changes.
- Your system will automatically detect the connected audio hardware on your computer and it will also download & install the default audio driver automatically.
- Finally, reboot your PC to apply changes.
This method should fix the Audio Services Not Responding on Windows 10 issue in most cases.
5. Install Realtek High Definition Audio Device
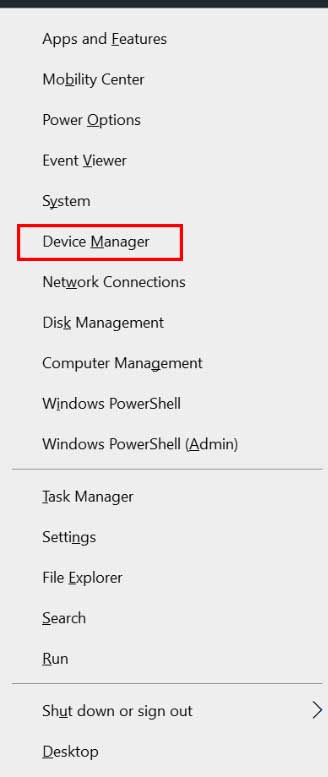
- Press the Windows + X key shortcut to open up the Quick Start Menu.

- Click on Device Manager > Click on the Sound, video, and game controllers to expand the list.
- Right-click on the sound device and choose the Update driver option.
- Then select Browse my computer for driver software.
- Select Let me pick from a list of available drivers on my computer.
- Now, uncheck the Show compatible hardware option.
- Then scroll down and look for High Definition Audio Device Version: xx.x.xxxxx.xxx > Click on it to select.
- Choose Next > Follow the on-screen instructions to complete the process.
- Finally, restart your computer to check for the issue.
However, if this method doesn’t work for you, try downloading and installing the latest official audio driver from the manufacturer’s website.
6. Use a System Restore Point
- Click on Start > Type Restore and click on the Create a restore point option from the search result.
- Now, click on the System Protection tab > Then click on System Restore.

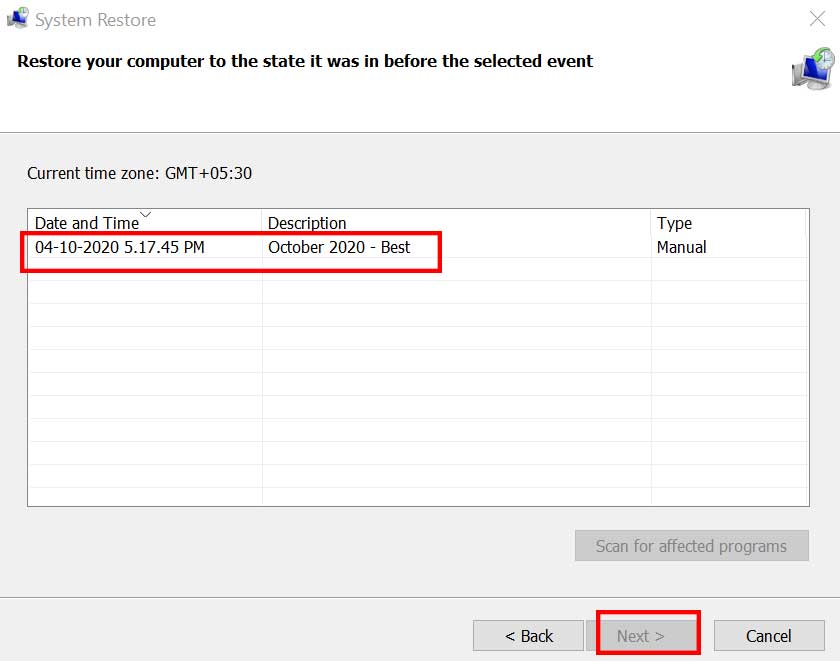
- Click on Next > Select the System Restore Point that you’ve created earlier. (Choose the best one)
- Click on Yes to confirm the action.
- Wait for a few moments to complete the process.
- Once done, restart the system and check for the Audio Services Not Responding on Windows 10 issue again.
That’s it, guys. We assume you’ve found this troubleshooting guide very helpful. Feel free to ask in the comment section below.
