In this tutorial, we will show you the steps to fix the Google Chrome Black Screen Issues on Windows 10. Highly regarded as among the web browser, this application has plenty to offer for everyday users. Cross-device support, Sync functionality, efficient tab management, bookmarks, and password manager are just some of its pretty nifty features. Likewise, for the power users, there are tons of hidden features as well, mostly in the form of experimental feature flags. Although in recent times, it is getting stiff competition from other Chromium and non-Chromium browsers, yet it has still managed a stronghold in the browser industry.
However, similar to other applications, this browse is prone to error. Among the various errors that it faces, one is the black screen issue in Chrome running on Windows 10. Recently we are seeing quite a spike in such complaints, as evident from various Google and Microsoft forums. If you too are sailing in the same boat, then you have docked your ship at the right place. In this tutorial. we will list out complete instructions through which you could fix the afore-mentioned issue. So without further ado, let us begin.
Also Read
Page Contents
How to Fix Google Chrome Black Screen Issues on Windows 10
There are quite a few workarounds that you could try out to fix this back screen issue in the Chrome browser. Try each of the below-mentioned fixes, one of which should rectify this issue of yours.
Fix 1: Disable Chrome Extensions
Extensions are small software programs that complement your daily usage experience. They are a great addition to the Chrome browser and could be used for a variety of reasons. However, these third-party plugins could also be the reason with some of the Chrome error. More often than not, they end up conflicting with the normal Chrome usage. As a result, you might face an issue or two. Therefore, you could consider disabling these extensions as follows:
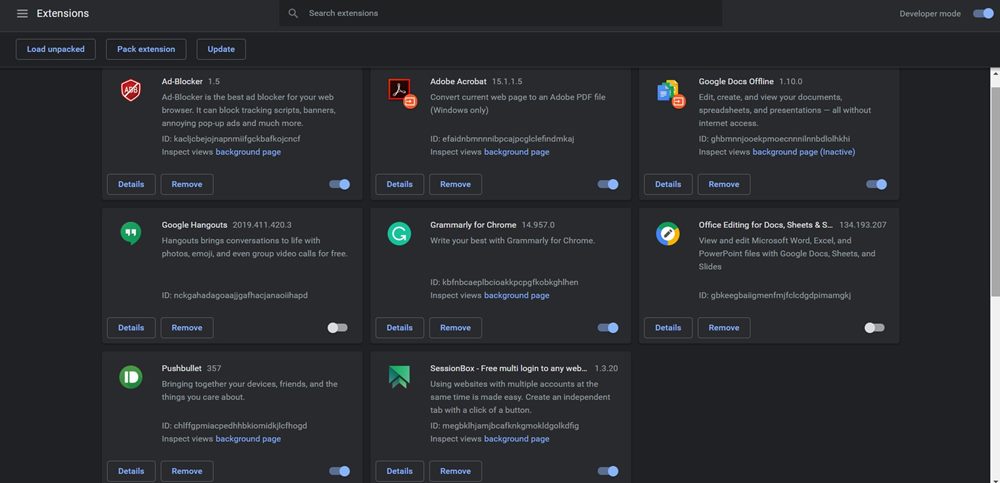
- Open the Chrome browser on your PC and click on the overflow icon situated at the top-right.
- Select More Tools from the menu followed by Extensions.
- This will take you to the extensions menu and will display all the installed extensions.
- Disable all these extensions by turning off their switch. Once done, restart the Chrome browser and check whether the black screen issue has been fixed or not.
Fix 2: Disable Certain Chrome Flags
Chrome flags are experimental features that are buried deep inside the browser, hidden from the normal user. These could be used to tweak some of the settings of the browser. But in some cases, it might cause more harm and good. And this might be the case here as well. Therefore we will list out three flags that you need to disable to fix this issue. Do note that for some of you, one or two flags might already be disabled.
On that note, head over to Chrome’s Omnibox, type in chrome://flags, and hit Enter. You will now be taken to the flags section. Search for the following Chrome flags in the search bar situated at the top:
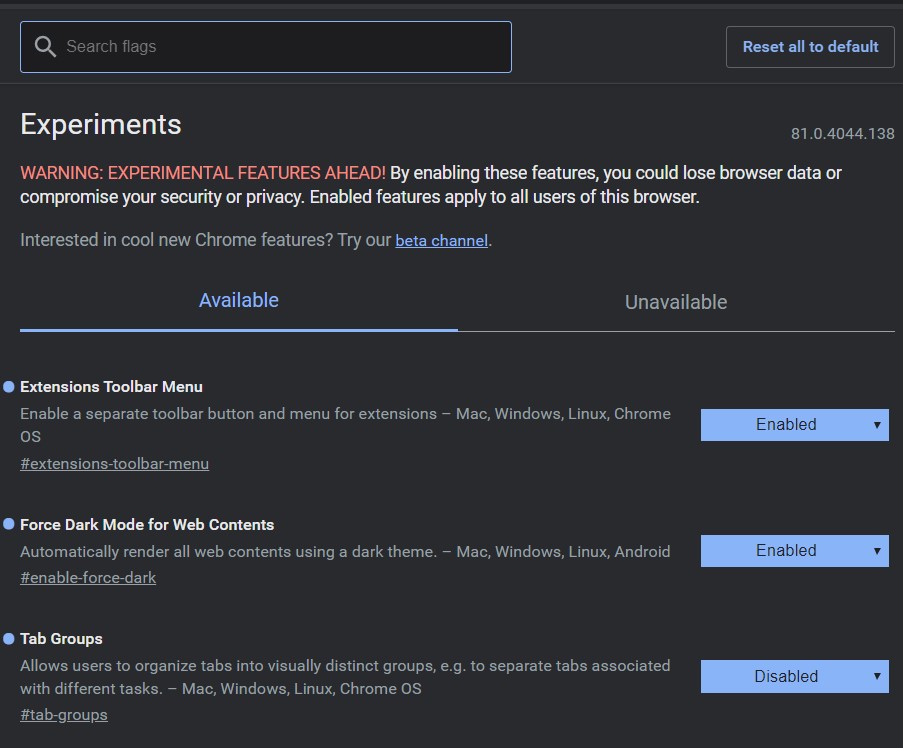
- GPU compositing on all pages
- Threaded compositing
- Do SHOW Presents with GD
Disable all the three. To do so, head over to each flag’s respective section, and from the drop-down menu, select Disabled. Chrome will now ask you to restart the browser. Don’t do it now, rather do so once you have disabled all the three flags. After that, perform a restart and this should fix the Chrome black issues on Windows 10. If you are still facing issues, follow the next method.
Fix 3: Run Chrome in Compatibility Mode
You could also try running Chrome in compatibility mode. Some users have tasted success when they tried out this method. However, this mode only appears on the shortcut file on any application. And most of the users don’t have Chrome’s shortcut (rather it is a standalone browser file). So to create a shortcut, right-click on your desktop and select Shortcut. Now browse to the Chrome.exe file and select it. This will create the required Chrome shortcut. Now follow the below steps to run it in Compatibility mode.
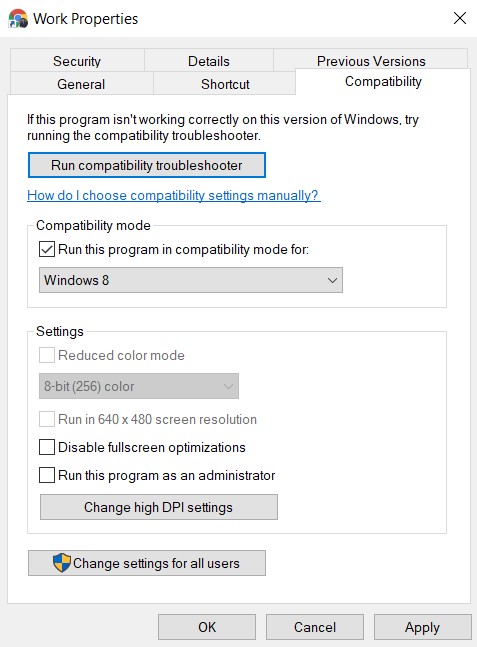
- Right-click on the Chrome.exe shortcut file and select Properties.
- Now head over to the Compatibility tab and tick mark the option: Run this program in Compatibility mode.
- Select Windows 7 or 8 OS from the list and hit Apply > OK. Launch Chrome and this should fix the black screen issue. if not, here is what else you could do.
Fix 4: Resize Chrome Window
Sometimes running Chrome in maximized mode might lead to the display issues. In those cases, you could try running Chrome in a resized window. To do so, click on the maximized window icon, situated right next to the close button. Once it goes to the windowed mode, you could drag from the edges and resize it as per your requirement. This should fix the black issue of the Chrome browser.
Fix 5: Disable Hardware Acceleration
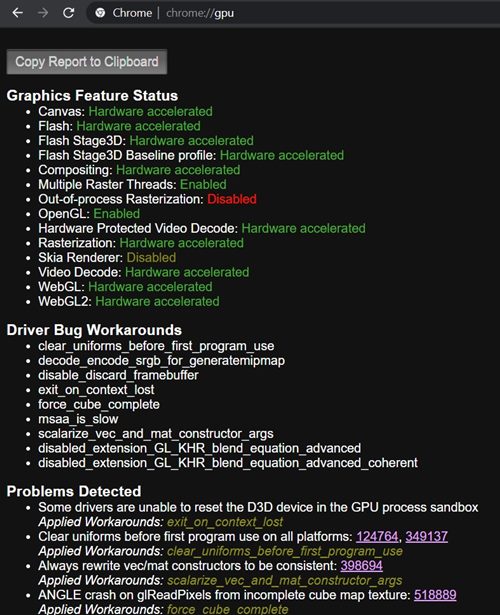
When the Hardware Acceleration feature is enabled, then most of the graphics-intensive tasks are taken care of by the GPU. This frees up your RAM, yet leads to unnecessary pressure on your GPU. As a result, it might lead to graphics issues. So first of all, check if this feature is enabled or not. For that, type in chrome://gpu in the address bar and hit Enter. Now have a look at the Graphics Feature Status section, if the majority of the components shows Hardware Accelerated, then this feature is enabled in your browser. So follow the below steps to disable Chrome’s Hardware Acceleration:
- Open Chrome and click on the overflow icon situated at the top-right.
- Select Settings from the drop-down menu that appears.
- Scroll to the bottom of your page and click on Advanced.
- Now head over to the System section and disable the Use hardware acceleration when available option.
- Next, restart the Chrome browser and head over to chrome://gpu. The Hardware Accelerated should now be replaced with Disabled for most of the Graphics Feature Status components.
- When that is done, the black screen issue of Chrome should also be fixed on your Windows 10 PC.
Fix 6: Reset Chrome
If the other features didn’t do much good, then you could try reverting all the Chrome settings to its default state. This will remove all the extensions installed, and your data as well. So before proceeding with this step, make sure that you have enabled the Sync feature of Chrome and that all the necessary data has been synced with your Google ID. Once that is done, follow the below steps to reset your browser:
- Launch the browser, click the overflow icon, and head over to the Settings menu.
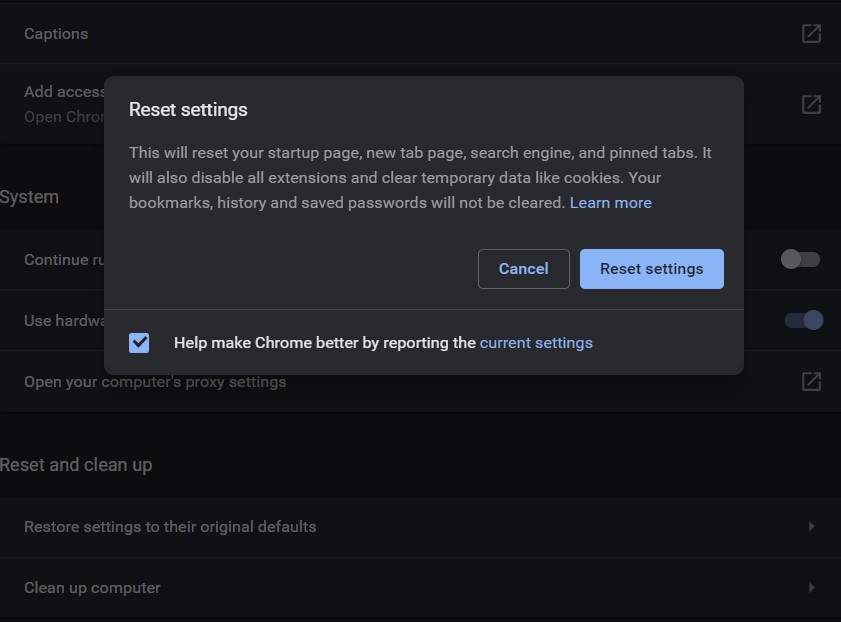
- Scroll to the bottom of the page and select Advanced. Now go to the Reset settings option and click on Reset settings to their original default.
- In the pop-up dialog box that appears, click on Reset Settings. Wait for the process to complete. Once done, restart browser and the Chrome black screen issue should be fixed by now.
Fix 7: Reinstall Chrome
If all the above methods didn’t manage to rectify the issue, then you should take the reinstall route. For that, first of all, sync the data with your Gmail ID. Then head over to Control Panel > Program and Features > Select the Chrome browser and click on Uninstall. Now head over to the Chrome download page, download and install it on your PC. Then open it and sync it with your Gmail ID. The issue should now be fixed.
Conclusion
So with this, we conclude the guide on how to fix the Google Chrome black screen issues on your Windows 10 PC. We have mentioned around seven different types of fixes, any one of which should rectify the issue. Do let us know which method worked out in your favor. On that here, here are some iPhone Tips and Tricks, PC tips and tricks, and Android Tips and Trick that you should check out as well.
