Squanch Games, Inc. recently released High On Life as a comedy action-adventure single-player FPS video game where players will have to hunt down aliens from a drug cartel. The best part is that players can use a talking gun with huge comedy and sarcasm to carry on the gameplay. However, multiple players are encountering the High On Life DirectX 12 Error on the PC while launching which is frustrating.
Now, if you’re one of the victims of such an error, then follow this troubleshooting guide to fix it. Though there are several potential errors or bugs present in the High On Life game for the PC version, it looks like the startup crashing errors are getting quite persistent to the players. Apart from the lags, stutters, graphical glitches, and other bugs, some PC players are facing the DirectX 12 error too.

Page Contents
High On Life DirectX 12 Error, How to Fix?
According to multiple reports, several players are experiencing the “DX12 Startup Error” on the PC while launching High Of Life which becomes irritating. It seems that whenever players launch the High On Life game, it starts crashing and the DX12 error appears on the PC. Due to this particular error, the game prevents players to get into it. Luckily, there are a couple of workarounds to fix this error.
1. Run the Game as an Administrator
Make sure to run the game app file on your PC as administrator access to allow the User Account Control (UAC) access to the system. In some cases, your system requires the UAC access permission to run a program which is quite important. By following the steps below you’ll have to allow the admin access for once and it won’t ask you for the same again. To do so:
- Go to the installed High On Life game directory.
- Right-click on the application file on your PC.
- Click on Properties > Click on the Compatibility tab.

- Click on the Run this program as an administrator checkbox to enable it.
- Once done, click on Apply and then OK to save changes.
- Finally, just double-click on the game app file to launch it.
If in case, you’re running the game via the Steam client then perform the same steps for the respective game client too.
2. Force Use DirectX 11
You should forcefully run the High On Life game on Steam with DirectX 11 by following the steps below. Sometimes issues with the DirectX version can also cause multiple conflicts with the game launching on Windows.
- Open the Steam client > Go to Library.
- Right-click on the High On Life game > Go to Properties.
- Click on General > Go to Launch Options.
- Here you’ll need to type -Dx11 inside the field.
- Once done, reboot the Steam client, and run the game.
Note: If in case, the error persists then you can follow the steps below to use DirectX 11 in another way.
- Go to Steam > Click on Library > Click on Manage.
- Select Browse local files > Make sure to create a desktop shortcut for the High On Life game.
- Right-click on the new desktop shortcut that you’ve created.
- Go to Properties > At the end of the Target line, click & add dx11.
- Finally, click on OK to apply changes, and run the game to check for the issue.
3. Update High On Life
It’s highly recommended to manually check for the game update at your end to avoid any kind of pending game updates by following the steps below. An outdated game version can eventually cause multiple issues or glitches with the game launching as well as the gameplay experience.
- Open the Steam client > Go to Library.
- Click on High On Life from the left pane.
- Steam will automatically search for the available update.
- If there is an update available, click on Update.
- Make sure to wait for some time until the update completes.
- Once done, ensure to reboot the PC to apply changes.
4. Verify and Repair the Game Files
Corrupted or missing game files installed on the PC can also cause multiple issues with the game launching or gaming experience. Luckily, you can easily verify and repair the installed game files on the PC version with the help of the game launcher by following the steps below.
- Launch Steam > Click on Library.
- Right-click on High On Life from the list of installed games.
- Now, click on Properties > Go to Local Files.
- Click on Verify Integrity of Game Files.
- You’ll have to wait for the process until it gets completed.
- Once done, just restart your computer.
5. Disable Windows Firewall
It seems that you’re using the default Windows Firewall protection on your PC to maintain the security level. However, in some cases, Windows Firewall can trouble to access online content by connecting to the servers. It’s recommended to temporarily disable the Firewall program by following the steps below.
- Click on the Start Menu > Type Windows Defender Firewall and open it.
- Next, click on Turn Windows Defender Firewall on or off from the left pane.
- Select the Turn off Windows Defender Firewall (not recommended) option for all domains.
- Once done, click on OK to save changes > Reboot your PC to apply changes.
6. Disable Windows Defender
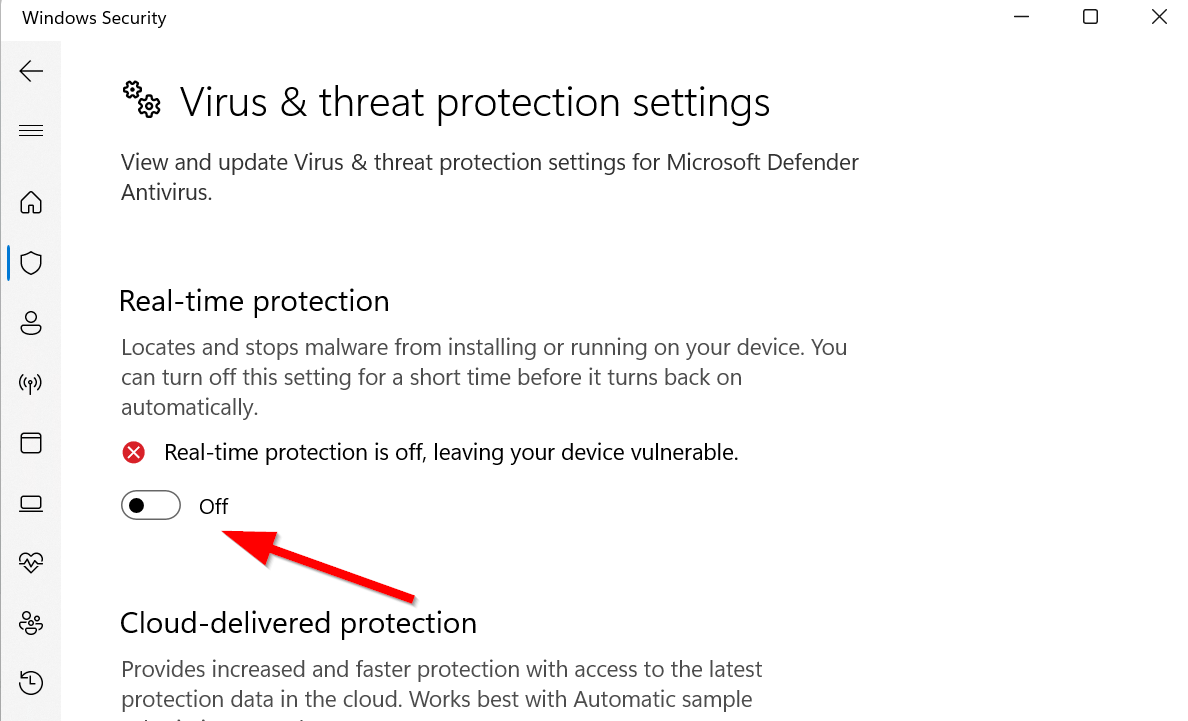
You should also turn off the Windows Defender antivirus program temporarily on your PC to ensure there is no issue with the game file blocking. To do so:
- Press the Win+I keys to open Settings.
- Click on Update & Security > Click on Windows Security.
- Click on Open Windows Security > Go to Virus & threat protection.

- Now, click on Manage settings > Just turn off the Real-time protection toggle.
- If prompted, click on Yes to proceed further.
Please Note: If you’re using any other third-party antivirus program on your PC then ensure to turn it off from its settings menu.
That’s it, guys. We assume this guide was helpful to you. For additional queries, you can comment below.
