The Legend of Zelda: Tears of the Kingdom is an action-adventure game developed for the Nintendo Switch. Published by Nintendo, it is the highly-anticipated sequel to the critically acclaimed The Legend of Zelda: Breath of the Wild. It retains the vast open-world environment of Hyrule, which has been expanded to allow for even more exploration. In Tears of the Kingdom, players control Link and help Princess Zelda stop Ganondorf from destroying Hyrule. In this guide, we will take you through how to solve the Jonsau Shrine puzzle in Zelda: Tears of the Kingdom.
In the Nintendo game, players face new challenges like the Zonai devices, which give Link new powers, and the Gloom, an enemy that threatens to engulf the land in darkness. The game’s story is rich and engaging, drawing players into a world of ancient legends, powerful magic, and epic battles between good and evil. And with a cast of memorable characters and a wide array of side quests and challenges, there’s always something new and exciting to discover in Hyrule. Let’s find out what the Jonsau Shrine solution is for Zelda: Tears of the Kingdom.
Also Read
Zelda Tears of the Kingdom Gleeok Locations and How to Defeat
How to Disable Satori’s Blue Beams of Light in Zelda Tears of the Kingdom
Fix: Legend of Zelda Tears of the Kingdom Stuttering and Freezing Issue in Switch
Zelda Tears of the Kingdom Hinox Locations Map Guide
How to Play Zelda Tears Of The Kingdom on PC using Ryujinx and Yuzu
How to solve the Jonsau Shrine puzzle in Zelda: Tears of the Kingdom
The Jonsau Shrine in Zelda: Tears of the Kingdom is home to one of the most unique and challenging puzzles in the game – the ‘Deep Force’ puzzle. This puzzle is centered around the concept of buoyancy, which is not a common theme in the game, and can be quite difficult to understand at first.
For those who are interested in physics, the Deep Force puzzle is an absolute treat. It requires you to use your Ultrahand to manipulate the buoyancy of objects, such as a ball, in order to progress through the Shrine. To put this in simpler terms, imagine holding an air-filled beach ball underwater – when you let go of it, it will shoot up to the surface due to the buoyant force acting upon it. The same concept applies to the Deep Force puzzle, and mastering this concept is crucial to obtaining the Light of Blessing from Jonsau Shrine.
If you’re struggling with the Deep Force puzzle, don’t worry – this guide is here to help. We’ll walk you through the entire process, from finding the Jonsau Shrine to completing the puzzle and acquiring the chest. With our help, you’ll be able to conquer the Deep Force puzzle and emerge victorious from Jonsau Shrine. The first step is of course, to find the shrine, so let’s take a look at its location.
Where to find the Jonsau Shrine
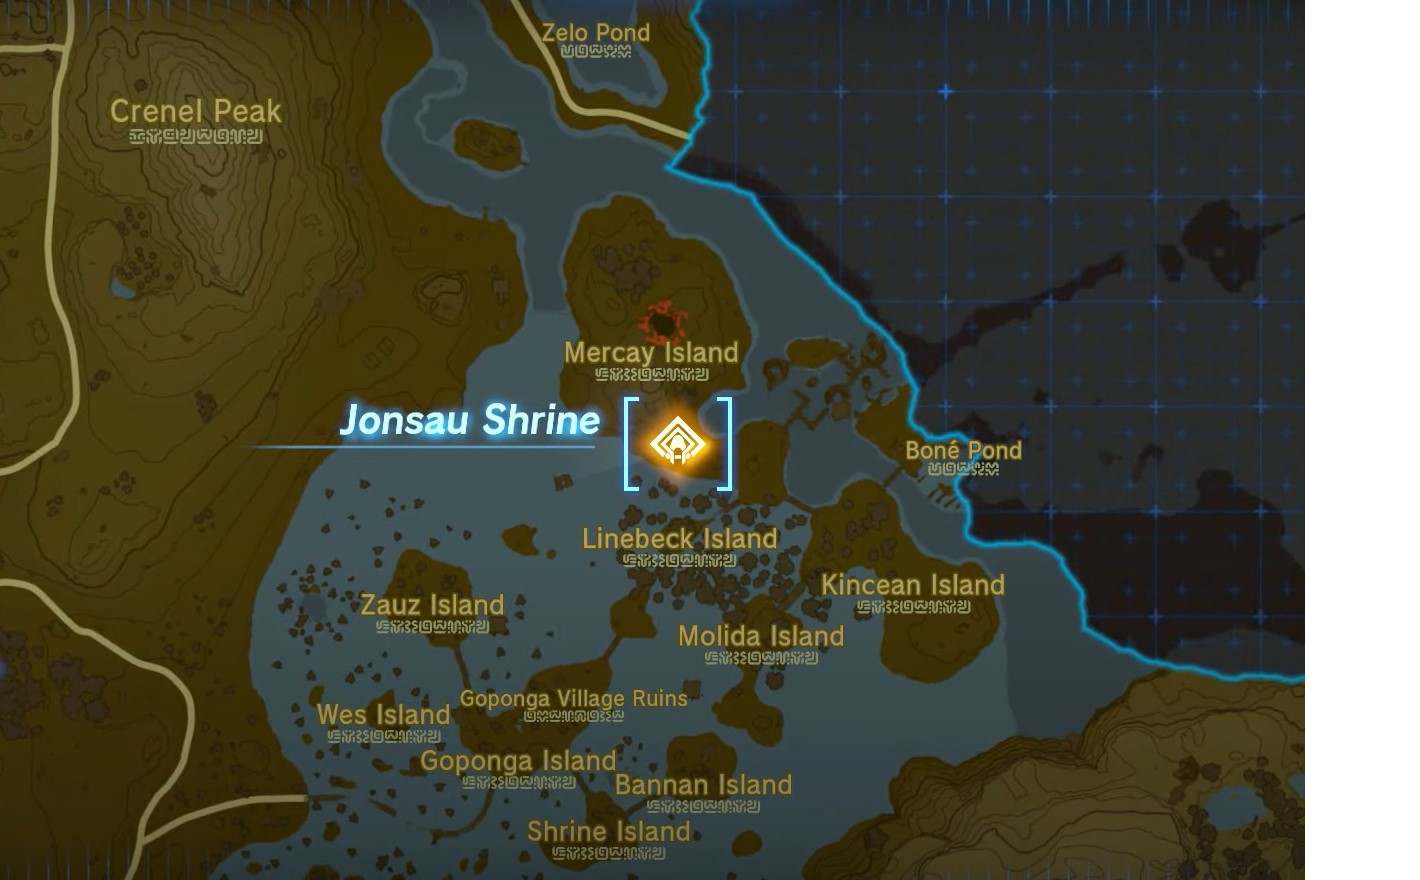
The Jonsau Shrine is one of the many interesting locations that players can visit in the Lanayru Wetlands, a vast region that is part of the Zelda: Tears of the Kingdom game. This shrine can be found near the center of the wetlands, specifically on the southern hills of Mercay Island, which is the largest isle in the region.

The coordinates to find the Jonsau Shrine are 1743, 0018, 0025, which you can use to navigate and find the shrine more easily. Don’t forget to take a look at the picture above to find the exact location on your map. Once you arrive at the shrine, you can begin solving the puzzles.
In Jonsau Shrine, there are three different puzzles that you need to complete in order to advance through the game. Each of these puzzles utilizes the buoyancy-based effect of dense water launching a less dense object from its surface. This physics effect is used to complete the first chamber, where you need to propel a ball onto an upside-down lock mechanism hanging from the ceiling. After completing this chamber, you will be presented with two more puzzles that make use of the same effect, but with different twists to make them more challenging.
Overall, these puzzles are a fun and engaging part of the game that test both your problem-solving skills and your ability to think creatively. So, let’s take a look at how to solve these puzzles.
First Jonsau Shrine puzzle solution
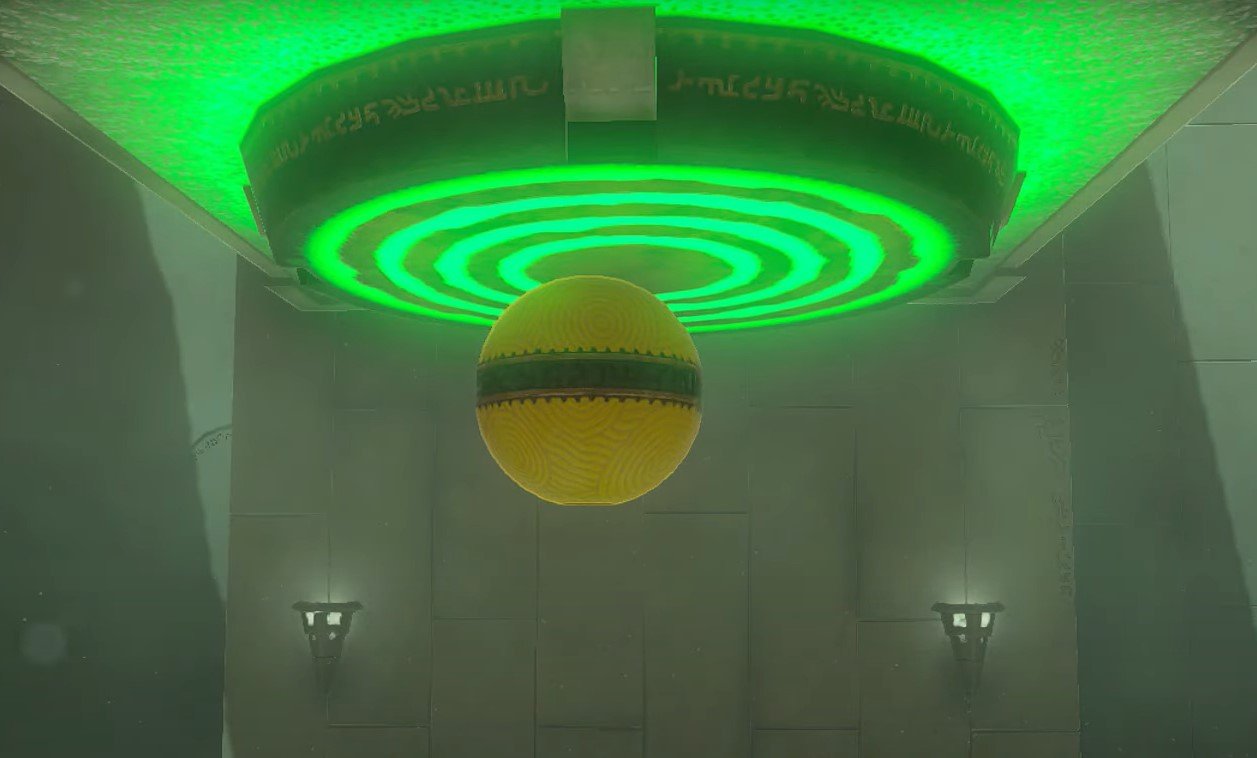
As you enter the shrine, you’ll come across a pool of water with a beach ball-like object floating in it, and a goal bullseye situated above the pool that is frequently seen in other Tears of the Kingdom shrines.

To solve the puzzle, you need to guide the ball to hit the goal. The key is to use Ultrahand to position the ball at the bottom of the water. Once it rebounds and bounces back up, it will hit the goal and the door will open to the next room of the shrine.
Upon completing the first puzzle, you will be led into a corridor with a path on one side and water on the other. Utilize Ultrahand to find and extract a chest from the water. Inside the chest, you will find a Strong Construct Bow, which will be of great use in your quests.
As you proceed down the corridor, you will encounter a Soldier Construct that you must defeat. However, be cautious as you navigate through this area.
Second Jonsau Shrine puzzle solution
Upon entering the next room, you will notice an item that needs to be submerged to activate the goal. This time, the item is a wooden board, but don’t be fooled by its appearance. To ensure that the thinnest end of the board hits the goal, you must submerge it vertically. This may require some careful maneuvering to get it into the correct position.

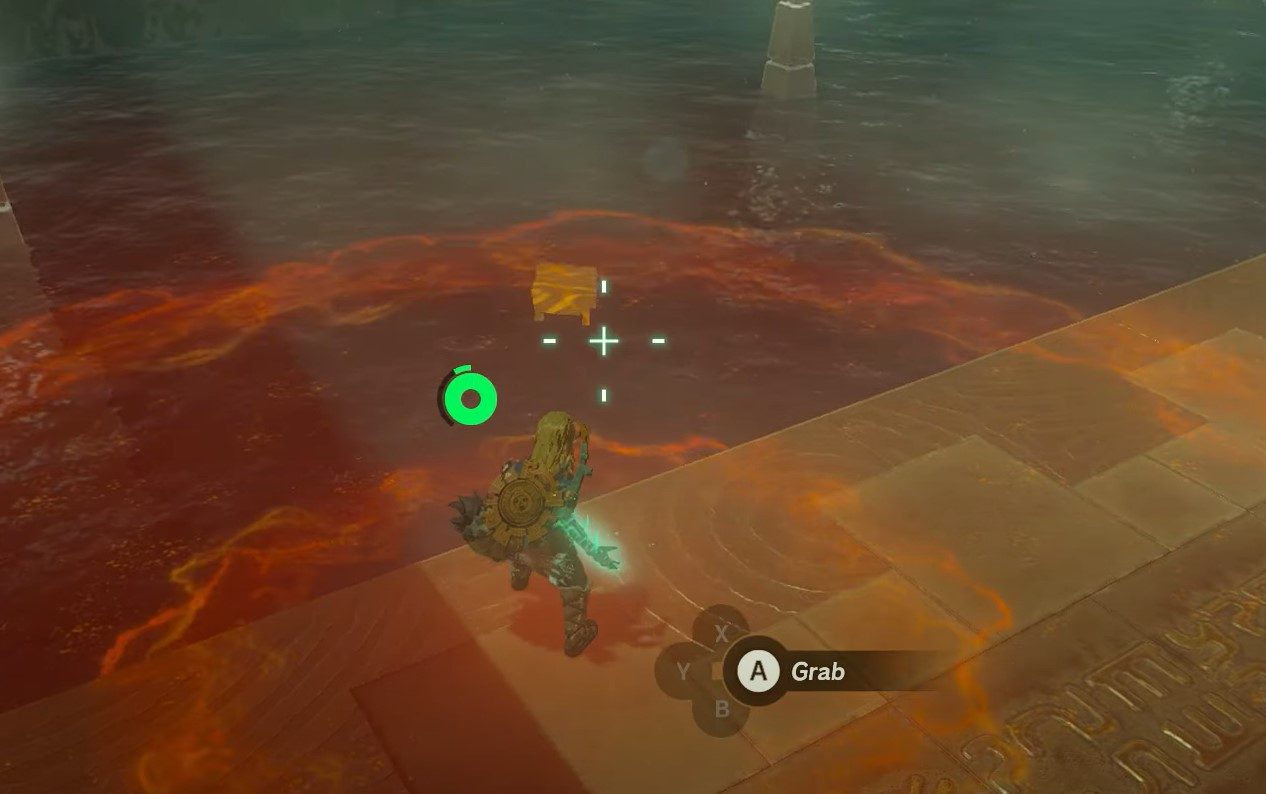
Once you’ve activated the goal, you will need to retrieve the chest from the water. If you’re having trouble locating the chest, check out the image above.
Fortunately, there are two ways to accomplish the task of getting the chest. You can attach the ball from the first room to the chest. Then, you will need to use the pop-up effect to bring it to the surface. Alternatively, you can approach the water carefully and pull the chest out using the Ultrahand. The latter option may be more challenging, as you must be mindful of the hostile Construct that may attempt to ambush you around the corner.
After successfully looting the chest, you will proceed to the second puzzle of the Jonsau Shrine in TotK. This puzzle is identical to the first, requiring you to use either the yellow plank or the ball from earlier to launch it upward using the density of the water. Whichever item you choose to use, the door will open.
Third Jonsau Shrine puzzle solution
To begin solving the puzzle, ensure that the ball is fully submerged in the water. Once you have confirmed that the ball is in place, gently tap it so that it shoots up and dislodges the platform. This will cause the platform to fall down to the water level, allowing you to proceed with the next step.

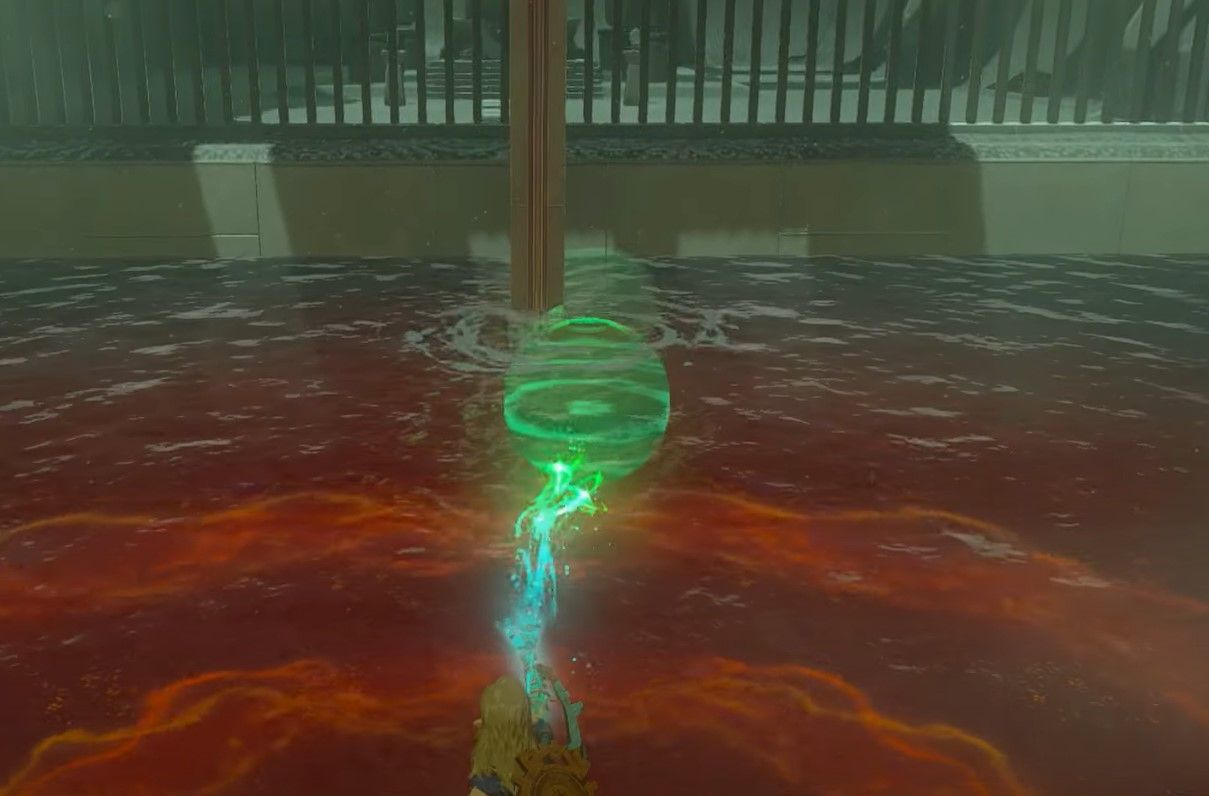
Now, depending on where the ball has rebounded to, carefully use Ultrahand to move it closer to the platform. This step requires a great deal of precision, as you don’t want the ball to accidentally rebound in the wrong direction. Take your time and pay close attention to the ball’s movements as you move it towards the platform. Check out the image above to get an idea of the direction.
Once you have successfully positioned the ball in the desired location, swim over and stand on the platform. Use Ultrahand to grab the ball and carefully place it underneath the platform. When the ball rebounds, the platform and Link will be launched into the air, allowing you to use the paraglider to reach the end of the Shrine.
Although this process may seem straightforward, it can be quite tricky to execute. For example, if the ball rebounds in the wrong direction, it can be deadly if it happens to bounce on Link’s head. To avoid this, use the vertical beam attached to the platform to ensure that the ball is placed in the correct position.
If you find that you have placed the ball correctly but don’t manage to jump in time, don’t worry. You can always use Recall to try again. This method is much easier than setting things up with Ultrahand for a second time, and will allow you to perfect your technique in an efficient manner.
Conclusion
We hope that this guide helped you find the shrine and solve the Jonsau Shrine puzzle in Zelda: Tears of the Kingdom. As this is just one of many shrines that await your discovery in the vast world of Zelda, you will be able to try each one out. All of them have their unique puzzles and obstacles to overcome. As you continue your journey, keep in mind the skills and techniques, and you’ll become an expert puzzle-solver in no time.