The external hard drive is not mounting in the macOS Ventura. The users have reported multiple errors like access denied, drive not recognized, disk not showing, etc. Some users have reported that the storage drive is recognized, but it’s not accepting the data transfer. Apple’s desktop operating system works differently compared to Windows and Linux. Let me show you how to connect the external HDD on your macOS machine without errors.
Also Read
Why Is Mac Computer Not Mounting External Hard Drive or SSD?
Millions of content creators produce content on Final Cut Pro and Garageband. We connect multiple external storage drives to transfer the videos and photos from the DSLR or a smartphone. We have Windows and Linux computers supporting various file systems. Here are some reasons why Mac is not accepting the USB storage drive.
Unrecognized File System:
The Cupertino-based company has created Apple File System (APFS). The computer doesn’t support the NTFS format. You have to format the USB drive to Apple-supported formats. I always choose exFAT or FAT32 because it works on Mac, Windows, Linux, and Android devices.
macOS Bugs or Glitches:
Apple releases a newer edition of the macOS operating system each year. The operating system has minor bugs and glitches that the in-house developer solves through software updates. Your USB drive is not connecting or recognized due to bugs or glitches. Reboot your computer and solve the connection issues temporarily.
Internal Software Error:
We don’t know what’s causing the “Access is denied, the drive becomes not accessible” error. You can format the USB drive to exFAT or FAT32. Mount the drive to another computer or Android device and create a backup in the local storage. You can use Linux or Windows to format the drive in MS-DOS formats.
Broken USB Port:
Apple utilizes high-quality components for the Mac computer construction. Electronic goods parts wear & tear over the years. There is a problem with the USB port on your MacBook or Mac machine. Connect the drive to another port or use a USB-C converter for the USB-A external drive.
Disabled Finder Detection Tool:
The Finder application allows the users to access the external hard drive. The computer may have detected the storage drive, but it is disabled from the settings. Enable the external hard drive feature to access the contents in the Mac computer.
Malware or Threats:
The external storage drives come in handy to carry the data. We connect the removable drives on multiple computers. One infected desktop can spread malware from one device to another. Use the anti-virus protection on your Mac and remove the malware from the drive. You can use a protection system and scan the connected device.
Fix: macOS Ventura External Drive (HDD) Not Mounting or Working
You can find some applications on the web to access the NTFS file system’s external hard drive. However, you spend a few bucks on the license key to activate the third-party program. I suggest you take a few minutes to format the external storage drive to exFAT or FAT32 to access the file across Windows, Android, Linux, etc.
Restart Mac Computer
Millions use the sleep mode on the Mac computer and move on with life. The impressive feature pauses the machine and reduces the hardware resources without turning off the computer. However, you should turn off the Mac for optimal performance. Close all background programs and save the unsaved documents.
1. Click on the Apple logo from the top menu.
2. Click “Shut down” from the drop-down menu.
3. Click the “Shut down” from the pop-up notification.
Allow the Mac machine to sleep for five minutes, and turn it on. I recommend one hour of sleep for optimal performance and to improve the hardware lifespan. The operating system loads the essential components during the boot and solves many software-related issues.
Clean USB Port & Device
When was the last time you cleaned the Mac and removable devices? Many don’t think much of the dust particles entering electronic goods. The computer has electrical components, including the external storage drive. Small dust particles slow down the machine and damage the hardware.
a. Use an air blower to remove the dust from the USB ports and external hard drives.
b. You can use a hair dryer, but the hot air can damage the internal components. Maintain a safe distance from the computer and removable device when using a hair dryer.
Many users consider cotton buds for reaching tricky areas. However, I don’t recommend cotton swabs because they can damage delicate ports. You can ask an authorized technician to take a look at the situation and clean the port.
Enable Finder Detection Feature
Your Mac computer has detected the external storage drive, but the Finder application is not displaying the device. You can view the settings and enable a specific feature.
1. Open the “Finder” application.
![]()
2. Click on the “Finder” from the top menu.
3. Click the “Preference” option from the drop-down menu.
4. Select the “External disks” option.
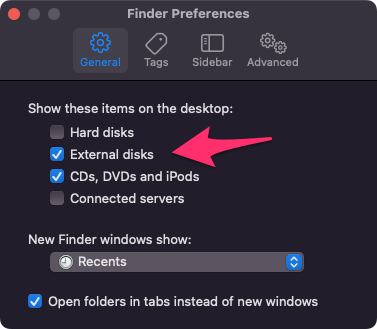
Close the settings window, and check the device in the Finder app.
Format External Hard Drive To exFAT File System
Content creators have a dedicated external hard drive for various purposes. Format the hard drive to the exFAT because you can use the device on cross-platform machines. You won’t have compatibility issues on Windows, Linux, and Mac. Even Android smartphone recognizes the exFAT file system. As a serious content creator, I suggest the exFAT file system. Create an external hard drive backup before you format the drive.
1. Open Disk Utility from the Launchpad or Applications.
2. Click the “View” button from the top menu.
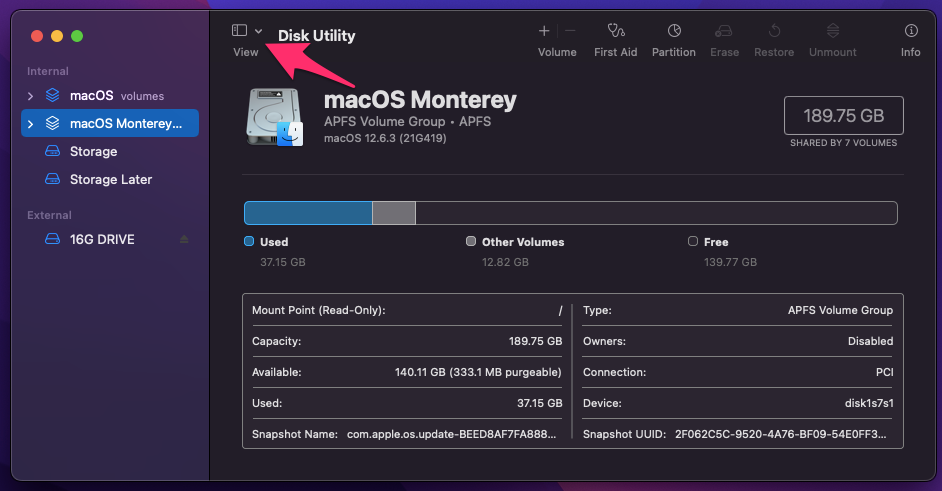
3. Click “Show all devices” from the drop-down menu.
4. Select the external drive.
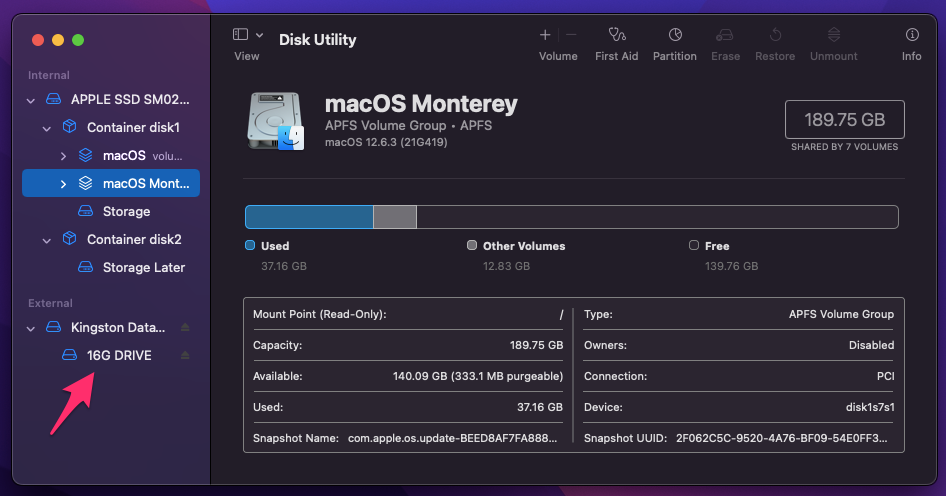
5. Click the “Erase” button.
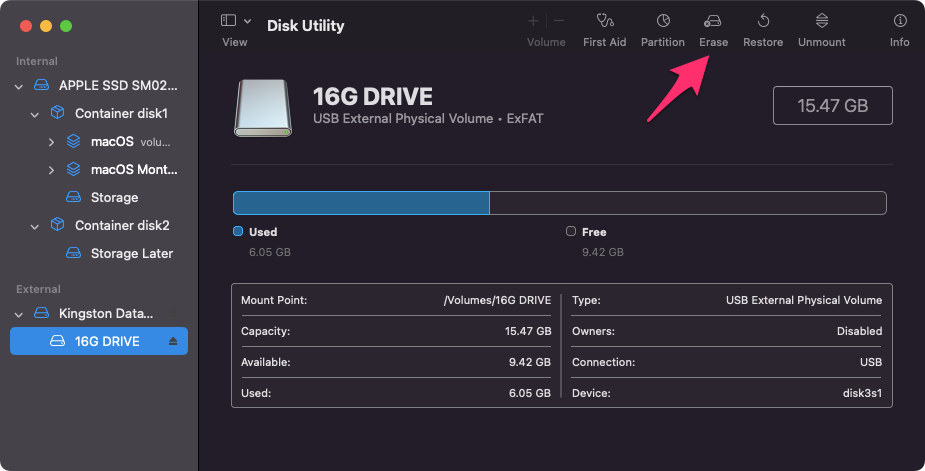
6. Click on the “Format” option and select the “ExFAT” option.
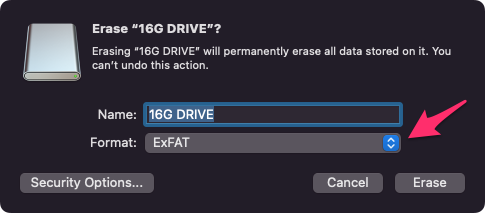
7. Click the “Erase” button.
8. Click the “Done” button.

You can use the external storage drive on Mac, Windows, and Linux without limitations. As a reminder, I would choose exFAT over another file system because it has fewer limitations.
Repair External Storage Drive
Removable drives go through many problems throughout the life cycle.
The operating system developers have recognized the problem. They have added a dedicated option to inspect the removable drive health and fix the issues. Let me show you how to fix the external hard drive issues on Mac.
1. Open Disk Utility from the Launchpad or Applications.
2. Click the “View” button from the top menu.
3. Click “Show all devices” from the drop-down menu.
4. Select the external drive.
5. Click the “First Aid” button.
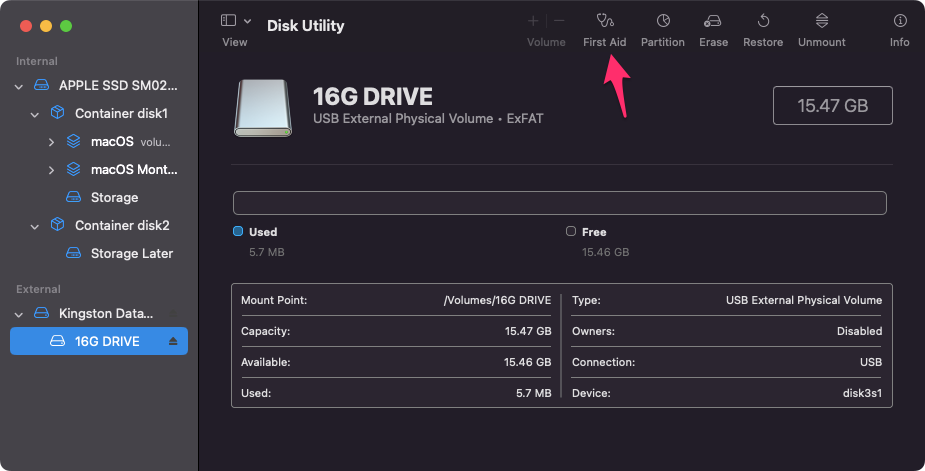
6. Click the “Run” option.
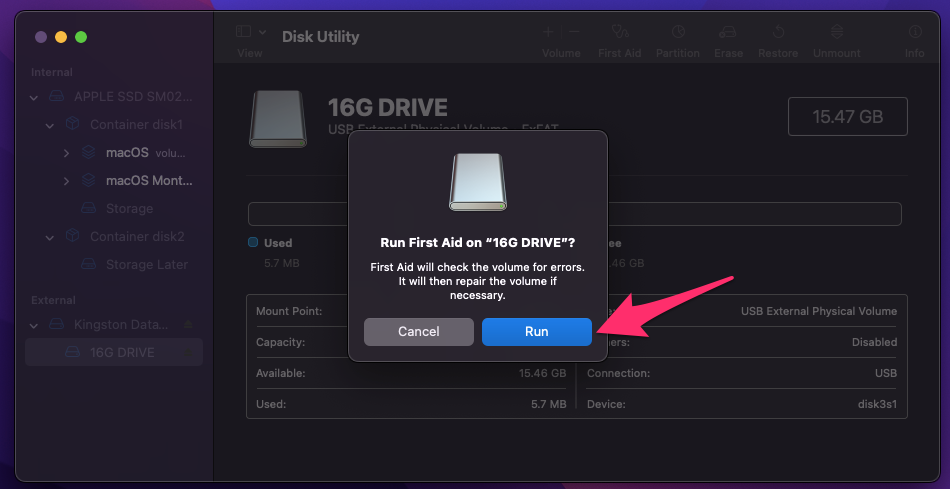
7. Give the Mac repair tool a few minutes to scan and fix the issues.
8. Click the “Done” button.
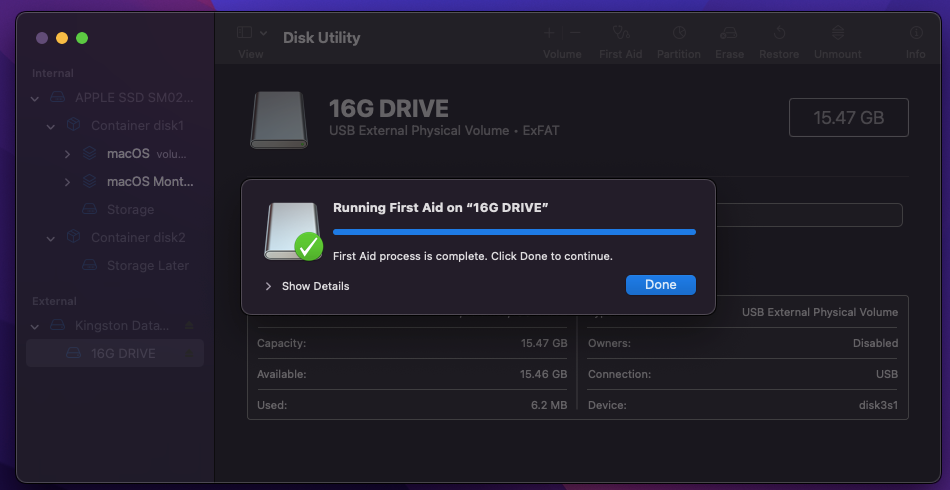
Access the drive contents through the Finder app.
Mount External Hard Drive Manually
The external storage drive is not mounted on a Mac computer. You can use the Disk Utility to mount the drive manually. Let me walk you through the mounting process.
1. Open Disk Utility from the Launchpad or Applications.
2. Click the “View” button from the top menu.
3. Click “Show all devices” from the drop-down menu.
4. Select the external drive.
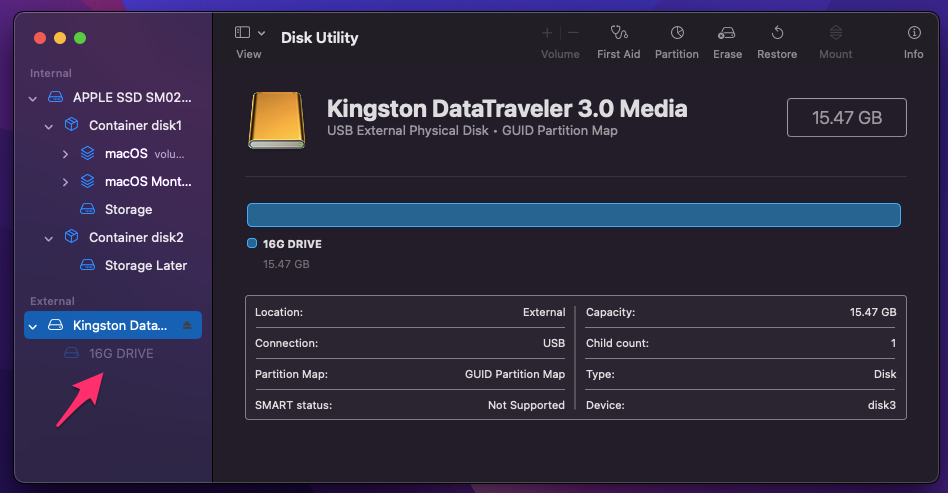
5. Click the “Mount” button from the top menu.
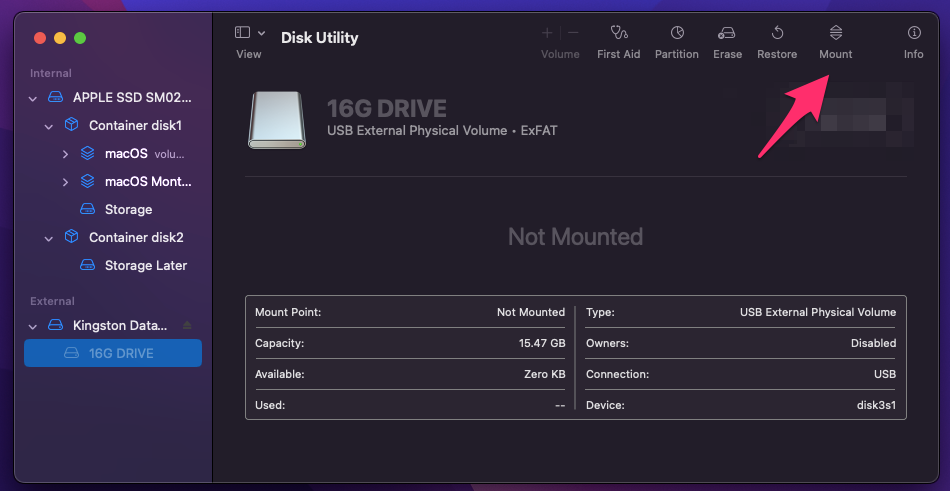
6. The program mounts the drive successfully.
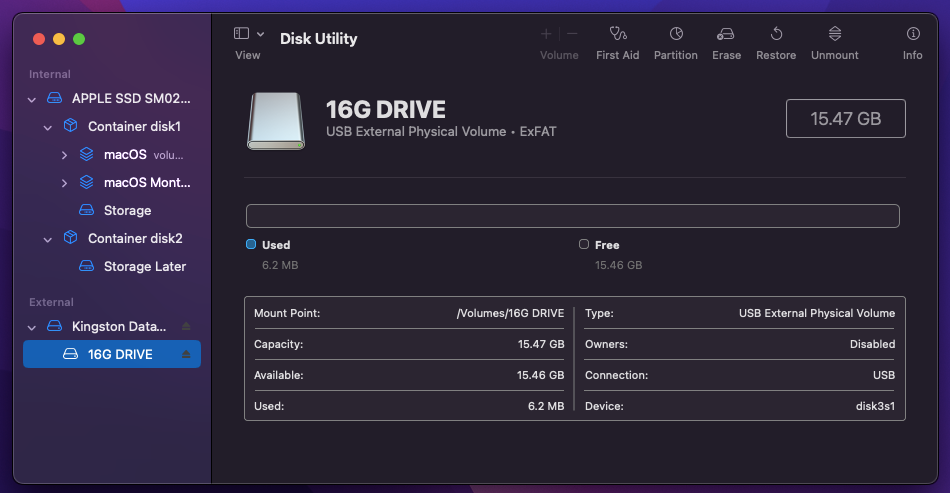
Wait a few seconds for the drive to appear in the Finder.
Remove Malware
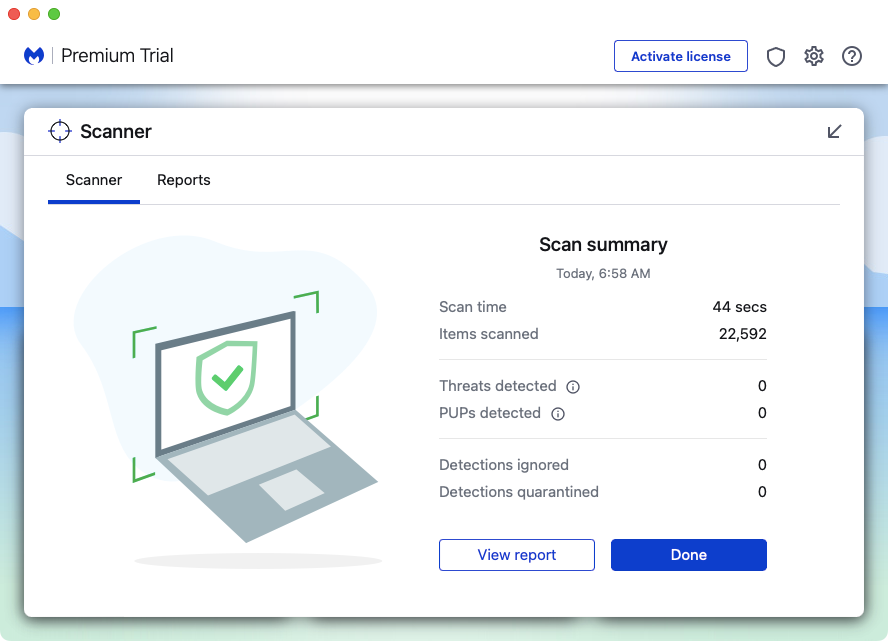
You may not know this, but there are malware pieces for the Mac computer. Unfortunately, you don’t know about them until it impacts the performance or interrupts the devices. You can use any reputed anti-virus system to remove the malware from the system.
Bottom Line
Look for the macOS software updates and install them when it contains security updates. Create an external hard drive data backup before you apply any solution. I don’t think you need an additional program to access the external storage drives on Mac. Meanwhile, the exFAT supports cross-platform devices without limitations. I have transferred large operating system files and conducted various tasks without issues. Let us know how you solved the External Drive (HDD) not mounting or working on macOS Ventura.
