There are several occasions where even though you have a decent specd PC or laptop, the device becomes slower and most of the apps take ages to run or load. Well, such situations arise due to memory leaks. Notably, memory leak on a PC or laptop happens when a certain app takes more memory than it should normally use. Besides, it could also happen if a resource is misplaced due to faulty memory allocation. However, one should note that memory leak is not similar to space leak. Several users on Windows 10 or other versions have reported this issue.
Fortunately, in this post, we will talk about all the possible and potential workarounds that you can use to fix this issue of Memory leak on Windows 10 PC or laptop. Note that this is a software issue related to a bug. So, physical replacing any component like RAM, etc won’t help and should not be done. Just follow the methods mentioned in this post, and hopefully, it will help you cure this bug. So, with that being said, let us get straight into the article itself:
Also Read
Page Contents
Memory leaks: What is it and How to Fix it in Windows 10
Even though Windows 10 is the most advanced Microsoft operating system at present, it still suffers from the Memory Leak issue. Multiple user reports can be found across platforms reporting similar issues. During memory leak, a certain part of the RAM is marked as “in use”, which apparently it is not. This leads to higher RAM usage thus making fewer RAM storage available for other apps. This issue can happen to any apps including Windows services, system-installed apps, background processes, hardware drivers, and third-party apps.
Let us take a look at the potential workarounds that you can follow to fix this memory leak issue on Windows 10 laptop or PC.
Find the Culprit
Well, it may sound like a treasure hunt, but it is the first thing that you should do if you are also experiencing a similar memory leak issue on Windows 10.
- Simply open the task manager by pressing Ctrl + Shift + Del.
- Head over to the Processes tab.
- Notice the Memory column.
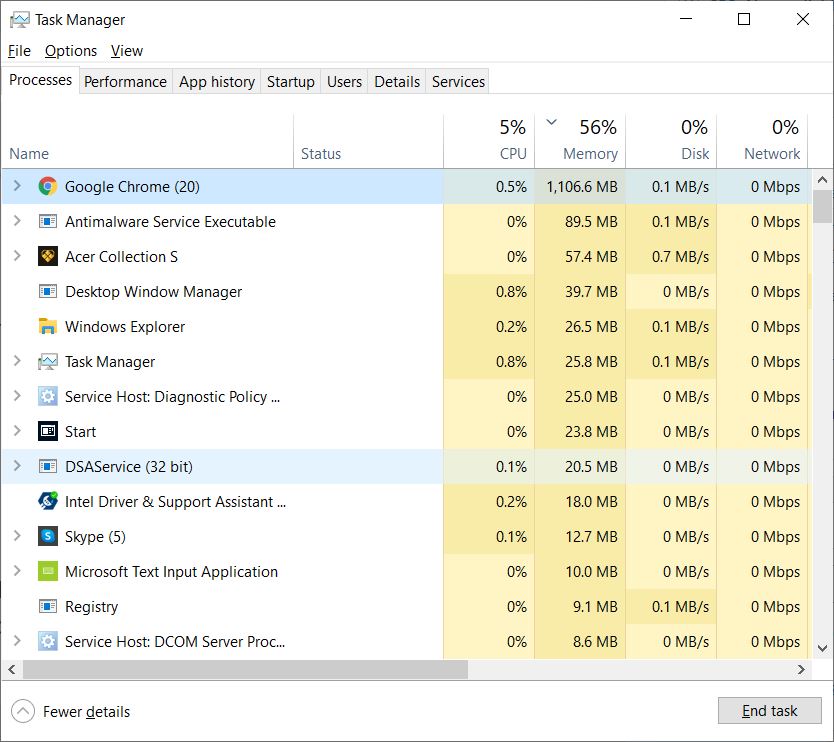
From here you will have to look for the process that is eating up more RAM than usual. But this has to be done by yourself. A tip would be if any process if using around 45-50% of the RAM, it becomes a contender for being the culprit for a memory leak. Though this might not be true every time, so make note of this. Once you have jotted down the culprit, here are few things that you can do.
- If it is a third-party app, then the best that you can do is reinstall the app and see if that helps.
- If it is not a third-party app, make sure to search for the particular process and understand what it does before ending the task. Simply right-click on the task and click Search Online.
Use the Memory Diagnostic Tool
Using the in-built Memory Diagnostic Tool will also help you curb this memory leak issue on your Windows 10 PC. It is an in-built software that performs a scan of the computer’s physical memory and also identifies possible errors. Follow the steps to use this tool:
- Make sure to save all your important works and files before running this tool.
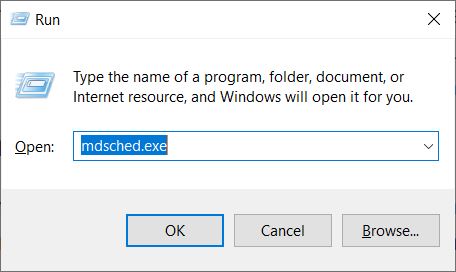
- Press Windows + R button on your keyboard.
- Type in mdsched.exe.
- Restart the PC.

- Once your PC is restarted, it will start in the Windows Memory Diagnostics environment.
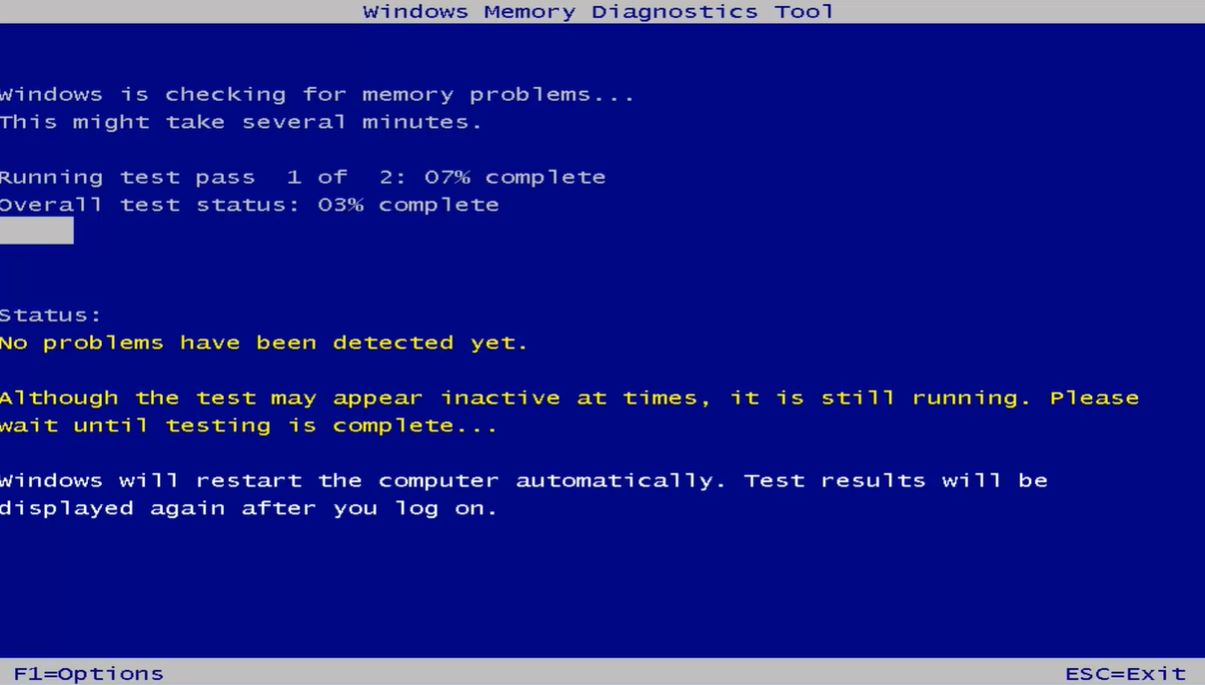
- By default, the scan will commence in the Standard mode.
- Press F10 to start the scan.
Check for Driver Updates
Sometimes, outdated drivers can also cause Memory Leaks on Windows 10. Notably, with new updates, the company’s tend to fix such issues or bugs.
- Press Windows + R button on your keyboard.
- Type in devmgmt.msc and hit Enter.
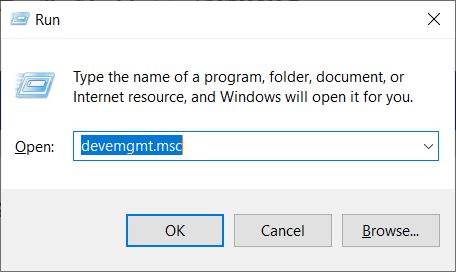
- Once the Device Manager opens, check for all the software updates.
- If available, update all the apps.
Disable Programs Running on Startup
It is a good practice to disable the programs running on startup. This would help you to reduce the Memory Leak issue. For this:
- Head over to Task Manager.
- Then go to Startup.

- Choose the software that you want to disable to startup by default when the system boots up.
ClearPage File at Shutdown
Well, this process might sound complicated, but it is not. Just follow the steps mentioned below to clear the page file at every shutdown. This will help you clear the Memory Leak issue on Windows 10.
- Type regedit on Search.
- This will open Registry Editor.
- Now, enter the below patch
HKEY_LOCAL_MACHINESYSTEMCurrentControlSetControlSession ManagerMemory Management - You need to change the value of ClearPageFileAtShutDown to ‘1‘.
- Save the changes and restart your PC.
- That’s it
Perform a Clean Boot of Windows 10
If none of the methods worked for you, then it is better to reinstall the Windows 10 OS. Notably, a clean boot would do great to fix the memory leak issue. Make sure that you have a copy of all the data on the drive where you will be installing Windows 10 fro scratch.
Wrap Up!
So, there you have it from my side in this post. I hope you guys liked this post and were able to fix the memory leak issue on your Windows 10 PC or laptop. Note that not all the methods mentioned here might work for everyone, so try performing all the workarounds. As a last resort, it is preferable to install a clean copy of Windows 10. Let us know in the comments below if you have any other potential workaround that you would like us to include in this post, that worked for you fixing the memory leak issue on Windows 10.
For more such awesome coverage, you can head over to our check out our Windows Guides, Gaming Guides, Social Media Guides, iPhone, and Android Guides to read more. Make sure to subscribe to our YouTube Channel for awesome videos related to Android, iOS, and Gaming and stay up to date with all the latest things in Tech. Until the next post…Cheers!
