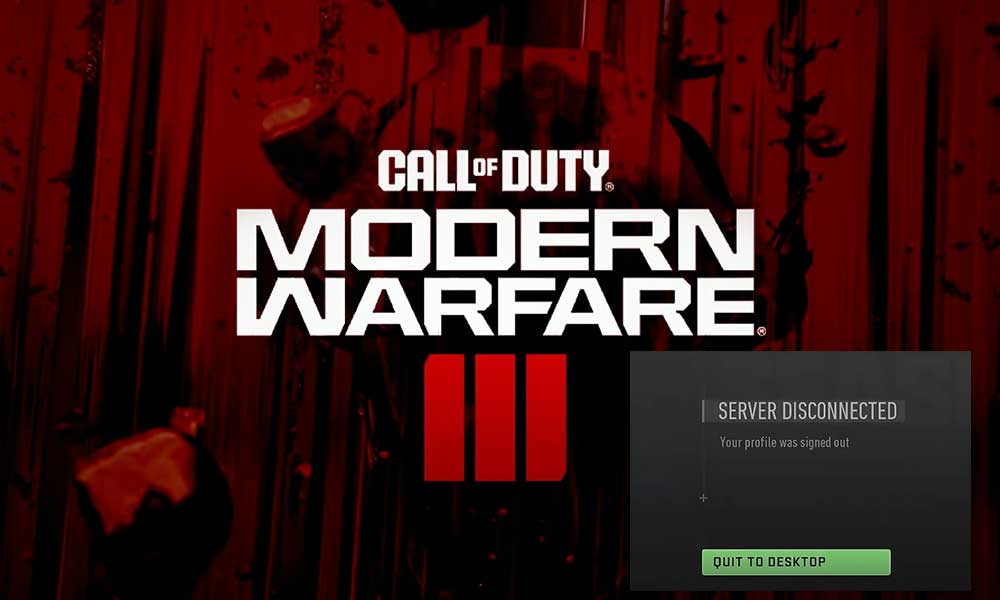
COD titles are more prone to bugs and errors than any other franchise games no matter how well developers have improved the game for all platforms. Even though Modern Warfare 3 (2023) introduced new improvements, maps, zombies mode, and more, it seems that plenty of players are experiencing a lot of errors irrespective of the gaming device. Several reports started claiming that Modern Warfare 3 is showing a Your Profile Was Signed Out Error notice that prevents players from joining the servers.
Though Sledgehammer and Activision are known for their active developments to provide patch updates, that’s not the case for everyone. The same old-school issue of the MW2 game that disconnects players from the Activision servers becomes a common thing even in MWIII 2023. Despite getting multiple patch updates to the Modern Warfare III title, the specific “SERVER DISCONNECTED. Your profile signed out.” error notice appears on the screen over & over again. Hence, affected players are thrown back to the main menu again.
Also Read
Page Contents
- Steps to Fix Modern Warfare 3 Your Profile Was Signed Out Error
- 1. Force Close and Relaunch MW3
- 2. Check Your Internet Connection
- 3. Power Cycle the Wi-Fi Router
- 4. Check for Activision Online Services
- 5. Update Modern Warfare 3
- 6. Scan and Repair the Game Files
- 7. Change the In-Game Voice Chat Settings
- 8. Delete the Game Save Data
- 9. Try Using a VPN
- 10. Turn Off Windows Firewall
- 11. Disable Intel Ethernet Controller I225-V
- 12. Use a Google DNS
- 13. Contact Activision Support
Steps to Fix Modern Warfare 3 Your Profile Was Signed Out Error
Now, if you’re also one of the victims to encounter the same error then don’t worry. Luckily, there are a couple of workarounds mentioned below that should come in handy. So, without further ado, let’s jump into it.
1. Force Close and Relaunch MW3
First of all, you should try force-closing the COD Modern Warfare III title on the gaming device and then relaunch it to check if the problem has been fixed. Any kind of temporary glitch can trouble you a lot at times.
2. Check Your Internet Connection
The chances are high that your internet connectivity is having some issues which causes server connectivity errors to the Activision services. It’s always a better idea to check for the internet connection manually at your end by running the speed test or ping test. If the internet connection is slow or unstable then switch to another network such as wired (ethernet) to Wi-Fi or vice versa. If you’re still facing the issue, contact your internet service provider (ISP) to get better technical help.
3. Power Cycle the Wi-Fi Router
We’ll also recommend you perform a power cycle to your Wi-Fi router by following the steps below to easily clear networking glitches or temporary cache issues. Any kind of temporary networking glitches on the router might also trouble MWIII players irrespective of any platform.
- Power Off the Wi-Fi Router at your end.
- After the LED indicator stops blinking, disconnect the power adapter from the router.
- Wait for around a couple of minutes and then reconnect the power adapter.
- Once done, Power On the Router to check for the issue again.
4. Check for Activision Online Services
You can also check for Activision Online Services by following the steps below to understand if a server downtime or outage is happening at the moment you’re trying to connect to the game servers.
- Visit the Activision Online Services page.
- Click on the drop-down menu > Select Call of Duty: Modern Warfare III.
- If you’re seeing All Platforms ONLINE then you’re good to go.
- You can also click on the Refresh link to manually refresh the page.
However, if you’re seeing server issues then wait for a couple of hours to check for the same. In case, the services are running fine then head over to the next method.
5. Update Modern Warfare 3
In some cases, an outdated game patch version can trouble you a lot due to stability issues or bugs. So, it’s recommended to check for the game updates manually by following the steps below.
Battle.net:
- Open Battle.net.
- Click on Game Library > Choose Modern Warfare III.
- Now, click on the cog wheel icon.
- Select Check for Updates.
- Make sure to download & install the update, if available.
Steam:
- Open Steam > Go to Game Library.
- Right-click on Modern Warfare III.
- Select Properties > Click on Updates.
- Now, go to Automatic Updates.
- Select Only update this game when I launch it.
- It’ll automatically install updates whenever available.
For PlayStation:
- Head over to the PlayStation Home Screen.
- Select the Modern Warfare III game.
- Press the Options button > Select Check for Updates.
- If there is an update available, the system will automatically download and install it.
Note: You should also Enable automatic video game updates via Settings > Saved Data and Game/App Settings > Automatic Updates > Turn on Auto-Download.
For Xbox:
- Go to the My Games and Apps section on your dashboard.
- Select Manage > Choose Updates.
- If an update is available, go to the Modern Warfare III game.
- Press the A key on the controller to start the update process.
- Once done, you can Set Automatic Updates.
- You can also Turn on ‘Keep my games and apps up to date’.
6. Scan and Repair the Game Files
Sometimes corrupted or missing game files on the PC might also trouble you while starting the game. It’s always better to verify and repair the game files by following the steps below on your PC to avoid errors.
For Battle.net:
- Open Battle.net > Click on Modern Warfare III.
- Select the Cog Wheel icon next to the Play button.
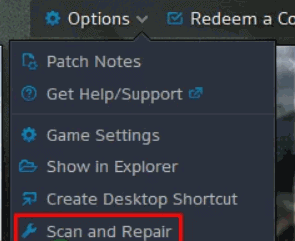
- Now, select Scan and Repair > Wait for the repair to complete.
- Once done, reboot the PC to apply changes.
For Steam:
- Open the Steam client > Go to Library.
- Right-click on Modern Warfare III in your library.
- Go to Settings and select Properties.
- Click on Local Files > Select Verify integrity of game files.
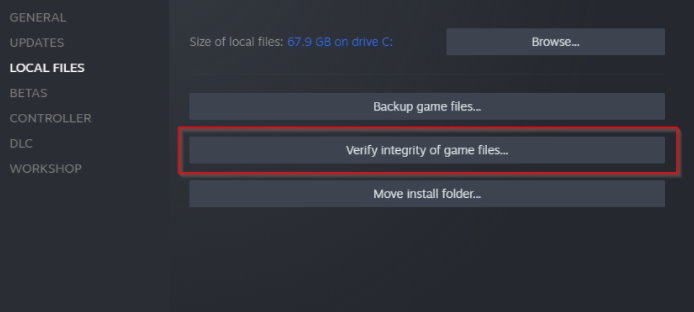
- Wait for the process to complete.
- Once done, reboot the PC to apply changes.
7. Change the In-Game Voice Chat Settings
Another possible solution is that you can try changing the Voice Channel settings in MW3 which has been suggested by a Reddit user recently. You can follow the steps below to do that.
- Launch COD Modern Warfare III.
- Head over to the in-game Settings menu.
- Go to the Voice Channel Settings.
- Select All Lobby or Party Only as per your preference.
- Confirm your changes and go back to the game.
- Once done, check for the game server connectivity error again.
8. Delete the Game Save Data
Sometimes your game’s saved data might be missing or outdated and needs to be deleted manually from the console. It’ll eventually help in creating new saved game data on the system whenever you relaunch the title. So, follow the steps below to check for the same.
Please Note: It’s recommended to take a backup of the saved data or download the data to avoid losing your progress in the game.
For PlayStation:
- Go to Settings on your PlayStation console.
- Choose Saved Data and Game/App Settings.
- Select Saved Data (PS5) or Saved Data (PS4).
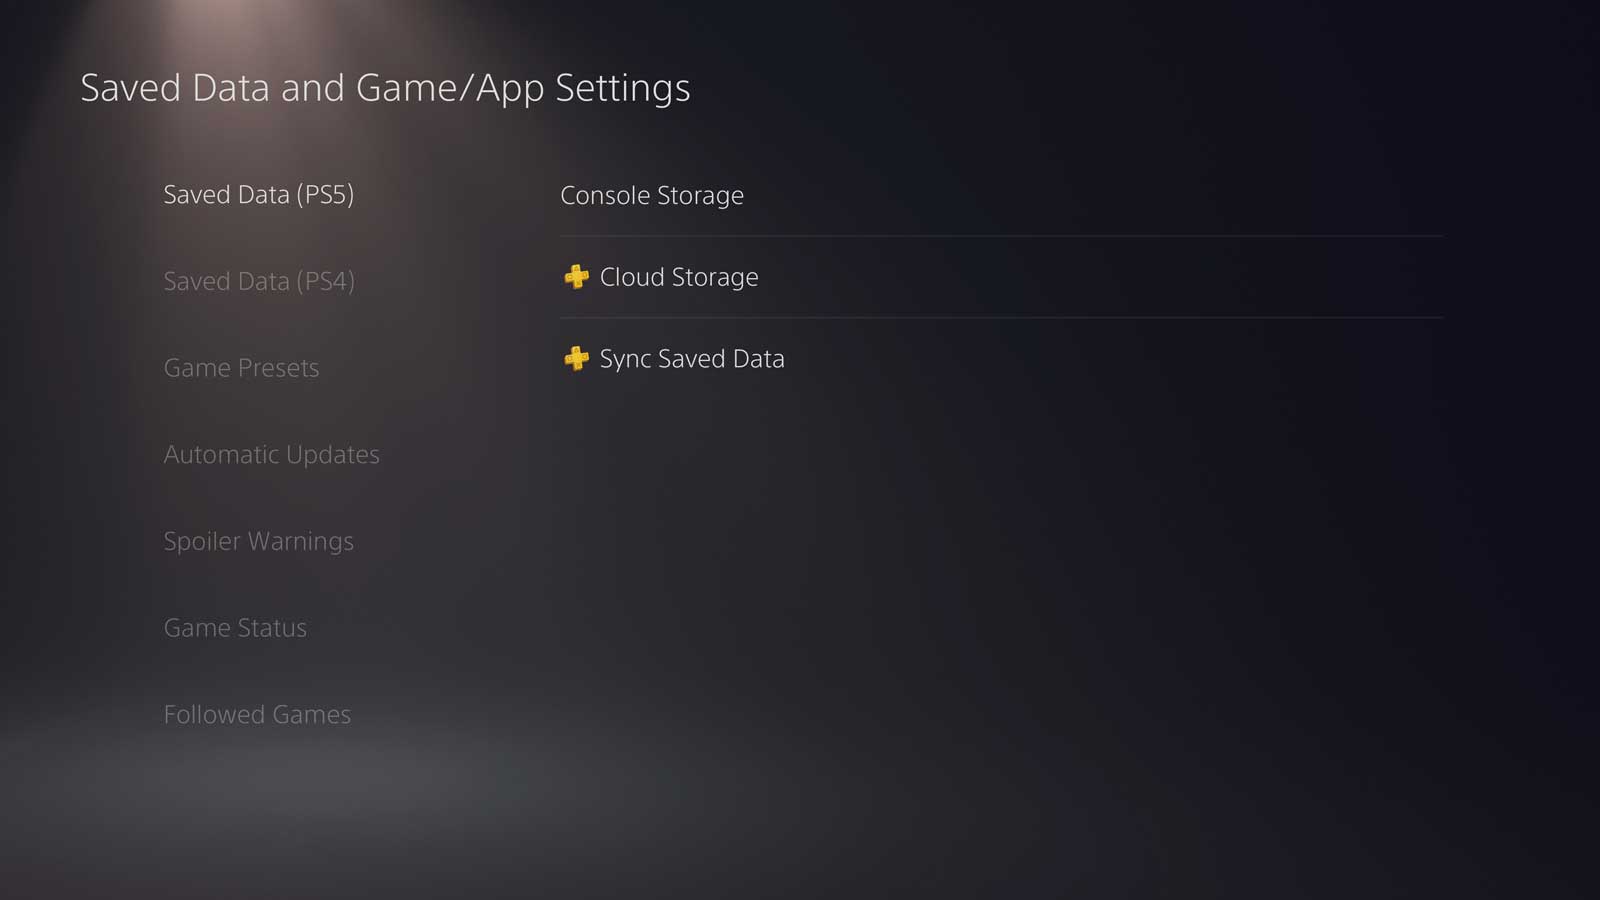
- Head over to Console Storage > Go to Delete.
- Select COD Modern Warfare III.
- Press the Delete option at the bottom right side.
- Wait for a while to delete the saved game data.
- Restart your console and check for the error again.
For Xbox:
- Press the Xbox button on the controller to open the Guide menu.
- Select My games & apps > Select See all.
- Highlight Games > Press the Menu button on the COD MW3 game.
- Choose Manage game and add-ons.
- Select Saved data > Select Delete All if you want to remove all saved data on your console.
- Otherwise, choose the profile that you want to delete.
- Choose Delete from Console or Delete Everywhere.
- Once done, reboot the console, and check for the issue again.
9. Try Using a VPN
Make sure to use a VPN (Virtual Private Network) service on the router or the gaming device directly to check if the server connectivity issue still appears or not. VPNs can be useful for connecting to the game servers or accessing online content. In case, you’re already using a VPN service then make sure to use a different VPN to check for the issue.
10. Turn Off Windows Firewall
You can try disabling Windows Firewall manually to ensure there is no issue with the security software blocking the game application. Make sure to follow the steps below to do so:
- Click on the Start Menu > Search and open Windows Defender Firewall.
- Select Turn Windows Defender Firewall ON or OFF.
- From the Customize Settings page, select the Turn off Windows Defender Firewall (not recommended) option in all the Public, Domain, and Private Networks.
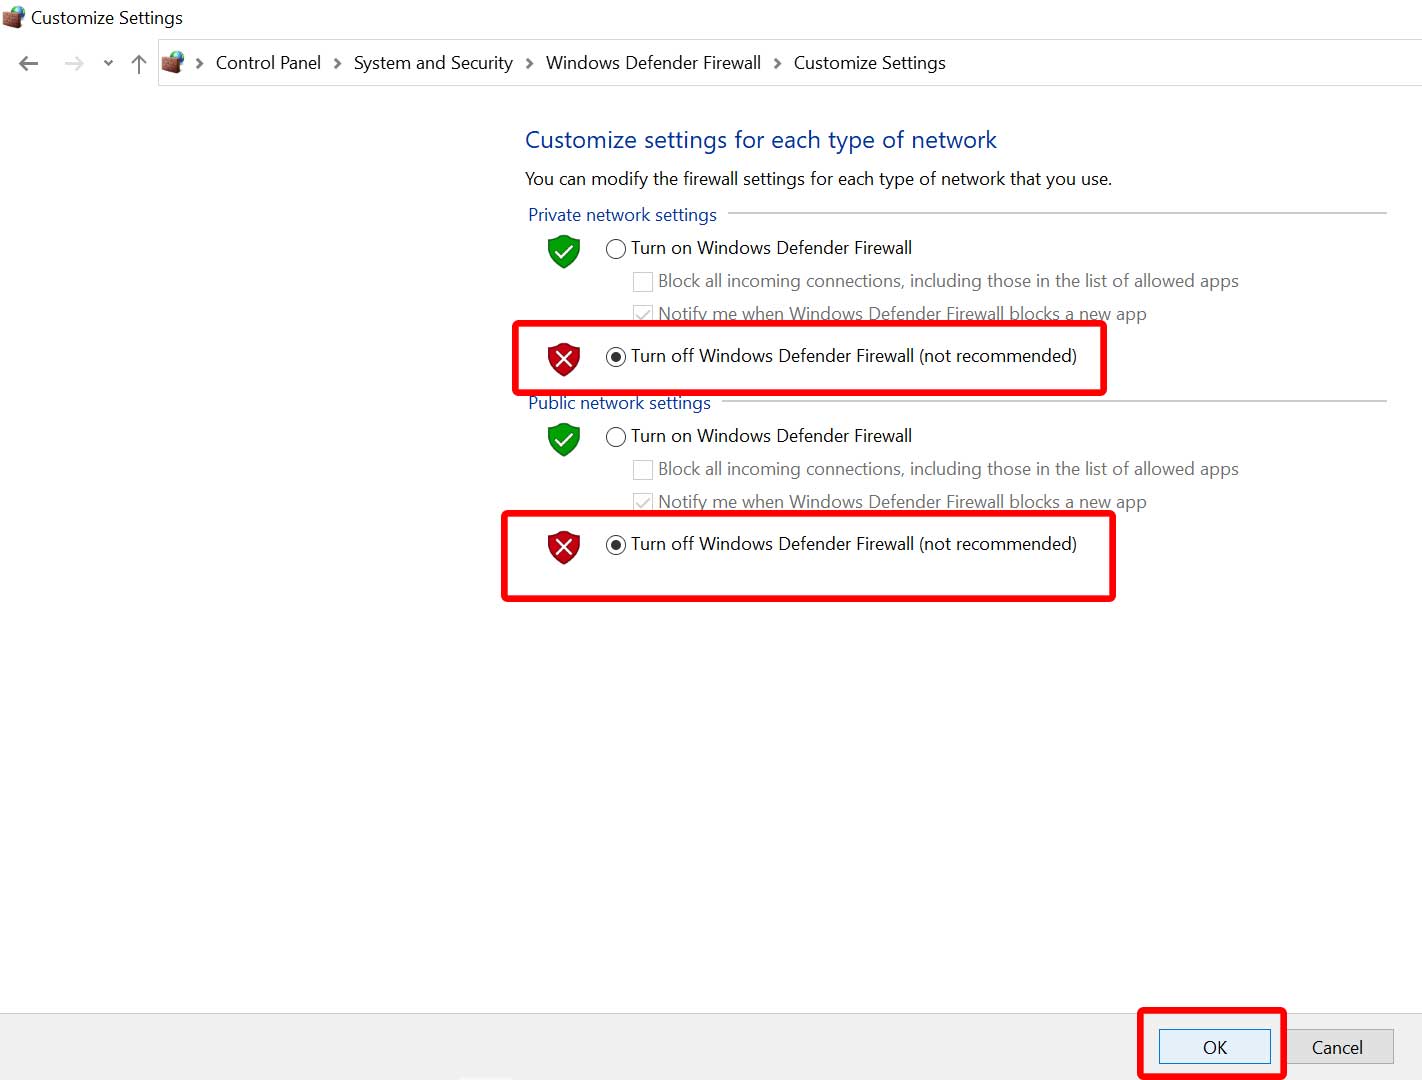
- Click on OK to save changes.
- Once done, reboot the PC to apply changes.
11. Disable Intel Ethernet Controller I225-V
You can also disable the Intel Ethernet Controller I225-V network adapter manually on your computer which might trigger issues with the ASUS ROG Strix motherboards or some mid-end motherboards to drop internet connection frequently. As several reports suggest this specific workaround on Reddit, you can also try using this method.
- Press the Win+X keys and go to Device Manager.
- Go to Network Adapters > Right-click on Intel Ethernet Controller I225-V.
- Select Properties > Go to the Power Management tab.
- Disable the Allow computer to turn this device off to save power toggle.
- Once done, reboot the computer, and check for the error again.
12. Use a Google DNS
You can use the Google DNS address manually on the gaming device to fix server connectivity or matchmaking issues with your active internet properties. You can try following the steps below to check for the issue again.
For PC:
- Press the Win+R keys to open the Run dialogue box.
- Now, search and open the Control Panel.
- Click on Network and Internet.
- Select Network and Sharing Center.
- Go to your Connections to select Ethernet or Wi-Fi.
- Select Properties > Double-click on Internet Protocol Version 4 (TCP/IPv4).
- Click on Use the following DNS server addresses.
- Use 8.8.8.8 as a Preferred DNS server address.
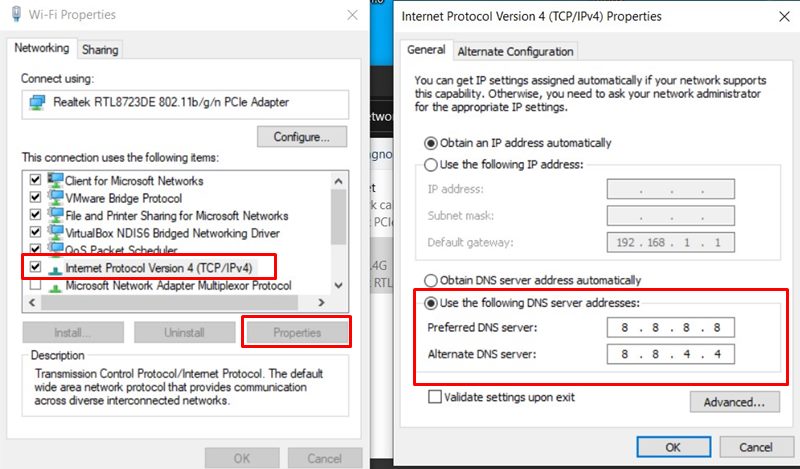
- Enter 8.8.4.4 as the Alternate DNS server.
- Click OK to confirm the changes.
- Once done, reboot the PC to change effects immediately.
For PlayStation:
- Go to the Settings menu from the PS4/PS5 home screen.
- Select Network > Go to Set Up Internet Connection.
- Choose Custom > Select Automatic to IP Address Settings.
- Select DHCP Host Name to Do Not Specify.
- Now, select DNS Settings to Manual.
- Go to Primary DNS > Set 8.8.8.8 in the field.
- Set 8.8.4.4 in the Secondary DNS field.
- Select Next > Choose MTU Settings to Automatic.
- Choose Proxy Server to Do Not Use.
For Xbox:
- Press the Xbox button on your controller to open the Guide menu.
- Go to the System tab > Select Settings.
- Choose Network > Select Network Settings.
- Select Advanced Settings.
- Select DNS Settings > Select Manual.
- Enter 8.8.8.8 for the Primary DNS Address.
- Set 8.8.4.4 for the Secondary DNS Address.
- Once done, reboot the console to apply the changes.
13. Contact Activision Support
If none of the methods worked for you, then contact Activision Support for additional help. You should also create a support ticket to get a better resolution ASAP. The chances are high that developers will try investigating this issue and fixing it. You might have to wait further to get it resolved.
That’s it, guys. We assume this guide was helpful to you. For additional queries, you can comment below.
