It’s just another day and another bug has been spotted in Call of Duty: Modern Warfare III that troubles a lot of players while matchmaking or entering the battle royale mode. Though the title is revised enough to deliver a better gaming experience, we’ve witnessed a couple of issues or errors since it was released. Meanwhile, the MW3 failing to request a daily login error has become a widespread issue among the players that we can’t deny. Now, if you’re also facing the same error then don’t worry.
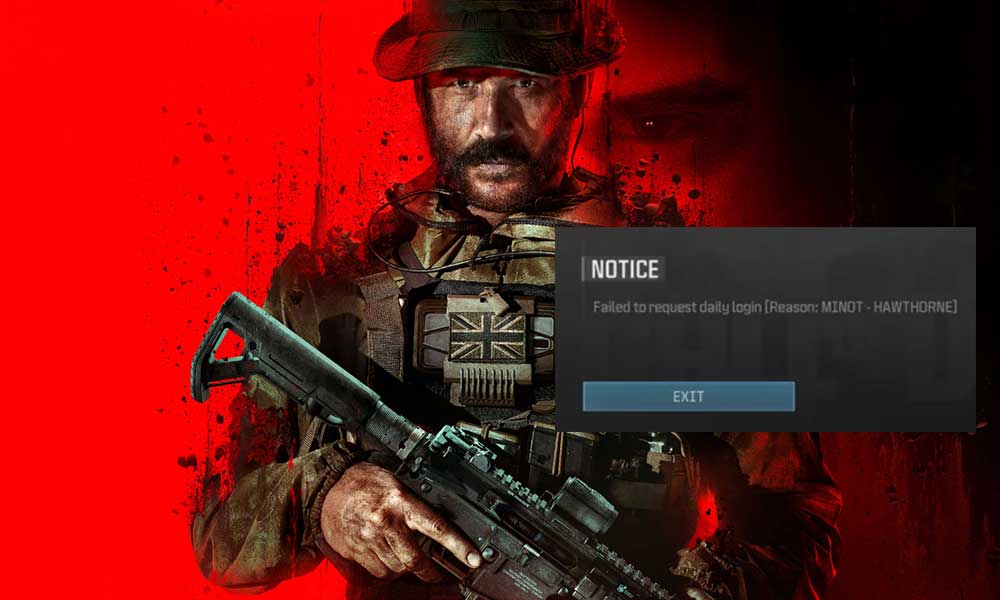
As per multiple reports, Modern Warfare 3 players are unfortunate enough to experience the “Failed to request daily login [Reason: MINOT – HAWTHORNE]” which hinders the overall gaming enjoyment by preventing them from entering into the multiplayer sessions. So, being unable to log into the multiplayer matches eventually leads to the matchmaking error or getting into the zombie mode. Currently, we’re not sure whether Activision is aware of this error or not.
Page Contents
- What is the MINOT – HAWTHRONE Login Failed Error in Modern Warfare 3?
- Possible Reasons for Failing to Request a Daily Login Error
- How to Fix MW3 Failing to Request a Daily Login Error?
- 1. Relaunch MW3
- 2. Check for the Activision Online Services
- 3. Run MW3 as an Administrator
- 4. Check the Internet Connection
- 5. Update Call of Duty Modern Warfare III
- 6. Scan and Repair the Game Files
- 7. Update the Network Adapter Driver
- 8. Check the Correct Login Credentials
- 9. Turn Off Windows Firewall
- 10. Disable Antivirus
- 11. Try Using a VPN
- 12. Clear the DNS Cache
- 13. Close Third-Party Programs
- 14. Use a Public DNS
- 15. Contact Activision Support
What is the MINOT – HAWTHRONE Login Failed Error in Modern Warfare 3?
The particular Minot – Hawthorne error code has been troubling several Call of Duty MWIII players since Season 2 arrived just like the beta testers suffered earlier. Many players have started reporting that this specific error occurs whenever they try attempting to matchmake in the Multiplayer sessions, access a Zombies run, or even get into the Battle Royale mode.
Well, this specific error indicates that there is some technical issue with the Activision online service in the backend which is affecting the daily login request in the multiplayer sessions. The Zombies run-affected players are also worried about the player ranks as this error completely reset their rank back to Level 1 which is unexpected. During the beta testing process, this same issue happened which was linked to the development conflicts in the backend.
Possible Reasons for Failing to Request a Daily Login Error
The chances are high that somehow technical faults in the game server background are troubling MW3 players regarding the daily login request error. In addition, issues with the internet connection, DNS cache issues, antivirus or firewall blocking, networking device conflicts, an outdated network driver, an outdated game patch version, etc can also be other possible reasons behind this error.
Whereas incorrect login credentials, account bans, lack of system admin access, corrupted game files, conflicts with other programs, etc can also apply to the Minot – Hawthorne error code in COD MWIII.
How to Fix MW3 Failing to Request a Daily Login Error?
Luckily, here we’ve shared with you some workarounds that should come in handy. Make sure to follow all troubleshooting steps until the problem has been fixed. So, without further ado, let’s jump into it.
1. Relaunch MW3
First of all, you should try force-closing the COD Modern Warfare III title on the gaming device and then relaunch it to check if the problem has been fixed. Any kind of temporary glitch can trouble you a lot at times.
2. Check for the Activision Online Services
You can also check for Activision Online Services by following the steps below to understand if a server downtime or outage is happening at the moment you’re trying to connect to the game servers.
- Visit the Activision Online Services page.
- Then head over to the respective platform that you’re using to check for the server status.
You should also check for the third-party DownDetector Call of Duty Status webpage to ensure there is no issue with the server. In case, there is a server outage, just wait for a couple of hours and try again later. At the time of writing this article, we can see that there is a huge spike in server downtime.
3. Run MW3 as an Administrator
You should run the Call of Duty MW3 game application as an administrator to avoid user account control regarding system admin permission issues. To do this, you can check the steps below:
- Right-click on the COD MWIII.exe app on your PC.
- Click on Properties > Go to the Compatibility tab.

- Enable the Run this program as an administrator option.
- Click on Apply > Select OK to save changes.
4. Check the Internet Connection
It seems that there is an issue with the internet connection at your end which can eventually cause multiple conflicts during the game launching or gaming sessions. Sometimes a poor or unstable internet network can be a reason behind this. You should check for internet speed and stability by running some online services. In case, there is an issue with the internet connection, you should contact the service provider for the same. Another thing you can do is to switch to another network.
5. Update Call of Duty Modern Warfare III
The chances are high that an outdated game patch version can trouble you a lot. You can check the steps below to manually update the game.
For Battle.net:
- Open Battle.net.
- Click on Game Library > Choose Modern Warfare III.
- Now, click on the cog wheel icon.
- Select Check for Updates.
- Make sure to download & install the update, if available.
For Steam:
- Open Steam > Go to Game Library.
- Right-click on Modern Warfare III.
- Select Properties > Click on Updates.
- Now, go to Automatic Updates.
- Select Only update this game when I launch it.
- It’ll automatically install updates whenever available.
For PlayStation:
- Head over to the PlayStation Home Screen.
- Select the Modern Warfare III game.
- Press the Options button.
- Select Check for Updates.
- If an update is available, the system will automatically download and install it.
For Xbox:
- Go to the My Games and Apps section on your dashboard.
- Select Manage > Choose Updates.
- If an update is available, go to the Modern Warfare III game.
- Press the A key on the controller to start the update process.
- Once done, you can Set Automatic Updates.
- You can also Turn on ‘Keep my games and apps up to date’.
6. Scan and Repair the Game Files
Sometimes corrupted or missing game files on the PC might also trouble you while logging into the game. It’s always better to verify and repair the game files by following the steps below on your PC to avoid errors.
For Battle.net:
- Open Battle.net > Click on Modern Warfare III.
- Select the Cog Wheel icon next to the Play button.
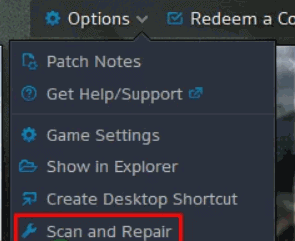
- Now, select Scan and Repair.
- Wait for the repair to complete.
- Once done, reboot the PC to apply changes.
For Steam:
- Open the Steam client > Go to Library.
- Right-click on Modern Warfare III in your library.
- Go to Settings and select Properties.
- Click on Local Files > Select Verify integrity of game files.
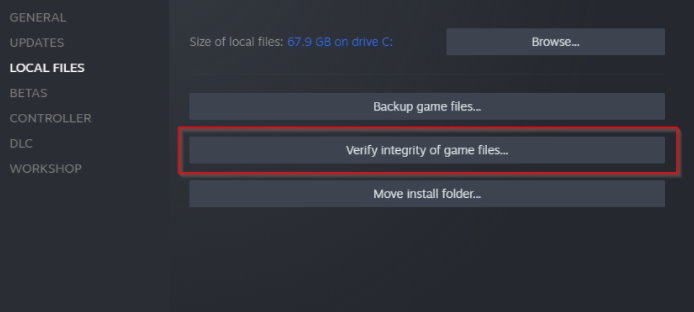
- Wait for the process to complete.
- Once done, reboot the PC to apply changes.
7. Update the Network Adapter Driver
It’s recommended to update the network driver on your computer manually to avoid potential networking glitches or outdated network driver-related issues. You can check the steps below to do so:
- Press the Win+X keys to open the Quick Link Menu.
- Click on Device Manager from the list.
- Double-click on the Network adapters category.
- Right-click on the specific network device.
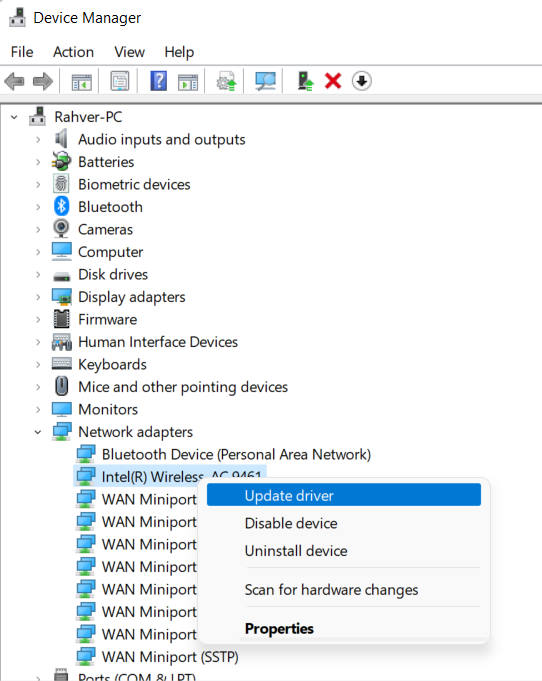
- Click on Update Driver > Click on Search automatically for drivers.
- If an update is available, it’ll automatically download and install the latest version.
- Once done, reboot your computer to change the effects.
8. Check the Correct Login Credentials
You might also need to check for the correct login credentials with the Activision account and whether there is no issue with the incorrect login. Using the correct account is necessary. You can also cross-check if your account is active or banned.
9. Turn Off Windows Firewall
You can try disabling Windows Firewall manually to ensure there is no issue with the security software blocking the game application. Make sure to follow the steps below to do so:
- Click on the Start Menu > Search and open Windows Defender Firewall.
- Select Turn Windows Defender Firewall ON or OFF.
- Select the Turn off Windows Defender Firewall (not recommended) option.
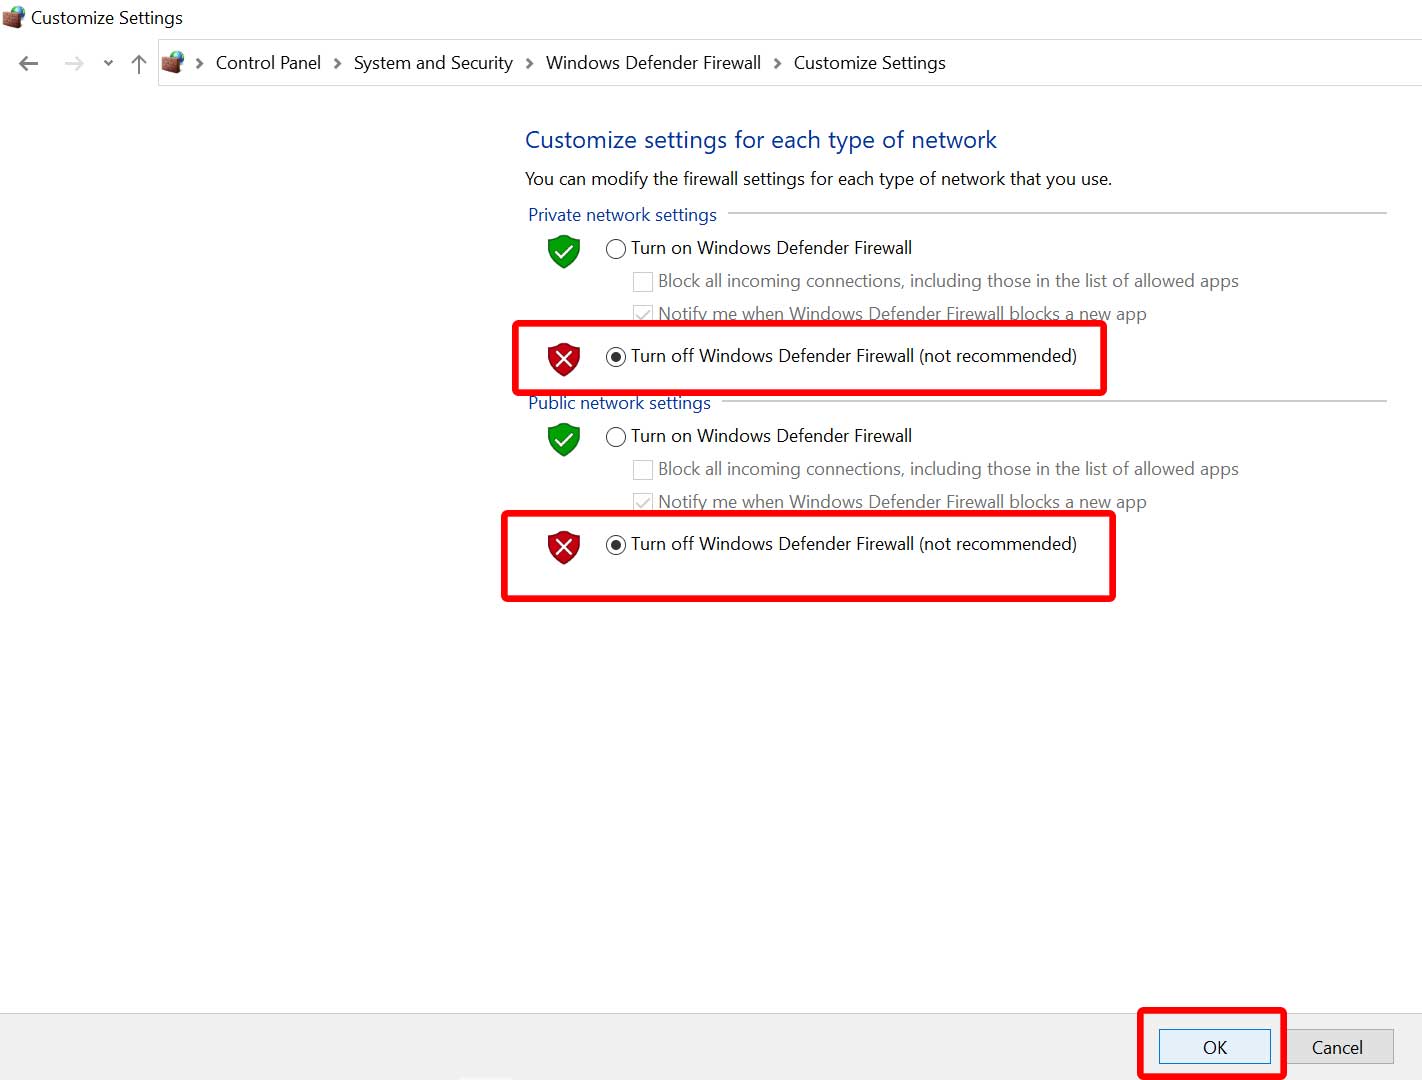
- Click on OK to save changes.
- Once done, reboot the PC to apply changes.
10. Disable Antivirus
You can also try turning off the antivirus protection on your PC to ensure there is no antivirus software blocking the game files from running properly.
- Press the Win+I keys to open Windows Settings.
- Click on Update & Security > Click on Windows Security from the left pane.
- Now, click on the Open Windows Security button.
- Go to Virus & Threat Protection.
- Click on Manage Settings.
- You’ll need to Turn Off the Real-time Protection toggle.
- If prompted, click on Yes to proceed further.
Note: If you’re using any other third-party antivirus program on your PC then turn off the real-time protection feature.
11. Try Using a VPN
It’s also needless to say that using a VPN (Virtual Private Network) service can be useful in accessing game servers in some regions. S, you can try using VPN temporarily to check if the problem has been fixed or not.
12. Clear the DNS Cache
DNS cache data can get stored over some time on the PC and may cause several issues with the network connectivity sometimes. It’s better to flush DNS manually to check if the login failed error has been fixed or not.
- Open the Start menu > Search Command Prompt.
- Right-click on Command Prompt > Click on Run as administrator.
- Click on Yes (if prompted) > Copy-paste the following command and hit Enter:
ipconfig /flushdns
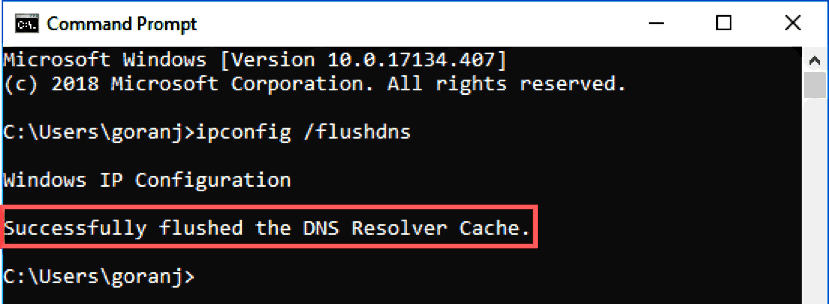
- You’ll receive the Successfully flushed the DNS Resolver Cache. message.
- Next, execute the following command to register DNS:
ipconfig /registerdns
- Then execute the following command to release the ipconfig:
ipconfig /release
- Now, execute the following command to renew the ipconfig:
ipconfig /renew
- Then reset Winsock by performing the command below:
netsh winsock reset
- Close the command prompt and restart the PC to apply changes.
13. Close Third-Party Programs
It might be possible that closing the unnecessary background tasks manually on your computer can be helpful enough to improve system performance as well as the networking bandwidth. Make sure to check the steps below to do so.
- Press the Ctrl+Shift+Esc keys to open Task Manager.
- Go to Processes > Right-click on the third-party task.
- Now, click on End Task.
- Do the same steps for each unnecessary third-party task.
- Once done, reboot the PC to apply changes.
14. Use a Public DNS
You can use the Google DNS address manually on the gaming device to fix server connectivity or matchmaking issues with your active internet properties. You can try following the steps below to check for the issue again.
For PC:
- Press the Win+R keys to open the Run dialogue box.
- Now, search and open the Control Panel.
- Click on Network and Internet.
- Select Network and Sharing Center.
- Go to your Connections to select Ethernet or Wi-Fi.
- Select Properties > Double-click on Internet Protocol Version 4 (TCP/IPv4).
- Click on Use the following DNS server addresses.
- Use 8.8.8.8 as a Preferred DNS server address.
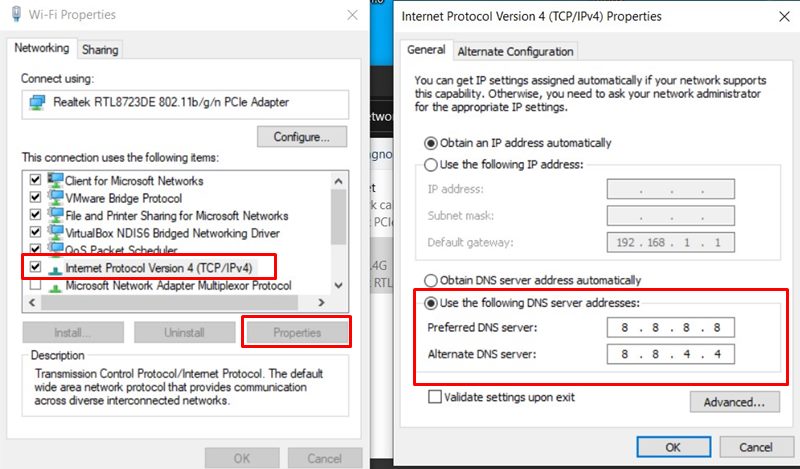
- Enter 8.8.4.4 as the Alternate DNS server.
- Click OK to confirm the changes.
- Once done, reboot the PC to change effects immediately.
For PlayStation:
- Go to the Settings menu from the PS4/PS5 home screen.
- Select Network > Go to Set Up Internet Connection.
- Choose Custom > Select Automatic to IP Address Settings.
- Select DHCP Host Name to Do Not Specify.
- Now, select DNS Settings to Manual.
- Go to Primary DNS > Set 8.8.8.8 in the field.
- Set 8.8.4.4 in the Secondary DNS field.
- Select Next > Choose MTU Settings to Automatic.
- Choose Proxy Server to Do Not Use.
For Xbox:
- Press the Xbox button on your controller to open the Guide menu.
- Go to the System tab > Select Settings.
- Choose Network > Select Network Settings.
- Select Advanced Settings.
- Select DNS Settings > Select Manual.
- Enter 8.8.8.8 for the Primary DNS Address.
- Set 8.8.4.4 for the Secondary DNS Address.
- Once done, reboot the console to apply the changes.
15. Contact Activision Support
If none of the methods worked for you, be sure to contact Activision Support or visit the official @ATVIAssist X handle for additional help. You should also create a support ticket to get a better resolution ASAP. The chances are high that developers will try investigating this issue and fixing it. You might have to wait further to get it resolved.
That’s it, guys. We assume this guide was helpful to you. For additional queries, you can comment below.
