Temporary File or Temp File can be created automatically to keep the information while a file is created or modified on the system. Temporary files store and move data, manage settings, help recover lost data, and manage multiple users. Although most of the temporary files get deleted after the program is closed, some of the temp files may not get deleted automatically. In that scenario, a bunch of temp files can be stored on your system over a period of time. For Windows 10 system, the older temporary files can cause multiple issues with the performance and takes up storage space too. If you’re interested to Quickly Remove Windows 10 Temporary Files, follow this full guide.
As mentioned, a bunch of already stored temporary files on your Windows 10 system not only take up a well amount of storage space but also slow down your computer by reducing the read/write speed of the hard drive. Sometimes, these temp files can also cause issues with the software or game performance. Over the period of time, your applications or games may start freezing, lagging, crashing, etc. Therefore, simply deleting all of the unnecessary temporary files from your system will fix plenty of issues in a jiffy. This will free up some of your storage space and improve the speed too.
Also Read
Page Contents
How to Quickly Remove Windows 10 Temporary Files
Windows 10 users can perform a couple of methods to delete all the junk files (temporary files) on your computer. Here in this useful guide, we’ll be sharing with you all the possible and quicker ways to delete temporary files in Windows 10. Here we’ve mentioned Disk Management, Disk Cleanup, Storage Sense, Command Prompt, and temporary folder method. So, without further ado, let’s get into it.
1. Via System Settings
- First of all, press the Windows + I keys to open up the Windows Settings menu.
- Click on System > Select Storage from the left pane.
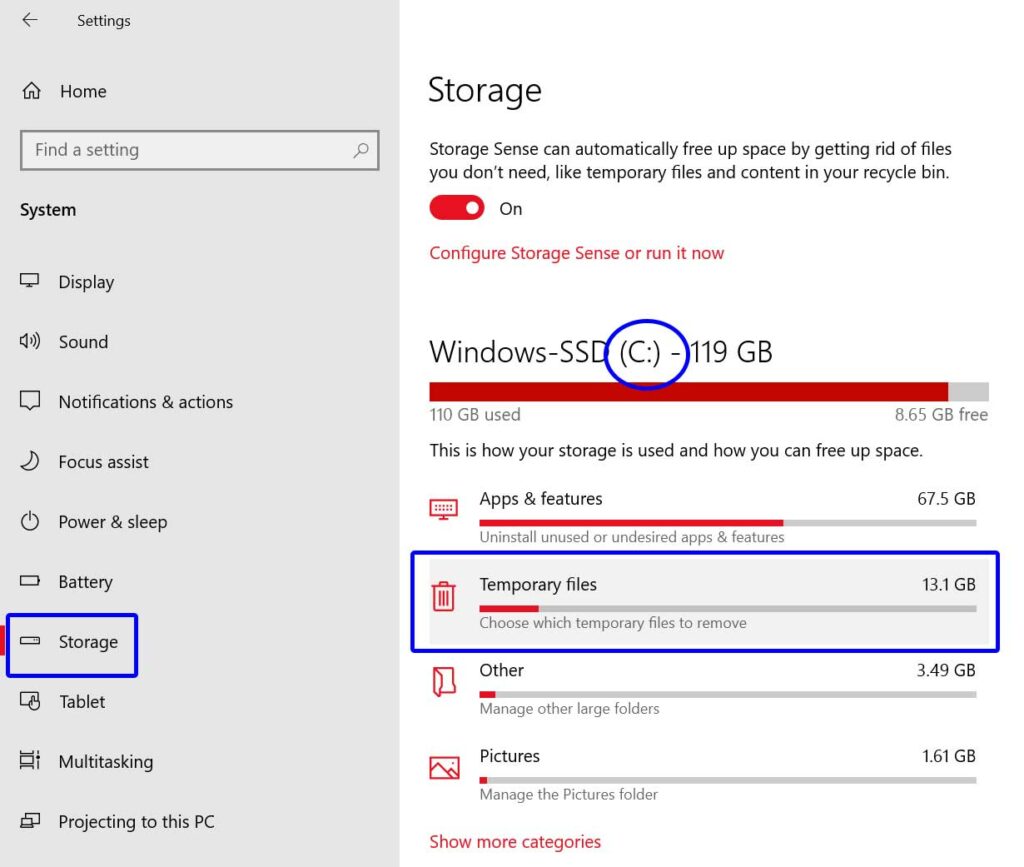
- Now, choose the local hard drive (C: drive) that you want to clean.
- Click on Temporary files from the right pane under the local drive. (If you don’t find the Temporary files option, click on ‘Show more categories’)
- Wait for a while to load up all the temporary files first.
- Now, you can click on the list of junk files that you want to delete such as Windows Update Cleanup, Windows upgrade log files, Thumbnails, DirectX Shader Cache, Delivery Optimization Files, Microsoft Defender Antivirus, Windows error reports and feedback diagnostics, Temporary Internet Files, Temporary files, Recycle Bin, Offline webpages, etc.
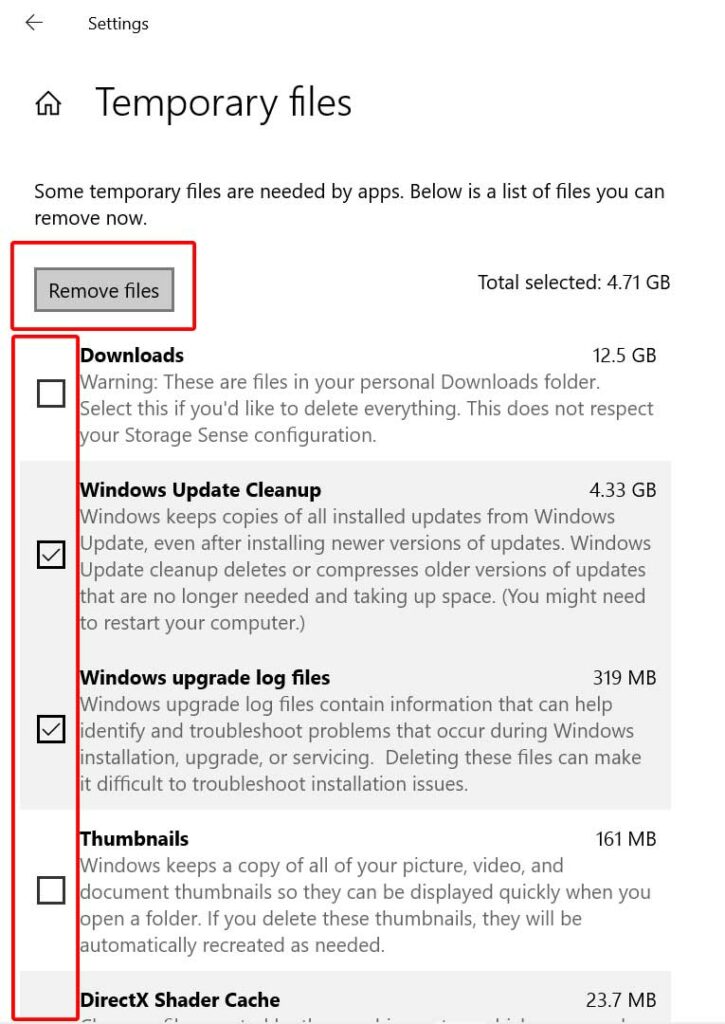
- So, whatever temp files you want to remove from your local drive, you can select by clicking on the checkbox.
- Once selected, click on the Remove files button from the top.
- You may have to wait for a couple of minutes or so to completely delete the temp files.
- Finally, make sure to restart your computer to refresh your system.
2. Via Temp Folder
You can manually open up the Windows temporary folder and delete all the files once at a time. To do this:
- Press Windows + R keys to open up the Run dialog box.
- Now, type %temp% and hit Enter to open up the Local Temp folder.
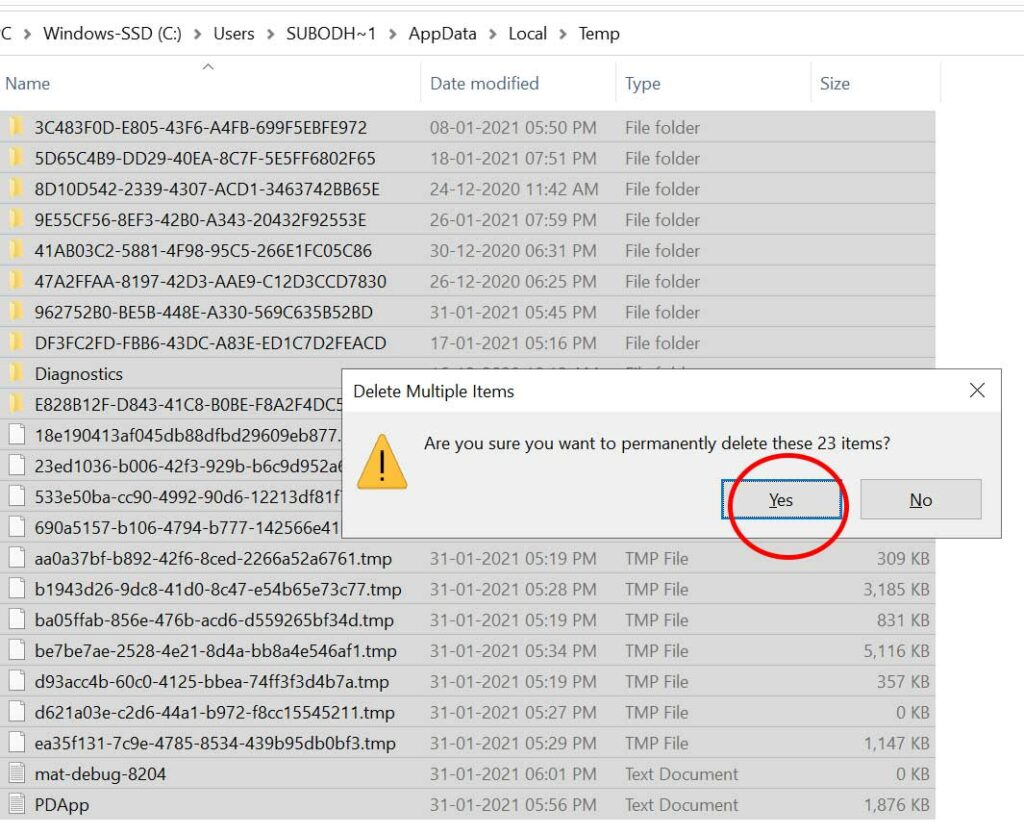
- Then press Ctrl + A keys to select all the temporary files inside the folder.
- Once all selected, simply press Shift + Delete keys and click on Yes to permanently delete all temp files.
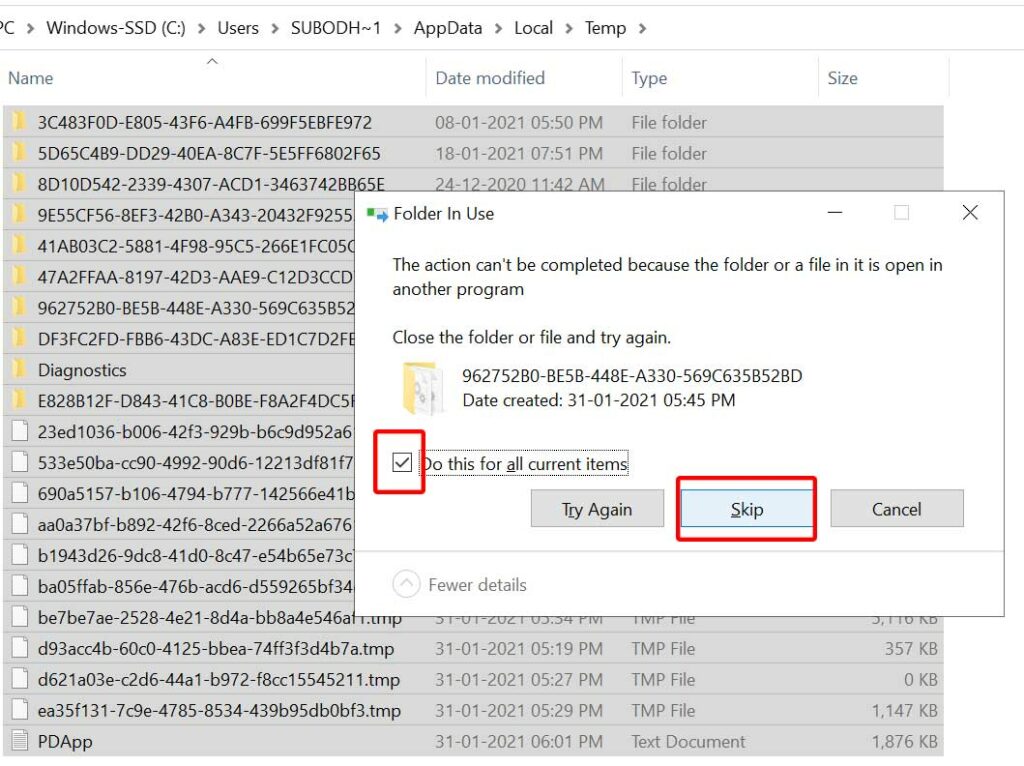
- However, if some of the temporary files can’t be deleted and you’re receiving Folder In Use pop-up window, click on the ‘Do this for all current items’ checkbox and select Skip.
- Close the window. There is no need to try deleting the pending files.
3. Via Disk Cleanup
- Open File Explorer (This PC) from your desktop or taskbar.
- Now, right-click on the C: disk partition > Select Properties.
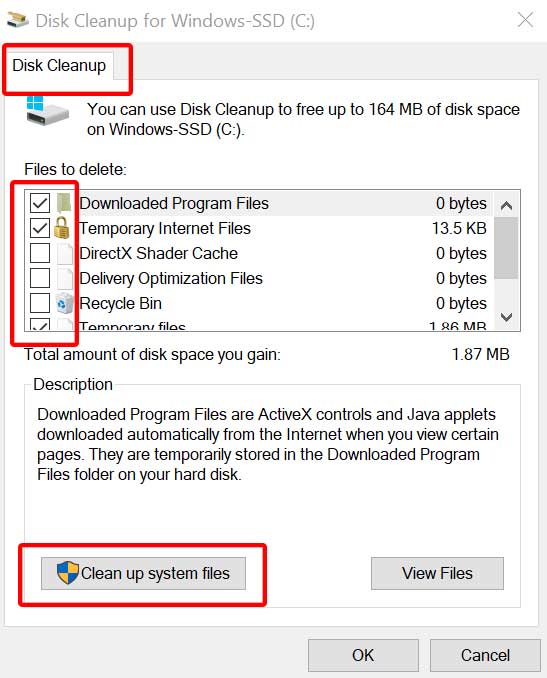
- Click on Disk Cleanup on the General tab.
- Disk Cleanup window will open up for the C: drive.
- Click to check the boxes whatever you want to remove and uncheck whatever you want to keep further.
- Finally, select Clean up system files to start the temporary file removal process.
- Once done, close the window and restart your computer to change effects.
Alternatively, you can Remove Windows 10 Temporary Files from the Storage Sense option.
4. Via Storage Sense
Windows 10 system comes preloaded with a service called ‘Storage Sense’ to automatically delete temporary files from your local drive on a scheduled basis. However, this feature is turned off by default. Therefore, you’ll need to turn it on, and then you can manually customize it to work automatically from the next time.
- Click on the Start Menu > Select Settings (gear icon).
- Now, click on System > Select Storage from the left pane.
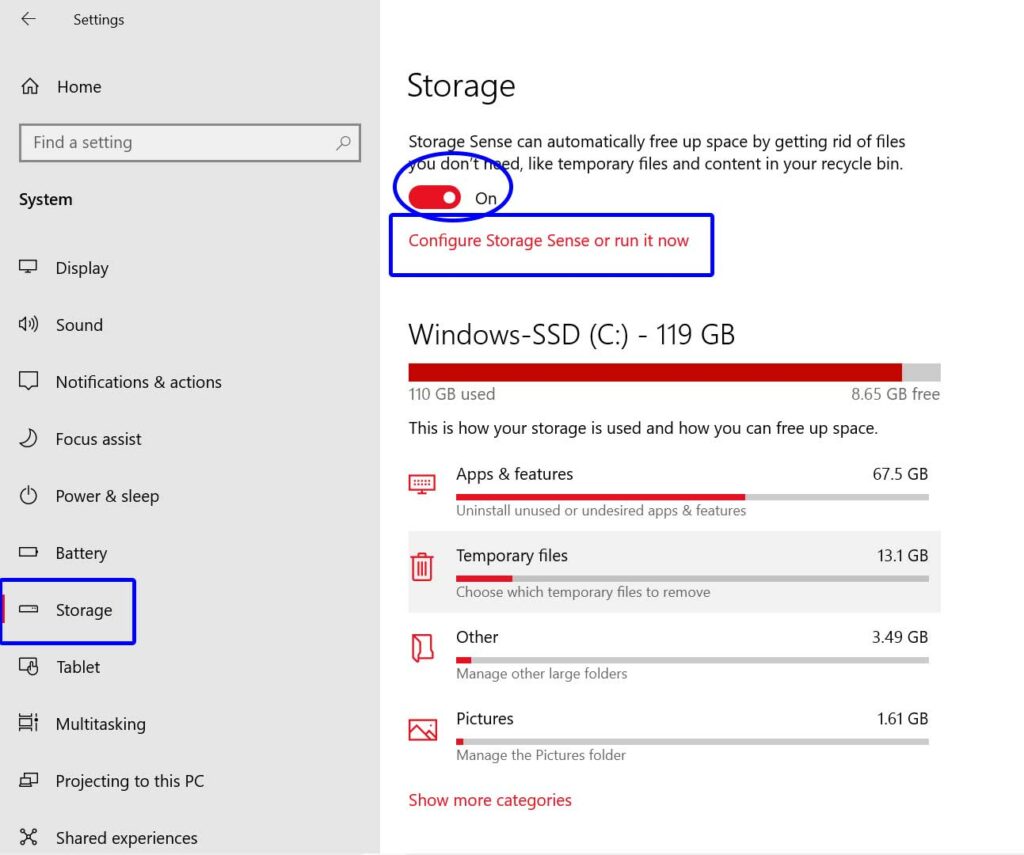
- Choose Configure Storage Sense or run it now.
- If not enabled, turn on the Storage Sense toggle.
- Additionally, you can choose the time-frequency to Run Storage Sense automatically in the background.
- You can also select time-frequency for the Temporary Files to delete automatically.
- If you want to clean up the temporary files right now, click on the Clean now button from the bottom of the page.
- Enjoy!
5. Via Command Prompt
- Click on the Start Menu > Type cmd.
- Right-click on the Command Prompt from the search result.
- Select Run as administrator and click on Yes (if prompted by UAC).
- Once the command prompt window opens, copy and paste the following command and hit Enter to execute it:

del /q/f/s %TEMP%\*
- This command will delete all the Windows 10 Temporary Files completely.
Now, we hope that your system speed is improved and some of the storage space is free as well. Even if you have enough free storage space available on your PC/Laptop, it’s always recommended to clean up temp or junk files for optimal performance.
That’s it, guys. If you’ve any queries, you can comment below.
